SATO CL4NX Operator's Manual
Hide thumbs
Also See for CL4NX:
- Operator's manual (807 pages) ,
- Programming reference manual (756 pages) ,
- Service manual (160 pages)
Table of Contents
Advertisement
Quick Links
Advertisement
Table of Contents
Troubleshooting

Related Manuals for SATO CL4NX


Summary of Contents for SATO CL4NX
- Page 1 Operator Manual For printer model:...
- Page 2 Specifications and contents in this document are subject to change without notice. Be sure to perform a virus check for the USB memory before connecting it to the printer. SATO Corporation shall not be held responsible for a malfunction of the printer caused by a virus infection through the USB memory.
-
Page 3: Table Of Contents
1.2.2 LED Indicator......................17 2 Installing the Printer ................19 2.1 Installation Precautions..................19 2.2 Installation Space....................20 2.2.1 Front View (CL4NX) ....................20 2.2.2 Front View (CL6NX) ....................20 2.2.3 Side View (CL4NX/CL6NX) ..................21 2.2.4 Bottom View (CL4NX) ..................... 22 2.2.5 Bottom View (CL6NX) ..................... - Page 4 4.2 Settings Mode....................61 4.2.1 Changing to Settings Mode ..................61 4.2.2 Log In to/Log Out of the Settings Mode..............62 4.2.3 Item Selection......................63 4.2.4 Setting Value Input or Selection ................64 4.3 Settings Menu Tree Structure ................67 CL4NX/CL6NX Operator Manual...
- Page 5 5.2 Maintenance of the Print Head and Platen Roller ........238 5.2.1 Maintenance using the Cleaning Kit ..............238 5.2.2 Additional Procedure for the Optional Linerless Kit (CL4NX only) ......241 5.2.3 Maintenance using the Cleaning Sheet..............242 5.3 Adjusting the Base Reference Point ............. 244 5.3.1 About the Base Reference Point ................
- Page 6 7.2 Media Sensor Positions and Media Stop Positions ........295 7.3 Replacing the Print Head................297 7.4 Replacing the Platen Roller................299 7.4.1 Guideline to Replace the Linerless Platen Roller (CL4NX only)......300 7.5 Optional RFID Configuration (CL4NX only) ..........301 7.5.1 Printing RFID Tag Errors ..................304 7.5.2 RFID Error and Reset Timing ................
-
Page 7: Before You Start
Features of the Product This SATO CL4NX/CL6NX printer is a high-performance labeling system with a robust casing made of metal and equipped with versatile functions. The main features of the printer are as follows: • Simple and stylish design •... -
Page 8: Safety Precautions
Then contact someone. your SATO reseller or technical support center. If you operate the printer in this Do not place containers filled with liquid on the condition, it could cause a fire or electric printer. - Page 9 • Do not disassemble or modify the printer. to a ground. Not grounding the ground Doing so could cause a fire or electric wire could cause an electric shock. shock. Contact your SATO reseller or technical support center to perform internal inspections, adjustments, and repairs.
- Page 10 Pulling the cord could expose or break the wires and cause a fire or electric shock. • The power cord set that comes with the printer is designed especially for this printer. Do not use it with any other electrical devices. CL4NX/CL6NX Operator Manual...
-
Page 11: Precautions For Installation And Handling
Precautions for Installation and Handling Printer operation can be affected by the printer environment. Refer to the following instructions for installation and handling of the CL4NX/CL6NX printer. Select a Safe Location Do not place the printer in a location subject to water or oil. -
Page 12: Regulatory Approval
• Remove the certificate label (serial number seal) affixed to this product. Use of this product near microwave and/or other wireless LAN equipment, or where static electricity or radio interference is present, may shorten the communication distance, or even disable communication. CL4NX/CL6NX Operator Manual... - Page 13 Diese Einrichtung kann im Wohnbereich Funkstörungen verursachen. In diesem Fall kann vom Betreiber verlangt werden, angemessene Maßnahmen durchzuführen. Das Gerät ist nicht für die Benutzung im unmittelbaren Gesichtsfeld am Bildschirmarbeitsplatz vorgesehen. Um störende Reflexionen am Bildschirmarbeitsplatz zu vermeiden, darf dieses Produkt nicht im unmittelbaren Gesichtsfeld platziert werden. CL4NX/CL6NX Operator Manual...
- Page 14 Before You Start (Pb) (Hg) (Cd) (Cr6+) (PBB) (PBDE) ABS PC SJ/T11363-2006 SJ/T11363- 2006 2006 2 28 SJ/T11364-2006 CL4NX/CL6NX Operator Manual...
-
Page 15: Parts Identification
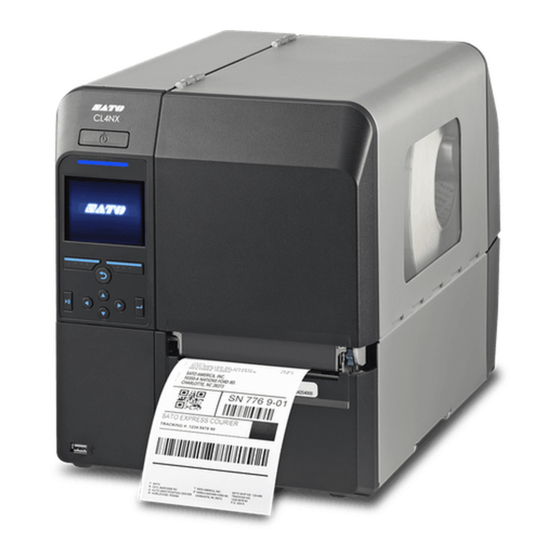
SATO Corporation shall not be held responsible for a malfunction of the printer caused by a virus infection through the USB memory. Note The pictures in this manual show the CL4NX unless otherwise stated. CL4NX/CL6NX Operator Manual... -
Page 16: Rear View
IEEE1284 connector Be sure to perform a virus check for the USB To connect the printer to the computer using memory before connecting it to the printer. SATO the IEEE1284 interface. Corporation shall not be held responsible for a EXT connector (External signal... -
Page 17: Internal View
Creates an image directly on the media or by using a ribbon. Highest print quality is achieved Head lock lever when regular maintenance is performed. Used to release the print head assembly. Platen roller (Consumables) Front cover CL4NX/CL6NX Operator Manual... -
Page 18: Parts On The Operator Panel
Navigate the selection in the screen menu. The functions change depending on the screen. The functions of the buttons are indicated on the bottom of the screen. (For example, when in offline mode, left soft button: ONLINE; right soft button: FEED) CL4NX/CL6NX Operator Manual... -
Page 19: Led Indicator
Sleep mode (energy saving mode) Flashes at intervals of two seconds. Note If the printer enters sleep mode during a printer error status (LED lights red), the LED indicator will flash blue at intervals of two seconds. CL4NX/CL6NX Operator Manual... - Page 20 1 Parts Identification This page is intentionally left blank. CL4NX/CL6NX Operator Manual...
-
Page 21: Installing The Printer
• A dusty location. • A location exposed to direct sunlight. • A location with a lot of electrical noise. • A location with a large fluctuation in power. • A location with an explosive atmosphere (flammable gas or vapor). CL4NX/CL6NX Operator Manual... -
Page 22: Installation Space
2.2 Installation Space Make sure that there is sufficient space around the printer so that the top cover can be fully opened when operating or cleaning the printer, or replacing consumables. 2.2.1 Front View (CL4NX) Standard model 150 mm 271 mm 150 mm (3.3”) -
Page 23: Side View (Cl4Nx/Cl6Nx)
2 Installing the Printer 2.2.3 Side View (CL4NX/CL6NX) Make sure that there is sufficient space on the rear side of the printer so that no stress is applied to the power cord or cables connected to the printer. Printer front view... -
Page 24: Bottom View (Cl4Nx)
2 Installing the Printer 2.2.4 Bottom View (CL4NX) 60 mm (2.4”) 346.4 mm (13.6”) Rubber foot 19.7 mm (0.8”) Printer front view 18 mm 297.5 mm 15 mm (0.6”) 81.5 mm (0.7”) (11.7”) (3.2”) 120.4 mm 102 mm 100 mm (4.7”) -
Page 25: Checking The Bundled Accessories
2 Installing the Printer 2.3 Checking the Bundled Accessories After unpacking the printer, make sure that you have all the bundled accessories: if there are any missing items, contact the SATO reseller where you purchased the printer. AC power cord* User documents (Quick guide, Warranty, etc.) -
Page 26: Connecting The Interface Cable
This may cause damage to the interface circuitry in the printer or computer and is not covered by warranty. 2.4.2 Interface Settings You can set the various interface settings of the printer through Interface in the Settings menu. For details, refer to Interface in chapter 4 Operation and Configuration. CL4NX/CL6NX Operator Manual... -
Page 27: Connecting The Power Cord
AC 100 - 240 V, 50 - 60 Hz. If your local voltage is not in the stated range, contact your SATO reseller or technical support center. *The shape of the power plug varies depending on the region in which it was purchased. -
Page 28: Power On/Off The Printer
System menu. 2.6.1 Power On the Printer Press the power button on the operator panel for more than one second to power on the printer. Online shows on the screen and the LED lights blue. CL4NX/CL6NX Operator Manual... -
Page 29: Power Off The Printer
Make sure that the printer is in offline mode before you power off. If Online shows on the screen, press the button to change to offline mode. Press the power button for more than two seconds to power off the printer. CL4NX/CL6NX Operator Manual... -
Page 30: Starting Up The Printer (Startup Guide)
Startup Screen The startup screen shows when you first power on the printer. 2.7.2 Language Selection Select the display language. Select the language name using the buttons, then press the right soft button or button to confirm. CL4NX/CL6NX Operator Manual... -
Page 31: Region Setting With Optional Rtc
Date Setting with Optional RTC Set the date. Select the current value using the buttons, and move the cursor using the buttons. When you have completed the date setting, press the right soft button or button to confirm. CL4NX/CL6NX Operator Manual... -
Page 32: Time Setting With Optional Rtc
The options are as follows: • Use Ribbon: Print with a ribbon. • Direct Thermal: Print using direct thermal media. Select the print method using the buttons, then press the right soft button or button to confirm. CL4NX/CL6NX Operator Manual... -
Page 33: Ribbon Setting
• None: Disable the media sensor. • Gap: Use the transmissive type sensor. • I-Mark: Use the reflective type sensor. Select the media sensor type using the buttons, then press the right soft button or button to confirm. CL4NX/CL6NX Operator Manual... -
Page 34: Media Setting
You can check the setting method of the media through the video. Press the button to select video mode. Note (for CL4NX only) When you are using the linerless model, the video is shown immediately after the button is pressed. -
Page 35: Confirmation Screen
Note • You can enable or disable the startup guide in Startup Guide under the Tools menu. • Even if you cancel the startup guide during play, the printer will save the settings you have changed. CL4NX/CL6NX Operator Manual... - Page 36 2 Installing the Printer This page is intentionally left blank. CL4NX/CL6NX Operator Manual...
-
Page 37: Loading The Ribbon And Media
If there is a mark on the media, the ink is coated on the outer side of the ribbon. The ink is coated on the inner side. (Face-in ribbon) The ink is coated on the outer side. (Face-out ribbon) CL4NX/CL6NX Operator Manual... -
Page 38: Loading The Ribbon
3 Loading the Ribbon and Media 3.2 Loading the Ribbon Use genuine SATO media and ribbons for the printer, for optimum print quality. CAUTION • The print head and its surroundings are hot after printing. Be careful not to touch it, to avoid being burned. - Page 39 If there is any ribbon on the ribbon rewind spindle, remove it. Push the head lock lever e towards the rear. Load the ribbon r onto the ribbon supply spindle t. While taking note of the wind direction, insert the ribbon all the way in. CL4NX/CL6NX Operator Manual...
- Page 40 If the media is already loaded, press the print head down until the head lock lever is locked. If the media is not loaded, continue with Section 3.5 Loading Media. Close the top cover. CL4NX/CL6NX Operator Manual...
-
Page 41: Removing The Ribbon
3.3 Removing the Ribbon Press the tab q on the tip of the ribbon rewind spindle to pull it out. Pull to remove the used ribbon from the ribbon rewind spindle. Push the ribbon rewind spindle all the way in. CL4NX/CL6NX Operator Manual... -
Page 42: Usable Media
(0.55”) I-mark journal paper/ I-mark label Gap label linerless label (CL4NX only) 3.4.1 Adjusting the Position of the Media Sensor When you use nonstandard media (for example, media with printing on the underside, or media with a special shape), the media sensor cannot sense the I-mark or Gap of the media correctly. In such a case, adjust the position of the media sensor to sense the I-mark or Gap correctly. -
Page 43: Loading Media
Face-in media Face-out media Open the top cover. CAUTION Open the top cover fully to prevent accidental drop of the cover. Push the head lock lever towards the rear to unlock the print head. CL4NX/CL6NX Operator Manual... - Page 44 Pass the media below the media damper t and media sensor guide y while pushing the media to inside of the printer. Make sure that the end of the media extends out the front of the printer. CL4NX/CL6NX Operator Manual...
-
Page 45: Loading Fan-Fold Media
Load the media from the bottom of the printer. Note If a media jam frequently occurs with the media being loaded from the bottom of the printer, change the load location to the rear of the printer. CL4NX/CL6NX Operator Manual... -
Page 46: Loading Media With The Optional Cutter
Refer to steps 1 through 6 of Section 3.5.1 Loading Media Roll to load the media. Press the tab q at the front of the printer to open the dispenser unit w. CL4NX/CL6NX Operator Manual... -
Page 47: Loading Media With An Optional Dispenser And Liner Rewinder
This section describes the procedure to dispense the label and rewind the liner in the printer. Note The maximum diameter of the liner that can be rewound in the printer is 120 mm (4.72”). The routing path of the media is shown in the right picture. Label Liner CL4NX/CL6NX Operator Manual... - Page 48 Pass the liner r below the liner rewinder y, then attach it with the clip u. Rotate the liner rewinder y counterclockwise by hand, to wind the liner. Close the dispenser unit. Close the print head and top cover. CL4NX/CL6NX Operator Manual...
-
Page 49: Removing The Liner From The Rewinder
3 Loading the Ribbon and Media 3.5.6 Removing the Liner from the Rewinder Pull the clip q away from the printer then pull to remove the liner w. Place the clip back to its original position. CL4NX/CL6NX Operator Manual... - Page 50 3 Loading the Ribbon and Media This page is intentionally left blank. CL4NX/CL6NX Operator Manual...
-
Page 51: Operation And Configuration
After you complete or cancel the print job, you can show the settings mode. Feed the media. Cancel the print job. Show the adjustment mode Change to when the print job is paused. online mode. Show the settings mode when there are no print jobs. CL4NX/CL6NX Operator Manual... -
Page 52: Status Icon
Network link is enabled and connected. Not connected to the NTP time server. Wi-Fi is not connected. Wi-Fi is connected. Signal Level: 1 Wi-Fi is connected. Signal Level: 2 Wi-Fi is connected. Signal Level: 3 Wi-Fi is connected. Signal Level: 4 CL4NX/CL6NX Operator Manual... - Page 53 Wi-Fi Direct is connected or the printer is set to act as an access point. Signal Level: 4 Printer is connected to USB host. Waiting for external input/output signal. RFID mode is enabled (CL4NX only). Standard code is disabled (Non-standard code). • USB Memory Status Icon Description USB memory is connected.
- Page 54 Defective print head is detected. Replace the print head. Incompatible print head is detected. Replace the print head. • Maintenance Status Icon Description Clean the print head or platen roller. Replace the print head. Replace the platen roller. Replace the cutter unit. CL4NX/CL6NX Operator Manual...
-
Page 55: Error Icon
Change to offline mode if allowed for the active error. Change to settings mode or guidance video. • Error Icon Icon Description Paper end is detected. Ribbon end is detected. CL4NX/CL6NX Operator Manual... - Page 56 • There is no free space in the USB memory. Calendar error is detected. • Writing/reading information to/from the RFID tag failed (CL4NX only). • With Non-RFID warning enabled and RFID tag loaded, the items received do not contain an RFID issue command (CL4NX only).
- Page 57 Description Printer error is detected. The temperature of the print head has exceeded the tolerance range. RFID module is defective (CL4NX only). Bluetooth module is defective. Paper jam is detected. (CL4NX only) The barcode verifier is not detected at printer startup when the barcode check mode is enabled.
-
Page 58: Guidance Video
Guide menu Media roll loading (Standard) Possible Possible Media roll loading (Cutter) Possible Possible Media roll loading (Linerless) (CL4NX only) Possible Possible Media roll loading (Dispenser) Possible Possible Media roll loading (Dispenser with rewinder) Possible Possible Fan-fold media loading (Standard) - Page 59 The printer enters offline mode. Press the button. The printer enters settings mode. Select Information using the buttons. Press the button. The item list shows. Select Help using the buttons. Press the button. The list of guidance videos shows. CL4NX/CL6NX Operator Manual...
- Page 60 Indication panel shows again when one of the buttons is pressed. Stop the playback of the video and return to menu. Playback the video Playback or pause from the start. the video. Rewind the video. Fast-forward the video. CL4NX/CL6NX Operator Manual...
-
Page 61: How To Adjust The Print Settings During Printing
Adjustments menu will be applied only to the data already analyzed at that time. The settings specified by command will be applied to the rest of the data. CL4NX/CL6NX Operator Manual... -
Page 62: How To Cancel The Print Job
Press the button to change the printer to offline mode. Press the left soft button. A message shows, confirming that you want to cancel the print job. Press the right soft button. The print job will be canceled. CL4NX/CL6NX Operator Manual... -
Page 63: Settings Mode
Changing to Settings Mode The settings mode can be shown when no print jobs remain in the printer. Change the printer to settings mode according to the following procedure: Press the button in online mode. The printer enters offline mode. CL4NX/CL6NX Operator Manual... -
Page 64: Log In To/Log Out Of The Settings Mode
Password is required to enter the settings mode again. Note With password enabled, if no button is pressed for about ten minutes after login, the login session will end automatically. Password is required to enter the settings mode again. CL4NX/CL6NX Operator Manual... -
Page 65: Item Selection
Press the button to show the next layer. buttons. Similarly, select an item using the Press the button to return to the previous screen. There are more items in the next layer. Returns to the previous screen. CL4NX/CL6NX Operator Manual... -
Page 66: Setting Value Input Or Selection
Select the character for input return to the item list. using the arrow buttons. The selected character will be Enter the selected character highlighted in the selection into the text box. area. CL4NX/CL6NX Operator Manual... - Page 67 Save the selection from the list and return to the item list. Cancel the selection from the Select an item using the list and return to the item list. buttons. The selected item will be highlighted in the selection area. CL4NX/CL6NX Operator Manual...
- Page 68 Cancel the IP address you Select the digit for input enter in the text box and return to the item list. using the buttons. Select the number to input using the buttons. CL4NX/CL6NX Operator Manual...
-
Page 69: Settings Menu Tree Structure
Click on the items in blue to link directly to the details of the selected items. Shortcut Shortcuts to frequently used settings Adjustments Speed Darkness Range Darkness Auto-mode Print Mode Backfeed Ribbon Sensor Type Head Check Help CL4NX/CL6NX Operator Manual... - Page 70 Head Check Mode Every Page Check Media Size Adjustments Offset Pitch Darkness Adjust Start Online Feed After Error Feed At Power On Finisher Feed Paper End Head Base Position Prioritize Reprint Print End Position Label Near End CL4NX/CL6NX Operator Manual...
- Page 71 IP Address Netmask Gateway IPv6 Mode DHCP/Renew Lease IP Address Prefix Length Gateway Proxy Enabled Server Exclude Wi-Fi Button (PBC) Protected Setup Wi-Fi Direct Device Name Connect Start Group Remove Group Disconnect SSID IP Address Passphrase SSID CL4NX/CL6NX Operator Manual...
- Page 72 EAP Conf. EAP Mode Inner Method Username Password Anon. Outer ID Verify Server Cert. Private Key P/W PAC Auto Provisioning PAC P/W Interface Services Ports Port1 Port2 Port3 Flow Control Enable Error Time Server IP Enable FTP Timeout CL4NX/CL6NX Operator Manual...
- Page 73 Authentication Passphrase Privacy Protocol Privacy Passphrase Traps Enable SNMP Version IP Version Destinations Destination 1 Destination 2 Destination 3 Community User Engine ID Security Authentication Protocol Authentication Passphrase Privacy Protocol Privacy Passphrase Advanced Additional Announce- Periodic ment CL4NX/CL6NX Operator Manual...
- Page 74 Flow Control Ignore CR/LF Ignore CAN/DLE External I/O Enable Signals EXT 9PIN EXT Mode Inputs Start Print Reprint Outputs Paper End Ribbon End Machine Error Print Done Qty/Offline Ribbon Near End Dispenser Label Near End EXT I/O Re-print CL4NX/CL6NX Operator Manual...
- Page 75 Pre-Encoded Tag Assign Prefix MCS Prefix Digit Input Prefix Non-RFID Warning Log RFID Data Data To Record Output Error Mode Pulse Length Counters Lifetime Count Success Count Failure Count Total User Count Success Count Failure Count Total CL4NX/CL6NX Operator Manual...
- Page 76 Delimiter Tilde Clock Format SIPL Font Settings Code Page c20 Proportional Pitch 0 Slash Format Save STCL Command Head Control Code 1st Byte Code 2nd Byte Code 3rd Byte Code Font Settings Zero Slash € Code Page CL4NX/CL6NX Operator Manual...
- Page 77 4 Operation and Configuration Applications Submenus SDPL Control Code Code Type CNTBY Label Rotation Format Attribute Pause Mode SOP Emulation 1 Byte Codepage SDPL Measure Unit Compatible Mode Enable Start Application CL4NX/CL6NX Operator Manual...
- Page 78 Cutter Life Cutter Count Change Platen Change Platen Platen Interval Platen Count Sound Error Sound Energy Saving Sleep Timeout LCD Brightness Show Total Count Password Password Enable Install Security Change Password admin manager level1 rfid Start on AC CL4NX/CL6NX Operator Manual...
- Page 79 Hex Dump Mode Buffer Dump Log Files Copy Remove Print Select Data Reset Data & Settings Settings Profiles Delete Load Save Start with Service Factory Certificates HTTPS Wi-Fi Root CA Wi-Fi Client Wi-Fi Private Key EAP-FAST PAC File CL4NX/CL6NX Operator Manual...
- Page 80 4 Operation and Configuration Tools Submenus Barcode Reader Reading Reader Select Reader Test Checking Mode Start Position VOID Print Retry Count Host Notification Logs Copy Remove Clone Startup Guide CL4NX/CL6NX Operator Manual...
- Page 81 4 Operation and Configuration Information Submenus Help Install Paper Roll Standard Cutter Linerless (CL4NX only) Dispenser Dispenser with Rewinder Fanfold Standard Cutter Install Ribbon Replace Paper Roll Standard Cutter Linerless (CL4NX only) Dispenser Dispenser with Rewinder Fanfold Standard Cutter Replace Ribbon...
- Page 82 4 Operation and Configuration Information Submenus LAN MAC Wi-Fi MAC Wi-Fi Region Wi-Fi Status Wi-Fi Direct SSID Role Device Address IP Address Passphrase Wi-Fi Versions CL4NX/CL6NX Operator Manual...
-
Page 83: Details Of The Settings Menu Screen
Ribbon Set whether to print using a ribbon or direct thermal media. Sensor Type Set the media sensor type. Head Check Check if there is a broken element of the print head. Help Shows the guidance video. CL4NX/CL6NX Operator Manual... -
Page 84: Printing Menu
Print Mode menu. Darkness Range Set the range of the print darkness. Darkness Set the print darkness. Imaging Set the print reference position in the vertical and horizontal directions. Advanced Set the sensor operation and print motion. CL4NX/CL6NX Operator Manual... -
Page 85: Label Length
• 305 dpi: 1 to 1984 dots if Head Base Position is Left-justify • 203 dpi: 1 to 1340 dots • 305 dpi: 1 to 2010 dots Note Set the label size to a value that includes the liner. CL4NX/CL6NX Operator Manual... -
Page 86: Auto Measure
Shows only if you have selected Use Ribbon in the Ribbon menu. The options are as follows: • Enabled: Show the warning icon. • Disabled: Do not show the warning icon. Note The warning icon shows in the status bar on the upper part of the screen. CL4NX/CL6NX Operator Manual... -
Page 87: Sensor Type
If you have selected Tear-Off, Dispenser or Cut & Print in Print Mode, only Gap and I-Mark will be available in the Sensor Type menu. If you have selected Linerless in Print Mode (CL4NX only), only None and I-Mark will be available in the Sensor Type menu. - Page 88 Operate in cutter mode if you have installed the optional cutter unit. Operate in dispenser mode if you have installed the optional dispenser unit. Operate in linerless mode if you have installed the optional linerless kit (CL4NX only). CL4NX/CL6NX Operator Manual...
-
Page 89: Print Mode
You can specify this option only if you have installed the dispenser unit. • Linerless (CL4NX only): Cut each label while printing the specified number of labels. You can specify this option only if you have installed the linerless kit. -
Page 90: Eject Cut
• Before: Before printing, backfeed the front part of the media to the print head position. If you have selected Tear-Off or Linerless (CL4NX only) in Print Mode, only Before is available in the Backfeed menu. Eject Cut Printing >... - Page 91 Offset the print position in the vertical (feed) direction. Horizontal Offset the print position in the horizontal direction. Label Liner Pitch Offset of vertical base reference point Print reference position Base reference Offset of horizontal point after offset base reference point CL4NX/CL6NX Operator Manual...
- Page 92 Set the offset value '+' from the print reference position to move to the left side and value '-' to move to the right side of the printer (when facing the front of the printer). The setting range is from -792 to +792 dots. CL4NX/CL6NX Operator Manual...
- Page 93 Set the print end position of the media. Enable or disable the warning when the media Label Near End is about to run out. *This printer does not support the Label Near End function. Keep the setting disabled. CL4NX/CL6NX Operator Manual...
- Page 94 The setting items are as follows: Auto-calibration Automatically adjust the sensor level. *Does not show if you have installed the optional linerless kit (CL4NX only). GAP Levels Manually set the Gap sensor level. GAP Slice Level Manually set the Gap sensor slice level.
- Page 95 • Low (with only liner) ≤ 0.5 (V) • High (media attached with liner) - Low ≥ 1.0 (V) 11. If both “High” and “Low” levels comply with the standard value, press the right soft button to confirm the value. CL4NX/CL6NX Operator Manual...
- Page 96 Slice level value. Set the Slice level to the level calculated in step 1. 4. Press the right soft button to confirm the value. Note If you set the Slice Level to 0.0 (V), the printer sets the slice level automatically. CL4NX/CL6NX Operator Manual...
- Page 97 • Low (without I-mark) ≤ 0.5 (V) • High (with I-mark) - Low ≥ 1.0 (V) 10. If both “High” and “Low” levels comply with the standard value, press the right soft button to confirm the value. CL4NX/CL6NX Operator Manual...
- Page 98 • After Batch: The head check occurs before starting to print and when printing is stopped. If backfeed is applicable, the head check occurs before starting to print, when stopping to print and during the backfeed. • Every Page: Perform the head check for each specified number of media. CL4NX/CL6NX Operator Manual...
- Page 99 Printing > Advanced > Adjustments Correct the offset position, print position and print darkness. The setting items are as follows: Offset Correct the offset position. Pitch Offset the print position in the vertical direction. Darkness Adjust Fine tune the print darkness. CL4NX/CL6NX Operator Manual...
- Page 100 • 305 dpi: -45 to 0 to 45 dots • 609 dpi: -90 to 0 to 90 dots <CL6NX> • 203 dpi: -30 to 0 to 30 dots • 305 dpi: -45 to 0 to 45 dots CL4NX/CL6NX Operator Manual...
- Page 101 Printing > Advanced > Feed At Power On Automatically feeds the media at power on. The options are as follows: • Enabled: Feed the media when the printer is powered on. • Disabled: Do not feed the media when the printer is powered on. CL4NX/CL6NX Operator Manual...
-
Page 102: Paper End
Section 7.6.1 Hardware for details. Note The message prompting to restart the printer will appear on the online/ offline screen if you have made any changes. In such a case, reboot the printer to make the setting effective. CL4NX/CL6NX Operator Manual... - Page 103 <CL4NX> • 203 dpi: 0 to 20000 dots • 305 dpi: 0 to 18000 dots • 609 dpi: 0 to 9600 dots <CL6NX> • 203 dpi: 0 to 20000 dots • 305 dpi: 0 to 18000 dots CL4NX/CL6NX Operator Manual...
- Page 104 Show or do not show the warning icon when the media is about to run out. The options are as follows: • Enabled: Show the warning icon. • Disabled: Do not show the warning icon. Note This printer does not support the Label Near End function. Keep the setting disabled. CL4NX/CL6NX Operator Manual...
-
Page 105: Interface Menu
To use LAN and wireless LAN for the interface between the host and the printer. The setting items are as follows: Settings Set the LAN, wireless LAN or select the interface. Services Set the TCP/IP port number, NTP, LPD, FTP or SNMP. Advanced Set the advanced function for the interface. CL4NX/CL6NX Operator Manual... - Page 106 Interface > Network > Settings> LAN Set the IPv4, IPv6 or proxy for the LAN. The setting items are as follows: IPv4 Set the IPv4 for the LAN. IPv6 Set the IPv6 for the LAN. Proxy Set the proxy for the LAN. CL4NX/CL6NX Operator Manual...
- Page 107 After setting, press the right soft button to enable the new setting. Press the left soft button to cancel the new setting and return to the previous setting. Note You cannot change IP Address, Netmask, Gateway and DNS if Mode is DHCP. CL4NX/CL6NX Operator Manual...
- Page 108 128.000.000.000 to 255.255.255.254 Gateway Interface > Network > Settings > LAN > IPv4 > Gateway If you have selected Static in the Mode menu, set the default gateway address. The setting range is as follows: 000.000.000.000 to 255.255.255.255 CL4NX/CL6NX Operator Manual...
- Page 109 If you have selected Static in the Mode menu, set and check DNS server addresses. The setting range is as follows: 000.000.000.000 to 255.255.255.255 Note You can register up to three IP addresses for the DNS server. Use a comma to delimit different IP addresses. CL4NX/CL6NX Operator Manual...
- Page 110 After setting, press the right soft button to enable the new setting. Press the left soft button to cancel the new setting and return to the previous setting. Note You cannot change IP Address, Prefix Length, Gateway and DNS if Mode is DHCP or Auto. CL4NX/CL6NX Operator Manual...
- Page 111 The setting range is from 1 to 128. Gateway Interface > Network > Settings > LAN > IPv6 > Gateway If you have selected Static in the Mode menu, set the default gateway address. The setting range is as follows: 0:0:0:0:0:0:0:0 to ffff:ffff:ffff:ffff:ffff:ffff:ffff:ffff CL4NX/CL6NX Operator Manual...
- Page 112 Server Interface > Network > Settings > LAN > Proxy > Server Set the name or IP address of the proxy server. Note Server should be set with a valid name or IP address and port number. CL4NX/CL6NX Operator Manual...
- Page 113 WPA2 in the Security menu. EAP Conf. Set the EAP authentication. *Shows only if you have selected Dynamic WEP in the Security menu. Note When Wi-Fi Direct is active, only IPv6 is not shown on the screen. CL4NX/CL6NX Operator Manual...
- Page 114 When Wi-Fi Direct is active, Mode, DHCP and DNS are not shown. In addition, you cannot change IP Address, Netmask and Gateway if Mode is DHCP or Wi-Fi Direct is active. DNS cannot be changed if Mode is DHCP. CL4NX/CL6NX Operator Manual...
- Page 115 128.000.000.000 to 255.255.255.254 Gateway Interface > Network > Settings > Wi-Fi > IPv4 > Gateway If you have selected Static in the Mode menu, set the default gateway address. The setting range is as follows: 000.000.000.000 to 255.255.255.255 CL4NX/CL6NX Operator Manual...
- Page 116 If you have selected Static in the Mode menu, set and check DNS server addresses. The setting range is as follows: 000.000.000.000 to 255.255.255.255 Note You can register up to three IP addresses for the DNS server. Use a comma to delimit different IP addresses. CL4NX/CL6NX Operator Manual...
- Page 117 Note When Wi-Fi Direct is active, this IPv6 screen is not shown. In addition, you cannot change IP Address, Prefix Length, Gateway and DNS if Mode is DHCP or Auto. CL4NX/CL6NX Operator Manual...
- Page 118 The setting range is from 1 to 128. Gateway Interface > Network > Settings > Wi-Fi > IPv6 > Gateway If you have selected Static in the Mode menu, set the default gateway address. The setting range is as follows: 0:0:0:0:0:0:0:0 to ffff:ffff:ffff:ffff:ffff:ffff:ffff:ffff CL4NX/CL6NX Operator Manual...
- Page 119 Server Interface > Network > Settings > Wi-Fi > Proxy > Server Set the name or IP address of the proxy server. Note Server should be set with a valid name or IP address and port number. CL4NX/CL6NX Operator Manual...
- Page 120 2. When Scanning… shows on the screen, press the WPS button on the access point of the wireless LAN device. 3. When the connection to the access point is established, Successfully configured. shows on the screen. CL4NX/CL6NX Operator Manual...
- Page 121 2. When Scanning… shows on the screen, set the PIN code shown on the screen to the access point of the wireless LAN or computer. 3. When the connection to the access point is established, Successfully configured. shows on the screen. CL4NX/CL6NX Operator Manual...
- Page 122 After setting up a start group, the printer will be set to GO (Group Owner) and will wait for a connection request from another device. If the printer is powered off during a persistent group connection, the group will be started automatically after the printer is powered on. CL4NX/CL6NX Operator Manual...
- Page 123 Shows if you have selected Infrastructure in the Mode menu. The options are as follows: • Enabled • Disabled Mode Interface > Network > Settings > Wi-Fi > Mode Set the communication method of the wireless LAN. The options are as follows: • Infrastructure • Ad-hoc CL4NX/CL6NX Operator Manual...
- Page 124 Key #1 - Key #4 Set the WEP key1 - key4. Authentication Interface > Network > Settings > Wi-Fi > WEP Conf. > Authentication Set the WEP authentication method. The options are as follows: • Open System • Shared Key CL4NX/CL6NX Operator Manual...
- Page 125 Set the PSK shared key. *Shows only if you have selected Personal (PSK) in the WPA Authentication menu. EAP Conf. Set the functions for EAP. *Shows only if you have selected items other than Personal (PSK) in the WPA Authentication menu. CL4NX/CL6NX Operator Manual...
- Page 126 Interface > Network > Settings > Wi-Fi > WPA Conf. > PSK Set the PSK shared key. Shows only if you have selected Personal (PSK) in the WPA Authentication menu. You can enter alphabetic, numeric and symbolic characters in the range of 8-63 ASCII or 64 hexadecimal digits. CL4NX/CL6NX Operator Manual...
-
Page 127: Eap Mode
Interface > Network > Settings > Wi-Fi > WPA Conf. > EAP Conf. > EAP Mode Set the EAP Mode (authentication mode). The options are as follows: • FAST • LEAP • PEAP • TLS • TTLS CL4NX/CL6NX Operator Manual... - Page 128 Interface > Network > Settings > Wi-Fi > EAP Conf. > Password Interface > Network > Settings > Wi-Fi > WPA Conf. > EAP Conf. > Password Set the password. You can enter alphabetic, numeric and symbolic characters in the range of 0 to 32 characters. CL4NX/CL6NX Operator Manual...
- Page 129 Set the Private Key password. Shows only if you have selected TLS in either the EAP Mode menu or Inner Method menu. You can enter alphabetic, numeric and symbolic characters in the range of 0 to 64 characters. CL4NX/CL6NX Operator Manual...
- Page 130 • Wi-Fi: Use wireless LAN interface (or Force wireless LAN interface). Note The message prompting to restart the printer will appear on the online/ offline screen if you have made any changes. In such a case, reboot the printer to make the setting effective. CL4NX/CL6NX Operator Manual...
- Page 131 Flow Control menu. Port1 Interface > Network > Services > Ports > Port1 Set the port number. The setting range is from 1 to 65535. Each port (1, 2 and 3) must be set to different values. CL4NX/CL6NX Operator Manual...
- Page 132 Enable or disable the BCC check function. Shows only if you have selected Status5 in the Flow Control menu. The options are as follows: • Enabled: Enable the BCC check function. • Disabled: Disable the BCC check function. CL4NX/CL6NX Operator Manual...
- Page 133 The setting range is from 0.0.0.0 to 255.255.255.255. The IP address should normally be set to 0.0.0.0 (the default) which means that global NTP servers will be assigned automatically. Set to a valid IP if the time synchronization is requested for a specific server. CL4NX/CL6NX Operator Manual...
- Page 134 Specify the maximum number of seconds that the printer's FTP server will allow clients to stay connected without receiving any data on either the control or data connection. The setting range is from 10 to 3600 seconds. CL4NX/CL6NX Operator Manual...
- Page 135 You can enter alphabetic, numeric and symbolic characters in the range of 0 to 255 characters. sysName Interface > Network > Services > SNMP > sysName Set the name information. You can enter alphabetic, numeric and symbolic characters in the range of 0 to 255 characters. CL4NX/CL6NX Operator Manual...
- Page 136 Interface > Network > Services > SNMP > Agent > Enable Enable or disable the functions for Agent. The options are as follows: • Enabled: Enable the functions for Agent. • Disabled: Disable the functions for Agent. CL4NX/CL6NX Operator Manual...
- Page 137 User Security menu. SNMP Version Interface > Network > Services > SNMP > Agent > Read-Only > SNMP Version Set the SNMP version. The options are as follows: • 1 • 1 • 3 • Disabled CL4NX/CL6NX Operator Manual...
- Page 138 Interface > Network > Services > SNMP > Agent > Read-Only > Authentication Protocol Set the authentication protocol. Shows only if you have selected Authentication or Privacy in the User Security menu. The options are as follows: • MD5 • SHA CL4NX/CL6NX Operator Manual...
- Page 139 Privacy Passphrase Set the privacy passphrase. Shows only if you have selected Privacy in the User Security menu. You can enter alphabetic, numeric and symbolic characters in the range of 8 to 32 characters. Initial setting: mypassword CL4NX/CL6NX Operator Manual...
- Page 140 User Security menu. SNMP Version Interface > Network > Services > SNMP > Agent > Read-Write > SNMP Version Set the SNMP version. The options are as follows: • 1 • 1 • 3 • Disabled CL4NX/CL6NX Operator Manual...
- Page 141 Interface > Network > Services > SNMP > Agent > Read-Write > Authentication Protocol Set the authentication protocol. Shows only if you have selected Authentication or Privacy in the User Security menu. The options are as follows: • MD5 • SHA CL4NX/CL6NX Operator Manual...
- Page 142 Privacy Passphrase Set the privacy passphrase. Shows only if you have selected Privacy in the User Security menu. You can enter alphabetic, numeric and symbolic characters in the range of 8 to 32 characters. Initial setting: mypassword CL4NX/CL6NX Operator Manual...
- Page 143 Authentication or Privacy in the Security menu. Privacy Protocol Set the privacy protocol. *Shows only if you have selected Privacy in the Security menu. Privacy Set the privacy passphrase. Passphrase *Shows only if you have selected Privacy in the Security menu. CL4NX/CL6NX Operator Manual...
- Page 144 • 4: Set the IP version to IPv4. • 6: Set the IP version to IPv6. Destinations Interface > Network > Services > SNMP > Traps > Destinations Set the number of trap destinations. The setting range is from 1 to 3. CL4NX/CL6NX Operator Manual...
- Page 145 Set the Traps community name. Shows only if you have selected 1 or 2c in the SNMP Version menu. You can enter alphabetic, numeric and symbolic characters in the range of 1 to 32 characters. Initial setting: trapcom CL4NX/CL6NX Operator Manual...
- Page 146 Interface > Network > Services > SNMP > Traps > Authentication Protocol Set the authentication protocol. Shows only if you have selected Authentication or Privacy in the Security menu. The options are as follows: • MD5 • SHA CL4NX/CL6NX Operator Manual...
- Page 147 Interface > Network > Services > SNMP > Traps > Privacy Passphrase Set the privacy passphrase. Shows only if you have selected Privacy in the Security menu. You can enter alphabetic, numeric and symbolic characters in the range of 8 to 32 characters. Initial setting: mypassword CL4NX/CL6NX Operator Manual...
- Page 148 1 second after the link up/DHCP assignment. Periodic Interface > Network > Advanced > ARP Announcement > Periodic Set the interval of the ARP announcement in the range of 0 to 600 seconds. Initial setting: 0 CL4NX/CL6NX Operator Manual...
- Page 149 Enable or disable the BCC check function. Shows only if you have selected Status5 in the Flow Control menu. The options are as follows: • Enabled: Enable the BCC check function. • Disabled: Disable the BCC check function. CL4NX/CL6NX Operator Manual...
- Page 150 *Shows only if you have selected STATUS5 in the Flow Control menu. Baudrate Interface > RS-232C > Baudrate Set the baud rate (bps). The options are as follows: • 2400 • 4800 • 9600 • 19200 • 38400 • 57600 • 115200 CL4NX/CL6NX Operator Manual...
- Page 151 • 7-N-2 • 7-O-2 • 7-E-2 Parameter Configurations List Parameter Data length (bit) Parity Stop bit (bit) 8-N-1 NONE 8-O-1 8-E-1 EVEN 8-N-2 NONE 8-O-2 8-E-2 EVEN 7-N-1 NONE 7-O-1 7-E-1 EVEN 7-N-2 NONE 7-O-2 7-E-2 EVEN CL4NX/CL6NX Operator Manual...
- Page 152 Set the BCC check function. *Shows only if you have selected Status5 in the Flow Control menu. Flow Control Interface > USB > Flow Control Set the communication protocol. The options are as follows: • Status4 • Status5 • None CL4NX/CL6NX Operator Manual...
- Page 153 Set the CRC check function. Flow Control Set the communication protocol. Enable Interface > Bluetooth > Enable Enable or disable the functions for Bluetooth. The options are as follows: • Enabled: Enable the Bluetooth function. • Disabled: Disable the Bluetooth function. CL4NX/CL6NX Operator Manual...
-
Page 154: Pin Code
Secure Simple Pairing) Interface > Bluetooth > ISI Set the ISI communication parameter. The setting range is 0, or from 18 to 4096. Set to a value that is higher than the ISW communication parameter setting value. CL4NX/CL6NX Operator Manual... - Page 155 Set to a value that is lower than the PSI communication parameter setting value. CRC Mode Interface > Bluetooth > CRC Mode Enable or disable the CRC check function. The options are as follows: • Enabled: Enable the CRC check function. • Disabled: Disable the CRC check function. CL4NX/CL6NX Operator Manual...
- Page 156 • Disabled: Do not ignore the CR/LF code. Ignore CAN/DLE Interface > Ignore CAN/DLE Ignore or acknowledge the CAN/DLE code of the received data. The options are as follows: • Enabled: Ignore the CAN/DLE code. • Disabled: Do not ignore the CAN/DLE code. CL4NX/CL6NX Operator Manual...
- Page 157 Set the function of the EXT 9PIN output. EXT Mode Set the mode of the Print End Signal. Inputs Set the input pin No. of the Signal Print Start/ Signal Reprint. Outputs Set the output pin No. of the signals. CL4NX/CL6NX Operator Manual...
- Page 158 The print end signal (PREND) is Low before label printing, becomes High from the start to the end of print, and becomes Low again after print completion. *Refer to Section 7.7.6 External Signal Interface (EXT) for the Timing Chart of the EXT Output Signal. CL4NX/CL6NX Operator Manual...
- Page 159 • PIN7: Set the Signal Reprint to 7PIN. Note You cannot set any inputs using the same pin number. If you attempt to set the same number, the settings will show in red and you cannot save the settings. CL4NX/CL6NX Operator Manual...
- Page 160 Dispenser Set the output pin No. of the Signal Dispenser. *To use this signal, connect the dispenser unit or linerless kit (CL4NX only). Label Near End Set the output pin No. of the Signal Label Near End. *This printer does not support the Label Near End function.
- Page 161 EXT I/O Re-print Interface > External I/O > EXT I/O Re-print Set the reprint function for use with the external terminal. The options are as follows: • Enabled: Enable the reprint function. • Disabled: Disable the reprint function. CL4NX/CL6NX Operator Manual...
- Page 162 4 Operation and Configuration RFID (CL4NX only) Interface > RFID Perform the RFID settings. *Shows only for the RFID model. The setting items are as follows: Antenna Pitch Set the antenna pitch. Write Power Set radio power level used to write information to RFID tag.
- Page 163 Interface > RFID > Tag Offset Set distance to print on label BEFORE pausing to encode RFID according to the Inlay Configuration Guide. This setting will be used when labels are not compatible with the CL4NX’s antenna positions. For details, access the following URL: http://www.satoworldwide.com/rfid/ The setting range is from 0 to 240 mm.
- Page 164 However, if you have set the Retries to 0, the RFID error screen shows and printing continues. • Release: Deletes the current print job, allowing the printer to move on to the next print job. If the RFID error occurs continuously and reaches the maximum number of Retries, printing stops. CL4NX/CL6NX Operator Manual...
- Page 165 Set the error print for the RFID tag error. • Enabled: Enable the RFID error print function. • Disabled: Disable the RFID error print function. For details on the RFID error print, refer to Section 7.5.1 Printing RFID Errors. CL4NX/CL6NX Operator Manual...
- Page 166 Enable or disable the Multi vendor Chip-based Serialization. • Enabled: Enable the Multi vendor Chip-based Serialization. • Disabled: Disable the Multi vendor Chip-based Serialization. Note Multi vendor Chip-based Serialization: use TID as base for SGTIN serial number. CL4NX/CL6NX Operator Manual...
- Page 167 • Auto: Set to the manufacturer prefix selected in Chip Manufacturer. • Manual: Set to the prefix determined by the MCS Prefix Digit and Input Prefix. Note Does not show if Chip Manufacturer is NXP and Pre-Encoded Tag is enabled. CL4NX/CL6NX Operator Manual...
- Page 168 The setting range is from 0 to 7. Note • Does not show if Chip Manufacturer is NXP and Pre-Encoded Tag is enabled. • The setting range varies depending on the setting value in MCS Prefix Digit. CL4NX/CL6NX Operator Manual...
- Page 169 Set the data to record the log when Log RFID Data is enabled. The options are as follows: • EPC and TID: Store the EPC and TID data. • EPC: Store the EPC data. • TID: Store the TID data. * Shows only if the module is UHF. CL4NX/CL6NX Operator Manual...
- Page 170 Shows the RFID counter. The display items are as follows: Lifetime Shows the number of encoding successes, failures, and total attempts. User Shows the number of encoding successes, failures, and total attempts after the RFID counter is cleared. CL4NX/CL6NX Operator Manual...
- Page 171 RFID tag after the RFID counter is cleared. This is the total number including Count Success and Count Failure. Note You can reset the counter using the right soft button (CLEAR) when the counter is 1 or higher. CL4NX/CL6NX Operator Manual...
-
Page 172: Applications Menu
• Printer language is finalized with the received print data. • Non-Standard Code is not supported. When Standard Code under SBPL in the Applications menu is disabled, the Protocol setting will be changed to SBPL. CL4NX/CL6NX Operator Manual... - Page 173 4 Operation and Configuration SBPL Applications > SBPL SBPL (Sato Barcode Printer Language) is the common command that controls SATO barcode label printers. To use SBPL as the printer command, set the following items: Show Error Enable or disable the command error indication.
- Page 174 This setting is applied to the following bitmap fonts: U, S, M, WB, WL, XU, XS, XM, XL, X20, X21, X22, X23, X24 The options are as follows: • Enabled: Print zero with a slash. • Disabled: Print zero without a slash. CL4NX/CL6NX Operator Manual...
-
Page 175: Character Code
When set to JP-COMPATIBLE or JP-JISX0208 • JIS • SJIS • UTF-16 When set to JP-JISX0213 • SJIS • UTF-16 When set to GB18030 • GB18030 When set to BIG5 • BIG5 When set to KCS5601 • KCS5601 CL4NX/CL6NX Operator Manual... - Page 176 Select the code page to be used from the list. € Applications > SBPL > Font Settings > € Set the European currency symbol to a hex code. The setting range is from 00 to ff (hexadecimal). CL4NX/CL6NX Operator Manual...
- Page 177 ESC+K5: Print with 40x40 dots Kanji in horizontal line. ESC+K6: A command error occurs and the data will not be printed. ESC+K7: A command error occurs and the data will not be printed. CL4NX/CL6NX Operator Manual...
- Page 178 Set the date format. Label Applications > SZPL > Label Set the print position. The setting items are as follows: Shift Set the shift offset position of the label. Set the top offset position of the label. CL4NX/CL6NX Operator Manual...
- Page 179 Set the top offset position of the label. The setting range is from -120 to 0 to 120. Caret Applications > SZPL > Caret Set the caret (^) code. The setting range is from 0 to 255. CL4NX/CL6NX Operator Manual...
- Page 180 • DD/MM/YY (12-hour clock) SIPL Applications > SIPL To use SIPL as the printer command, set the following items: Font Settings Set the font. Format Save Set whether to save the user format data registered at printing in the printer. CL4NX/CL6NX Operator Manual...
- Page 181 Applications > SIPL > Font Settings > 0 Slash Set whether to print the number zero (0) with or without a slash (/). The options are as follows: • Enabled: Print zero with a slash. • Disabled: Print zero without a slash. CL4NX/CL6NX Operator Manual...
- Page 182 Applications > STCL > Command Head > Control Code Set the control code. The options are as follows: • Auto: Perform the protocol detection automatically. • ESC|LF|NUL • 7B|7C|7D • Custom: Change the first to third byte codes. CL4NX/CL6NX Operator Manual...
- Page 183 Applications > STCL > Font Settings Set the font. The setting items are as follows: Zero Slash Set the type for printing zero. € Set the European currency symbol to a hex code. Code Page Set the code page to be used. CL4NX/CL6NX Operator Manual...
- Page 184 Set the European currency symbol to a hex code. The setting range is from 00 to ff (hexadecimal). Code Page Applications > STCL > Font Settings > Code Page Select the code page to be used from the list. CL4NX/CL6NX Operator Manual...
- Page 185 Set the CR code. CNTBY Set the CNTBY code. Code Type Applications > SDPL > Control Code > Code Type Set the control code type. The options are as follows: • Standard • Alternate 1 • Alternate 2 • Custom CL4NX/CL6NX Operator Manual...
- Page 186 Applications > SDPL > Control Code > CNTBY Set the CNTBY code. You can change the code only if you have selected Custom in the Code Type menu. The setting range is from 00 to ff (hexadecimal). CL4NX/CL6NX Operator Manual...
- Page 187 • Disabled: Disable the pause mode. SOP Emulation Applications > SDPL > SOP Emulation Set the SOP emulation. The options are as follows: • Disabled • Prodigy Plus - 110 • Allegro - 220 • Prodigy - 250 • Auto CL4NX/CL6NX Operator Manual...
-
Page 188: Compatible Mode
Applications > SDPL > Compatible Mode > TTF Set whether to allow the use of TrueType fonts. The options are as follows: • Enabled: Allow the use of TrueType fonts. • Disabled: Do not allow the use of TrueType fonts. CL4NX/CL6NX Operator Manual... - Page 189 Enable or disable AEP mode. Start Application Select the application to start at printer startup in AEP mode. Note Contact your SATO sales representative for more information about the use of AEP mode. Enable Applications > AEP > Enable Enable or disable AEP mode.
-
Page 190: System Menu
*You can set the time only if you have installed the optional RTC kit. Date Set the date. *You can set the date only if you have installed the optional RTC kit. Time Zone Set the time zone. CL4NX/CL6NX Operator Manual... -
Page 191: Usb Keyboard
AEP applications. Select the locale from the list. Unit System > Regional > Unit Set the unit of length for indication. The options are as follows: • dot • " (inch) • mm CL4NX/CL6NX Operator Manual... -
Page 192: Time Zone
*The date format is Year - Month - Date. Time Zone System > Regional > Time Zone > Region > City Set the time zone. First select the region from the Region list. Then select the city from the City list. CL4NX/CL6NX Operator Manual... - Page 193 System > Notifications > Clean Printhead > Clean Printhead Enable or disable the notification function about when the print head needs to be cleaned. The options are as follows: • Enabled: Enable the notification function. • Disabled: Disable the notification function. CL4NX/CL6NX Operator Manual...
-
Page 194: Cleaning Interval
Set the notification interval about when the print head needs to be replaced. Available to change only if you have selected Enabled in the Change Printhead menu. The printer shows the print distance as the setting value. The setting range is from 10 to 100 km. CL4NX/CL6NX Operator Manual... - Page 195 Enable or disable the notification function about when the platen roller needs to be replaced. Platen Interval Set the notification interval about when the platen roller needs to be replaced. Platen Count Shows the current distance the platen roller has fed. CL4NX/CL6NX Operator Manual...
- Page 196 Error Sound System > Sound > Error Sound Set the buzzer volume for the error sound. The options are as follows: • Off: Mute the sound. • Low: Low volume. • Medium: Medium volume. • High: High volume. CL4NX/CL6NX Operator Manual...
-
Page 197: Energy Saving
0 is the darkest and 9 is the brightest. Press the right soft button to complete the setting. Note The printer has a built-in energy saving function, which will decrease the brightness of the screen when you have not operated the printer for a period. CL4NX/CL6NX Operator Manual... - Page 198 Password screen before you enter the Settings menu. The options are as follows: • Enabled: Enable the password setting. • Disabled: Disable the password setting. Note The default password is 0310. You can change the password in Password > Change Password > level1. CL4NX/CL6NX Operator Manual...
-
Page 199: Change Password
Note The password used for installing a pkg file can be any passwords set in the System > Password. Contact a SATO reseller or technical service center for more information of the pkg file. Change Password System > Password > Change Password Change the password. - Page 200 • Do not disconnect the power cord until the powering off process is completed on the printer. • An incorrect power on/off operation may damage the printer settings. In such a case, the printer settings are reset to their default values. CL4NX/CL6NX Operator Manual...
-
Page 201: Tools Menu
Initialize the configuration or counter of the printer. Profiles Utilize the printer configurations as profiles. Service These are the setting items for service. Strictly for SATO authorized service personnel use. Factory These are the setting items for factory. Strictly for SATO factory personnel use. Certificates Set the wireless LAN authentication. - Page 202 When you increase the setting value, the stop position moves opposite the feed direction (toward the end part of the media). Darkness Adjust Fine tune the print darkness of the test print. 0 is the lightest and 99 is the darkest. CL4NX/CL6NX Operator Manual...
- Page 203 When you decrease the setting value, the print position moves in the feed direction (toward the front part of the media). When you increase the setting value, the print position moves opposite the feed direction (toward the end part of the media). CL4NX/CL6NX Operator Manual...
- Page 204 To stop the test print, first pause the print and then press the button. The setting items are as follows. Label Width Shows the necessary media width of the test print. The necessary media width is 50.8 mm (2”) for Small. CL4NX/CL6NX Operator Manual...
- Page 205 When you increase the setting value, the stop position moves opposite the feed direction (toward the end part of the media). Darkness Adjust Fine tune the print darkness of the test print. 0 is the lightest and 99 is the darkest. CL4NX/CL6NX Operator Manual...
-
Page 206: Paper Sensor
When you decrease the setting value, the print position moves in the feed direction (toward the front part of the media). When you increase the setting value, the print position moves opposite the feed direction (toward the end part of the media). CL4NX/CL6NX Operator Manual... - Page 207 USB memory. The setting items are as follows: Hex Dump Mode Enable or disable the Hex Dump mode. Buffer Dump Save the receive buffer data to the printer. Log Files Manage the log files of the printer. CL4NX/CL6NX Operator Manual...
-
Page 208: Hex Dump Mode
SCI0001.bin: The contents of the receive buffer for RS-232C. • USB0001.bin: The contents of the receive buffer for USB. • WIFI0001.bin: The contents of the received buffer for Wi-Fi. • If you perform the Buffer Dump again, the existing file will be overwritten. CL4NX/CL6NX Operator Manual... -
Page 209: Log Files
CAUTION Be sure to perform a virus check for the USB memory before connecting it to the printer. SATO Corporation shall not be held responsible for a malfunction of the printer caused by a virus infection through the USB memory. - Page 210 CAUTION Printing the contents of the file may use a lot of media. Note When Hex Dump Mode is set to Enabled, it may take some time before the files are shown. CL4NX/CL6NX Operator Manual...
- Page 211 Press the left soft button to cancel or right soft button to perform the initialization. The printer will reboot after reset. CAUTION It is generally not necessary to perform the initialization. Doing so could change the print conditions. CL4NX/CL6NX Operator Manual...
- Page 212 The printer will reboot after reset. Refer to Section 7.1 List of Initial Values for the initial value of each setting items. Note The data to be initialized are the fonts and graphics registered in the printer. CL4NX/CL6NX Operator Manual...
- Page 213 Load the profile of the printer. *Not available if no profile is saved. Save Save the current printer configurations as a new profile. Start with Select the profile to load at printer startup. *Not available if no profile is saved. CL4NX/CL6NX Operator Manual...
- Page 214 You can enter a maximum of thirty-two characters including alphabet (upper case and lower case), numbers and symbols. Press the right soft button to confirm. The new profile name is shown on the list and is loaded. CL4NX/CL6NX Operator Manual...
- Page 215 CAUTION Be sure to perform a virus check for the USB memory before connecting it to the printer. SATO Corporation shall not be held responsible for a malfunction of the printer caused by a virus infection through the USB memory.
-
Page 216: Barcode Reader
Matrix 2 of 5 GS1-128 POSTNET IMB (USPS) GS1 DataBar Truncated GS1 DataBar Stacked GS1 DataBar Expanded GS1 DataBar Expanded Stacked GS1 DataBar Limited 2D Codes PDF417 Micro PDF417 Maxi Code QR Code Micro QR Code Data Matrix Aztec Code CL4NX/CL6NX Operator Manual... - Page 217 Perform a test read with the connected barcode verifier. Available only if you have connected the barcode verifier. Press the right soft button to start a test read, and check the test result displayed on the screen. CL4NX/CL6NX Operator Manual...
- Page 218 The options are as follows: • Disabled: Disable the barcode check function. • Readable: Check if the printed barcodes are readable. • Comparison: Check if the read results of the printed barcodes match the command data sent from the host. CL4NX/CL6NX Operator Manual...
- Page 219 Note Printing of the VOID mark is not supported in dispenser and linerless (CL4NX only) modes. Retry Count Tools > Barcode Reader > Checking > Retry Count Set how many times the printer will try to print the same barcode after a barcode error is detected.
- Page 220 CAUTION Be sure to perform a virus check for the USB memory before connecting it to the printer. SATO Corporation shall not be held responsible for a malfunction of the printer caused by a virus infection through the USB memory.
- Page 221 CAUTION Be sure to perform a virus check for the USB memory before connecting it to the printer. SATO Corporation shall not be held responsible for a malfunction of the printer caused by a virus infection through the USB memory.
-
Page 222: Information Menu
Shows the connection information of Wi-Fi Direct. *Shows only if connected using Wi-Fi Direct. Wi-Fi Versions Shows the version of the wireless LAN. *Shows only if the optional wireless LAN is installed and the Wi-Fi interface is selected. CL4NX/CL6NX Operator Manual... - Page 223 Information > Help > Install Paper Shows the video for loading the media. The setting items are as follows: Roll Shows the video for loading the media roll. Fanfold Shows the video for loading the fan-fold media. CL4NX/CL6NX Operator Manual...
- Page 224 Information > Help > Replace Paper Shows the video for replacing the media. The setting items are as follows: Roll Shows the video for replacing the media roll. Fanfold Shows the video for replacing the fan-fold media. CL4NX/CL6NX Operator Manual...
-
Page 225: Build Version
Shows the information and version of this printer. Name Shows the name of the build version. Date Shows the build date. Checksum Shows the checksum of the build version. Kernel Version Shows the kernel version. Boot Version Shows the boot version. CL4NX/CL6NX Operator Manual... -
Page 226: Kernel Version
A checked box shows enabled while an unchecked box shows disabled. Date Shows the build date of the boot version. Applications Information > Applications Shows the versions of the installed applications in the printer, such as printer languages. CL4NX/CL6NX Operator Manual... -
Page 227: System Restore
Press the right soft button to clear the selected RPM log file. System Restore Information > Installation Log > System Restore Shows the system restore log. The system restore log file is created after installing a pkg-file that incurs the inability to operate the printer LCD. CL4NX/CL6NX Operator Manual... -
Page 228: Print Module
Shows the Boot firmware release date. Checksum Shows the Boot firmware checksum. Main Information > Print Module > Main Name Shows the Main firmware version. Release Date Shows the Main firmware release date. Checksum Shows the Main firmware checksum. CL4NX/CL6NX Operator Manual... - Page 229 Shows the head counter information of this printer. Cutter Shows the current number of cuts. CAUTION Only SATO authorized service personnel are permitted to clear the counter. Head Information > Counters > Head Shows the head counter information of this printer.
- Page 230 Shows only if you have installed the optional wireless LAN and Wi-Fi is the active interface. Wi-Fi Region Information > Wi-Fi Region Shows the region information of the wireless LAN. Shows only if you have installed the optional wireless LAN and Wi-Fi is the active interface. CL4NX/CL6NX Operator Manual...
- Page 231 Shows only if Wi-Fi Direct is the active interface and you are connected using Wi-Fi Direct. Wi-Fi Versions Information > Wi-Fi Versions Shows the version of the wireless LAN. Shows only if you have installed the optional wireless LAN. CL4NX/CL6NX Operator Manual...
-
Page 232: Web Configuration
Wi-Fi is current IP address version, uptime, SNMP available and active. and MAC address of contact, name and Wi-Fi Strength is not the active interface. location. shown if the printer is P2P GO. CL4NX/CL6NX Operator Manual... -
Page 233: Settings
These six setting items are also available on the printer through the LCD screens. For details, refer to Section 4.4 Details of the Settings Menu Screen. Click on any icon on this Settings page to perform the settings. The following page will be shown after clicking on Printing: CL4NX/CL6NX Operator Manual... - Page 234 Section 4.4.2 Printing Menu. Interface Refer to Section 4.4.3 Interface Menu. Applications Refer to Section 4.4.4 Applications Menu. System Refer to Section 4.4.5 System Menu. Tools Refer to Section 4.4.6 Tools Menu. Information Refer to Section 4.4.7 Information Menu. CL4NX/CL6NX Operator Manual...
-
Page 235: Tools
Clone Refer to Clone on page 219. Install Package Refer to Section 2.5 Downloading Firmware of the CL4NX/CL6NX service manual. Logs Lists all log files in the log directory. Users can click to download the file. Reset Refer to Select on page 209. - Page 236 Refer to Test Print on page 199. Support Info List various information of the printer such as attached options, serial number, application versions and settings configuration. You can also get a screenshot of the current printer display. CL4NX/CL6NX Operator Manual...
-
Page 237: Certificates
4 Operation and Configuration 4.5.4 Certificates Shows the Root Certificate authority and client certificates installed on the printer. Note client certificate that is a PFX (PKCS #12) file will not be shown CL4NX/CL6NX Operator Manual... - Page 238 4 Operation and Configuration This page is intentionally left blank. CL4NX/CL6NX Operator Manual...
-
Page 239: Cleaning And Performing Printer Adjustments
• When loading linerless label, make sure that the front end of the media extends about 3 cm (1.18”) out the media discharge outlet. Note You can purchase a cleaning kit or cleaning sheet from a SATO reseller or technical service center. CL4NX/CL6NX Operator Manual... -
Page 240: Maintenance Of The Print Head And Platen Roller
• Media route • Ribbon route Maintenance intervals for the optional linerless kit (CL4NX only): • After you print one media roll or whenever there is any glue residue or paper dust on the media route. Use the cleaning kit to clean these parts: •... - Page 241 Section 3.3 Removing the Ribbon the reverse procedure in Section 3.5 Loading Media. Clean the dirt on the print head w, platen roller e and ribbon roller r using a cleaning pen or a cotton swab dabbed with cleaning liquid. CL4NX/CL6NX Operator Manual...
- Page 242 Clean the media sensor u using the cotton cloth dabbed with cleaning liquid. Return the media sensor guide to its original position and tilt the sensor guide lock up to the locked position. CL4NX/CL6NX Operator Manual...
-
Page 243: Additional Procedure For The Optional Linerless Kit (Cl4Nx Only)
5 Cleaning and Performing Printer Adjustments 5.2.2 Additional Procedure for the Optional Linerless Kit (CL4NX only) After performing step 8 above, clean the media guide i and inner surface o that is in contact to the label edge. Use the cotton cloth dabbed with cleaning liquid to clean. -
Page 244: Maintenance Using The Cleaning Sheet
Section 3.3 Removing the Ribbon and the reverse procedure in Section 3.5 Loading Media. Place the cleaning sheet w between the print head and the platen roller. Note Align the rough side of the cleaning sheet adjacent to the print head. CL4NX/CL6NX Operator Manual... - Page 245 Push the head lock lever q towards the rear to unlock the print head. Use a cleaning pen e to clean the dirt on the print head. CL4NX/CL6NX Operator Manual...
-
Page 246: Adjusting The Base Reference Point
Gap Label Print and Print and stop position stop position Cutter Mode I-mark Label Gap Label position Print and cut Print position position Dispenser Mode I-mark Label Gap Label Dispensing position Print and Print dispensing position position CL4NX/CL6NX Operator Manual... -
Page 247: Adjusting The Print Position
5 Cleaning and Performing Printer Adjustments Linerless Mode (CL4NX only) I-mark Linerless Label position Print position Non-printable zone (5 mm / 0.2”) 5.3.2 Adjusting the Print Position Set the Pitch in the Printing > Advanced > Adjustments menu to adjust the print position. - Page 248 Press the right soft button to save the setting value. Press the button to change to offline mode. Press the button again to change to online mode. You can perform printing to check the adjusted print position. CL4NX/CL6NX Operator Manual...
-
Page 249: Adjusting The Media Stop Position
• You can also adjust when the operation mode is specified to Tear-off or Dispenser. Adjust the stop position using the procedure: following When the printer is in online mode, press button on the operator panel to change to offline mode. Press the button to show the Settings menu. CL4NX/CL6NX Operator Manual... -
Page 250: Notes On The Stop/Cut Position Of Different Media
Stop position of the label in dispenser 2.0 mm ± 1.0 mm mode. (0.08” ± 0.04”) The regular position is to let the label stay about 2 ± 1 mm (0.08” ± 0.04”) on the liner. Stop position Dispenser bar CL4NX/CL6NX Operator Manual... -
Page 251: Cutter Mode
Perforated line • Fan-fold media 25 mm Area not to be cut Do not cut on the perforated line or within 4 mm 4 mm 25 mm (0.16” 0.98”) from the perforated line Perforated line towards you. CL4NX/CL6NX Operator Manual... -
Page 252: Adjusting The Print Quality
Press the button to show the Settings menu. Press the buttons to select Printing and then press the button. Press the buttons to select Darkness and then press the button. The Darkness screen shows. CL4NX/CL6NX Operator Manual... -
Page 253: Adjusting The Print Speed
Section 4.1.5 How to Adjust the Print Settings During Printing. Note (CL4NX only) If the optional linerless kit is installed, the setting range will be from 2 to 6 ips (inches/sec) regardless of the print resolution of the printer. The adjustment procedure for the print speed is as follows:... - Page 254 Press the right soft button or button to save the value. Press the button to change to offline mode. Press the button again to change to online mode. You can perform printing to check the print quality. CL4NX/CL6NX Operator Manual...
-
Page 255: Adjusting The Buzzer Volume
The options are as follows: • Off: Mute the sound. • Low: Low volume. • Medium: Medium volume. • High: High volume. Press the right soft button or button to save the setting. CL4NX/CL6NX Operator Manual... -
Page 256: Adjusting The Head Pressure Balance
Media Thickness (mm) CL4NX: 0.080-0.200 0.200 - 0.268 CL6NX: 0.060-0.200 Adjustment dials (Left and Right, CL4NX only) (Left and Right) (Left and Right, CL6NX only) Reference Thin paper/normal label, etc. Thick paper/tag, etc. Be sure to perform the pressure balance setting as explained below, after step 3. -
Page 257: Pressure Balance Setting
*First use the dial setting for the head pressure and then adjust according to the media width. Note The factory default setting is Left and Right For CL6NX dispenser model, the factory default setting is Left and Right CL4NX/CL6NX Operator Manual... - Page 258 5 Cleaning and Performing Printer Adjustments This page is intentionally left blank. CL4NX/CL6NX Operator Manual...
-
Page 259: Troubleshooting
To clear the error: 1006 Press the Offline The communication settings Set the communication between the printer and the between the printer and the button. host are incorrect. host correctly. CL4NX/CL6NX Operator Manual... - Page 260 To clear the error: 1012 and try to adjust missing Power off or elements to white bars. change the head check conditions. The print head is damaged. Replace the print head. CL4NX/CL6NX Operator Manual...
- Page 261 To clear the error: 1017 occurrence Press the Cancel <bb>: error command name button. cc: error code RFID tag error (CL4NX only) Could not read/write to the Discard this tag. RFID inlay. To clear the error: 1018 Press the Cancel button.
- Page 262 6 Troubleshooting Error Message Cause Countermeasure RFID system error (CL4NX only) RFID module is not operating Contact the technical support correctly. center for repair of the RFID module. To clear the error: 1019 Power off the printer. Calendar error The date and time of the Check if you have installed the calendar are incorrect.
- Page 263 Adjust the media sensor level. button or open/ incorrect. close the print head. EAP authentication error EAP Authentication failure. Use the correct Wi-Fi settings. (EAP failure) 1046 To clear the error: Change the Wi-Fi settings or press the Offline button. CL4NX/CL6NX Operator Manual...
- Page 264 Left soft button: Cancel the print data with the CRC error and continue printing from the next item. Paper jam error (CL4NX only) The media has jammed. Remove the jammed media. Load the media again. To clear the error:...
- Page 265 Press the Offline button. Barcode comparison error The read result of the barcode Check the layout for printing does not match the command and barcode verifier settings. data. 1080 To clear the error: Press the Offline or Cancel button. CL4NX/CL6NX Operator Manual...
-
Page 266: More Information About Command Error
Specified memory area (card slot) is inappropriate. Tried to write to a write-protected media. This number is already Number specified by registration command has already been registered taken. Over registration area limit Exceeded the registration area. (Memory full). CL4NX/CL6NX Operator Manual... - Page 267 Data is not registered. Printing position is out of The specified print start position is outside the printable area. printable area Barcode image is out of The printing image is outside the printable area. (Barcode only). printable area CL4NX/CL6NX Operator Manual...
-
Page 268: When The Led Lights Red/Blue
An error has occurred. Clear the error according to the message. Note If the printer enters sleep mode during a printer error status (LED lights red), the LED indicator will flash blue at intervals of two seconds. CL4NX/CL6NX Operator Manual... -
Page 269: Troubleshooting Table
• Disconnect the power cord from the AC outlet before you perform the cleaning. Note You can purchase a cleaning kit or cleaning sheet from a SATO reseller or technical service center. 6.3.1 No Power/Nothing on the Screen... -
Page 270: Can Feed The Media But Cannot Print
Does the interface operate correctly? Check the interface according to the Interface Troubleshooting. Is the data or signal sent from the computer Power on the device again. incorrect? Check the data sent from the computer and communication conditions. CL4NX/CL6NX Operator Manual... -
Page 271: Bad Print Quality
Maintenance of the Print Head and Platen Roller. Is the print head defective? Replace the print head and reset the counter. Is the platen roller damaged? Replace the platen roller. Is the main board defective? Replace the main board. CL4NX/CL6NX Operator Manual... -
Page 272: Incorrect Print Position
Maintenance of the Print Head and Platen Roller. Is the data or signal sent from the computer Power on the device again. incorrect? Check the data sent from the computer and communication conditions. Is the platen roller damaged? Replace the platen roller. CL4NX/CL6NX Operator Manual... -
Page 273: Interface Troubleshooting
Check that there is no obstacle such as a metal rack between the printer and the host. Check the configuration of the printer. Check the setting of the Bluetooth interface through the Settings > Interface > Bluetooth menu. Power on the printer and computer again. Install the Bluetooth driver again. CL4NX/CL6NX Operator Manual... -
Page 274: Rs-232C Interface
Check that the power of the external device is on. Check the configuration of the printer. Check the setting of the external signal (EXT) interface through the Settings > Interface > External I/O menu. Power on the printer and external device again. CL4NX/CL6NX Operator Manual... -
Page 275: Wireless Lan Interface
Check that there is no obstacle such as a metal rack between the printer and the host. Check the configuration of the printer. Check the setting of the wireless LAN interface through the Settings > Interface > Network > Settings > Wi-Fi menu. Power on the printer again. CL4NX/CL6NX Operator Manual... - Page 276 6 Troubleshooting This page is intentionally left blank. CL4NX/CL6NX Operator Manual...
-
Page 277: Appendix
Ribbon Near End Enable Speed 203 dpi: 6 ips 203 dpi: 6 ips 305 dpi: 6 ips 305 dpi: 6 ips 609 dpi: 4 ips Linerless mode: 4 ips Sensor Type None (When Print Mode is Linerless) Auto-mode Enabled CL4NX/CL6NX Operator Manual... - Page 278 I-Mark Slice Level Auto Head Check Head Check Mode Always Every Page Check Media Size Disabled Adjustments ― ― ― Offset 0 dot Pitch 0 dot Darkness Adjust Start Online Enabled Auto-calibration is not available for linerless models. CL4NX/CL6NX Operator Manual...
- Page 279 Reset CL4NX CL6NX Feed After Error Disabled Feed At Power On Disabled Finisher Feed 0 dot Paper End Using I-mark Head Base Position Standard Prioritize Commands Reprint Disabled Print End Position 0 dot Label Near End Disabled CL4NX/CL6NX Operator Manual...
-
Page 280: Interface Menu
Yes/ Interface Interface Yes/ Yes/ Interface Interface Proxy ― ― ― Enabled Disabled Yes/ Yes/ Interface Interface Server ― Yes/ Yes/ Interface Interface Exclude ― Yes/ Yes/ Interface Interface Wi-Fi ― ― ― IPv4 ― ― ― CL4NX/CL6NX Operator Manual... - Page 281 ― ― ― Button (PBC) ― ― ― ― ― ― Wi-Fi Direct ― ― ― Device Name SATO_PRINTER Yes/ Yes/ Interface Interface Connect ― ― ― Start Group ― ― ― Remove Group ― ― ― CL4NX/CL6NX Operator Manual...
- Page 282 Interface Interface Inner Method MSCHAPv2 Yes/ Yes/ Interface Interface Username ― Yes/ Yes/ Interface Interface Password ― Yes/ Yes/ Interface Interface Anon. Outer ID ― Yes/ Yes/ Interface Interface Verify Server Cert. Enabled Yes/ Yes/ Interface Interface CL4NX/CL6NX Operator Manual...
- Page 283 Disabled Yes/ Yes/ Interface Interface FTP Timeout Yes/ Yes/ Interface Interface SNMP ― ― ― sysContact ― Yes/ Yes/ Interface Interface sysName ― Yes/ Yes/ Interface Interface sysLocation ― Yes/ Yes/ Interface Interface Agent ― ― ― CL4NX/CL6NX Operator Manual...
- Page 284 Interface Authentication mypassword Yes/ Yes/ Passphrase Interface Interface Privacy Protocol Yes/ Yes/ Interface Interface Privacy Passphrase mypassword Yes/ Yes/ Interface Interface Traps ― ― ― Enable Disabled Yes/ Yes/ Interface Interface SNMP Version Yes/ Yes/ Interface Interface CL4NX/CL6NX Operator Manual...
- Page 285 Enabled Yes/ Yes/ Interface Interface Periodic Yes/ Yes/ Interface Interface IEEE1284 ― ― ― Flow Control Status4 Multi Yes/ Yes/ Interface Interface Disabled Yes/ Yes/ Interface Interface RS-232C ― ― ― Baudrate 115200 Yes/ Yes/ Interface Interface CL4NX/CL6NX Operator Manual...
- Page 286 Interface Disabled Yes/ Yes/ Interface Interface Bluetooth ― ― ― Enable Enabled Yes/ Yes/ Interface Interface Name SATO PRINTER_xxxxxxxxxxxx (BD address) Yes/ Yes/ Interface Interface Pin Code 0000 Yes/ Yes/ Interface Interface BD Address xxxxxxxxxxxx Yes/ Yes/ Interface Interface Firm Version spp3_vX.YY...
- Page 287 Yes/ Yes/ Interface Interface Dispenser Yes/ Yes/ Interface Interface Label Near End Yes/ Yes/ Interface Interface EXT I/O Re-print Disabled Yes/ Yes/ Interface Interface RFID ― ― ― ― Antenna Pitch Standard ― Yes/ Yes/ Interface Interface CL4NX/CL6NX Operator Manual...
- Page 288 Data To Record EPC and TID ― Yes/ Yes/ Interface Interface Output Error Mode Level ― Yes/ Yes/ Interface Interface Pulse Length 100 ms ― Yes/ Yes/ Interface Interface Counters ― ― ― ― Lifetime ― ― ― ― CL4NX/CL6NX Operator Manual...
- Page 289 Setting Item Initial Value User Reset Reset CL4NX CL6NX Count Success 000000 ― Count Failure 000000 ― Count Total 000000 ― User ― ― ― ― Count Success 000000 ― Count Failure 000000 ― Count Total 000000 ― CL4NX/CL6NX Operator Manual...
-
Page 290: Applications Menu
0 dot 0 dot Caret 94 (^) Delimiter 44 (,) Tilde 126 (~) Clock Format (none) SIPL ― ― ― Font Settings ― ― ― Code Page 1252 c20 Proportional Pitch Disabled 0 Slash Disabled Format Save Enabled CL4NX/CL6NX Operator Manual... - Page 291 Standard CNTBY Label Rotation Disabled Format Attribute Pause Mode Disabled SOP Emulation Auto 1 Byte Codepage CP 850 SDPL Measure Unit Inch Compatible Mode ― ― ― Disabled ― ― ― Enable Disabled Start Application Standard (rom/standalone/sa.lua) CL4NX/CL6NX Operator Manual...
-
Page 292: System Menu
Disabled Platen Interval 100 km Sound ― ― ― Error Sound Medium Energy Saving ― ― ― Sleep Timeout 60 min LCD Brightness Show Total Count Disabled Password ― ― ― Password Enable Disabled Install Security Disabled CL4NX/CL6NX Operator Manual... - Page 293 7 Appendix Factory Setting Item Initial Value User Reset Reset CL4NX CL6NX Start on AC Disabled CL4NX/CL6NX Operator Manual...
-
Page 294: Tools Menu
203 dpi: 800 dots 203 dpi: 800 dots 305 dpi: 1200 dots 305 dpi: 1200 dots 609 dpi: 2400 dots Pitch 0 dot Offset 0 dot Darkness Adjust HEX-Dump ― ― ― Hex Dump Mode Disabled Reset ― ― ― CL4NX/CL6NX Operator Manual... - Page 295 305 dpi: 108 dots 305 dpi: 108 dots 609 dpi: 216 dots VOID Print Disabled Retry Count Host Notification Disabled Logs ― ― ― Copy ― ― ― Remove ― ― ― Clone Normal Startup Guide Enabled CL4NX/CL6NX Operator Manual...
-
Page 296: Information Menu
― ― ― Installation Log ― ― ― Print Module ― ― ― Counters ― ― ― Head ― ― ― Life Measured value Head 1 Measured value Head 2 Measured value Head 3 Measured value Cutter CL4NX/CL6NX Operator Manual... -
Page 297: Media Sensor Positions And Media Stop Positions
8.0 mm ~ 73.0 mm (0.32” ~ 2.9”) <CL4NX> 13.3 mm ~ 66.6 mm (0.5” ~ 2.6”) RFID mode: 7.3 mm ~ 60.6 mm (0.3” ~ 2.4”) <CL6NX> 25.0 mm ~ 90.0 mm (1.0” ~ 3.5”) Frame CL4NX/CL6NX Operator Manual... - Page 298 CAUTION For the CL4NX RFID model, the position of the I-mark sensor becomes 0.3 mm at minimum when the position of the gap sensor is adjusted to around 7.3 mm. Because of this, the paper end may be frequently detected...
-
Page 299: Replacing The Print Head
• Touching the edge of the print head with your bare hand could cause injury. Remove the media and ribbon if they are already loaded. Refer to Section 3.3 Removing the Ribbon the reverse procedure in Section 3.5 Loading Media. CL4NX/CL6NX Operator Manual... - Page 300 Contact your SATO reseller or technical support center for more information. Disconnect all the connectors r from the defective print head e. In total, there are two connectors for CL4NX and three connectors for CL6NX. Connect all the connectors r to the new print head.
-
Page 301: Replacing The Platen Roller
• Touching the edge of the print head with your bare hand could cause injury. Lift the lever w in the direction unlock the platen roller e, then pull out the platen roller e in the direction CL4NX/CL6NX Operator Manual... -
Page 302: Guideline To Replace The Linerless Platen Roller (Cl4Nx Only)
Turn the lever w back to lock the platen roller. 7.4.1 Guideline to Replace the Linerless Platen Roller (CL4NX only) The linerless platen roller has a blue striped marking on the left side. When the blue striped marking started to fade off, it indicates that you should replace the linerless platen roller. -
Page 303: Optional Rfid Configuration (Cl4Nx Only)
This chapter explains the procedures on how to configure the printer to encode your inlays. Examine the media to determine the printer settings. Refer to the CL4NX Inlay Configuration Guide* for the measurements you should take and what they mean, as well as a list of inlays and their required configurations. - Page 304 Then press the button to go to the adjustment screen. Refer to Interface > RFID (CL4NX only) menu of Section 4.3 Settings Menu Tree Structure details on the configuration items. Open the top cover q.
- Page 305 When the Antenna Pitch is set to Standard in the Interface > RFID menu, adjust the physical position of the antenna according to the settings required for the specific media and inlay used. Refer to the “Antenna Position” of the Inlay Placement & Configuration Table in the CL4NX Inlay Configuration Guide*.
-
Page 306: Printing Rfid Tag Errors
The dump is printed for the first sixteen Dotted line shows the range specified with or thirty-two bytes of data. media size command <A1>. *(0,0): The origin of the range specified by the media size command <A1> CL4NX/CL6NX Operator Manual... - Page 307 TAG NOT FOUND error in RFID write command 40 mm TAG NOT FOUND 30 mm 3031323334353637 3839414243444546 The dump is printed for the first sixteen or thirty-two bytes of data. CL4NX/CL6NX Operator Manual...
- Page 308 (Tried to write to a wrong card.) Countermeasure: Confirm the inlay operation and check the printer/antenna configuration. DIFFER EPC ERROR • Only for UHF Cause: Detected inconsistent EPC during a series of processes. Countermeasure: Check the media. CL4NX/CL6NX Operator Manual...
-
Page 309: Rfid Error And Reset Timing
RFID tag error output Print end (Print done) (Type2) When the reprint count reaches the specified number, the RFID tag error and Machine error are outputted at a time. The machine error output is always a long pulse. CL4NX/CL6NX Operator Manual... - Page 310 100 - 500 ms Machine Error RFID write error End of error print Print Print End TYPE 1 (Print Done) TYPE 2 TYPE 3 TYPE 4 Paper End/ Ribbon End RFID tag error 100 - 500 ms Machine Error CL4NX/CL6NX Operator Manual...
- Page 311 Paper End/ Ribbon End RFID tag error Machine Error RFID write error End of error print Print Print End TYPE 1 (Print Done) TYPE 2 TYPE 3 TYPE 4 Paper End/ Ribbon End RFID tag error Machine Error CL4NX/CL6NX Operator Manual...
-
Page 312: External (Ext) Signal Interfaces When Rfid Mode Is Enabled
Avoid printing barcodes or characters directly on top Feed direction of an RFID chip. The uneven surface will negatively Recommended affect the print quality. non-printable zone Antenna Inlay 15 mm RFID tag/label 15 mm IC chip Print object I-mark CL4NX/CL6NX Operator Manual... -
Page 313: Printer Specifications
Dutch / Finnish / Greek / Hungarian / Norwegian / Polish / Romanian / Russian / Slovak / Swedish / Turkish / Chinese (Simplified) / Chinese (Traditional) / Korean / Japanese / Arabic / Thai / Vietnamese / Persian / Indonesian / Hindi / Bulgarian CL4NX/CL6NX Operator Manual... - Page 314 203 dpi: 1 to 20000 dots 203 dpi: 1 to 20000 dots 305 dpi: 1 to 18000 dots 305 dpi: 1 to 18000 dots 609 dpi: 1 to 9600 dots Print Darkness Darkness level: 1 to 10 Darkness range: A CL4NX/CL6NX Operator Manual...
- Page 315 Fixed Fixed * If linerless kit or dispenser unit is * If the dispenser unit is installed. installed. Cutter Fixed Fixed * If cutter unit or linerless kit is * If the cutter unit is installed. installed. CL4NX/CL6NX Operator Manual...
-
Page 316: Ribbon And Media
7 Appendix 7.6.2 Ribbon and Media Model CL4NX CL6NX Ribbon (Use genuine ribbon made by SATO.) Size Length: maximum 600 m (1968.5 ft.) Length: maximum 600 m (1968.5 ft.) Width: 39.5 mm to 128 mm Width: 59 mm to 177 mm (1.55”... - Page 317 7 Appendix Model CL4NX CL6NX Media (Use genuine media made by SATO.) Size Tear-off/Cutter Pitch 203 dpi: 17 to 2497 mm (0.67” to 98.30”) 203 dpi: 17 to 2497 mm (0.67” to 98.30”) 305 dpi: 17 to 1497 mm (0.67” to 58.94”) 305 dpi: 17 to 1497 mm (0.67”...
-
Page 318: Interface
7 Appendix Model CL4NX CL6NX Media (Use genuine media made by SATO.) Core Diameter 76 mm, 101 mm (3”, 4”) (Media Roll) When using a dispenser with liner rewinder: 76 mm (3”) * Recommend to use 4” core for thick paper (more than 150 μm), non-adhesive media and RFID tags (CL4NX only)/labels. -
Page 319: Built-In Functions
Label detection at dispensing (If dispenser unit is installed) Adjustment Functions Print Darkness Print Position Media Stop Position Buzzer LCD Brightness 7.6.5 Printer Languages Model CL4NX CL6NX Printer Languages SBPL (Includes XML support) SZPL SDPL SIPL STCL CL4NX/CL6NX Operator Manual... -
Page 320: Fonts/Symbols/Barcodes
40 dots H x 40 dots W Compatible Kanji Fonts 16 dots H x 16 dots W (Mincho) 24 dots H x 24 dots W Simplified Chinese 16 dots H x 16 dots W Characters 24 dots H x 24 dots W CL4NX/CL6NX Operator Manual... - Page 321 24 dots H x 24 dots W Scalable Fonts Rasterized Font SATO CG Sleek SATO CG Stream SATO 0 SATO Alpha Bold Condensed SATO Beta Bold Italic SATO Folio Bold SATO Futura Medium Condensed SATO Gamma SATO OCR-A SATO OCR-B...
- Page 322 GS1 DataBar Composite (CC-A/CC-B) GS1 DataBar Truncated Composite (CC-A/CC-B) GS1 DataBar Stacked Composite (CC-A/CC-B) GS1 DataBar Expanded Stacked Composite (CC-A/CC-B) GS1 DataBar Expanded Composite (CC-A/CC-B) GS1 DataBar Stacked Omnidirectional Composite (CC-A/CC-B) GS1 DataBar Limited Composite (CC-A/CC-B) GS1-128 Composite (CC-A/CC-B/CC-C) CL4NX/CL6NX Operator Manual...
-
Page 323: Options
9) Wireless LAN interface kit 8) External rewinder (RWG-500) 10)Combo interface board (RS- 232C, IEEE1284, and EXT) 11)External rewinder (RWG-500) 7.6.8 Accessories Model CL4NX CL6NX Accessories 1) Power cord 2) Documentations (Quick Guide, Global Warranty Program leaflet, etc.) CL4NX/CL6NX Operator Manual... -
Page 324: Standards
Cadmium and cadmium compounds ..Max. 0.01% Polybrominated biphenyls (PBB) ... .Max. 0.1% Polybrominated diphenyl ethers (PBDE) ..Max. 0.1% Energy Saving International ENERGY STAR program CL4NX/CL6NX Operator Manual... -
Page 325: Interface Specifications
This may cause damage to the interface circuitry in the printer or host and is not covered by warranty. Note • Wireless LAN is an optional interface. • You cannot use the wireless LAN interface and LAN interface at a time. CL4NX/CL6NX Operator Manual... -
Page 326: Usb Interface
USB Type B connector Protocol Status4, Status5 Power Supply BUS Power through cable Pin Assignments Pin No. Description VBus -Data +Data Cable Specifications Cable Connector USB Type B connector Cable Length 5 m (16.4 feet) or less CL4NX/CL6NX Operator Manual... -
Page 327: Lan Ethernet Interface
Gateway Address IPv4 IPv6 Cable Specifications Cable 10BASE-T/100BASE-TX Category 5 Cable Length 100 m (328 feet) or less Software Specifications Supported Protocol TCP/IP Network Layer IP, ICMP Session Layer Application Layer LPD, FTP, DHCP, HTTPS, SNMP, NTP CL4NX/CL6NX Operator Manual... -
Page 328: Bluetooth Interface
10 m (32.8 feet) Profile Serial Port Profile Security Level None, level 2, 2-1, 2-2, level 3, level 4 PIN Code 1 to 16 characters consisting of ASCII code (20H, 21H, 23H to 7EH) Disconnect Timeout 60 seconds (LMP layer) CL4NX/CL6NX Operator Manual... -
Page 329: Rs-232C Interface
Ready/Busy, XON/XOFF, Status3, Status4, Status5 Connector Pin Specifications Pin No. Description Data Carrier Detect Input Receive Data Output Transmit Data Output Data Terminal Ready Reference Signal Ground Input Data Set Ready Output Request To Send Input Clear To Send Not connected CL4NX/CL6NX Operator Manual... - Page 330 (2.95 MB). Send data that is less than 2.95 MB while monitoring the status of the printer. • A parity error will be detected if this error occurs after the reception of ESC+A. CL4NX/CL6NX Operator Manual...
-
Page 331: Ieee1284 Interface
BUSY Output PAPER EMPTY/PAPER ERROR Output SELECT Input AUTO FEED Not in use LOGIC Ground Frame Ground +5 V STROBE RETURN 20-27 DATA 1 - DATA 8 RETURN ACK RETURN BUSY RETURN PAPER EMPTY RETURN Input INITIALIZE CL4NX/CL6NX Operator Manual... - Page 332 7 Appendix Connector Pin Specifications Output FAULT 33-35 Not in use Input SELECT INPUT Cable Specifications Cable Connector Amphenol 36 pins, male Cable Length 1.5 m (5 feet) or less CL4NX/CL6NX Operator Manual...
-
Page 333: External Signal Interface (Ext)
• MODE1: The output signal becomes Withstand voltage 50 V “Active” when there is remaining print Sink current 50 mA data without error in online mode. • MODE2: The output signal becomes “Active” when the printer is Online. CL4NX/CL6NX Operator Manual... - Page 334 > Inputs Outputs menu. • The Print Done signal of pin No. 6 is not outputted when 0 is specified in the number of cuts in the command specifying the number of cuts during the cutter operation. CL4NX/CL6NX Operator Manual...
- Page 335 TYPE 1 20 ms (Print Done) TYPE 2 TYPE 3 TYPE 4 Printed 1 piece Print Start (PRIN) Reprint More than 10ms (PRIN2) Print Print End TYPE 1 20 ms (Print Done) TYPE 2 TYPE 3 TYPE 4 CL4NX/CL6NX Operator Manual...
- Page 336 Printed 1 piece Print Start (PRIN) Reprint There is no problem to make the PRIN signal to High (PRIN2) during the dotted line with TYPE 3 and 4. Print TYPE 3 Print End (Print Done) TYPE 4 CL4NX/CL6NX Operator Manual...
- Page 337 • The reprint signal is valid only from the time of the print operation end (QTY=0) until the next print data reception. Other than that, the printer does not perform reprinting. CL4NX/CL6NX Operator Manual...
- Page 338 TYPE 4 Replace media Paper End Ribbon End Machine Error Head Open Head Close Ribbon End Print Print End TYPE 1 (Print Done) TYPE 2 TYPE 3 TYPE 4 Paper End Replace ribbon Ribbon End Machine Error CL4NX/CL6NX Operator Manual...
- Page 339 TYPE 1 (Print Done) TYPE 2 TYPE 3 TYPE 4 Paper End Ribbon Near End Head Open Head Close Press ONLINE button Print TYPE 1 Print End (Print Done) TYPE 2 TYPE 3 TYPE 4 Paper End Offline CL4NX/CL6NX Operator Manual...
- Page 340 7 Appendix • When RFID Mode is enabled (CL4NX only) Item Output Waveform Printed 1 piece Print Print End TYPE 1 (Print Done) TYPE 2 TYPE 3 TYPE 4 Paper End Ribbon End RFID tag error Machine Error Head Open...
- Page 341 (Print Done) TYPE 2 TYPE 3 TYPE 4 Wait for dispense completion 500ms + backfeed time Dispense Complete Printed 1 piece Print TYPE 1 Print End (Print Done) TYPE 2 TYPE 3 TYPE 4 Wait for dispense completion CL4NX/CL6NX Operator Manual...
-
Page 342: Wireless Lan Interface
Any alphanumeric character (maximum 32) Authentication Open System Shared Key WPA/WPA2 Perform the RADIUS server authentication using 802.1x (EAP-TLS, LEAP, EAP-TTLS, EAP-PEAP, EAP-FAST protocol) Encryption None WEP (64 bits/128 bits) AES (WPA-PSK/WPA2-PSK, WPA-802.1x/WPA2-802.1x authentication) Communication Mode Infrastructure Ad Hoc CL4NX/CL6NX Operator Manual... - Page 343 7 Appendix Software Specifications Supported Protocol TCP/IP Network Layer IP, ICMP Session Layer Application Layer LPD, FTP, DHCP, HTTPS, SNMP, NTP CL4NX/CL6NX Operator Manual...
- Page 344 Extensive contact information for worldwide SATO operations can be found on the Internet at www.satoworldwide.com...
Need help?
Do you have a question about the CL4NX and is the answer not in the manual?
Questions and answers