
Related Manuals for Yamaha EMX7


Summary of Contents for Yamaha EMX7
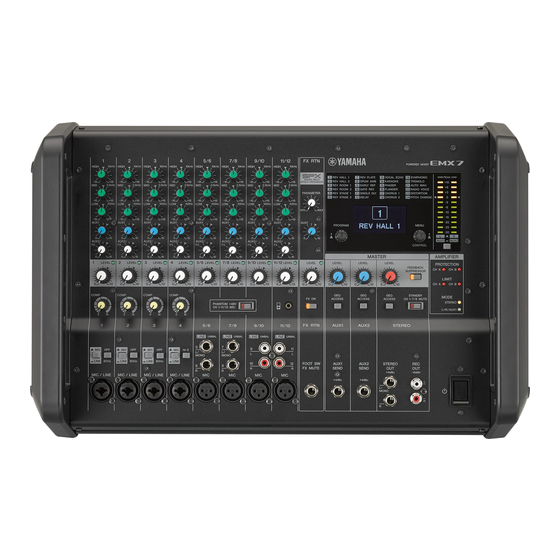
- Page 1 Owner’s Manual If you wish to get started right away: pages 8 to 11 Quick Start Guide If you encounter a problem: page 21 Troubleshooting...
-
Page 3: Important Safety Instructions
TO REDUCE THE RISK OF FIRE OR ELECTRIC SHOCK, DO NOT EXPOSE THIS APPARATUS TO RAIN OR MOISTURE. AVERTISSEMENT POUR RÉDUIRE LES RISQUES D’INCENDIE OU DE DÉCHARGE ÉLECTRIQUE, N’EXPOSEZ PAS CET (UL60065_03) APPAREIL À LA PLUIE OU À L’HUMIDITÉ. (UL60065_03) EMX7 Owner’s Manual... - Page 4 The model number, serial number, power requirements, etc., may be * This applies only to products distributed by YAMAHA CORPORATION OF AMERICA. (class B) found on or near the name plate, which is at the rear of the unit. You...
- Page 5 - Do not install it on a carpet or rug. should be turned off FIRST for the same reason. compatible. Please check with your Yamaha dealer. - Do not use the device in a confined, poorly-ventilated • Check the electric plug and each jack periodically, and Fire warning location.
- Page 6 AC outlet, and • When cleaning the device, use a dry and soft cloth. Do have the device inspected by qualified Yamaha service not use paint thinners, solvents, cleaning fluids, or personnel.
-
Page 7: Table Of Contents
It also has a built-in overload protection function to improve reliability. Appendix................22 Rack Mounting Connecting Speakers.............. 22 This product can be mounted onto a 19-inch rack by using the RK-EMX7 (rack-mount brackets) sold separately. Vertical/Horizontal Orientation and Installation ....... 23 Rack Mounting ................ 24 Effect Programs ..............25 Accessories (Please check that they are included with your mixer.) -
Page 8: Quick Start Guide
MIC” position for microphone con- nection, and to the “ LINE” position for connection of an instrument or audio device. When connecting a condenser Electric bass guitar microphone, set the [PHANTOM +48V] switch to the ON position ( Keyboard EMX7 Owner’s Manual... - Page 9 [SPEAKERS A/B] jacks on ume is reached. Portable audio the rear panel. However, if a higher player output level is required, connect the speakers via a power amplifier that is connected to the [STEREO OUT] Passive speakers jack. EMX7 Owner’s Manual...
-
Page 10: Using The Compressor
Turn the control to the right to increase the level of compression. Avoid setting the value too high, as too much compression may lead to feedback. Output (Min) (Max) Input Common Compressor Applications In addition to vocals, the compressor can be used to enhance the sound of instruments such as guitars, bass guitars, and drums. EMX7 Owner’s Manual... -
Page 11: Using The Built-In Effects
If you wish to change effect parameters such as reverb time or delay time, adjust the FX RTN [PARAMETER] control. (See section !2 on page 12.) For details about the parameters of each effect that can be adjusted with the FX RTN [PARAME- TER] control, refer to the “Effect Programs” on page 25. EMX7 Owner’s Manual... -
Page 12: Controls And Functions
If this switch is on and the foot switch (see “!6 [FOOT SW] jack”) is used restores the value that was previously used with the newly selected effect to mute the built-in effect, the switch flashes. (regardless of the current position of the FX RTN [PARAMETER] control). EMX7 Owner’s Manual... - Page 13 For turning the power ON ( ) or OFF ( For connecting an unlatched-type foot switch such as the Yamaha @6 [STANDBY] switch FC5. It is useful for solo performers, since it allows you to mute the...
-
Page 14: Rear Panel
This is used only for performing maintenance. It is not used during signal. For more information about selecting the amplifier mode, normal operation. see page 17. Amplifier Mode [SPEAKERS A] Jack [SPEAKERS B] Jack Selection STEREO STEREO L signal STEREO R signal L+R/AUX1 L+R signal AUX1 signal EMX7 Owner’s Manual... -
Page 15: Screen Procedures
(From the GEQ EDIT screen) tion you wish to perform. Press it to confirm your selection. (Select the MENU button to return to the MENU screen.) MENU button (* Firmware version information) SPEAKER PROCESSOR SYSTEM SETUP screen GEQ ON screen screen EMX7 Owner’s Manual... -
Page 16: Speaker Processor
• The program list is automatically closed if no operation is sor Program detected for an extended period of time. • The program list includes the names of common Yamaha speakers, etc. Call up the SPEAKER PROCESSOR screen. (For more information about the screen pro- Turn the [MENU/CONTROL] rotary encoder to cedures, see page 15.) -
Page 17: System Setup
If you wish to return to the MENU screen, turn the [MENU/ be set to any value from 0 to 10, providing 11 CONTROL] rotary encoder until the cursor highlights the MENU button, and press the [MENU/CONTROL] rotary different contrast levels. encoder to confirm your selection. EMX7 Owner’s Manual... -
Page 18: Setting The Lcd Backlight
Press the [MENU/CONTROL] rotary encoder so that the parameter box is fully highlighted. Turn the [MENU/CONTROL] rotary encoder to set the Backlight parameter. The brightness can be set to any value from 0 to 3, providing 4 different brightness levels. EMX7 Owner’s Manual... -
Page 19: Graphic Equalizer (Geq)
“0.0” for the selected r Number of available bands frequency. Since the EMX7 uses a Flex9GEQ graphic equalizer (with NOTE maximum of 9 bands), this shows the number of remaining Both the frequencies and the gain can be reset using the [MENU/ bands that can be set. -
Page 20: Turning The Graphic Equalizer (Geq) On/Off
OK button. Press the [MENU/CON- TROL] rotary encoder to confirm your selection. All gain values will then be reset. (Select the CANCEL button to cancel the reset procedure.) [GEQ ACCESS] button GEQ ON screen EMX7 Owner’s Manual... -
Page 21: Troubleshooting
[AC IN] jack and plugged into a working power outlet. If the power still does not come on when pressing the [ ] (Power) switch after waiting a few minutes, the mixer may be malfunctioning. If this is the case, contact your nearest Yamaha dealer. Check that the vents on the sides of the mixer are not blocked. -
Page 22: Appendix
• When connecting each device, only use appropriately rated cables and plugs. Only use proper speaker cable when connecting speakers. • Make sure to insert the speaker cables all the way inside until secure. • Use speaker cables with an insulated-housing connector. EMX7 Owner’s Manual... -
Page 23: Vertical/Horizontal Orientation And Installation
Vertical Orientation Exhaust This is convenient when operating the mixer on a tabletop. At least At least 30 cm 30 cm Intake At least 30 cm EMX7 Owner’s Manual... -
Page 24: Rack Mounting
Assembly of the Rack-mount Brack- Rack Mounting Use a screwdriver to loosen and remove the 12 screws on the To prepare the mixer for rack mounting, use the RK-EMX7 mixer side pads. (rack-mount brackets) sold separately. This mixer requires 7U* of rack-mount space. -
Page 25: Effect Programs
Adds a sharp-edged distortion to the sound. PITCH CHANGE Pitch An effect which changes the pitch of the signal. * “LFO” stands for Low Frequency Oscillator. An LFO is normally used to periodically modulate another signal, using different waveform shapes and modulation speeds. EMX7 Owner’s Manual... -
Page 26: Jack And Plug List
*2 Since the hot and cold terminals of impedance balanced output jacks have the same impedance, the balanced connection enables these output jacks to be less affected by induced noise. Unit: mm EMX7 Owner’s Manual... -
Page 27: General Specifications
For other specifications, see the included “Technical Specifications.” The contents of this manual apply to the latest specifications as of the publishing date. To obtain the latest manual, access the Yamaha website then download the manual file. EMX7 Owner’s Manual... -
Page 28: Index
Flex9GEQ ..............7, 19 Phone................26 Frequency ..............19, 20 ] (Power) switch ..........13, 15 FX RTN (Effect Return) [AUX1] send control....12 [PROGRAM] rotary encoder ........13, 15 FX RTN (Effect Return) [FOOT SW] (Foot Switch) jack 13 EMX7 Owner’s Manual... - Page 29 EMX7 Owner’s Manual...
- Page 30 Tel: +81-53-460-2312 Tel: +46-31-89-34-00 PT. Yamaha Musik Indonesia (Distributor) GERMANY DENMARK Yamaha Music Center Bldg. Jalan Jend. Gatot Subroto Yamaha Music Europe GmbH Yamaha Music Denmark, Kav. 4, Jakarta 12930, Indonesia Siemensstrasse 22-34, 25462 Rellingen, Germany Fillial of Yamaha Music Europe GmbH, Tyskland...
- Page 32 Yamaha Pro Audio global website http://www.yamahaproaudio.com/ Yamaha Downloads http://download.yamaha.com/ Manual Development Department © 2016 Yamaha Corporation Published 05/2016 POSG-A0 Printed in Malaysia ZR75610...
Need help?
Do you have a question about the EMX7 and is the answer not in the manual?
Questions and answers