Table of Contents
Advertisement
Available languages
Available languages
Quick Links
Advertisement
Table of Contents

Summary of Contents for Numark C1
- Page 1 QUICKSTART GUIDE ENGLISH ( 1 – 3 ) MANUAL DE INICIO RÁPIDO ESPAÑOL ( 5 – 7 ) GUIDE D’UTILISATION RAPIDE FRANÇAIS ( 9 – 11 ) MANUALE RAPIDO DI UTILIZZAZIONE ITALIANO ( 13 – 15 ) KURZANLEITUNG DEUTSCH ( 17 – 19 )
-
Page 3: Box Contents
Safety Instructions & Warranty Information REGISTRATION Please go to http://www.numark.com to register your C1. Registering your product ensures that we can keep you up-to-date with any last-minute product developments and provide you with world-class technical support, should you run into any problems. -
Page 4: Rear Panel Features
REAR PANEL FEATURES MIC INPUT – Connect a ¼” microphone to this input. Microphone controls are located on the top panel. GROUNDING TERMINAL – If using phono-level turntables with a grounding wire, be sure to connect the grounding wire to these terminals. If you experience a low “hum” or “buzz”, this could mean that your turntables are not grounded. -
Page 5: Top Panel Features
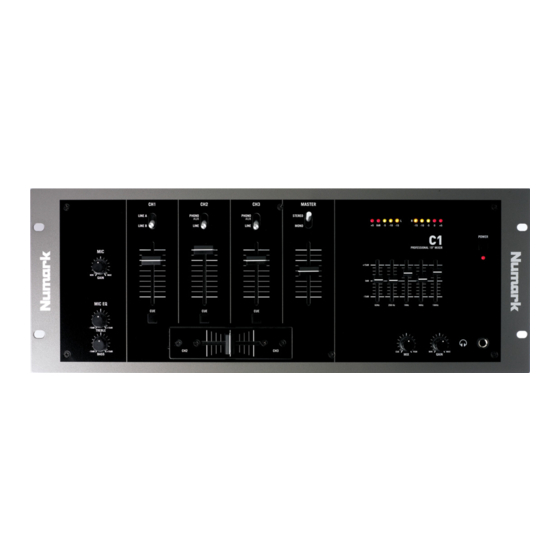
TOP PANEL FEATURES MIC GAIN – Adjusts the audio level of the microphone signal. MIC TREBLE & BASS – Adjusts the treble (high) and bass (low) frequencies of the audio for both mic inputs. Tip: If you experience feedback when using a microphone at loud levels, try turning down the high (treble) frequencies. -
Page 7: Contenido De La Caja
Folleto de información sobre la seguridad y la garantía REGISTRO Visite http://www.numark.com y registre su C1. El registro de su producto asegura que podamos mantenerle actualizado con los desarrollos de productos de último momento y brindarle apoyo técnico de categoría mundial en caso de que tenga algún problema. - Page 8 CARACTERÍSTICAS DEL PANEL TRASERO ENTRADA DE MICRÓFONO – Conecte a esta entrada un micrófono con un cable de ¼”. Los controles de micrófono se encuentran en el panel superior. TERMINAL DE TIERRA – Si usa giradiscos de nivel fonográfico con cable de conexión a tierra, asegúrese de conectar dicho cable a estos terminales.
- Page 9 CARACTERÍSTICAS DEL PANEL SUPERIOR GANANCIA DE MICRÓFONO – Ajusta el nivel de audio de la señal de micrófono. AGUDOS Y GRAVES DE MICRÓFONO – Estos controles ajustan los agudos (altas frecuencias) y los graves (bajas frecuencias) del audio de ambas entradas de micrófono. Consejo: Si experimenta realimentación cuando usa un micrófono con niveles altos, pruebe disminuyendo las altas frecuencias.
-
Page 11: Contenu De La Boîte
Le livret des consignes de sécurité et des informations concernant la garantie ENREGISTREMENT Veuillez visiter le site internet http://www.numark.com pour enregistrer votre nouvelle C1. L'enregistrement des produits vous permet d'être informé sur les toutes dernières nouveautés concernant les produits et de vous offrir un soutien technique de niveau international, si vous en aviez besoin. -
Page 12: Caractéristiques Du Panneau Arrière
CARACTÉRISTIQUES DU PANNEAU ARRIÈRE ENTRÉE MIC – Permet de brancher un microphone à l’aide d’un câble ¼ po. Les commandes microphone sont situées sur le panneau supérieur. BORNE DE MISE À LA TERRE – Si vous utilisez des tables tournantes avec fils de mise à la terre, assurez-vous de brancher le fils à... - Page 13 CARACTÉRISTIQUES DU PANNEAU SUPÉRIEUR MIC GAIN – Permet d'ajuster le niveau du signal audio de l’entrée microphone. MIC TREBLE et BASS – Permet d'ajuster le niveau des hautes (treble) et des basses (bass) fréquences des deux entrées microphone Conseil: Si vous entendez du feedback lorsque vous utilisez le microphone à de hauts niveaux, essayez de diminuer les hautes fréquences.
-
Page 15: Contenuti Della Confezione
Libretto di istruzioni di sicurezza e garanzia REGISTRAZIONE Recarsi alla pagina http://www.numark.com per registrare il C1. La registrazione del prodotto garantisce che possiamo tenervi aggiornati con tutti gli ultimissimi sviluppi del prodotto e offrirvi assistenza tecnica di livello mondiale, in caso di eventuali problemi. - Page 16 CARATTERISTICHE PANNELLO POSTERIORE INGRESSO MIC – Collegare un microfono da ¼” a questo ingresso. I comandi del microfono si trovano sul pannello superiore. TERMINALE DI MESSA A TERRA – Se si utilizzano giradischi a livello phono dotati di cavo di messa a terra, questo va collegato a questi terminali.
- Page 17 CARATTERISTICHE PANNELLO SUPERIORE MIC GAIN (guadagno mic) – Regola il livello audio del segnale del microfono. MIC TREBLE & BASS – Regolare le frequenza treble (alte) e bass (basse) dell’audio per entrambi gli ingressi mic. Suggerimento: in caso di ritorno durante l’uso di un microfono ad alti livelli, provare ad abbassare le frequenze alte.
-
Page 19: Inhalt Der Verpackung
Kurzanleitung Broschüre mit den Sicherheits- und Garantierichtlinien REGISTRIERUNG Registrieren Sie Ihren C1 bitte auf http://www.numark.de. Dadurch geben Sie uns die Möglichkeit, Ihnen Informationen bei Produktaktualisierungen zukommen zu lassen und Ihnen bei möglichen Problemen den bestmöglichen technischen Support zu bieten. GRUNDREGELN Vorderseite der Anleitung abgebildeten Bestandteile im Karton befinden. -
Page 20: Übersicht Über Die Rückseite
ÜBERSICHT ÜBER DIE RÜCKSEITE MIKROFON EINGANG – Verbinden Sie Ihr Mikrofon mit einem 6,3 mm Klinkenkabel mit diesem Eingang. Die Regler für das Mikrofon befinden sich auf der Oberseite des Mixers. GROUNDING TERMINAL – Bei der Verwendung von Phono Pegel Turntables mit einem Massekabel müssen Sie dieses an diese Erdungspins anschließen. -
Page 21: Übersicht Über Die Oberseite
ÜBERSICHT ÜBER DIE OBERSEITE MIKROFONLAUTSTÄRKE – Dient zur Einstellung des Lautstärkepegels des Mikrofonsignals. MIKROFON HÖHEN & BÄSSE – Dient zur Einstellung der Höhen- und Bassfrequenzen für beide Mikrofoneingänge. Tipp: Falls es bei der Verwendung des Mikrofons zu Rückkopplungen kommt, vermindern Sie die hohen Frequenzen mit diesem Regler. -
Page 22: Specifications
SPECIFICATIONS INPUTS: OUTPUTS: SIGNAL-TO-NOISE RATIO: (max output; JIS-A weighted) FREQUENCY RESPONSE: GRAPHIC EQUALIZER: POWER CONSUMPTION: DIMENSIONS (W x H x D): WEIGHT: Line: 10kΩ input impedance 90mV rms sensitivity (for 1.22V output) Mic: 10kΩ input impedance unbalanced 2mV rms sensitivity (for 1.22V output) 78mV rms max input Phono: 47kΩ... - Page 24 www.numark.com...


Need help?
Do you have a question about the C1 and is the answer not in the manual?
Questions and answers