
Subscribe to Our Youtube Channel
Related Manuals for Tuff stuff MSL-IV


Summary of Contents for Tuff stuff MSL-IV
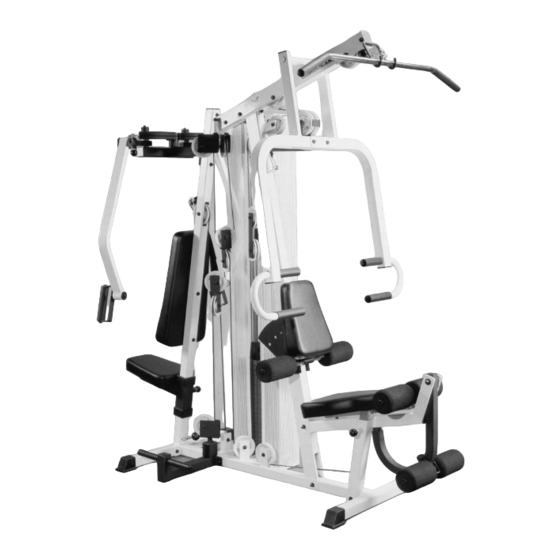
- Page 1 A S S E M B L Y I N S T R U C T I O N M A N U A L Revision Date 9 -9 8 MSL-IV Muscle IV Home Gym L 8’-0” W 4’-0” H 7’-0”...
- Page 2 Congratulations on your new purchase of the Muscle IV 1) Lubrication of all moving parts is essential to the longevity Home Gym (MSL-IV). This gym is capable of a variety of and optimal performance of your Muscle IV Home Gym.
- Page 3 Plastic Insert Caps 2 X 3 (#101) into the pulley bracket that the axle on the Low Row Swivel Pulley Bracket (#25)be housing on the Low Row Foot Support (#37). lubricated with grease prior to this assembly. MSL-IV Muscle IV Home Gym...
- Page 4 Hex Head Cap Screw 3/8-16 X 2 3/4 (#77), two Flat Washers SAE (#90) and one Nylon Insert Jam Lock Nut 3/8-16 (#86). Note: Do not tighten this hardware assembly at this time. MSL-IV Muscle IV Home Gym...
- Page 5 Pec Dec procedure for the opposite Pec Dec Arm Assembly. Note: It is Housing (#18), as shown above. recommended that the axle on the Pec Dec Arm (#7) lubricated with grease prior to assembly. MSL-IV Muscle IV Home Gym...
- Page 6 Pec Dec Swivel Pulley Brackets (#25) must and one Nylon Insert Jam Lock Nut 3/8-16 (#86). move freely during use of the machine. Note: It is recommended that the Pec Dec Swivel Pulley Brackets (#25) be greased prior to assembly. MSL-IV Muscle IV Home Gym...
- Page 7 Top Pulley Assembly (#5). Secure this assembly using two Hex Head Cap Screws 3/8-16 X 3 (#94), four Flat Washers SAE 3/8 (#90) and two Nylon Insert Jam Lock Nuts 3/8-16 (#86). MSL-IV Muscle IV Home Gym...
- Page 8 Set Screws 3/8-16 X 1/2 (#61). Next, insert two is recommened that the Pivot Axle 1 X 11 3/4 (#19) be Plastic Insert Caps 1 X 2 (#67) into the tube-ends of the Press greased prior to this assembly. (#1). MSL-IV Muscle IV Home Gym...
- Page 9 3/8-16 X 3 1/4 (#76), four Flat Washers SAE 3/8 (#90) and two Tube (#47) into the Range Of Motion Device (#48), as shown Nylon Insert Jam Lock Nuts 3/8-16 (#87). above. Secure this assembly using the Hex Key 3/16 (#50). MSL-IV Muscle IV Home Gym...
- Page 10 Hex Head Cap Screws 3/8-16 X 1 3/4 (#79) and two Flat (#100). Next, insert a Plastic Insert Cap 1” Rd. (#65) into each Washers SAE 3/8 (#90), as shown above. end of the Foot Roll Tube 1 X 16 (#100). MSL-IV Muscle IV Home Gym...
- Page 11 SAE 3/8 (#90) and one Nylon Insert Jam Lock Nut 3/8-16 on page 19 for further clarification of this assembly. (#86). Refer to the Exploded View on page 19 for further clarification of this assembly. MSL-IV Muscle IV Home Gym...
- Page 12 Flat Washers SAE 3/8 (#90). two Flat Washers SAE 3/8 (#90) and one Nylon Insert Jam Lock Nut 3/8-16 (#86). Refer to Fig. 1 on page 17 for further detailed illustration of this cable routing. MSL-IV Muscle IV Home Gym...
- Page 13 Lat Cable (#14) under, then over the Nylon Pulley 4 1/2 Rd. (#35), as shown above. Refer to Fig. 1 on page 17 and Fig. B on page 18 for further detailed illustration of this cable routing. MSL-IV Muscle IV Home Gym...
- Page 14 3/8 (#90) and one Nylon Insert Jam Lock Nut 3/8-16 (#86). further detailed illustration of this assembly. Note: Be sure this Route the Lat Cable (#14) through the Adjustable Pulley hardware assembly is securely fastened. Bracket (#26), as shown above. MSL-IV Muscle IV Home Gym...
- Page 15 Repeat the same procedure in Fig. 49 and Fig. 50 to complete the routing of the Pec Dec Cable (#16). Refer to Fig. A on page 18 for further detailed illustration of this cable routing. MSL-IV Muscle IV Home Gym...
- Page 16 Hex Head Cap Screw 3/8-16 X 1 3/4 (#79), two Flat Washers shown above. SAE 3/8 (#90) and one Nylon Insert Jam Lock Nut 3/8-16 (#86). Next, route the Leg Extension Cable (#15) through the Nylon Pulley 4 1/2 Rd. (#35), as shown above. MSL-IV Muscle IV Home Gym...
- Page 17 Fig. 55 on page 15 to fasten the pulley place using one Nylon Pulley 4 1/2 Rd. (#35). Use the pulley into place. mounting hardware described in Fig. 55 on page 15 to fasten the pulley and cable into place. MSL-IV Muscle IV Home Gym...
- Page 18 FIG. 62 This completes the assembly of the MSL-IV. It is FIG. 61 Finally, coonect the end of the Low Row Cable recommended that you check and secure all the hardware (#17) to the empty pulley bracket located on the...
- Page 19 Owners’ Manual: Assembly Instructions FIG. A FIG. B Note: Some Parts Have Been Cut Away For Clarity. FIG. C FIG. D FIG. E FIG. F FIG. G FIG. H Leg Press Configuration MSL-IV Muscle IV Home Gym...
- Page 20 MSL-IV Muscle IV Home Gym...
-
Page 21: Color Chart
1 1 4 TUBEING CONNECTOR 3/8-16 BNH0551 AB CRUNCH INSERT BRACKET UP119 1 1 5 BRONZE BUSHING 1/2 X 5/8 BNH0528 TOP PLATE/ SELECTOR BAR UP003 1 1 6 STAINLESS STEEL TAPE 1 X 8 BNH0740 MSL-IV Muscle IV Home Gym... - Page 22 Notes_____________________________________________________________ __________________________________________________________________ __________________________________________________________________ __________________________________________________________________ __________________________________________________________________ __________________________________________________________________ __________________________________________________________________ __________________________________________________________________ __________________________________________________________________ __________________________________________________________________ __________________________________________________________________ __________________________________________________________________ __________________________________________________________________ __________________________________________________________________ __________________________________________________________________ __________________________________________________________________ __________________________________________________________________ __________________________________________________________________ MSL-IV Muscle IV Home Gym...
- Page 23 Notes_____________________________________________________________ __________________________________________________________________ __________________________________________________________________ __________________________________________________________________ __________________________________________________________________ __________________________________________________________________ __________________________________________________________________ __________________________________________________________________ __________________________________________________________________ __________________________________________________________________ __________________________________________________________________ __________________________________________________________________ __________________________________________________________________ __________________________________________________________________ __________________________________________________________________ __________________________________________________________________ __________________________________________________________________ __________________________________________________________________ MSL-IV Muscle IV Home Gym...
- Page 24 D O N O T D I S C A R D T H I S M A N U AL 1325 E. Franklin Ave., Pomona, CA 91766 Ph: 909-629-1600 Fax: 909-629-4967 E-mail: taskind@aol.com Net: www.tuffstuff.net...
Need help?
Do you have a question about the MSL-IV and is the answer not in the manual?
Questions and answers