Dell latitude E6420 Owner's Manual
Hide thumbs
Also See for latitude E6420:
- Owner's manual (145 pages) ,
- Setup and features information (11 pages) ,
- Specifications (2 pages)

Related Manuals for Dell latitude E6420


Summary of Contents for Dell latitude E6420
- Page 1 Dell Latitude E6420 and E6420 ATG Owner's Manual Regulatory Model P15G Regulatory Type P15G001, P15G002 Downloaded from LpManual.com Manuals...
-
Page 2: Notes, Cautions, And Warnings
Information in this publication is subject to change without notice. © 2011 Dell Inc. All rights reserved. Reproduction of these materials in any manner whatsoever without the written permission of Dell Inc. is strictly forbidden. Trademarks used in this text: Dell... -
Page 3: Table Of Contents
Contents Notes, Cautions, and Warnings..............2 1 Working on Your Computer..............9 ................9 Before Working Inside Your Computer .......................10 Recommended Tools ....................11 Turning Off Your Computer ................11 After Working Inside Your Computer 2 ATG Handle....................13 ....................13 Removing The ATG Handle ....................14 Installing The ATG Handle 3 ATG Port Cover..................15 ..................15 Removing the ATG Port Cover... - Page 4 ............24 Installing the Subscriber Identity Module (SIM) Card 8 Secure Digital (SD) Card.................25 ................25 Removing the Secure Digital (SD) Card ................25 Installing the Secure Digital (SD) Card 9 Base Cover....................27 ....................27 Removing the Base Cover ....................28 Installing the Base Cover 10 Hard Drive....................29 ....................29 Removing the Hard Drive...
- Page 5 16 Heat Sink....................47 ....................47 Removing The Heat Sink ....................49 Installing The Heat Sink 17 Bluetooth Card..................51 ..................51 Removing the Bluetooth Card ...................53 Installing the Bluetooth Card 18 Keyboard Trim..................55 ..................55 Removing the Keyboard Trim ...................56 Installing the Keyboard Trim 19 Keyboard....................57 ....................57 Removing the Keyboard ....................60...
- Page 6 ..................78 Installing the ExpressCard Cage 25 System Board Components..............79 ...................79 Removing the System Board ....................84 Installing the System Board 26 Speaker....................85 ....................85 Removing the Speakers ....................87 Installing the Speakers 27 Modem Connector.................89 ..................89 Removing the Modem Connector ..................93 Installing the Modem Connector 28 Input/Output Panel.................95 ................95 Removing the Input/Output (I/O) Board...
- Page 7 Technical Specifications 37 System Setup..................129 ......................129 Setup Overview ....................129 Entering System Setup ......................129 System Setup Menu 38 Diagnostics....................141 ....................141 Diagnostic LED Codes .....................142 Battery Status Lights ......................143 Device Status Lights 39 Contacting Dell..................145 ......................145 Contacting Dell Downloaded from LpManual.com Manuals...
- Page 8 Downloaded from LpManual.com Manuals...
-
Page 9: Working On Your Computer
Damage due to servicing that is not authorized by Dell is not covered by your warranty. Read and follow the safety instructions that came with the product. -
Page 10: Recommended Tools
NOTE: The color of your computer and certain components may appear differently than shown in this document. To avoid damaging your computer, perform the following steps before you begin working inside the computer. Ensure that your work surface is flat and clean to prevent the computer cover from being scratched. -
Page 11: Turning Off Your Computer
CAUTION: To avoid damage to the computer, use only the battery designed for this particular Dell computer. Do not use batteries designed for other Dell computers. Connect any external devices, such as a port replicator, battery slice, or media base, and replace any cards, such as an ExpressCard. - Page 12 CAUTION: To connect a network cable, first plug the cable into the network device and then plug it into the computer. Replace the battery. Connect your computer and all attached devices to their electrical outlets. Turn on your computer. Downloaded from LpManual.com Manuals...
-
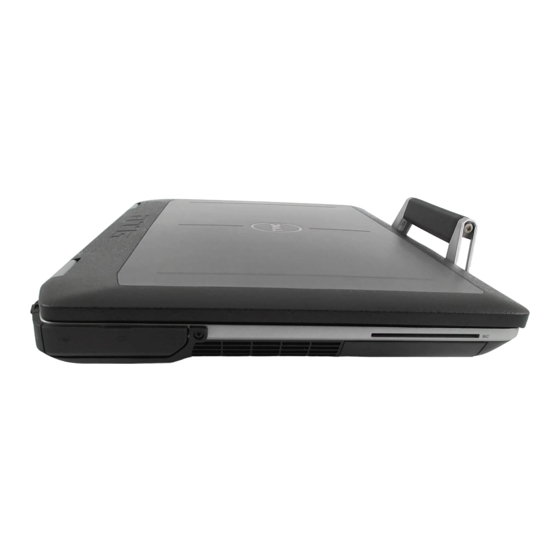
Page 13: Atg Handle
ATG Handle Removing The ATG Handle Before Working On Your Computer . Follow the procedures in Remove the screws that secure the ATG handle to the computer. Remove the ATG handle out of the computer. Downloaded from LpManual.com Manuals... -
Page 14: Installing The Atg Handle
Installing The ATG Handle Place the ATG handle and tighten the screws that secure it to the computer. After working inside your computer . Follow the procedures in Downloaded from LpManual.com Manuals... -
Page 15: Atg Port Cover
ATG Port Cover Removing the ATG Port Cover Before Working On Your Computer . Follow the procedures in Remove the screws on the right ATG Port Cover. Remove the right ATG port cover. Remove the screws on the left ATG port cover. Downloaded from LpManual.com Manuals... -
Page 16: Installing The Atg Port Cover
Remove the left ATG Port Cover. Installing The ATG Port Cover Place the ATG Port Covers and tighten the screws that secure it to the computer. After working inside your computer . Follow the procedures in Downloaded from LpManual.com Manuals... -
Page 17: Modem Connector Plug
Modem Connector Plug Removing the Modem Connector Plug Before Working On Your Computer . Follow the procedures in battery . Remove the Pop open the rubber cover. Identify the pin hole. Insert a pin into the hole and pull the pin upwards to release the latch cover. -
Page 18: Installing The Modem Connector Plug
Remove the cover. Installing the Modem Connector Plug Place the modem cover. Identify the pin hole and insert a pin into the hole and pull the pin to lock the cover. Lock the rubber cover. Battery . Install the After Working Inside Your Computer . Follow the procedures in Downloaded from LpManual.com Manuals... -
Page 19: Expresscard
ExpressCard Removing the ExpressCard Before Working On Your Computer . Follow the procedures in Press in on the ExpressCard to release it from the computer. Slide the ExpressCard out of the computer. Installing the ExpressCard Slide the ExpressCard into its slot until it clicks into place. After working inside your computer . - Page 20 Downloaded from LpManual.com Manuals...
-
Page 21: Battery
Battery Removing the Battery Before Working On Your Computer . Follow the procedures in Slide the battery latches toward the unlock position. Slide the battery out of the computer and remove it. Downloaded from LpManual.com Manuals... -
Page 22: Installing The Battery
Installing the Battery Slide the battery into its slot until it clicks into place. After working inside your computer . Follow the procedures in Downloaded from LpManual.com Manuals... -
Page 23: Subscriber Identity Module (Sim) Card
Subscriber Identity Module (SIM) Card Removing the Subscriber Identity Module (SIM) Card Before Working On Your Computer . Follow the procedures in Battery . Remove the Insert the SIM card into the slot. Remove the SIM card from the system. Downloaded from LpManual.com Manuals... -
Page 24: Installing The Subscriber Identity Module (Sim) Card
Installing the Subscriber Identity Module (SIM) Card Slide the SIM card into its slot. Battery . Install the After Working Inside Your Computer . Follow the procedures in Downloaded from LpManual.com Manuals... -
Page 25: Secure Digital (Sd) Card
Secure Digital (SD) Card Removing the Secure Digital (SD) Card Before Working On Your Computer . Follow the procedures in Press in on the SD card to release the SD card from the computer. Slide the SD card out of the computer. Installing the Secure Digital (SD) Card Slide the Secure Digital (SD) card into its slot until it clicks into place. - Page 26 Downloaded from LpManual.com Manuals...
-
Page 27: Base Cover
Base Cover Removing the Base Cover Before Working On Your Computer . Follow the procedures in ATG Handle (only for E6420 ATG systems). Remove the ATG Port Cover (only for E6420 ATG systems). Remove the Battery . Remove the SD Card . Remove the Remove the screws that secure the base cover to the computer. -
Page 28: Installing The Base Cover
Installing the Base Cover Place the base cover to align the screw holes correctly with the computer. Tighten the screws that secure the base cover to the computer. Secure Digital (SD) Card . Install the Battery . Install the ATG Port Cover (only for E6420 ATG systems). Install the ATG Handle (only for E6420 ATG systems). -
Page 29: Hard Drive
Hard Drive Removing the Hard Drive Before Working On Your Computer . Follow the procedures in Battery . Remove the Remove the screws that secure the hard drive to the computer. Slide and remove the hard drive out of the computer. Remove the screw that secures the hard drive caddy to the hard drive. -
Page 30: Installing The Hard Drive
Pull and remove the hard drive caddy away from the hard drive. Installing the Hard Drive Attach the hard drive caddy to the hard drive. Tighten the screw to secure the hard-drive caddy to the hard drive. Slide the hard drive into the computer. Replace and tighten the screws that secure the hard drive to the computer. -
Page 31: Optical Drive
Optical Drive Removing The Optical Drive Before Working On Your Computer . Follow the procedures in Battery . Remove the Push in the drive latch into the slot. Pull the optical drive using the drive latch. Pull the optical drive door from one side to release it. Downloaded from LpManual.com Manuals... - Page 32 Pull the other side of the optical drive door to release it completely from the optical drive. Remove the screw that secures the drive latch to the optical drive. Remove the drive latch from the optical drive. Downloaded from LpManual.com Manuals...
- Page 33 Remove the screws that secures the drive latch bracket to the optical drive. 10. Remove the drive latch bracket from the optical drive. Downloaded from LpManual.com Manuals...
-
Page 34: Installing The Optical Drive
Installing the Optical Drive Insert the drive latch bracket into the optical drive. Tighten the screws that secure the drive latch bracket to the optical drive. Insert the drive latch into the optical drive. Tighten the screw that secures the drive latch to the optical drive. Push one side of the optical drive door to insert it completely into the optical drive. -
Page 35: Memory Card
Memory Card Removing the Memory Card Before Working On Your Computer Follow the procedures in ATG Handle (only for E6420 ATG systems). Remove the ATG Port Cover (only for E6420 ATG systems). Remove the battery . Remove the Secure Digital (SD) card . Remove the base cover . -
Page 36: Installing The Memory Card
Installing the Memory Card Push the memory module into the memory slot. Press the clips to secure the memory module to the system board. Base Cover . Install the Secure Digital (SD) card . Install the Battery . Install the ATG Port Cover (only for E6420 ATG systems). -
Page 37: Wireless Local Area Network (Wlan) Card
Wireless Local Area Network (WLAN) Card Removing the Wireless Local Area Network (WLAN) Card Before Working On Your Computer . Follow the procedures in ATG Handle (only for E6420 ATG systems). Remove the ATG Port Cover (only for E6420 ATG systems). Remove the battery . - Page 38 Slide and remove the WLAN card out from its slot on the system board. Downloaded from LpManual.com Manuals...
-
Page 39: Installing The Wireless Local Area Network (Wlan) Card
Installing the Wireless Local Area Network (WLAN) Card Insert the WLAN card into its connector at a 45–degree angle. Replace and tighten the screw that secures the WLAN card to the computer. Connect the antenna cables to their respective connectors marked on the WLAN card. - Page 40 Downloaded from LpManual.com Manuals...
-
Page 41: Wireless Wide Area Network (Wwan) Card
Wireless Wide Area Network (WWAN) Card Removing the Wireless Wide Area Network (WWAN) Card Before Working On Your Computer . Follow the procedures in ATG Handle (only for E6420 ATG systems). Remove the ATG Port Cover (only for E6420 ATG systems). Remove the Battery . - Page 42 Slide the WWAN card from its connector and remove it from the computer. Downloaded from LpManual.com Manuals...
-
Page 43: Installing The Wireless Wide Area Network (Wwan) Card
Installing the Wireless Wide Area Network (WWAN) Card Insert the WWAN card into its connector at a 45–degree angle. Replace and tighten the screw that secures the WWAN card to the computer. Connect the antenna cables to their respective connectors marked on the WWAN card. - Page 44 Downloaded from LpManual.com Manuals...
-
Page 45: Coin-Cell Battery
Coin-Cell Battery Removing the Coin-Cell Battery Before Working on Your Computer . Follow the procedures in ATG Handle (only for E6420 ATG systems). Remove the ATG Port Cover (only for E6420 ATG systems). Remove the Battery . Remove the SD Card . Remove the Base Cover . -
Page 46: Installing The Coin-Cell Battery
Release and remove the coin-cell battery from the computer. Installing the Coin-Cell Battery Place the coin-cell battery in its location. Connect the coin-cell battery cable to the system board. Connect any antennas that were routed over the coin cell battery. Base Cover . -
Page 47: Heat Sink
Heat Sink Removing The Heat Sink Before Working On Your Computer . Follow the procedures in ATG Handle (only for E6420 ATG systems). Remove the ATG Port Cover (only for E6420 ATG systems). Remove the Battery . Remove the SD Card . Remove the Base Cover . - Page 48 Remove the heat sink assembly from the system. 10. Rotate the processor cam lock in a counter-clockwise direction. Downloaded from LpManual.com Manuals...
-
Page 49: Installing The Heat Sink
11. Remove the processor from the system. Installing The Heat Sink Insert the processor back into the system. Rotate the processor cam lock in a clockwise direction. Place the heat sink assembly into the system. Tighten the four screws securing the heat sink. Connect the heat sink assembly cable. - Page 50 Downloaded from LpManual.com Manuals...
-
Page 51: Bluetooth Card
Bluetooth Card Removing the Bluetooth Card Before Working On Your Computer . Follow the procedures in ATG Handle (only for E6420 ATG systems). Remove the ATG Port Cover (only for E6420 ATG systems). Remove the Battery . Remove the Secure Digital Card . Remove the Base Cover . - Page 52 10. Disconnect the bluetooth cable. Downloaded from LpManual.com Manuals...
-
Page 53: Installing The Bluetooth Card
Installing the Bluetooth Card Connect the bluetooth cable to the bluetooth card. Replace and tighten the screw to secure the bluetooth card to the computer. Hard Drive . Install the Base Cover . Install the SD Card . Install the Battery . - Page 54 Downloaded from LpManual.com Manuals...
-
Page 55: Keyboard Trim
Keyboard Trim Removing the Keyboard Trim Before Working On Your Computer . Follow the procedures in Using a plastic scribe, pry the keyboard trim from the top edge to release it from the computer. Pry along the sides. Release the tabs part of the trim. Downloaded from LpManual.com Manuals... -
Page 56: Installing The Keyboard Trim
Gently lift the keyboard trim to release it from the computer. Installing the Keyboard Trim Align the keyboard trim with the keyboard and gently snap it into place. After Working Inside Your Computer . Follow the procedures in Downloaded from LpManual.com Manuals... -
Page 57: Keyboard
Keyboard Removing the Keyboard Before Working On Your Computer . Follow the procedures in Battery . Remove the Keyboard Trim . Remove the Remove the screws that secure the keyboard at the bottom of the computer. Remove the screws that secure the keyboard on the system. Downloaded from LpManual.com Manuals... - Page 58 Carefully flip the keyboard over and lay it toward the display. Disconnect the keyboard cable from the system board. Remove the keyboard from the computer. Downloaded from LpManual.com Manuals...
- Page 59 Remove the tape securing the keyboard cable from the keyboard. 10. Unlock the cable holder. Downloaded from LpManual.com Manuals...
-
Page 60: Installing The Keyboard
11. Disconnect and remove the keyboard cable from the keyboard. Installing the Keyboard Connect the keyboard cable and secure it to the keyboard using the tape. Connect the keyboard cable to its connector on the system board. Replace and tighten the screws that secure the keyboard to the computer. Battery . -
Page 61: Modem Card
Modem Card Removing the Modem Card Before Working On Your Computer . Follow the procedures in Battery . Remove the Keyboard Trim . Remove the Keyboard . Remove the Remove the screw securing the modem card to the computer. Pull out the tab from underneath the palmrest. Downloaded from LpManual.com Manuals... - Page 62 Lift the tab to disconnect the holder. Rotate the modem card at an angle. Remove modem card from the slot away from the computer. Downloaded from LpManual.com Manuals...
-
Page 63: Installing The Modem Card
10. Disconnect the modem cable from the modem card and remove it from the system. Installing the Modem Card Connect the modem cable to the modem card on the system board. Place the modem card in its slot in the computer. Tighten the screw securing the modem card to the system. - Page 64 Downloaded from LpManual.com Manuals...
-
Page 65: Palm Rest
Palm Rest Removing the Palm Rest Assembly Before Working On Your Computer . Follow the procedures in ATG Handle (only for E6420 ATG systems). Remove the ATG Port Cover (only for E6420 ATG systems). Remove the Battery . Remove the SD Card . - Page 66 15. Release and disconnect the LED, smart card, touchpad, RFID, and ExpressCard cable from the system board. 16. Using a plastic scribe, gently pry out the top right corner of the palm rest and run along the scribe to the right side of the palm rest to release the snaps.
- Page 67 17. Continue to use the scribe to run along the top and left side of the palm rest until all snaps are released. 18. Lift the top side at a 25–degree angle, pull the palm rest towards the screen, and remove it from the computer. Downloaded from LpManual.com Manuals...
-
Page 68: Installing The Palm Rest Assembly
Installing the Palm Rest Assembly Align the palm rest assembly with the computer and gently snap it into place. Replace and tighten the screws that secure the palm rest assembly to the system board. Connect the LED, smart card, touchpad, RFID, and ExpressCard cables to the system board. -
Page 69: Smart Card Reader
Smart Card Reader Removing the Smart Card Before Working On Your Computer . Follow the procedures in ATG Handle (only for E6420 ATG systems). Remove the ATG Port Cover (only for E6420 ATG systems). Remove the Battery . Remove the SD Card . - Page 70 13. Remove the Smart Card Reader from the computer. Downloaded from LpManual.com Manuals...
-
Page 71: Installing The Smart Card
Installing the Smart Card Replace the Smart Card Reader in the computer in its original position. Tighten the screws of the Smart Card Reader. Connect the Smart Card Reader cable on the system board. Palmrest Assembly . Install the Keyboard . Install the Keyboard Trim . - Page 72 Downloaded from LpManual.com Manuals...
-
Page 73: Media Board
Media Board Removing The Media Board Before Working On Your Computer . Follow the procedures in ATG Handle (only for E6420 ATG systems). Remove the ATG Port Cover (only for E6420 ATG systems). Remove the Battery . Remove the SD Card . Remove the Optical Drive . - Page 74 16. Remove the media board from the computer. Downloaded from LpManual.com Manuals...
-
Page 75: Installing The Media Board
Installing the Media Board Align the media board to its original position on the computer. Replace and tighten the screws that secure the media board to the computer. Connect the media board cable to the system board. Install the ATG Handle (for E6420 ATG systems only). Install the ATG Port Cover (for E6420 ATG systems only). - Page 76 Downloaded from LpManual.com Manuals...
-
Page 77: Expresscard Cage
ExpressCard Cage Removing the ExpressCard Cage Before Working On Your Computer . Follow the procedures in ATG Handle (only for E6420 ATG systems). Remove the ATG Port Cover (only for E6420 ATG systems). Remove the Battery . Remove the SD Card . Remove the Base Cover . -
Page 78: Installing The Expresscard Cage
Installing the ExpressCard Cage Align the ExpressCard cage into its slot. Replace and tighten the screws securing the ExpressCard cage to the computer. Palm rest Assembly . Install the Keyboard . Install the Keyboard Trim . Install the Bluetooth Card . Install the Hard Drive . -
Page 79: System Board Components
System Board Components Removing the System Board Before Working On Your Computer . Follow the procedures in ATG Handle (only for E6420 ATG systems). Remove the ATG Port Cover (only for E6420 ATG systems). Remove the Battery . Remove the Secure Digital Card . - Page 80 22. Remove the screws from the video cable holder. 23. Remove the video cable holder. Downloaded from LpManual.com Manuals...
- Page 81 24. Disconnect the video camera and LED cables from the system board. 25. Remove the screw that secures the system board to the computer. 26. Flip and remove the screws from the system board. Downloaded from LpManual.com Manuals...
- Page 82 27. Remove the Smart Card reader cable, Media Board cable, and DC-in Cable. 28. Disconnect the motherboard from the IO Board. Downloaded from LpManual.com Manuals...
- Page 83 29. Slide to unlock system board from the port connectors. 30. Remove the system board. Downloaded from LpManual.com Manuals...
-
Page 84: Installing The System Board
Installing the System Board Align the system board into its original position on the computer. Connect the system board to the I/O board. Connect the Smart Card reader cable, Media Board cable, and DC-in Cable to the system board. Replace and tighten the screws that secure the system board to the computer. -
Page 85: Speaker
Speaker Removing the Speakers Before Working On Your Computer . Follow the procedures in ATG Handle (only for E6420 ATG systems). Remove the ATG Port Cover (only for E6420 ATG systems). Remove the Battery . Remove the Secure Digital Card . Remove the Base Cover . - Page 86 23. Unthread the speaker cable. 24. Remove the speaker from the system. Downloaded from LpManual.com Manuals...
-
Page 87: Installing The Speakers
Installing the Speakers Place the speaker back into the system. Route the speaker cable. Tighten the screws securing the speaker assembly. System Board . Install the ExpressCard Cage . Install the Palmrest Assembly . Install the Modem Card . Install the Keyboard . - Page 88 Downloaded from LpManual.com Manuals...
-
Page 89: Modem Connector
Modem Connector Removing the Modem Connector Before Working On Your Computer . Follow the procedures in ATG Handle (only for E6420 ATG systems). Remove the ATG Port Cover (only for E6420 ATG systems). Remove the Battery . Remove the Secure Digital Card . Remove the Base Cover . - Page 90 24. Unthread the video and wireless antenna cables. 25. Unthread the modem cable. Downloaded from LpManual.com Manuals...
- Page 91 26. Pull out the end of the modem-to-motherboard connector. 27. Remove screw from modem cable holder. 28. Remove modem cable holder. Downloaded from LpManual.com Manuals...
- Page 92 29. Remove the whole modem cable assembly by pulling it out from the base. Downloaded from LpManual.com Manuals...
-
Page 93: Installing The Modem Connector
Installing the Modem Connector Place the modem cable assembly into the base. Place the modem cable holder. Tighten the screw securing the modem cable holder. Connect the end of the modem-to-motherboard connector. Route the modem cable. Route the video and wireless antenna cables. System Board . - Page 94 Downloaded from LpManual.com Manuals...
-
Page 95: Input/Output Panel
Input/Output Panel Removing the Input/Output (I/O) Board Before Working On Your Computer . Follow the procedures in ATG Handle (only for E6420 ATG systems). Remove the ATG Port Cover (only for E6420 ATG systems). Remove the Battery . Remove the Secure Digital Card . - Page 96 22. Remove the I/O board from the computer. Downloaded from LpManual.com Manuals...
-
Page 97: Installing The Input/Output (I/O) Board
Installing the Input/Output (I/O) Board Replace the I/O board in the computer. Tighten the screw securing the I/O board to the computer. System Board . Install the ExpressCard Cage Install the Palmrest Assembly . Install the Modem Card . Install the Keyboard . - Page 98 Downloaded from LpManual.com Manuals...
-
Page 99: Dc-In Port
DC-In Port Removing DC-in Port Before Working On Your Computer . Follow the procedures in ATG Handle (only for E6420 ATG systems). Remove the ATG Port Cover (only for E6420 ATG systems). Remove the Battery . Remove the Secure Digital Card . Remove the Base Cover . - Page 100 23. Remove the DC-in bracket. 24. Remove the DC-in cable from the system. Downloaded from LpManual.com Manuals...
- Page 101 25. Push in the DC-in trim and remove it from the system. Downloaded from LpManual.com Manuals...
-
Page 102: Installing Dc-In Port
Installing DC-In Port Push the DC-in trim and place it into the system. Place the DC-in cable into the system. Insert the DC-in bracket. Tighten the screw securing the DC-in bracket. System Board . Install the ExpressCard Cage . Install the Palmrest Assembly . -
Page 103: Display Assembly
Display Assembly Removing the Display Assembly Before Working On Your Computer . Follow the procedures in ATG Handle (only for E6420 ATG systems). Remove the ATG Port Cover (only for E6420 ATG systems). Remove the Battery . Remove the Secure Digital Card . Remove the Base Cover . - Page 104 24. Unthread the antennas, video, and camera connectors. 25. Lift up the whole bottom base while threading the cable down via the bottom base. Downloaded from LpManual.com Manuals...
- Page 105 Downloaded from LpManual.com Manuals...
-
Page 106: Installing The Display Assembly
Installing the Display Assembly Align the display assembly into its original position on the computer. Route the antennas, video, and camera connectors. DC in port . Install the System Board . Install the ExpressCard Cage Install the Palmrest Assembly . Install the Modem Card . -
Page 107: Display Hinges
Display Hinges Removing the Display Hinge Covers Before Working On Your Computer . Follow the procedures in ATG Handle (only for E6420 ATG systems). Remove the ATG Port Cover (only for E6420 ATG systems). Remove the Battery . Remove the Secure Digital Card . - Page 108 25. Remove the display hinge cover from the left hinge. 26. Pry the display hinge cover from the right hinge. 27. Remove the display hinge cover from the right hinge. Downloaded from LpManual.com Manuals...
- Page 109 Downloaded from LpManual.com Manuals...
-
Page 110: Installing The Display Hinge Covers
Installing the Display Hinge Covers Place the display hinges in the appropriate positions. Replace the display hinge cover to the computer. Display Assembly . Install the DC-in port . Install the System Board . Install the ExpressCard Cage Install the Palmrest Assembly . -
Page 111: Display Bezel
Display Bezel Removing the Display Bezel Before Working On Your Computer . Follow the procedures in Battery . Remove the Pry the left and right edges of the display bezel. Work along to the top and bottom edges of the display bezel. Remove the display bezel. -
Page 112: Installing The Display Bezel
Installing the Display Bezel Place the display bezel into the system. Work along to the top and bottom edges of the display bezel. Press the left and right edges of the display bezel. Battery . Install the After Working Inside Your Computer . Follow the procedures in Downloaded from LpManual.com Manuals... -
Page 113: Display Panel
Display Panel Removing the Display Panel Before Working On Your Computer . Follow the procedures in Battery . Remove the Display Bezel . Remove the Remove the screws securing the display panel to the display assembly. Flip the display panel over. Downloaded from LpManual.com Manuals... - Page 114 Disconnect the Low-Voltage Differential Signaling (LVDS) cable connector tape from the display panel. Disconnect the Low-Voltage Differential Signaling (LVDS) cable from the display panel. Remove the display panel from the display assembly. Downloaded from LpManual.com Manuals...
-
Page 115: Installing The Display Panel
Installing the Display Panel Align the display panel in its original position on the display assembly. Connect the Low-Voltage Differential Signaling (LVDS) cable to the display panel. Tighten the screws securing the display panel to the display assembly. LCD Bezel . Install the Battery . - Page 116 Downloaded from LpManual.com Manuals...
-
Page 117: Display Bracket
Display Bracket Removing the Display Bracket Before Working On Your Computer . Follow the procedures in Battery . Remove the Display Bezel . Remove the Display Panel . Remove the Remove the screws from each side of the display panel and remove the display brackets. - Page 118 Downloaded from LpManual.com Manuals...
-
Page 119: Camera
Camera Removing the Camera Before Working On Your Computer . Follow the procedures in Battery . Remove the Display Bezel . Remove the Display Panel . Remove the Disconnect the camera cable from the camera. Remove the captive screw securing the camera to the display assembly. Downloaded from LpManual.com Manuals... -
Page 120: Installing The Camera
Remove the camera from the display assembly. Installing the Camera Place the camera module in its original position in the display assembly. Tighten the screw securing the camera to the display assembly. Connect the camera cable to the camera. Display Panel . Install the Display Bezel . -
Page 121: Specifications
SPI 32 Mbits PCIe Gen1 bus 100 MHz Processor Types • Intel Core i3 series (available only with Latitude E6420 only) • Intel Core i5 series with Turbo Boost technology 2.0 • Intel Core i7 series with Turbo Boost technology 2.0... - Page 122 Discrete • PCI-E x16 Gen1 • PCI-E x16 Gen2 Controller: Latitude E6420 Intel HD Graphics Latitude E6420 ATG Intel HD Graphics 3000 Discrete NVIDIA NVS 4200M Discrete Graphics (512 MB DDR3) Communications Network adapter 10/100/1000 Mbps Ethernet LAN Downloaded from LpManual.com Manuals...
- Page 123 309.40 mm x 173.95 mm Dimensions: Height 192.50 mm (7.58 inches) Width 324.00 mm (12.76 inches) Diagonal 355.60 mm (14.00 inches) Maximum resolution 1366 x 768 pixels at 263 K colors Maximum Brightness Latitude E6420 200 nits Downloaded from LpManual.com Manuals...
- Page 124 Display Latitude E6420 ATG 730 nits Operating angle 0° (closed) to 135° Refresh rate 60 Hz Minimum Viewing angles: Latitude E6420 Horizontal +/- 40° Vertical +10°/-30° Latitude E6420 ATG Horizontal +/- 50° Vertical +/- 40° Pixel pitch 0.2265 mm Keyboard...
- Page 125 0 °C to 60 °C (32 °F to 140 °F) Non-Operating –51 °C to 71 °C (–59 °F to 159 °F) Coin-cell battery 3 V CR2032 lithium coin cell AC Adapter Latitude E6420 Latitude E6420 ATG Type 65 W, 90 W, and 150 90 W Downloaded from LpManual.com Manuals...
- Page 126 158 °F) Physical Latitude E6420 Height 26.90 mm to 32.40 mm (1.06 inches to 1.27 inches) Width 352.00 mm (13.86 inches) Depth 241.00 mm (9.49 inches) Weight (with 4-cell battery) 2.07 kg (4.56 lb) Latitude E6420 ATG Downloaded from LpManual.com Manuals...
- Page 127 Operating 0 °C to 35 °C (32 °F to 95 °F) Storage –40 °C to 65 °C (–40 °F to 149 °F) Latitude E6420 ATG Operating 0 °C to 60 °C (32 °F to 140 °F)* Storage –51 °C to 71 °C (–59 °F to 159 °F)
- Page 128 Downloaded from LpManual.com Manuals...
-
Page 129: System Setup
Certain changes can cause your computer to work incorrectly. Entering System Setup Turn on (or restart) your computer. When the blue DELL logo is displayed, you must watch for the F2 prompt to appear. Once the F2 prompt appears, press <F2> immediately. - Page 130 General Option Description System Information This section lists the primary hardware features of your computer. • System Information • Memory Information • Processor Information • Device Information Battery Information Displays the battery status and the type of AC adapter connected to the computer. Boot Sequence Allows you to change the order in which the computer attempts to find an operating...
- Page 131 Option Description • Enabled w/PXE Default Setting: Enabled w/PXE System Management Allows you to control the systems management mechanism. The options are: • Disabled • DASH/ASF 2.0 Default Setting: DASH/ASF 2.0 Parallel Port Allows you to configure the parallel port on the docking station.
- Page 132 Option Description USB Controller Allows you to control the USB controller. The options are: • Enable Boot Support • Enable External USB Port Default Setting: Enable USB Controller and Enable External USB Port Miscellaneous Devices Allows you to enable or disable the following devices: •...
- Page 133 Option Description • SATA-5 Default Setting: All drives are enabled. Video Option Description LCD Brightness Allows you to set the display brightness depending on the power source (On Battery and On AC). Enable Optimus This option enables or disables the Nvidia Optimus Technology applicable to Windows 7 only.
- Page 134 Option Description NOTE: Successful password changes take effect immediately. Default Setting: Not set Password Bypass Allows you to enable or disable the permission to bypass the System and the Internal HDD password, when they are set. The options are: • Disabled •...
- Page 135 Option Description NOTE: The Activate and Disable options will permanently activate or disable the feature and no further changes will be allowed. Default Setting: Deactivate CPU XD Support Allows you to enable the Execute Disable mode of the processor. Default Setting: Enabled Non-Admin Setup Changes Allows you to determine whether changes to the setup options are allowed when an...
- Page 136 Option Description Default Setting: The options C states, C3, C6, Enhanced C-states, and C7 options are selected/enabled. Limit CPUID Allows you to limit the maximum value the processor Standard CPUID Function will support. Default Setting: Enable CPUID Limit Intel TurboBoost Allows you to enable or disable the Intel TurboBoost mode of the processor.
- Page 137 Option Description NOTE: This feature is only functional when the AC power adapter is connected. If the AC power adapter is removed during Standby, the system setup will remove power from all of the USB ports to conserve battery power. Wireless Radio Control Allows you to enable or disable the feature that automatically switches from wired or...
- Page 138 POST Behavior Option Description Adapter Warnings Allows you to enable or disable the system setup (BIOS) warning messages when you use certain power adapters. Default Setting: Enable Adapter Warnings is selected. Keypad (Embedded) Allows you to choose one or two methods to enable the keypad that is embedded in the internal keyboard.
- Page 139 Option Description • Minimal • Thorough • Auto Default Setting: Thorough Virtualization Support Option Description Virtualization Allows you to enable or disable the Intel Virtualization Technology. Default Setting: Enable Intel Virtualization Technology is selected. VT for Direct I/O Allows you to enable or disable Virtualization Technology for Direct I/O.
- Page 140 Option Description Default Setting: All the options are selected. Maintenance Option Description Service Tag Displays the Service Tag of your computer. NOTE: If a Service Tag has not been set for this system, the computer will automatically bring up this screen when users enter the BIOS.
-
Page 141: Diagnostics
Diagnostics Diagnostic LED Codes The following table shows the possible LED codes that may display when your computer is unable to complete a power on self test. Appearance Description Next Step Stora Powe Wirel r LED Blinki Solid Solid The micro- Replace the processor. -
Page 142: Battery Status Lights
If the computer is connected to an electrical outlet, the battery light operates as follows: • Alternately blinking amber light and blue light — An unauthenticated or unsupported non-Dell AC adapter is attached to your laptop. • Alternately blinking amber light with steady blue light — Temporary battery failure with AC adapter present. -
Page 143: Device Status Lights
Device Status Lights Turns on when you turn on the computer and blinks when the computer is in a power management mode. Turns on when the computer reads or writes data. Turns on steadily or blinks to indicate battery charge status. Turns on when wireless networking is enabled. - Page 144 Downloaded from LpManual.com Manuals...
-
Page 145: Contacting Dell
Dell product catalog. Dell provides several online and telephone-based support and service options. Availability varies by country and product, and some services may not be available in your area. To contact Dell for sales, technical support, or customer service issues: Visit support.dell.com.
Need help?
Do you have a question about the latitude E6420 and is the answer not in the manual?
Questions and answers