Table of Contents
Advertisement
Quick Links
Download this manual
See also:
Instruction Manual
Advertisement
Table of Contents

Summary of Contents for Xray T1
-
Page 2: Table Of Contents
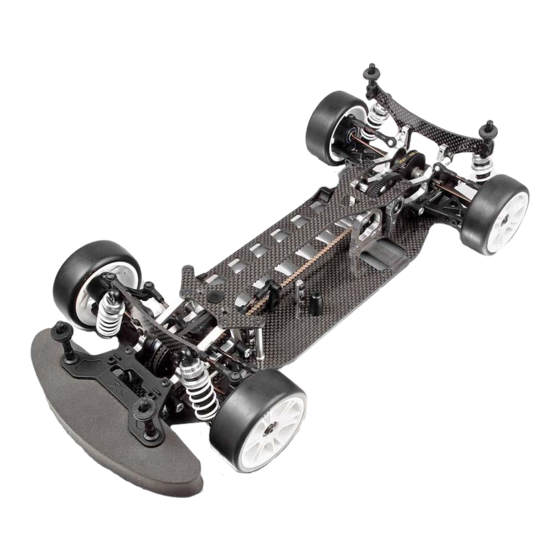
Also, you can register your T1 on the RC portal • Please support your local hobby shop. We at XRay Model Racing Cars support all local hobby dealers. Therefore we ask you, if at all possible, to purchase XRAY This car was built purely for top competition races, and for that purpose, we gave www.myTSN.com --- we intend on really taking care of our customers. -
Page 3: Front & Rear Differential
1.FRONT & REAR DIFFERENTIAL FRONT & REAR DIFFERENTIAL 1 1 . Hold the diff shaft with the installed pulley facing up. Place the other 5x8 305050 ball-bearing on the center stub on top of the other bearing. 305040 2 2 . . The 17x23 diff washer has a front side (brightly polished) and a back side 305010 309070 BB 5x8... -
Page 4: Rear Transmission
2. REAR TRANSMISSION REAR TRANSMISSION 5 5 . . Press the 2x10 pin into the hole on the layshaft. Note that the pin should 303010 stick out from both sides equally. 309050 6 6 . . Install the 16T fixed pulley with the pin keyed into it. The fixed pulley and 302040 fixed pulley shim should be flush against the one-way pulley and the pin 305000... -
Page 5: Rear Suspension
3. REAR SUSPENSION REAR SUSPENSION 1 1 . . Release the pivot pin set screw to allow the arm to slide forward and back so that the SB M3x4 wheelbase clips can be installed on the pivot pin. 307310 2 2 . . Install the clips for wheelbase adjustment. Use only three clips (one each of 4mm, 302080 3mm, and 2mm) on each arm. -
Page 6: Front Transmission
REAR SUSPENSION 4. FRONT TRANSMISSION Assemble the rear turnbuckles by threading a ball joint onto each end of the spring steel turnbuckle. 309010 302500 Note: The turnbuckle has a CCW thread on one end and a CW thread on the other end. 51.5 mm 305430 Adjust the turnbuckles to a length of 51.5 mm, measured end-to-end. -
Page 7: Front Suspension
5. FRONT SUSPENSION FRONT SUSPENSION Clean and lubricate both 10x15 ball-bearings with light bearing oil. 1 1 . . Slide a 10x15 ball-bearing onto the axle. 2 2 . . Insert the drive shaft through the steering block until the bearing on the axle is 302080 seated. -
Page 8: Servo Saver
6. SERVO SAVER SERVO SAVER Assemble the steering rods by threading a ball-joint onto each end of the spring steel steering rods. Note that the steering rod has a CCW thread on the long end and a CW thread on the short end. 302580 302500 Also note that the ball-joints should be 180-degrees to each other. -
Page 9: Shock Absorbers
7. SHOCK ABSORBERS SHOCK ABSORBERS 1 1 . . Lubricate a small O-ring with a couple of drops of shock oil. Taking care not to rip or damage the O-ring, place it over the extended end 308010 SHORT FRONT of the shock rod. O 3.1x1.6 2 2 . -
Page 10: Rear Final Assembly
8. REAR FINAL ASSEMBLY 9. FRONT FINAL ASSEMBLY 301320 301330 302090 P 2x10 SB M3x6 303090 308100 301212 SB M3x6 SH M3x8 301220 SH M3x6 N M3 SS 2,9X9.5 308200 301200 SP M3x8 SS 2,9x13 30 1320 FRONT BODY MOUNTS ( SET ) 30 2090 SHOCK TOWER FRONT - 2.5 MM GRAPHITE 30 1212... -
Page 11: Servo Saver, Battery Holder & Upper Deck Assembly
10. SERVO SAVER, BATTERY HOLDER & UPPER DECK ASSEMBLY 11. ACCESSORY INSTALLATION 306310 SP M3x6 301160 306140 SB M3x3 SH M3x8 306300 SERVO 305724 306110 306150 S 3.2 306200 SS 2.9x10 SH M3x8 SP M3 x 6 305793 SP M3x6 305790 OPTION SH M3x5 305940... -
Page 12: Accessory Installation
- in the street. and safety. Wear eye and hand protection. • Always turn off the receiver/speed control or disconnect XRAY T1's battery pack before turning transmitter off. Disregard of the above cautions may lead to accidents, personal injury, or •...


Need help?
Do you have a question about the T1 and is the answer not in the manual?
Questions and answers