Viessmann VITOTRONIC 100 Installation And Service Instructions Manual
Hide thumbs
Also See for VITOTRONIC 100:
- Installation and service instructions manual (168 pages) ,
- Operating instructions manual (64 pages) ,
- Operating instructions for the system user (57 pages)

Related Manuals for Viessmann VITOTRONIC 100


Summary of Contents for Viessmann VITOTRONIC 100
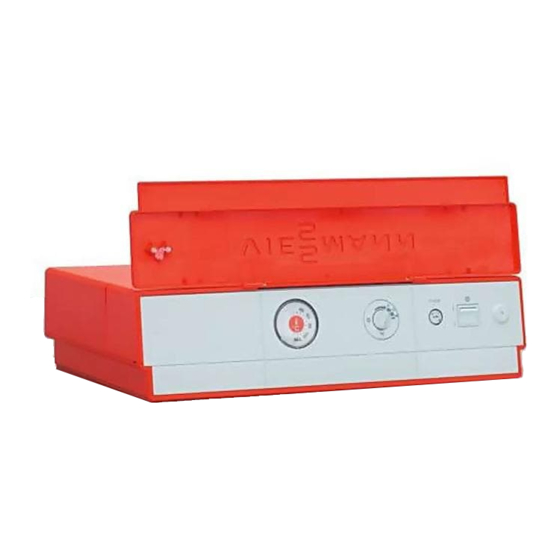
- Page 1 VIESMANN Installation and service instructions for contractors Vitotronic 100 Type KC3 Boiler control unit for constant temperature operation For applicability, see the last page VITOTRONIC 100 Please keep safe. 5862 701 GB 1/2013...
-
Page 2: Safety Instructions
Safety instructions Safety instructions Please follow these safety instructions closely to prevent accidents and mate- rial losses. Safety instructions explained ■ All current safety regulations as defined by DIN, EN, DVGW, TRGI, Danger TRF, VDE and all locally applicable This symbol warns against the standards risk of injury. - Page 3 If the boiler is operated at Defective components must be the same time, this can lead to reverse replaced with genuine flow of the flue gas. Viessmann spare parts.
- Page 4 Installing non-author- ised components and making non-approved modifications or conversions can compromise safety and may invalidate our warranty. For replacements, use only orig- inal spare parts supplied or approved by Viessmann.
-
Page 5: Table Of Contents
Index Index Installation instructions Preparing for installation System example....................Installation sequence Opening the control unit casing................Terminal overview....................Inserting cables/leads and applying strain relief........... Adjusting the high limit safety cut-out (if required)..........10 Adjusting the thermostat (if required)..............11 Connecting the Vitotrol 100.................. 12 Connecting pumps.................... -
Page 6: Preparing For Installation
Preparing for installation System example One directly connected heating circuit without mixer A Boiler with Vitotronic 100 B Power supply (230 V/50 Hz) C Vitotrol 100 (accessory) D Heating circuit pump E Heating circuit without mixer Plug fA Burner... -
Page 7: Installation Sequence
Installation sequence Opening the control unit casing... -
Page 8: Terminal Overview
Installation sequence Terminal overview Terminals 230 V~ Plug 230 V~ A Terminals 1 to 12 B Burner plug fA (page 19) ■ Power supply (see page 21) ■ Vitotrol 100 (see from page 12) ■ Heating circuit pump (see page 17) ■... -
Page 9: Inserting Cables/Leads And Applying Strain Relief
Installation sequence Inserting cables/leads and applying strain relief... -
Page 10: Adjusting The High Limit Safety Cut-Out (If Required)
Installation sequence Adjusting the high limit safety cut-out (if required) In the delivered condition, the high limit When adjusting the temperature to safety cut-out is set to 110 °C and can be 100 °C, never set the thermostat higher adjusted to 100 °C. than 75 °C. -
Page 11: Adjusting The Thermostat (If Required)
Installation sequence Adjusting the high limit safety cut-out (if… (cont.) °C A JUMO slotted screw B Rathgeber slotted screw Adjusting the thermostat (if required) In the delivered condition, the thermostat Note is set to 75 °C and can be adjusted to Never set the thermostat higher than 87/95 °C. -
Page 12: Connecting The Vitotrol 100
Installation sequence Adjusting the thermostat (if required) (cont.) 1. Remove rotary selector " ". 3. Install rotary selector " " so that the mark is between "75" and "90" or 2. Using a pair of pointed pliers, break "95". Turn rotary selector " " fully off the cams between "75"... - Page 13 Installation sequence Connecting the Vitotrol 100 (cont.) Connecting the Vitotrol 100, type UTA Switching the heating circuit pump Remove jumper across terminals 4 and Recommended connecting cable: 3-core cable with a cross-section of 1.5 mm² 1 2 3 4 5 6 7 8 9 10 11 12 A Terminal strip inside the control D Vitotrol 100, type UTA unit...
- Page 14 Installation sequence Connecting the Vitotrol 100 (cont.) 1 2 3 4 5 6 7 8 9 10 11 12 A Terminal strip inside the control E Vitotrol 100, type UTDB unit Switching the burner Remove jumper across terminals 9 and Recommended connecting cable: 2-core cable with a cross-section of 1.5 mm²...
- Page 15 Installation sequence Connecting the Vitotrol 100 (cont.) No minimum temperature is main- Note tained. There is no frost protection when the burner is switched off. Connecting the Vitotrol 100, type UTDB-RF Switching the heating circuit pump Remove jumper across terminals 4 and Recommended connecting cable: 4-core cable without earth conductor and with a cross-section of 1.5 mm²...
- Page 16 Installation sequence Connecting the Vitotrol 100 (cont.) 1 2 3 4 5 6 7 8 9 10 11 12 A Terminal strip inside the control F Wireless receiver of the Vitotrol 100, unit type UTDB-RF No minimum temperature is main- Note tained.
-
Page 17: Connecting Pumps
Installation sequence Connecting pumps Pumps 230 V~ Pumps 400 V~ 6 7 8 6 7 8 L1 L2 L3 N PE A Terminal strip inside the control unit A Terminal strip inside the control unit G Contactor For switching the contactor: Rated voltage: 230 V~ Rated current:... -
Page 18: Connecting External Safety Equipment
Installation sequence Connecting external safety equipment Please note The external connections must 'Live' contacts lead to short cir- be potential-free. cuits or phase failure. 13 14 15 16 17 18 C Terminal strip inside the control K Maximum pressure limiter unit L Further safety equipment H Low water indicator... -
Page 19: Connecting A Burner
Hours run meter A To the control unit M To the burner Burner without plug Install the mating plug from Viessmann or from the burner manufacturer; con- nect the burner cable. Atmospheric burner The burner cables are included in the Max. - Page 20 Installation sequence Connecting a burner (cont.) 5-core burner cable 6-core burner cable GY BU B To the control unit M To the burner To the control unit To the burner BK → B4 BN → T2 BK1 → T1 BU → N BK2 →...
-
Page 21: Power Supply
Installation sequence Power supply Regulations Carry out the power supply connection and all earthing measures (i.e. RCD cir- cuit) in accordance with IEC 364, the requirements of your local power supply utility, and VDE or national regulations. Protect the power cable to the control unit with a 16 A max. - Page 22 Installation sequence Power supply (cont.) Control unit power supply 1. Check whether the power cable to the control unit has appropriate fuse pro- tection. 2. Connect the power cable in the junc- tion box and the control unit (on- 1 2 3 site).
-
Page 23: Commissioning
Commissioning Testing the high limit safety cut-out 1. Shut down the heating system. 2. Insert jumper across control unit ter- 13 14 15 16 17 18 minals 15 and 16. 3. Switch on the heating system. The temperature controller bridged. The high limit safety cut-out shuts the burner down if the boiler water temperature reaches the safety C Terminal strip inside the control... -
Page 24: Troubleshooting
Troubleshooting Troubleshooting System characteris- Cause Action tics Boiler cold, burner not High limit safety cut-out has Reset high limit safety cut-out running. responded. (see page 23). External safety equipment ■ Check connection (see page 18). ■ Check external safety equipment. Vitotrol 100 ■... -
Page 25: Designs
Designs Connection and wiring diagram F1 Fuse/MCB F7 Temperature controller 75 °C F6 High limit safety cut-out 110 °C (87 °C, 95 °C) (100 °C, 95 °C) S1 ON/OFF switch... - Page 26 Designs Connection and wiring diagram (cont.) Plug 230 V~ fA Burner Terminals 230 V~ A Power supply B Vitotrol 100 (accessory) for switch- ing the heating circuit pump (remove jumper when connecting) C Heating circuit pump D Vitotrol 100 (not for type UTA) for switching the burner (remove jumper when connecting) External burner blocking (remove...
-
Page 27: Components
Components Vitotrol 100 Type UTA Type UTDB Type UTDB-RF Rated voltage 230 V~ 3 V– Wireless receiver: Battery LR6/AA 230 V~ ± 10 % Reception frequen- — — 868 MHz Rated breaking ca- 6(1) A, 250 V~ pacity of the floating contact ■... -
Page 28: Vitoair Secondary Air Device, Part No. 7338 725 And 7339 703
Components Vitoair secondary air device, part no. 7338 725 and 7339 703 A To the burner B To the control unit Colour coding to DIN IEC 60757 Black GN/YE Green/yellow Function check ■ Enable burner from the control unit ⇒ The rotary selector should move towards "3". -
Page 29: Mcb Inside The Control Unit
Components Vitoair secondary air device, part no. 7338 725… (cont.) Emergency mode Press rotary selector on the motor and turn it clockwise as far as it will go beyond position "3". MCB inside the control unit ■ F1: 6.3 A (slow), 250 V~ ■... -
Page 30: Parts Lists
Parts lists Ordering parts The following information is required: 0033 Temperature controller rotary ■ Serial no. (see type plate A) selector ■ Position number of the part (from this 0036 2-pole switch parts list) (ON/OFF switch) Burner connecting cable with plug Standard parts are available from your fA (for boilers with pressure-jet local supplier. - Page 31 Parts lists Ordering parts (cont.) 0017 0081 0010 0082 0007 0098 0016 0011 0031 0004 0023 0030 0018 0091 0033 0036 0005 0024 0099 0065 0021 0071 0072...
-
Page 32: Specification
Specification Specification Rated voltage 230 V~ Rated frequency 50 Hz Rated current 6 A~ Safety category IP rating IP 20 D to EN 60529, ensure through design/instal- lation Mode of operation Type 1B to EN 60730-1 Permiss. ambient temperature ■ During operation 0 to +40 °C Installation in living spaces or boiler rooms (stand- ard ambient conditions) -
Page 33: Settings And Equipment
Settings and equipment Settings and equipment Delivered condition Modification = Adjusted to ...°C High limit safety cut-out set to 110 °C Temperature controller set to 75 °C = Adjusted to ...°C Connected accessories = Vitotrol 100 affects the burner = Vitotrol 100 affects the heating circuit pump = Vitoair... -
Page 34: Keyword Index
Keyword index Keyword index Adjusting the high limit safety cut-out 10 Parts list..........30 Adjusting the thermostat....11 Power supply........21 Atmospheric burner......19 Pressure jet oil/gas burner....19 Cables/leads, inserting and applying System equipment......33 strain relief...........9 System example........6 Commissioning........23 Components........27 Connecting a burner......19 Testing the high limit safety cut-out. . .23 Connecting external safety equipment18 Troubleshooting.........24 Connecting pumps......17... - Page 36 Applicability Serial No.: 7186582 Viessmann Werke GmbH&Co KG Viessmann Limited D-35107 Allendorf Hortonwood 30, Telford Telephone: +49 6452 70-0 Shropshire, TF1 7YP, GB Fax: +49 6452 70-2780 Telephone: +44 1952 675000 www.viessmann.com Fax: +44 1952 675040 E-mail: info-uk@viessmann.com...
Need help?
Do you have a question about the VITOTRONIC 100 and is the answer not in the manual?
Questions and answers