Table of Contents
Advertisement
Available languages
Available languages
Quick Links
0 +
Babyphone Premium Care
Réf. : A014200
Notice D'utilisation • Instructions for use • Benutzungsanleitung • Gebruikshandleiding
Instrucciones De Uso • Instruções de uso • Istruzioni per l'uso • Návod k používání
Babymoov
Parc Industriel des Gravanches
16, rue Jacqueline Auriol
0681
63051 Clermont-Ferrand cedex 2 - France
Designed and engineered
www.babymoov.com
by Babymoov in France
Advertisement
Table of Contents

Subscribe to Our Youtube Channel
Related Manuals for babymoov A014200


Summary of Contents for babymoov A014200
- Page 1 Babyphone Premium Care Réf. : A014200 Notice d’utilisation • Instructions for use • Benutzungsanleitung • Gebruikshandleiding Instrucciones de uso • Instruções de uso • Istruzioni per l’uso • Návod k používání Babymoov Parc Industriel des Gravanches 16, rue Jacqueline Auriol...
- Page 2 Parc Industriel des Gravanches 63051 Clermont Ferrand cedex 2 France Déclare que le produit suivant : Modèle : Babyphone Premium Care Référence : A014200 Modèle : BC-52 est conforme aux normes harmonisées appropriées suivantes : EMC : EN 301489-1 V1.9.2 EN 301489-3 V1.4.1 Radio : EN 300220-1 V2.4.1...
- Page 3 COMMANDES - CONTROLS - STEUERUNGEN - BEDIENING MANDOS - COMANDOS - COMANDI - OVLÁDÁNÍ PŘÍSTROJE Émetteur - Transmitter - Sender Zender - Transmisor - Emissor Trasmettitore - Vysílač Récepteur - Receiver - Empfänger Ontvanger - Receptor - Receptor Ricevitore - Přijímač BABYPHONE PREMIUM CARE...
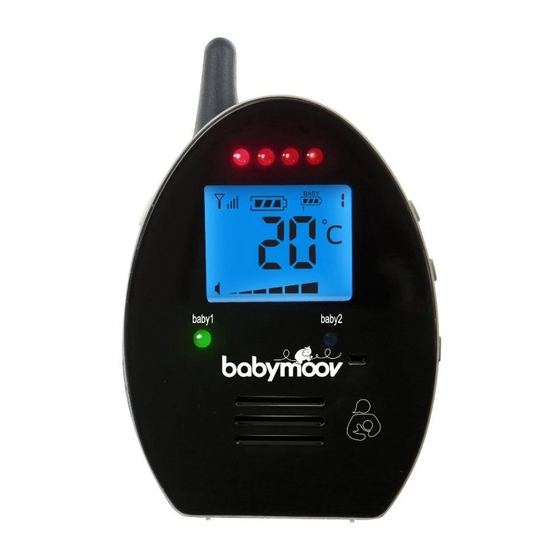
- Page 4 Écran du récepteur - Parent unit (PU) LCD screen - Elterneinheit (PU) LCD Display Ouderunit (PU) LCD scherm - Pantalla LCD de la unidad parental (UP) - Visor LCD Unidade pais (PU) Display LCD Unità genitori (UG) - Displej LCD jednotky Rodiče (PU) Écran de l’émetteur - Baby unit (BU) LCD screen - Babyeinheit (BU) LCD Display Baby unit (BU) LCD scherm - Pantalla LCD de la unidad del bebe (UB) - Visor LCD Unidade Bebê...
- Page 5 NOTICE D’UTILISATION Merci d'avoir choisi notre babyphone Premium Care. Nous vous invitons à lire attentivement cette notice d'utilisation, cela vous permettra de maximiser les performances et la durée de vie de votre appareil. Toutefois, si vous observez un défaut ou si vous rencontrez un quelconque problème, veuillez contacter notre service consommateur.
- Page 6 • Ne démontez pas l’appareil : il ne contient aucune Ce symbole indique à travers l’Union Européenne pièce susceptible d’être utilisée de manière isolée. que ce produit ne doit pas être jeté à la poubelle • Les équipements électriques et électroniques font ou mélangé...
- Page 7 ALIMENTATION A/ ÉMETTEUR 1. Fonctionnement avec piles (non fournies) Appuyez sur le bouton de verrouillage et faites glisser le couvercle du compartiment à piles dans la direction indiquée. Insérez 3 piles alcalines de type AAA dans le compartiment. Respectez les indications de polarité (+/-). Refermez le capot.
- Page 8 2. Positionnez l'interrupteur marche/arrêt (11) sur ON et patientez jusqu'à ce ■ FIXE qu'un clignote à l'écran. ■ CLIGNOTE 3. Maintenez enfoncé le bouton (3) sur l’émetteur. 4. Positionnez l'interrupteur marche/arrêt (1) sur ON et patientez jusqu'à ce que devienne fixe et que le numéro de l'unité Bébé clignote à l'écran (le cas échéant, répétez l'opération avec l'unité...
- Page 9 B/ RÉCEPTEUR 1. Configuration de la fonction d'alerte « Hors de portée » et de l'alarme de température a. Positionnez l'interrupteur marche/arrêt (11) sur ON pour allumer l'écran LCD. Maintenez enfoncé le bouton « Menu » (14) pendant au moins 5 secondes pour accéder au mode de programmation. Voici ce qui s'affiche à...
- Page 10 b. Utilisez les boutons (12) (13) ▲▼ pour configurer la fonction d'alerte « Hors de portée », la configuration doit être identique à celle de l’émetteur. Si la configuration est différente, l'alarme peut se déclencher sans raison ou à l'inverse, ne pas se déclencher même si le récepteur n'est plus à portée de l’émetteur. Si l'appareil est associé...
- Page 11 Écran affichant les Écran affichant les informations de l'unité informations de l'unité Bébé n°2 (Alerte « Hors Bébé n°1 (alerte « Hors de portée » désactivée et de portée » activée) veilleuse réglée sur VOX) 8. Le récepteur est équipé d'une fonction vibreur. Positionnez l'interrupteur marche/arrêt (11) sur la position vibreur, l’icone va apparaitre à...
- Page 12 GUIDE DE DÉPANNAGE Problème Causes possibles Solutions • Le récepteur est éteint. • Allumez le récepteur • La sensibilité du microphone est • Augmentez la sensibilité du microphone à • L’émetteur n'émet pas. trop basse. l'aide du bouton (2). • Les piles sont déchargées ou l'adaptateur •...
- Page 13 INSTRUCTION MANUAL Thank you for choosing our Baby monitor Premium Care. We recommend you read these instructions carefully in order to use your Baby monitor to best advantage and ensure it continues to operate as long as possible. If you should find a fault, however, or if you have any problem, please contact our company. IMPORTANT: This baby monitor uses low emission power, in order to protect baby’s health.
- Page 14 • Do not open the cabinet, no serviceable part inside. This marking indicates that this product should • Waste Electrical and Electronic Equipment should be not be disposed with other household wastes disposed of by selective collection. Do not throw throughout the EU.
-
Page 15: Power Supply
POWER SUPPLY A/ TRANSMITTER 1. Functioning with batteries (not supplied) Press the locking button and slide the battery compartment lid in the direction indicated. Insert 3 alkaline AAA type batteries in the compartment. Respect the polarity indications (+/-). Close the cover. N.B. - Page 16 2. Switch the start/stop switch (11) to ON and wait until a starts flashing on ■ STEADY the screen. ■ FLASHING 3. Maintenez enfoncé le bouton (3) sur l’émetteur. 4. Switch the start/stop switch (1) to ON and wait until the becomes steady and the Baby unit number starts flashing on the screen (if need be repeat the operation with the additional Baby unit).
- Page 17 B/ RECEIVER 1. Configuration of the “Out of range” alert function and temperature alarm a. Switch the start/stop switch (11) to ON to switch on the LCD screen. Keep the “Menu” button (14) down for at least 5 seconds to have access to the programming mode. This is what is displayed on the screen: ■...
- Page 18 b. Use the buttons (12) (13) ▲▼ to configure the “Out of range” alert function; the configuration must be identical to the transmitter’s. If the configuration is different the alarm may go off for no reason or inversely not go off at all even if the receiver is no longer in range of the transmitter. If the appliance is associated with 2 transmitters the configuration must be identical to that of the transmitter with the corresponding number.
- Page 19 Screen displaying the Screen displaying the information from Baby unit information from Baby no. 2 (“Out of range” alert unit no. 1 (“Out of inactivated and nightlight range” alert activated) set to VOX) 8. The receiver is equipped with a vibrator function. Set the start/stop switch (11) to the vibrator position; the vibrator icon appears on the screen .
-
Page 20: Trouble Shooting
TROUBLE SHOOTING Problem Possible cause Solution • The receiver is off. • Switch the receiver on. • The microphone’s sensitivity is too low. • Increase the microphone’s sensitivity with the • The transmitter is not transmitting. “Up” button (2). • The batteries are exhausted or the mains •... - Page 21 BEDIENUNGSANLEITUNG Vielen Dank für Ihre Wahl für unser Babyphone Premium Care. Wir bitten Sie, die vorliegende Bedienungsanleitung aufmerksam zu lesen, um Ihr Gerät bestmöglich zu nutzen und ihm eine lange Lebensdauer zu garantieren. Wenn Sie jedoch einen Fehler feststellen oder auf irgendein Problemstoßen, setzen Sie sich bitte mit unserem Kundendienst in Verbindung.
- Page 22 • Das Gerät nicht auseinanderbauen: es enthält keine Dieses Symbol weist in der Europäischen Union Teile, die als solche wieder verwendet werden könnten. darauf hin, dass das Produkt nicht in den • Elektrische und elektronische Gegenstände unterliegen Mülleimer geworfen oder zu anderen Sondermüllbestimmungen für die Entsorgung.
- Page 23 STROMVERSORGUNG A/ SENDER 1. Batteriebetrieb (Batterien nicht im Lieferumfang inbegriffen) Verriegelungsknopf drücken und den Deckel des Batteriefaches in die angegebene Richtung schieben. 3 Batterien vom Typ AAA in das Fach einlegen. Auf die korrekte Polarität (+/-) achten. Deckel wieder schließen. N.B.
- Page 24 2. Ein/Aus-Schalter (11) auf ON schalten und warten, bis im Display blinkt. ■ LEUCHTET ■ BLINKT 3. Taste (3) am Sender gedrückt halten. 4. Schalter Ein/Aus (1) auf ON schalten und warten, bis leuchtet und die Nummer der Babyeinheit im Display blinkt (Den Vorgang ggf. mit der zusätzlichen Babyeinheit wiederholen).
- Page 25 B/ EMPFÄNGER 1. Konfiguration der Warnfunktion „Außer Reichweite“ und des Temperaturalarms. a. Den Ein/Aus-Schalter (11) auf ON schalten, um das LCD-Display einzuschalten. Die Taste „Menü“ (14) mindestens 5 Sekunden lang drücken, um zur Programmierung zu gelangen. Das Display zeigt Folgendes an: ■...
- Page 26 b. Über die Tasten (12) (13) ▲▼ die Warnung „Außer Reichweite“ genauso konfigurieren, wie im Sender. Bei unterschiedlicher Konfiguration von Sender und Empfänger kann grundlos Alarm ausgelöst werden oder kein Alarm ausgelöst werden, wenn der Empfänger außerhalb der Reichweite des Senders ist. Wenn das Gerät mit 2 Sendern verbunden ist, muss die Konfiguration dem Sender entsprechen, dessen Nummer angezeigt wird.
- Page 27 Display mit Informationen der Display mit Informationen Einheit Baby Nr. 2 der Einheit Baby Nr. 1 (Signal „Außer Reichweite“ (Signal „Außer Reichweite“ ausgeschaltet und Nachtlicht eingeschaltet) auf VOX eingestellt). 8. Der Empfänger ist mit einem Vibrationsalarm ausgestattet. Wenn der Schalter Ein/Aus (11) auf Vibrationsalarm geschaltet wird, erscheint das entsprechende Symbol auf dem Display.
- Page 28 FEHLERBEHEBUNG Problem Mögliche Ursachen Lösung • Der Empfänger ist ausgeschaltet. • Empfänger einschalten. • Das Mikrofon ist nicht empfindlich • Empfindlichkeit des Mikrofons mit Taste • Der Sender sendet nicht. genug eingestellt. „oben“ (2) einstellen. • Die Batterien sind entladen oder der •...
- Page 29 GEBRUIKSHANDLEIDING U hebt uw keuze laten vallen op onze Babyphone Premium Care en wij danken u voor uw vertrouwen. Wij verzoeken u deze gebruikshandleiding aandachtig te lezen met het oog op een optimaal gebruik van het apparaat en een optimale levensduur. Mocht u echter een gebrek vaststellen of een probleem tegenkomen, dan verzoeken wij u contact op te nemen met onze consumentendienst.
- Page 30 • Het apparaat niet demonteren, het bevat geen enkel Dit symbool geeft aan voor heel Europa dat onderdeel dat ergens voor gebruikt kan worden. dit product niet bij het huisvuil weggegooid • Elektrische en elektronische uitrustingenmoeten op mag worden, het moet op selectieve wijze selectieve wijze afgevoerd worden.
- Page 31 VOEDING A/ ZENDER 1. Werking op batterijen (niet bijgeleverd) Op de vergrendeling drukken, en het deksel van het batterijvak in de aangegeven richting afschuiven. 3 AAA alkaline batterijen in het vak voegen. Let goed op de polariteit (+/-). Het deksel weer dicht doen. N.B.
- Page 32 2. De Aan/uit schakelaar (11) op ON zetten, en wachten tot een knippert ■ VAST op het scherm. ■ KNIPPEREND 3. De knop (3) op de zender ingedrukt houden. 4. De aan/uit schakelaar (1) op ON zetten. Wachten tot de stopt met knipperen, en het numero van de baby-unit op het scherm knippert.
- Page 33 B/ ONTVANGER 1. Instelling van de alarmfunctie “buiten bereik” en het temperatuuralarm a. De aan/uit schakelaar (11) op ON zetten om het LCD scherm aan te zetten. De « Menu » knop (14) ten minste 5 seconden ingedrukt houden om toegang te krijgen tot de programmering. Dit krijgt u vervolgens op het scherm: ■...
- Page 34 b. De knoppen (12) (13) ▲▼ gebruiken om de alarmfunctie «Buiten bereik» in te stellen. Deze instelling moet gelijk zijn aan die van de zender. Indien de instelling anders is, kan het alarm zomaar afgaan, of omgekeerd, niet afgaan wanneer de ontvanger niet meer binnen bereik van de zender is. Indien het apparaat aangesloten is op 2 zenders, moet de instelling ten opzichte van beide zenders hetzelfde zijn.
- Page 35 Scherm dat informatie Scherm dat informatie betreffende Baby unit 2 betreffende Baby unit 1 weergeeft («Buiten bereik» weergeeft («Buiten bereik» alarmfunctie uitgeschakeld, en alarmfunctie geactiveerd) nachtlampje ingesteld op VOX) 8. De ontvanger is uitgerust met een trilfunctie. De aan/uit schakelaar (11) op de trilfunctie inschakelen, en het trilicoon verschijnt op het scherm .
- Page 36 REPARATIEGIDS Probleem Mogelijke oorzaak Oplossing • De ontvanger is uit. • De ontvanger aanzetten. • De microfoon gevoeligheid staat te • De microfoon gevoeligheid verhogen met laag ingesteld. de knop «Hoog» (2). • De zender zendt niet. • De batterijen zijn leeg, of de stekker adapter •...
-
Page 37: Instrucciones De Uso
INSTRUCCIONES DE USO Gracias por haber escogido nuestro Babyphone Premium Care. Le invitamos a leer detenidamente este manual de utilización para sacar el máximo partido a su aparato y prolongar su vida. Si a pesar de todo detecta usted algún defecto o si tiene algún problema, por favor, contacte con su distribuidor o con nuestro servicio al cliente. - Page 38 • No desmonte el aparato: no contiene ninguna pieza Este símbolo indica, en toda la Unión Europea, que pueda utilizarse de manera aislada. que este producto no debe tirarse a la basura • Los equipos eléctricos y electrónicos deben ser ni mezclarse con residuos domésticos, sino reciclados.
- Page 39 ALIMENTACIÓN A/ TRANSMISOR 1. Funcionamiento con pilas (no proporcionadas) Pulse el botón de bloqueo y deslice la tapa del compartimento de pilas en la dirección indicada. Introduzca 3 pilas alcalinas de tipo AAA en el compartimento. Respete las indicaciones de polaridad (+). Vuelva a cerrar la tapa. N.B.
- Page 40 2. Coloque el interruptor encendido/apagado (11) en ON y espere hasta que ■ FIJA parpadee en la pantalla. ■ INTERMITENTE 3. Mantenga pulsado el botón (3) en el transmisor. 4. Coloque el interruptor encendido/apagado (1) en ON y espere hasta que la permanezca fija y que el número de la unidad del Bebé...
- Page 41 B/ RECEPTOR 1. Configuración de la función de alerta «Fuera de alcance» y de la alarma de temperatura a. Coloque el interruptor encendido/apagado (11) en ON para encender la pantalla LCD. Mantenga pulsado el botón «Menú» (14) durante 5 segundos como mínimo para acceder al modo de programación. Esto es lo que visualiza la pantalla: ■...
- Page 42 b. Utilice los botones (12) (13) ▲▼ para configurar la función de alerta «Fuera de alcance», la configuración debe ser idéntica a la del transmisor. Si la configuración es diferente, la alarma puede dispararse sin motivo o al contrario, no dispararse aunque el receptor ya no esté al alcance del transmisor. Si el aparato está asociado a 2 transmisores, la configuración debe ser idéntica a la del transmisor cuyo número corresponde.
- Page 43 Pantalla que visualiza la Pantalla que visualiza la información de la unidad del información de la unidad Bebé n°2 (Alerta «Fuera de del Bebé n°1 (Alerta «Fuera alcance» desactivada y piloto de alcance» activada) regulado en VOX) 8. El receptor está equipado de una función vibrador. Coloque el interruptor encendido/apagado (11) en posición vibrador, el icono aparecerá...
- Page 44 GUÍA DE REPARACIÓN Problema Posibles causas Solución • El receptor está apagado. • Encienda el receptor. • La sensibilidad del micrófono • Aumente la sensibilidad del micrófono • El transmisor no emite. es demasiado baja. utilizando el botón «Alto» (2). •...
- Page 45 INSTRUÇÕES DE USO Agradecemos ter escolhido o nosso Babyphone Premium Care. Pedimos-lhe que leia atentamente estas instruções para assim aproveitarem ao máximo as possibilidades do nosso aparelho, garantindo-lhe uma duração máxima. Sempre que note um defeito ou avaria, deverá contactar o nosso serviço de atendimento do consumidor.
- Page 46 • Não desmonte o aparelho: Não contém peças que Na União Europeia, este símbolo indica que possam ser usadas separadamente. este produto não deve ser deitado no lixo nem • Os equipamento eléctricos e electrónicos devem ser misturado com o lixo doméstico; deve ser objecto de recolha selectiva.
- Page 47 ALIMENTAÇÃO A/ EMISSOR 1. Funcionamento com pilhas (não disponibilizadas) Carregar no botão bloqueador e deslizar a tampa do compartimento das pilhas na direção indicada. Inserir 3 pilhas alcalinas de tipo AAA no compartimento. Inserir as pilhas respeitando a polaridade (+/-). Voltar a fechar a tampa.
- Page 48 2. Posicione o interruptor de funcionamento on/off (11) em ON e aguarde até ■ FIXO aparecer um intermitente no visor. ■ INTERMITENTE 3. Mantenha recolhido o botão (3) no emissor. 4. Posicione o interruptor de funcionamento on/off (1) em ON e aguarde até...
- Page 49 B/ RECEPTOR 1. Configuração da função de alerta « Fora de alcance » e do alarme de temperatura a. Posicionar o interruptor de funcionamento on/off (11) em ON para acender o visor LCD. Mantenha recolhido o botão « Menu » (14) durante pelo menos 5 segundos para aceder ao modo de programação. Segue o que aparece no visor: ■...
- Page 50 b. Utilize os botões (12) (13) ▲▼ para configurar a função de alerta « Fora de alcance», a configuração deve ser idêntica ao do emissor. Se a configuração for diferente, o alarme pode disparar sem motivo algum ou ao contrário, não disparar mesmo que o receptor não se encontre ao alcance do emissor. Se o aparelho estiver associado a 2 emissores, a configuração terá...
- Page 51 Visor mostrando as Visor mostrando as informações da unidade Bebê informações da unidade nº 2 (Alerta « Fora de alcance » Bebê nº 1 (Alerta « Fora desativada e luz de presença de alcance » ativada) ligada em modo VOX) 8.
- Page 52 GUIA DE REPARAÇÕES Problema Causas possíveis Solução • O receptor está desligado. • Ligue o receptor. • A sensibilidade do microfone é baixa demais. • Aumente a sensibilidade do microfone com •O emissor não emite. o botão « Subir » (2). •...
- Page 53 MANUALE DI ISTRUZIONI Grazie per aver scelto il nostro Babyphone Premium Care. Vi invitiamo a leggere attentamente il presente manuale di istruzioni per sfruttare al meglio il vostro apparecchio e garantirgli una durata di vita ottimale. Se doveste tuttavia notare un difetto o riscontrare qualsiasi problema, vi invitiamo a contattare il nostro servizio clienti.
- Page 54 • Non smontare l’apparecchio: non contiene nessun Questo simbolo indica, nell'Unione europea, componente utilizzabile separatamente. che questo prodotto non deve essere gettato • Gli apparecchi elettrici ed elettronici sono oggetto di tra i rifiuti comuni o nella spazzatura domestica, raccolta differenziata. Non gettare mai componenti di ma deve essere smaltito separatamente.
- Page 55 ALIMENTAZIONE A/ TRASMETTITORE 1. Funzionamento con pile (non fornite) Premere il pulsante di blocco e far scivolare il coperchio dello scomparto delle pile nella direzione indicata. Inserire 3 pile alcaline di tipo AAA nello scomparto. Rispettare le indicazioni di polarità (+/-). Richiudere il coperchio. N.B.
- Page 56 2. Posizionare l’interruttore On/Off (11) su ON e attendere finché una ■ FISSO lampeggia sul display. ■ LAMPEGGIANTE 3. Mantenere premuto il pulsante (3) sul trasmettitore. 4. Posizionare l’interruttore On/Off (1) su ON e attendere finché la diventa fissa e il numero dell’unità Bimbo lampeggia sul display. (All’occorrenza, ripetere l’operazione con l’Unità...
- Page 57 B/ RICEVITORE 1. Configurazione della funzione di allarme « Fuori portata » e dell’allarme di temperatura a. Posizionare l’interruttore On/Off (11) su ON per accendere il display LCD. Mantenere premuto il pulsante « Menu » (14) per almeno 5 secondi per accedere alla modalità di programmazione. Ecco ciò che compare sul display: ■...
- Page 58 b. Utilizzare i pulsanti (12) (13) ▲▼ per configurare la funzione di allarme « Fuori portata », la configurazione deve essere identica a quella del trasmettitore. Nel caso in cui la configurazione sia differente, l’allarme può attivarsi senza ragione oppure, al contrario, non attivarsi anche se il ricevitore non è più a portata del trasmettitore.
- Page 59 Display che visualizza le Display che visualizza informazioni dell’Unità le informazioni dell’Unità bimbo n°2 (Allarme « Fuori bimbo n°1 (Allarme portata » disattivato e luce « Fuori portata » attivato) notturna regolata su VOX) 8. Il ricevitore è dotato di una funzione vibratore. Posizionare l’interruttore On/Off (11) sulla posizione vibratore, sul display compare l’icona .
- Page 60 GUIDA DI RISOLUZIONE DEI GUASTI Problema Cause possibili Soluzione • Il ricevitore è spento. • Accendere il ricevitore. • La sensibilità del microfono è troppo bassa. • Aumentare la sensibilità del microfono per • Il trasmettitore non trasmette. mezzo del pulsante « Alto » (2). •...
- Page 61 NÁVOD K POUŽITÍ Děkujeme, že jste si vybrali naši dětskou chůvičku Premium Care. Doporučujeme pečlivě pročíst tento návod, abystemohli přístroj využívat co nejlépe a nejdéle. Pokud však zjistíte závadu nebo budete mít jakýkoli problém, obraťte se prosímna naši společnost. DŮLEŽITÉ: Tato dětská chůvička využívá napájení s nízkýmvyzařováním, aby chránila zdraví dítěte. Aby se omezily emise rádiového záření...
- Page 62 • Elektrická a elektronická zařízení je třeba vyhazovat do Tento symbol označuje v celé Evropské unii, že tříděného odpadu. Elektrický a elektronický odpad daný výrobek nelze vyhodit do popelnice nebo nevyhazujte do netříděného komunálního odpadu, ale do směsného komunálního dopadu, ale do do zvláštních kontejnerů...
- Page 63 NAPÁJENÍ PŘÍSTROJE A/ VYSILAC 1. Funkce na baterie (nejsou součástí výrobku) Zatlačte na uzávěr prostoru na baterie a odsuňte kryt ve vyznačeném směru. Do prostoru na baterie vložte 3 alkalické baterie typu AAA. Dodržte označení polarity (+/-). Uzavřete krytem. POZNÁMKA. Pro optimální výkon přístroje je doporučeno nemíchat nové baterie s použitými a nabíjecí baterie s alkalickými.
- Page 64 2. Otočte vypínač zapnuto/vypnuto (11) na ON a vyčkejte až začne blikat ■ STABILNÍ na displeji. ■ BLIKÁNÍ 3. Dlouze stiskněte tlačítko (3) na vysílači. 4. Otočte vypínač zapnuto/vypnuto (1) na ON vyčkejte až symbol přestane blikat a začne blikat číslo světelné kontrolky « Dítě » na displeji. ( V případě potřeby zopakujte i pro přístroj «...
- Page 65 B/ PRIJIMAC 1. Nastavení výstražného signálu « Mimo dosah » a signálu teploty a. Otočením tlačítka zapnuto/vypnuto (11) na ON se rozsvítí displej LCD. Stlačením tlačítka « Menu » (14) po dobu 5 vteřin vstoupíte do režimu programování. Na displeji se zobrazí : ■...
- Page 66 b. Pomocí tlačítek (12) (13) ▲▼ nastavte funkci výstražného signálu « Mimo dosah ». Nastavení musí být identické nastavení této funkce na vysílači. Pokud bude nastavení rozdílné, může dojít ke spuštění signálu bez příčiny anebo se naopak signál neozve v případě, kdy bude přijímač mimo dosah vysílače. Pokud přístroj pracuje se 2 vysílači, nastavení...
- Page 67 8. Přijímač je vybaven vibrační funkcí. Otočte tlačítko zapnuto/vypnuto (11) na vibrační funkci. Na displeji se objeví symbol . Vibrační funkce je spuštěna v okamžiku, kdy hlas dítěte dosáhne určité intenzity. Funkce je vhodná pro chvíle, kdy se rodiče nachází v hlučném prostředí (př. hluk vysavače). Pro úsporu energie není doporučeno používat vibrační...
- Page 68 ODSTRANĚNÍ PORUCH Závada Možné příčiny Řešení • Přijímač je vypnutý. • Zapněte přijímač. • Citlivost mikrofonu je nastavena na minimum. • Zvyšte citlivost mikrofonu pomocí tlačítka • Vysílač nevysílá. « Výše » (2). • Baterie jsou vybité anebo není správně •...
- Page 69 16, rue Jacqueline Auriol Parc Industriel des Gravanches 63051 Clermont Ferrand cedex 2 France Declare that the following product: Model: Babyphone Premium Care Reference: A014200 Mode l: BC-52 is in conformity with the following relevant harmonised: EMC: EN 301489-1 V1.9.2 EN 301489-3 V1.4.1 Radio: EN 300220-1 V2.4.1...
- Page 70 • Nous vous rappelons que vous disposez d'un droit d'accès, de modification, de rectification et de suppression des données qui vous concernent (art. 34 de la loi "Informatique et Libertés" du 6 janvier 1978). Pour exercer ce droit, adressez-vous à Babymoov - 16, rue Jacqueline Auriol - 63051 Clermont-Ferrand cedex 2.
Need help?
Do you have a question about the A014200 and is the answer not in the manual?
Questions and answers