Table of Contents
Advertisement
Available languages
Available languages
Electric Start Capable
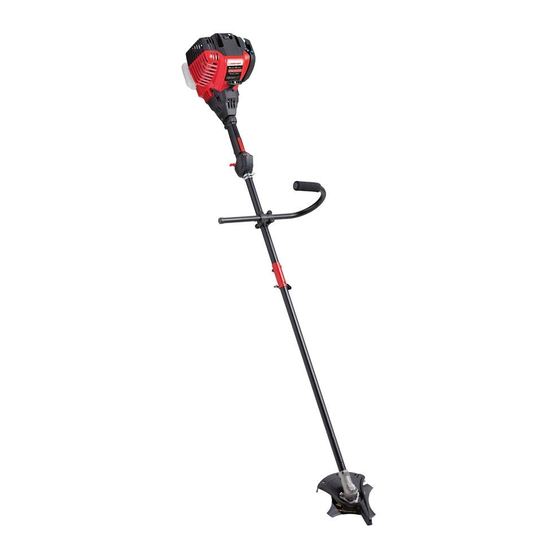
4-Cycle Gas Trimmer/Brushcutter
TB590 EC
769-07396 P00
Operator's Manual
TABLE OF CONTENTS
Service Information . . . . . . . . . . . . . . . . . . . . . . . . . . . . . . . . . . . . . . . . . . . .1
Rules for Safe Operation . . . . . . . . . . . . . . . . . . . . . . . . . . . . . . . . . . . . . . .2
Know Your Unit . . . . . . . . . . . . . . . . . . . . . . . . . . . . . . . . . . . . . . . . . . . . . . .4
Assembly Instructions . . . . . . . . . . . . . . . . . . . . . . . . . . . . . . . . . . . . . . . . .4
Oil and Fuel Information . . . . . . . . . . . . . . . . . . . . . . . . . . . . . . . . . . . . . . . .5
Starting and Stopping Instructions . . . . . . . . . . . . . . . . . . . . . . . . . . . . . . . .6
Operating Instructions . . . . . . . . . . . . . . . . . . . . . . . . . . . . . . . . . . . . . . . . .6
Maintenance and Repair Instructions . . . . . . . . . . . . . . . . . . . . . . . . . . . . . .7
Cleaning and Storage . . . . . . . . . . . . . . . . . . . . . . . . . . . . . . . . . . . . . . . . . .9
Optional Accessory . . . . . . . . . . . . . . . . . . . . . . . . . . . . . . . . . . . . . . . . . .10
Troubleshooting Chart . . . . . . . . . . . . . . . . . . . . . . . . . . . . . . . . . . . . . . . .10
Specifications . . . . . . . . . . . . . . . . . . . . . . . . . . . . . . . . . . . . . . . . . . . . . . .10
Warranty Information . . . . . . . . . . . . . . . . . . . . . . . . . . . . . . . . . . . . . . . . .24
SAVE THESE INSTRUCTIONS
SERVICE INFORMATION
DO NOT RETURN THIS UNIT TO THE RETAILER. PROOF OF PURCHASE
WILL BE REQUIRED FOR WARRANTY SERVICE.
For assistance regarding the assembly, controls, operation or maintenance of
the unit, please call the Customer Support Department at 1-800-828-5500 in
the United States or 1-800-668-1238 in Canada. Additional information about
the unit can be found on our website at www.troybilt.com or www.troybilt.ca.
For service, please call the Customer Support Department to obtain a list of
authorized service dealers near you. Service on this unit, both within and after
the warranty period, should only be performed by an authorized and approved
service dealer. When servicing, use only identical replacement parts.
All information, illustrations, and specifications in this manual are based on
the latest product information available at the time of printing. We reserve
the right to make changes at any time without notice.
Copyright© 2012 MTD SOUTHWEST INC, All Rights Reserved.
01/12
Advertisement
Chapters
Table of Contents

Related Manuals for Troy-Bilt TB590 EC


Summary of Contents for Troy-Bilt TB590 EC
-
Page 1: Table Of Contents
Know Your Unit ..........4 TB590 EC Assembly Instructions . -
Page 2: Rules For Safe Operation
RULES FOR SAFE OPERATION SPARK ARRESTOR NOTE • Use only 0.105 inch, 2.67 mm diameter original equipment manufacturer replacement line. Never use metal-reinforced line, wire or rope. These can NOTE: For users on U.S. Forest Land and in the states of California, Maine, break off and become dangerous projectiles. - Page 3 RULES FOR SAFE OPERATION WHILE OPERATING WITH CUTTING BLADE SYMBOL MEANING • Read and understand all safety warnings before operating this unit. • UNLEADED FUEL • Always use the shoulder harness when using the brush blade accessory. Always use clean, fresh unleaded fuel •...
-
Page 4: Know Your Unit
KNOW YOUR UNIT ASSEMBLY INSTRUCTIONS REMOVE AND INSTALL THE CUTTING ATTACHMENT SHIELD Spark Plug APPLICATIONS As a trimmer: Muffler WARNING: The cutting attachment shield should NOT be installed • Cutting grass and light weeds. when operating the unit with a blade. Remove the cutting attachment shield •... -
Page 5: Oil And Fuel Information
ASSEMBLY INSTRUCTIONS OIL AND FUEL INFORMATION REMOVE THE CUTTING BLADE AND INSTALL THE CUTTING ATTACHMENT WARNING: OVERFILLING OIL CRANKCASE MAY CAUSE Remove the Cutting Blade SERIOUS PERSONAL INJURY. Check and maintain the proper oil level Top View 1. Align the shaft bushing hole with the locking in the crank case;... -
Page 6: Starting And Stopping Instructions
OIL AND FUEL INFORMATION STARTING AND STOPPING INSTRUCTIONS FUELING THE UNIT IF USING THE OPTIONAL ELECTRIC STARTER 3. Wipe up any gasoline that may have spilled. OR POWER START BIT™ ACCESSORY 4. Reinstall the fuel cap. NOTE: There is no need to turn the unit on. The On/Off Control is in the ON ( I ) 5. -
Page 7: Maintenance And Repair Instructions
OPERATING INSTRUCTIONS OPERATING INSTRUCTIONS trimming line fully extended. Line release becomes more difficult as the cutting WARNING: Do not sharpen the cutting blade. Sharpening the line becomes shorter. blade can cause the blade tip to break off while in use. This can result NOTE: Do not rest the Bump Head™... - Page 8 MAINTENANCE AND REPAIR INSTRUCTIONS SINGLE LINE INSTALLATION 4. Remove the oil fill plug. Go To Step 8 for SplitLine™ Installation 5. Look into the oil fill hole, use a flashlight if needed. The oil should be just touching the 6. Take approximately 18 feet (6 m) of new inner most thread (Fig.
-
Page 9: Cleaning And Storage
MAINTENANCE AND REPAIR INSTRUCTIONS IDLE SPEED ADJUSTMENT ROCKER ARM CLEARANCE 9. Reinstall the rocker arm cover using a new gasket. Torque the screw to WARNING: The cutting attachment may spin during idle speed 20–30 in•lb (2.2–3.4 N•m). adjustments. Wear protective clothing and observe all safety 10.Check the spark plug and reinstall. -
Page 10: Optional Accessory
OPTIONAL ACCESSORY TROUBLESHOOTING ELECTRIC STARTER AND POWER START BIT™ FEATURES CAUSE ACTION This unit is designed to be started with an optional electric starter or Power ENGINE WILL NOT START Start Bit™ that are sold separately. If choosing to start the unit using one of Empty fuel tank Fill fuel tank with fuel these features or have questions please contact your local retailer or call 1-... - Page 11 Normas para una operación segura ......12 TB590 EC Conozca su unidad ......... . 14 Instrucciones de ensamble .
-
Page 12: Normas Para Una Operación Segura
NORMAS PARA UNA OPERACIÓN SEGURA PARACHISPAS • Limpie el área de corte antes de cada uso. Retire todos los objetos como rocas, vidrios rotos, clavos, alambre o cuerda los cuales pueden ser NOTA: Para los usuarios en tierras forestales de los EE.UU. y en los estados despedidos o enredarse en el accesorio de corte. - Page 13 NORMAS PARA UNA OPERACIÓN SEGURA • Use sólo piezas y accesorios de repuesto del fabricante del equipo original SYMBOLE SIGNIFICADO para esta unidad. Puede obtenerlos en su proveedor de servicio autorizado. El • SIMBOLO DE ALERTA DE SEGURIDAD uso de piezas y accesorios que no son equipo origina; puede causar graves lesiones al operador o el daño de su unidad, y la cancelación de su garantía.
-
Page 14: Conozca Su Unidad
CONOZCA SU UNIDAD INSTRUCCIONES DE ENSAMBLE REMOCIÓN E INSTALACIÓN DEL PROTECTOR ACCESORIO DE CORTE APLICACIONES Bujía de encendido Como recortadora; Silenciador ADVERTENCIA: El protector accesorio de corte NO debe estar • Corte de césped y hierbas delgadas instalado cuando use la unidad con una cuchilla. Saque el protector Mango de la cuerda •... -
Page 15: Información Del Aceite Y Del Combustible
INSTRUCCIONES DE ENSAMBLE INSTRUCCIONES DE ENSAMBLE ADVERTENCIA: ADVERTENCIA: Para evitar graves lesiones personales o el Para evitar graves lesiones personales, daño de la unidad, no arranque ni use esta unidad con la varilla de apague la unidad antes de sacar o instalar accesorios. cierre en la ranura de la varilla de cierre. -
Page 16: Instrucciones De Arranque Y Apagado
INSTRUCCIONES DE ARRANQUE Y APAGADO INFORMACION DEL ACEITE Y DEL COMBUSTIBLE • Use siempre una mezcla fresca de combustible según lo indica su manual 8. Mantenga oprimido el regulador y deje que el motor se caliente durante 30 del operador a 60 segundos. -
Page 17: Instrucciones De Operación
INSTRUCCIONES DE ARRANQUE Y APAGADO INSTRUCCIONES DE OPERACIÓN CONSEJOS PARA OBTENER MEJORES RESULTADOS AL RECORTAR SI VA A UTILIZAR EL ARRANCADOR ELÉCTRICO • Para mejores resultados que recortan, operar la unidad en válvula de O ACCESORIO DE POWER START BIT™ OPCIONAL admisión repleta. -
Page 18: Instrucciones De Mantenimiento Y Reparación
INSTRUCCIONES DE OPERACIÓN INSTRUCCIONES DE MANTENIMIENTO Y REPARACIÓN 5. Verifique el desgaste de los dientes de posición del carrete interior y ADVERTENCIA: No afile la cuchilla de corte. Si afila la cuchilla, la bobina exterior (Fig. 29). Si es necesario, saque la rebaba o cambie el punta puede desprenderse durante su uso. - Page 19 INSTRUCCIONES DE MANTENIMIENTO Y REPARACIÓN INSPECCION DEL NIVEL DE ACEITE MANTENIMIENTO DEL FILTRO DE AIRE PRECAUCION: ADVERTENCIA: Para evitar un desgaste excesivo del motor y el Para evitar graves lesiones personales, apague daño de la unidad, mantenga siempre el nivel de aceite correcto en siempre su recortador y espere que se enfríe antes de limpiarlo o el cárter del cigüeñal.
-
Page 20: Limpieza Y Almacenamiento
INSTRUCCIONES DE MANTENIMIENTO Y REPARACIÓN HUELGO DEL BRAZO OSCILANTE CAMBIO DE LA BUJIA DE ENCENDIDO Esto requiere el desarmado del motor. Si usted siente que no está seguro o Use una bujía de encendido 753-05784 o Champion® RDZ4H. La separación que no está... -
Page 21: Accesorio Opcional
RESOLUCIÓN DE PROBLEMAS ACCESORIO OPCIONAL ARRANCADOR ELÉCTRICO Y ACCESORIO DE ARRANQUE ELÉCTRICO CAUSA ACCIÓN OPCIONAL POWER START BIT™ EL MOTOR NO ARRANCA Esta unidad está diseñada para utilizarse, de forma opcional, con un arrancador eléctrico o con un accesorio de arranque Power Start Bit™, los El tanque de combustible está... - Page 22 NOTES...
- Page 23 NOTES...
-
Page 24: Warranty Information
Troy-Bilt LLC concede la garantía limitada establecida debajo para mercancías nuevas que sean compradas y usadas en los Estados Unidos, sus posesiones y territorios. Troy-Bilt LLC garantiza este producto contra defectos en el material y la mano de obra durante un período de dos (2) años, a partir de la fecha de compra original y a su entera discreción, arreglará...
Need help?
Do you have a question about the TB590 EC and is the answer not in the manual?
Questions and answers