Table of Contents
Advertisement
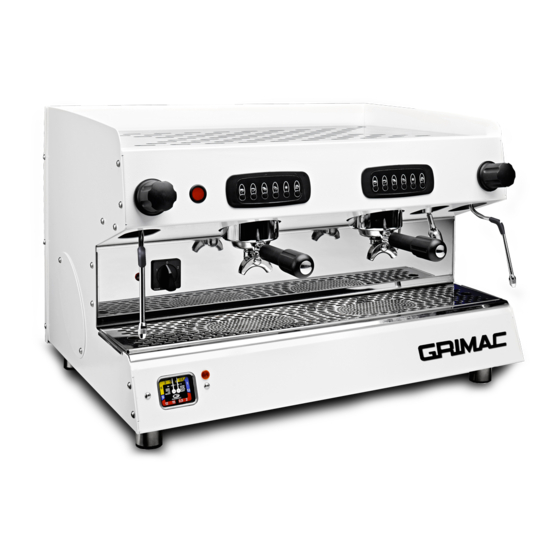
G 11
ISTRUZIONI PER L'USO
OPERATING INSTRUCTIONS
INSTRUCTIONS POUR L'EMPLOI
Leggere attentamente queste istruzioni d'uso
Read these instructions carefully
Lire attentivement ces instructions d'emploi
prima di utilizzare la macchina
before using the machine
avant d'utiliser la machine.
Istruzioni originali
Translates of the
Traduction des
original instrunctions
Instructions Originales
GEBRAUCHSANLEITUNGEN
INSTRUCCIONES PARA EL USO
Aufmerksam die folgenden Anleitungen vor
Leer atentamente estas instrucciones de uso
dem Gebrauch der Maschine lesen.
ntes de usar la máquina.
Übersetzung der
Traducción de las
Instrucciones Originales
Originalanleitungen
Advertisement
Table of Contents

Subscribe to Our Youtube Channel
Related Manuals for Grimac G 11


Summary of Contents for Grimac G 11
-
Page 1: Operating Instructions
G 11 ISTRUZIONI PER L’USO OPERATING INSTRUCTIONS INSTRUCTIONS POUR L’EMPLOI Leggere attentamente queste istruzioni d’uso Read these instructions carefully Lire attentivement ces instructions d’emploi prima di utilizzare la macchina before using the machine avant d’utiliser la machine. Istruzioni originali Translates of the... - Page 2 Dear Customer, GRIMAC S.p.A. would like to thank you for your choice and guarantees the highest quality of your purchase.
-
Page 3: Table Of Contents
INDEX 1 INTRODUCTION....29 5 INSTALLATION ....38 1.1 Constructor......29 5.1 Assembly-Siting ....38 1.2 Authorized personnel ...29 5.2 Packing disposal ....39 1.3 Manual structure ....29 5.3 Water Network Connector ..39 1.3.1 Aim and contents ....29 5.4 Electrical connection ....39 1.3.2 Recipients .......29 1.3.3 Storage ........29... - Page 4 8 CLEANING AND MAINTENANCE .... 45 8.1 Daily cleaning.......45 8.2 Weekly cleaning ....45 8.3 Periodic Maintenance ...46 9 DEMOLITION ...... 46 10 PROBLEMS - REMEDIES ..46...
-
Page 6: Introduction
1 INTRODUCTION 1.3 Manual structure The information in this Manual must be carefully read by the 1.1 Constructor Customer. Grimac S.p.A. - Via Morazzo, 2 - 40069 Zola Predosa (Bologna) - Italy 1.3.1 Aim and contents ): +39 051 6167069 This Manual aims to provide all information necessary for : +39 051 750996... -
Page 7: Signs Used
1.4 Warranty In the event the manual is damaged or lost, immediately request another copy from The guarantee is valid for 12 months and extends to all me- the manufacturer or the authorized dis- chanical parts of the machine. It is annulled if the equipment tributor of the Country where the appli- is not utilised in the appropriate way or is tampered with. -
Page 8: Appliance Description
2 APPLIANCE DESCRIPTION 2.1 Appliance use Your purchased machine for professional use is suitable for producing coffee, hot water and steam. 2.2 Main components The main components of the appliance are listed below: 1) Removable warming plate for saucers and cups 2) Cup warmer (optional) 3) Control panel (see section. -
Page 9: Equipment
2.3 Equipment 1) 2- cup filter holder 6) Filter-fastening ring 2) 1 -cup filter holder 7) Drain hose 3) 2- cup filter 8) Filling hose 4) 1- cup filter 9) Hose clamp 5) Blind filter... -
Page 10: Technical Specifications
2.4 Technical specifications The technical specifications and features are listed below: G 11 G 11 Model (2 groups) (3 groups) Dimensions L x P x A - (mm). 710 x 580 x 510 950 x 58 0 x 510 Weight (kg) (empty appliance). Max absorbed power (W). See technical detail plate on the bottom of the appliance Working voltage (V). -
Page 11: Control Panel
2.5 Control panel 2.5.1 Push button version Switch for dispensing Switch for dispensing coffee – left unit coffee – right unit G 11 (2 groups) Cup warmer ON/OFF Hot water key (where foreseen) dispensing key Steam dispensing knob Steam dispensing knob... -
Page 12: Electronic Version
2.5.2 Electronic version Dispensation of 2 cups of espresso coffee Long coffee Hot water G 11 (2 groups) dispenser dispenser Espresso coffee Continuous and dispenser programming of dispensing coffee Cup warmer ON/OFF key (where foreseen) Dispensation of 2 cups of... -
Page 13: Safety
3 SAFETY - To carry out any technical modification to the appli- ance; 3.1 General Safety Rules - To dip the appliance into any kind of liquid; - To clean the appliance by means of water jet; • The coffee machine is for professional use.Technical - To use the appliance in different ways than the ones modifications and any misuse are not allowed owing to described in the manual;... -
Page 14: Identification
3.3 Identification 4.2 Transport and handling Each machine is identified by the technical data nameplate Make sure nobody stands within the work- and EC marking on the front of the machine. ing area of the load lifting and handling The plate contains the essential data regarding installation, procedures and, in difficult conditions, pre- moving, use, maintenance and demolition which can be dispose personnel in charge of checking the... -
Page 15: Installation
5 INSTALLATION All the operations described in section 5 must be performed exclusively by special- ised technicians who shall organise all op- erating sequences and employ suitable means to ensure strict compliance with the safety regulations in force. 20 cm The machine must be installed inside a lit, ventilated build- ing with a solid paved, levelled (below 2°... -
Page 16: Packing Disposal
5.2 Packing disposal 5.4 Electrical connection When opening the packing it is recommended to separate Such operation must be carried out in com- pliance with the safety rules of the Country the various material used and to dispose of them in compli- ance with the current standards in the Country of destina- of installation. -
Page 17: Functioning
6 FUNCTIONING • Once the loading has finished, position the selector switch to the “2” position and wait 30 minutes for the Before proceeding with the start-up, you must check that all machine to heat up. parts are properly installed. During this period, you should operate the steam knobs and the dispensing group buttons, for few seconds, to Check that:... -
Page 18: Coffee
6.2 Coffee 6.2.2 Dispensing coffee (key machine) On every Grimac appliance, the coffee dispensing procedure After loading the filter holder, dispense the coffee. For man- is easy and quick; a delicious coffee can be tasted after few ual machines, controlling the quantity of coffee in a small steps. cup depends on the operator’s sensitivity. -
Page 19: Coffee Brewing
6.2.3 Coffee Brewing This button allows you to stop espresso coffee and long cof- fee dispensing at any moment. (electronic machine) After loading the filter holder, dispense the coffee. In elec- When brewing ends, leave the filter holder in its seat until tronic machines, controlling the amount of coffee brewed in the next time you use it. -
Page 20: Dispensation Of Hot Water (Key Machine)
6.4 Steam 6.3.1 Dispensation of hot water (key machine) Danger of being burnt! At the start of the After positioning the container, dispensing, short spurts of hot water and/ push the hot water dispensing or steam may come out. switch. The switch is positioned above the Danger of being burnt! The wand can reach hot water dispensation wand. -
Page 21: Cup Warmer (Optional)
7 PROGRAMMING MENU 6.5 Cup warmer (optional) Attention: do not cover the cup warmer (ELECTRONIC MACHINE) plate with a cloth. Machines with electronic control panel allow programming the quantity of coffee and hot water dispensed by simply touching a button. Machines can be equipped with a cup-warming plate for the storage and heating up of the cups. -
Page 22: Cleaning And Maintenance
8 CLEANING AND MAINTENANCE 8.2 Weekly cleaning Clean the groups and the brew head filters: The cleaning and maintenance of the ex- a) Approximately put a spoonful of the machine’s deter- ternal components of the machine must be gent (the most suitable product for cleaning the units carried out with the main selector switch in and the water dispensers of coffee machines) into the the “1”... - Page 23 8.3 Periodic Maintenance 9 DEMOLITION The machine needs to be periodically Electrical and electronic equipment must checked - at least once a year - by a special- be disposed of in accordance with the Euro- ised technician. pean Directive 2002/96/CE. This periodic checking maintains a high This equipment must NOT be disposed of safety level for all the installed parts and...
- Page 24 Grimac S.p.A. – Via Morazzo, 2 -40069 Zola Predosa (Bologna) Italy – Tel. +39 051 6167069 – Fax +39 051 750996 Web site: www.grimac.net, e.mail: info@grimac.net...
Need help?
Do you have a question about the G 11 and is the answer not in the manual?
Questions and answers