Chapters
Table of Contents

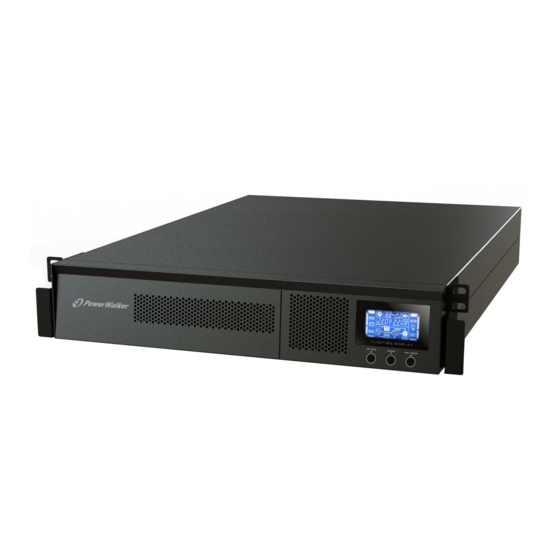
Related Manuals for PowerWalker VFI 1000RM LCD


Summary of Contents for PowerWalker VFI 1000RM LCD
- Page 1 Online UPS PowerWalker VFI 1000RM LCD PowerWalker VFI 1500RM LCD PowerWalker VFI 2000RM LCD PowerWalker VFI 3000RM LCD User Manual (EN, ES, DE, FR, IT, PT, RU, PL) Uninterruptible Power Supply System...
-
Page 2: Table Of Contents
Table of Contents 1. Important Safety Warning………………………………………………… 1-1. Transportation 1-2. Preparation 1-3. Installation 1-4. Operation 1-5. Maintenance, service and faults 2. Installation and setup…………………………………………………….. 2-1. Rear panel view 2-2. Rack-mounted the UPS 2-3. Setup the UPS 2-4. Battery replacement 2-5. Battery kit assembly (option) 3. -
Page 3: Important Safety Warning
1. Important Safety Warning Please comply with all warnings and operating instructions in this manual strictly. Save this manual properly and read carefully the following instructions before installing the unit. Do not operate this unit before reading through all safety information and operating instructions carefully 1.1. -
Page 4: Maintenance, Service And Faults
1.5. Maintenance, service and faults The UPS system operates with hazardous voltages. Repairs may be carried out only by qualified maintenance personnel. Caution - risk of electric shock. Even after the unit is disconnected from the mains (building wiring outlet), components inside the UPS system are still connected to the battery and electrically live and dangerous. -
Page 5: Installation And Setup
2. Installation and setup NOTE: Before installation, please inspect the unit. Be sure that nothing inside the package is damaged. Please keep the original package in a safe place for future use. NOTE: There are two different types of online UPS: standard and long-run models. Please refer to the following model table. -
Page 6: Setup The Ups
2.3. Setup the UPS Step 1: Connect battery wires For safety consideration, the UPS is shipped out from factory without connecting battery wires. Before install the UPS, please follow below steps to re-connect battery wires first. Step 1 Step 2 Step 3 Remove front panel. - Page 7 The UPS is equipped with intelligent slot perfect for either SNMP or AS400 card. When installing either SNMP or AS400 card in the UPS, it will provide advanced communication and monitoring options. PS. USB port and RS-232 port can’t work at the same time. Step 5: Network connection Network/Fax/Phone surge port Connect a single modem/phone/fax line into surge-protected “IN”...
-
Page 8: Battery Replacement
2.4 Battery replacement NOTICE: This UPS is equipped with internal batteries and user can replace the batteries without shutting down the UPS or connected loads.(hot-swappable battery design) Replacement is a safe procedure, isolated from electrical hazards. CAUTION!! Consider all warnings, cautions, and notes before replacing batteries. Note: Upon battery disconnection, equipment is not protected from power outages. -
Page 9: Battery Kit Assembly (Option)
Step 8 Put the front panel back to the unit. 2.5 Battery kit assembly (option) NOTICE: Please assemble battery kit first before installing it inside of UPS. Please select correct battery kit procedure below to assemble it. 2-battery kit Step 1: Remove adhesive tapes. Step 2: Connect all battery terminals by following below chart. - Page 10 4-battery kit Step 1: Remove adhesive tapes. Step 2: Connect all battery terminals by following below chart. Tapes Tapes Step 3: Put assembled battery packs on Step 4: Cover the other side of plastic shell as one side of plastic shells. below chart.
-
Page 11: Operations
3. Operations 3.1. Button operation Button Function Turn on the UPS: Press and hold ON/Mute button for at least 2 seconds to turn on the UPS. Mute the alarm: When the UPS is on battery mode, press and hold this button for at least 5 seconds to disable or enable the alarm system. - Page 12 Display Function Backup time information Indicates the remaining backup time in pie chart. Indicates the remaining backup time in numbers. H: hours, M: minute, S: second Fault information Indicates that the warning and fault occurs. Indicates the warning and fault codes, and the codes are listed in details in 3-5 section.
-
Page 13: Audible Alarm
3.3. Audible Alarm Battery Mode Sounding every 4 seconds Low Battery Sounding every second Overload Sounding twice every second Fault Continuously sounding Bypass Mode Sounding every 10 seconds 3.4. LCD display wordings index Abbreviation Display content Meaning Enable Disable Escape High loss Low loss Battery... - Page 14 01: Output voltage setting Interface Setting Parameter 3: Output voltage For 200/208/220/230/240 VAC models, you may choose the following output voltage: 200: present output voltage is 200Vac 208: present output voltage is 208Vac 220: present output voltage is 220Vac 230: present output voltage is 230Vac 240: present output voltage is 240Vac For 100/110/150/120/127 VAC models, you may choose the following output voltage:...
- Page 15 06: Bypass enable/disable when UPS is off Interface Setting Parameter 3: Enable or disable Bypass function. You may choose the following two options: ENA: Bypass enable DIS: Bypass disable 07: Bypass voltage range setting Interface Setting Parameter 2 & 3: Set the acceptable high voltage point and acceptable low voltage point for Bypass mode by pressing the Down key or Up key.
-
Page 16: Operating Mode Description
3.6. Operating Mode Description Operating mode Description LCD display Online mode When the input voltage is within acceptable range, UPS will provide pure and stable AC power to output. The UPS will also charge the battery at online mode. ECO mode Energy saving mode: When the input voltage is within voltage regulation range, UPS will bypass... -
Page 17: Faults Reference Code
3.7. Faults Reference Code Fault event Fault code Icon Fault event Fault code Icon Bus start fail Inverter voltage Low Bus over Inverter output short Bus under Battery voltage too high Bus unbalance Battery voltage too low Inverter soft start fail Over temperature Inverter voltage high Over load... -
Page 18: Troubleshooting
4. Troubleshooting If the UPS system does not operate correctly, please solve the problem by using the table below. Symptom Possible cause Remedy No indication and alarm even The AC input power is not Check if input power cord though the mains is normal. connected well. -
Page 19: Storage And Maintenance
Symptom Possible cause Remedy Fault code is shown as 14 and shut down Check output wiring and if automatically because connected devices are in the icon is lighting on short circuit occurs on the short circuit status. display alarm UPS output. continuously sounding. -
Page 20: Specifications
6. Specifications MODEL 1000 1500 2000 3000 CAPACITY* 1000 VA / 800 W 1500 VA / 1200 W 2000 VA / 1600 W 3000 VA / 2400 W INPUT 80VAC/70VAC/60VAC/50VAC ± 5% or 160VAC/140VAC/120VAC/110VAC ± 5% Low Line Transfer ( based on load percentage 100% - 80 % / 80 % - 70 % / 70 - 60 % / 60 % - 0) Voltage Low Line Comeback 85VAC/75VAC/65VAC/55VAC ±... - Page 21 SAI Online PowerWalker VFI 1000RM LCD PowerWalker VFI 1500RM LCD PowerWalker VFI 2000RM LCD PowerWalker VFI 3000RM LCD Manual de usuario Sistema de Alimentación Ininterrumpida...
- Page 22 INDICE 1. Aviso importante sobre seguridad …………………………………... 1.1. Transporte 1.2. Preparación 1.3. Instalación 1.4. Funcionamiento 1.5. Mantenimiento y reparación 2. Instalación y configuración ……………………………………....2.1. Vista del panel posterior 2.2. Montaje en rack del SAI 2.3. Configuración del SAI 2.4. Sustitución de baterías 2.5.
-
Page 23: Aviso Importante Sobre Seguridad
1. Aviso importante sobre seguridad Siga estrictamente todas las advertencias e instrucciones de este manual. Guarde este manual y lea atentamente las siguientes instrucciones antes de instalar la unidad. No utilice este aparato sin antes leer con atención toda las instrucciones y la información sobre seguridad. -
Page 24: Mantenimiento Y Reparación
1.5. Mantenimiento y reparación El SAI funciona con voltajes peligrosos. Cualquier reparación debe ser realizada exclusivamente por personal cualificado. Precaución - Riesgo de descarga eléctrica. Incluso después de desconectarse de la red, el cableado interno continúa conectado a la batería y la tensión es peligrosa. Antes de realizar cualquier tipo de servicio y/o mantenimiento, desconecte las baterías, verificando que no haya corriente ni exista riesgo de voltaje, incluidas las creadas por los condensadores de alta capacidad. -
Page 25: Instalación Y Configuración
2. Instalación y configuración NOTA: Antes de la instalación, por favor, compruebe la unidad. Asegúrese de que no haya nada dañado en el interior del embalaje. Por favor, mantenga el embalaje original en un lugar seguro para un futuro uso. NOTA: Hay dos tipos diferentes de SAI On-line Rack: estándar y de larga autonomía. -
Page 26: Configuración Del Sai
2.3. Configuración del SAI Paso 1: Conexión de las baterías Por razones de seguridad, el SAI viene embalado de fabrica con las baterias desconectadas. Antes de conectar el SAI, por favor siga los siguientes pasos para conectar las baterías. Paso 1 Paso 2 Paso 3 Quite el panel frontal... - Page 27 puerto USB/RS-232 del SAI. Con el software de control instalado en su PC, puede programar el encendido / apagado del SAI y controlar su estado a través del PC. El SAI está equipado con una ranura (slot) para tarjetas inteligentes AS400 o SNMP para tener una comunicación avanzada o una mejor opción de controlar el SAI.
- Page 28 2.4. Cambio de baterías NOTA: El SAI está equipado con baterías internas y el usuario puede reemplazarlas sin necesidad de desconectar las cargas conectadas al SAI (extracción de baterías en caliente). ¡¡PRECAUCIÓN!! La sustitución es un procedimiento seguro y desprovisto de peligros electricos, aún así, tome en consideración todas las advertencias, precauciones y notas antes de reemplazar las baterias.
-
Page 29: Kit De Baterías (Opcional)
Paso 7 Coloque nuevamente el panel frontal. 2.5. Kit de baterías adicional (opcional) AVISO: Por favor ensamble el kit de baterías primero, antes de colocarlo en el SAI. Seleccione el procedimiento correcto dependiendo del tipo de kit para colocar las baterías. Kit de 2 baterías Paso 1: Quite las cintas adhesivas. - Page 30 Kit de 4 baterías Paso 1: Quite las cintas adhesivas. Paso 2: Conecte todos los terminales de las baterías tal como se muestra en el gráfico. Adhesivos Adhesivos Paso 3: Coloque las baterías sobre uno de los Paso 4: Cubra el otro lado con la tapa del kit de laterales de la carcasa de plástico.
-
Page 31: Operaciones
3. Operaciones 3.1. Botones de funcionamiento Botón Función Encender el SAI. Mantenga pulsado el botón ON/Mute durante 2 segundos para encender el SAI. Silenciar la alarma: Cuando el SAI entra en modo batería, mantenga pulsado el botón durante al menos 5 segundos para activar o desactivar el sistema de alarma. - Page 32 Display Función Información del tiempo de autonomía Indica el tiempo de autonomía con reloj analógico Indica el tiempo de autonomía con reloj digital. H: horas, M: minutos, S: segundos Información del error Indica una alarma de aviso y de error. Indica el código del aviso y del error, detallados en la sección 3.5.
-
Page 33: Alarma Acústica
3.3. Alarma acústica Modo batería Sonido cada 4 segundos Batería baja Sonido cada segundo Sobrecarga Dos sonidos cada segundo Avería Sonido continuado Modo bypass Sonido cada 10 segundos 3.4. Indicación del display LCD Abreviaturas Indicación del Display Significado Habilitado Deshabilitado Escape Fuerte pérdida Pérdida baja... - Page 34 01: Ajuste de la tensión de salida Interfaz Configuración Voltaje de salida (Parámetro 3) Para los modelos 200/208/220/230/240 VAC, se puede elegir el voltaje de salida siguiente: 200: la tensión de salida es de 200Vac 208: la tensión de salida es de 208Vac 220: la tensión de salida es de 220Vac 230: la tensión de salida es de 230Vac 240: la tensión de salida es de 240Vac...
- Page 35 06: Bypass activado / desactivado cuando el SAI está OFF Interfaz Configuración Parámetro 3: Activa o desactiva la función del bypass. Puede elegir entre las siguientes dos opciones: ENA: Bypass activado DIS: Bypass desactivado 07: Configuración del rango de voltaje del Bypass Interfaz Configuración Parámetros 2 y 3: Ajusta los límites aceptables de alto y bajo...
-
Page 36: Descripción Del Modo Operativo
3.6. Descripción del modo operativo Modo operativo Descripción Display LCD Modo Online Cuando el voltaje de entrada está dentro del rango aceptable, el SAI proporcionará una corriente alterna (AC) de salida limpia y estable. Al mismo tiempo, el SAI carga la batería en modo online. -
Page 37: Indicadores De Alerta
3.7. Código errores Causa del fallo Nº error Icono Causa del fallo Nº error Icono No se enciende Volt.inverter bajo Volt. Entrada alto Corto inverter salida Volt. Entrada bajo Volt. Batería alto Entrada no balanceada Volt. Batería bajo Error arranque Inverter Sobrecalentamiento Volt. -
Page 38: Solución De Problemas
4. Solución de problemas Si el SAI no funciona correctamente, por favor, resuelva el problema utilizando el cuadro siguiente. Síntoma Posibles causas Remedio Sin indicación ni alarma, incluso La entrada de red AC no Compruebe si el cable de si la alimentación es normal. está... -
Page 39: Almacenamiento Y Mantenimiento
Síntoma Posibles causas Remedio Código de error 14, el icono El SAI se ha apagado Compruebe el cableado y automáticamente, como dispositivos parpadea en el display resultado corto conectados a la salida del alarma suena circuito a la salida del SAI. SAI están en cortocircuito. -
Page 40: Especificaciones
6. Especificaciones MODELO 1000 1500 2000 3000 CAPACIDAD* 1000 VA / 800 W 1500 VA/ 1200W 2000 VA / 1600 W 3000 VA / 2400 W ENTRADA 80VAC/70VAC/60VAC/50VAC ±5% o 160VAC/140VAC/120VAC/110VAC ±5% Volt. transferencia baja ( basado en % de carga: 100% - 80 % / 80 % - 70 % / 70 - 60 % / 60 % - 0) Rango Volt. - Page 41 Online USV PowerWalker VFI 1000RM LCD PowerWalker VFI 1500RM LCD PowerWalker VFI 2000RM LCD PowerWalker VFI 3000RM LCD Bedienungsanleitung Unterbrechungsfreie Stromversorgung...
- Page 42 Inhaltsverzeichnis 1. Wichtige Sicherheitshinweise…………………………………....1.1. Transport 1.2. Vorbereitung 1.3. Installation 1.4. Betrieb 1.5. Instandhaltung, Service und Fehlerbehebung 2. Installation und Aufbau……………………………………......2.1. Hintere Konsolenansicht 2.2. Rack-montage 2.3. Das UPS anschließen 2.4. Batterie austaschen 2.5. Batterie-Kit Montage (optional) 3. Betrieb………………………………………………………………….... 10 3.1.
-
Page 43: Wichtige Sicherheitshinweise
1. Wichtige Sicherheitshinweise Bitte beachten Sie strikt alle Warnhinweise und Bedienungsanleitungen in diesem Handbuch. Verwahren Sie diese Anleitung gut auf und lesen sorgfältig die folgenden Anweisungen, bevor Sie das Gerät installieren. Nehmen Sie das Gerät nicht vor dem Lesen aller Sicherheitsinformation und Betriebsanleitungen in Betrieb. -
Page 44: Instandhaltung, Service Und Fehlerbehebung
1.5. Instandhaltung, Service und Fehlerbehebung Der Betrieb des UPS erfolgt mit gefährlichen Spannungen. Reparaturen dürfen nur von qualifizierten Personen durchgeführt werden. Achtung – Stromschlaggefahr. Selbst wenn das Gerät ausgesteckt ist, sind Teile des UPS immer noch mit dem Akku verbunden und stehen unter Strom. Vor jeder Art von Service und/oder Instandhaltungsmaßnahmen klemmen Sie die Akkus ab und vergewissern sich, dass keine gefährliche Spannung mehr an den Verbindungen der Superkondensatoren wie den BUS-Kondensatoren auftritt. -
Page 45: Installation Und Aufbau
2. Installation und Aufbau HINWEIS: Bitte inspizieren Sie das Gerät vor der Installation. Vergewissern Sie sich, dass kein Teil beschädigt ist. Bitte bewahren Sie die original Verpackung für weiteren Gebrauch auf. HINWEIS: Es gibt zwei unterschiedliche Arten von Online-UPS: Standard and Long-run Modelle. - Page 46 Schritt 1 Schritt 2 Schritt 3 Entfernen Sie die Frontplatte Verbinden Setzen Sie die Frontplatte wieder Eingang und schließen Sie die auf das Gerät Batterie Kabel wieder an. Schritt 2: UPS Eingangsstecker Stecken Sie das UPS nur in eine zweipolige, dreiadrige, geerdete Steckdose. Vermeiden Sie die Verwendung von Verlängerungsschnüren.
- Page 47 Das UPS ist mit einem Intelligent Slot ausgestattet für entweder eine SNMP oder AS400 Karte. Die SNMP oder AS400 Karte biete erweiterte Kommunikations- und Überwachungsoptionen. Anmerkung: der USB-Port und RS-232-Port können nicht gleichzeitig betrieben werden. Schritt 5: Netzwerkverbindung Netzwerk/Fax/Modem Überspannungsschutz Stecken Sie ein einfaches Modem/Telefon/Fax Kabel in den mit Überspannungsschutz versehenen “IN”...
- Page 48 2.4 Batterie ausstauschen HINWEIS: Diese USV ist mit internen Batterien ausgestattet. Der Benutzer kann Batterien bei laufendem Betrieb des UPS oder angeschlossenen Verbrauchern (Hot-Swap-Design) zu ersetzen. Der Austausch ist ein sicheres Verfahren, ohne elektrische Gefahren. ACHTUNG!! Betrachten Sie alle Warnhinweise und Notizen vor einem Batteriewechsel. Hinweis: Wenn die Batterie abgeklemmt ist, sind die Geräte nicht mehr vor Stromausfällen geschützt.
-
Page 49: Batterie-Kit Montage (Optional)
Schritt 8 Setzen Sie die Frontplatte wieder auf das Gerät 2.5 Batterie-Kit Montage (optional) HINWEIS: Bitte montieren Sie die Batterie-Kit vor der Installation der Batterien in der USV. Wählen Sie das richtige Verfahren für den Zusammenbau der Batterie-Kit unten beschrieben. 2-Batterie-Kit Schritt 1: Entfernen Sie die Klebebänder. - Page 50 4-Batterie-Kit Schritt 1: Entfernen Sie die Klebebänder. Schritt 2: Schließen Sie alle Batterieklemmen nach dem unten Diagramm. Klebeband Klebeband Shcritt 3: Setzen Sie den Akkupack auf der Schritt 4: Decken Sie die Batterie mit dem anderen einen Seite des Kunststoff-Gehäuse. Ende der Kunststoff als unten Zeichnung.
-
Page 51: Betrieb
3. Betrieb 3.1. Tastenbedienung Taste Funktion Anschalten des UPS: Drücken und halten Sie die ON/Mute Taste für mindesten 2 Sekunden, um das UPS einzuschalten. Stummschaltung des Alarms: Sobald das UPS im Akkubetrieb ist, drücken und halten Sie diese Taste für mindesten 5 Sekunde um den Alarm an oder auszuschalten. - Page 52 Anzeige Funktion Laufzeit Zeigt die verbleibende Laufzeit als Diagramm an. Zeigt die verbleibende Laufzeit als Zahl an. H: Stunde, M: Minute, S: Sekunde Fehlermeldung Zeigt Warnungen und Fehler an. Zeigt Warnung- und Fehlerkodierung an. Die Kodes sind im Kapitel 3-5 detailliert aufgelistet. Stummschaltung Zeigt an, dass der UPS-Alarm ausgeschaltet ist.
-
Page 53: Akustischer Alarm
3.3. Akustischer Alarm Akkumodus Ertönt alle 4 Sekunden Akku leer Ertönt jede Sekunde Überlastung Ertönt zweimal jede Sekunde Fehler Kontinuierlicher Ton Bypassmodus Ertönt alle 10 Sekunden 3.4. LCD-Display Index der Formulierungen Abkürzung Anzeige Bedeutung Aktivieren Deaktivieren Escape Hohe Verlustrate Niedrige Verlustrate Akku Wandler Not-Aus (EPO) - Page 54 01: Ausgangsspannungseinstellung Interface Einstellung Parameter 3: Ausgangsspannung Bei den Modellen 200/208/220/230/240 VAC können folgende Ausgangsspannung eingestellt werden: 200: Ausgangsspannung 208V Wechselstrom 208: Ausgangsspannung 208V Wechselstrom 220: Ausgangsspannung 220V Wechselstrom 230: Ausgangsspannung 230V Wechselstrom 240: Ausgangsspannung 240V Wechselstrom Für 100/110/150/120/127 VAC Modelle können Sie folgende Ausgangsspannung wählen: 100: Ausgangsspannung 100V Wechselstrom 110: Ausgangsspannung 110V Wechselstrom...
- Page 55 Für 200/208/220/230/240 VAC der Einstellungsbereich des Parameters 3 wird von -7V bis -24V der nominalen Spannung eingestellt. Für Modelle 100/110/115/120/127 VAC der Einstellungsbereich des Parameters 3 wird von -3V bis -12V der nominalen Spannung eingestellt. 06: Bypass aktivieren/deaktivieren wenn das UPS abgestellt ist Interface Einstellung Parameter 3: Aktiviert oder deaktiviert die Bypass-Funktion.
-
Page 56: Beschreibung Der Betriebsmodi
10: Standard Steckdosen Einstellungen Interface Einstellung Parameter 3: Einstellung des Laufzeitlimits der standard Steckdosen. 0-999: Einstellung des Laufzeitlimits von 0-999 Minuten, für standard Steckdosen (Akkumodus). 0: Wenn auf "0" gesetzt, wird das Laufzeitlimit 10 sek. 999: Wenn auf "999" gesetzt, wird das Laufzeitlimit deaktiviert 00: Abschalteinstellungen 3.6. -
Page 57: Fehlerreferenzkode
Standby-Modus Das UPS ist ausgeschalten und bietet keinen Backupstrom, kann aber immer noch die Akkus laden. 3.7. Fehlerreferenzkode Aufgetretener Fehler Fehlerkode Icon Aufgetretener Fehler Fehlerkode Icon Bus Startfehler Inverter Niederspannung Bus über Inverter Ausgangkurzschluss Bus unter Akkuspannung zu hoch Bus unausgeglichen Akkuspannung zu niedrig Inverter Softstart Fehler Zu hohe Temperatur... -
Page 58: Fehlerbehebung
4. Fehlerbehebung Falls das UPS nicht einwandfrei funktioniert, können Sie den Fehler mit Hilfe der Tabelle unten beheben. Symptom Mögliche Ursache Abhilfe Kein Alarm oder Warnhinweis. Das Stromkabel ist nicht Überprüfen korrekt verbunden. Stromkabel korrekt verbunden ist. Das Stromkabel ist mit dem Verbinden UPS Ausgang verbunden. -
Page 59: Lagerung Und Instandhaltung
Abhilfe Symptom Mögliche Ursache Der Fehlerkode 14 und das Icon Das UPS wurde automatisch Überprüfen abgestellt da ein Kurzschluss Ausgangsverkabelung erscheinen im UPS Ausgang aufgetreten angeschlossenen LCD-Display und der Alarm ertönt ist. Geräte einen Kurzschluss kontinuierlich. haben. Der Fehlerkode 1, 2, 3, 4, 11, 12, 13 Ein interner Fehler hat sich Kontaktieren Sie Ihren erscheinen... -
Page 60: Spezifikationen
6. Spezifikationen MODELL 1000 1500 2000 3000 1000 VA / 800 W 1500 VA / 1200W 2000 VA / 1600 W 3000 VA / 2400 W KAPAZITÄT* INPUT 80 VAC/70 VAC/60 VAC/50 VAC ± 5% oder 160 VAC/140 VAC/120 VAC/110 VAC ± Niedrige Überleitung ( abhängig von der prozentualen Last 100% - 80 % / 80 % - 70 % / 70 - 60 % / 60 % - 0) - Page 61 UPS Online PowerWalker VFI 1000RM LCD PowerWalker VFI 1500RM LCD PowerWalker VFI 2000RM LCD PowerWalker VFI 3000RM LCD Manual d’usager Alimentation sans Interruption (ASI)
- Page 62 Table des matières 1. Consignes importantes de sécurité …………………………………..1.1. Transport 1.2. Préparation 1.3. Installation 1.4. Utilisation 1.5. Entretien, révision et défauts 2. Installation et configuration ……………………………………....2.1. Vue de la face arrière 2.2. Montage rack de l’onduleur 2.3. Configuration de l'onduleur 2.4.
-
Page 63: Consignes Importantes De Sécurité
1. Consignes importantes de sécurité Veuillez strictement appliquer toutes les consignes de sécurité indiquées dans ce manuel. Conservez ce manuel dans un endroit sûr et prenez soigneusement connaissance des instructions suivantes avant d'installer l'unité. N'utilisez pas cette unité avant d'avoir soigneusement pris connaissance de tous les avertissements et de toutes les instructions d'utilisation. -
Page 64: Entretien, Révision Et Défauts
1.5. Entretien, révision et défauts L'onduleur fonctionne avec des tensions dangereuses. Les réparations ne doivent être faites que par du personnel d'entretien qualifié. Attention - risque d'électrocution. Même après avoir été déconnecté du secteur (prise de courant du secteur), les composants internes de l'onduleur sont encore connectés à... -
Page 65: Installation Et Configuration
2. Installation et configuration REMARQUE : Inspecter l'unité avant de l'installer. S'assurer que rien n'est endommagé à l'intérieur de l'emballage. Conserver l'emballage original dans un endroit sûr pour une utilisation future. REMARQUE : Il y a deux types différents d'onduleur: les modèles standards et modèles longue autonomie. -
Page 66: Configuration De L'onduleur
2.3. Configuration de l'onduleur Étape 1: Connexion des câbles de la batterie. Par mesure de sécurité, l’onduleur est emballé en fabrique sans connecter les câbles des batteries. Avant installer l’onduleur, veuillez suivre d’abord les étapes suivantes pour connecter à nouveau les câbles. Étape 1 Étape 2 Étape 3... - Page 67 d'établir sur l'ordinateur l'horaire d'arrêt, de démarrage et de surveillance de l'état de l'onduleur. L'onduleur est équipé d'un slot intelligent qui permet d’insérer soit une carte SNMP soit une carte AS400. L'installation d'une carte SNMP ou AS400 sur l'onduleur permet l'utilisation d'options avancées de surveillance et de communication.
- Page 68 2.4 Remplacement des batteries. REMARQUE: L’onduleur est equipé avec des batteries internes et l’usager peut les remplacer sans éteindre l’onduleur ou les charges connéctées (design d’échange à chaud). Le remplacement est un procédé sur, libre de risques électriques. ATTENTION!! Considérez tous les avertissements, mises en garde, et remarques avant de remplacer les batteries.
- Page 69 Étape 8 Mettez le panneu frontal à sa place. 2.5 Montage du Kit de batteries (optionnel) REMARQUE: Veuillez monter d’abord le kit de batteries avant l’installer dans l’onduleur. Veuillez choisir le procédé de montage du kit de battéries correct détaillé ci-dessous. Kit de 2 battéries Étape 1: Rétirez les rubans adhésives.
- Page 70 Kit de 4 battéries Étape 1: Rétirez les rubans adhésives. Étape 2: Connectez les terminals des batteries sélon le dessin ci-dessous. Adhésif Adhésif Étape 3: Mettez le pack de batteries sur un Étape 4: Couvrez l’autre côté du boîtier en plastique côté...
-
Page 71: Utilisation
3. Utilisation 3.1. Utilisation des boutons de la face avant Bouton Fonction Mise en marche de l'onduleur : Appuyer sur le bouton On/Mute pendant au moins 2 secondes pour mettre l'onduleur en marche. Arrêt alarme sonore (silence): Après avoir mis l'onduleur en marche en mode batteries, appuyer sur le bouton pendant au moins 5 secondes pour activer ou désactiver le système d'alarme. - Page 72 Écran d'affichage Fonction Informations sur l’autonomie Indique le mode autonomie sous la forme d'un pictogramme Indique la durée de l’autonomie par des nombres. H : heures, M : minutes, S : secondes Informations de défaut Indique un avertissement ou un défaut. Indique les codes d'avertissement et de défaut.
-
Page 73: Alarme Sonore
3.3. Alarme sonore Mode Batteries Signal toutes les 4 secondes Batteries faibles Signal chaque seconde Surcharge Deux signaux chaque seconde Défaut Signal continu Mode By-pass Signal toutes les 10 secondes 3.4. Index des abréviations de l'écran LCD Abréviation Contenu de l'affichage Signification Activé... - Page 74 01: Configuration de la tension de sortie Interface Valeur Pour les modèles 200/208/220/230/240 VAC, le choix de la tension de sortie est : 200 : donne une tension de sortie de 200 Vac 208 : donne une tension de sortie de 208 Vac 220 : donne une tension de sortie de 220 Vac 230 : donne une tension de sortie de 230 Vac 240 : donne une tension de sortie de 240 Vac...
- Page 75 06: Activation/désactivation du mode By-pass lorsque l'onduleur est à l'arrêt Interface Valeur ENA : active le mode By-pass DIS : désactive le mode By-pass 07: configuration de la plage de tension de By-pass Interface Valeur Appuyer sur la touche ascendante ou sur la touche descendante pour régler la tension haute et la tension basse désirées.
-
Page 76: Description Du Mode D'utilisation
10: Configuration des prises générales. Interface Valeur Paramètre 3: Réglage de l’autonomie des prises générales en mode batterie. 0-999: Réglage du temps d’autonomie en minutes de 0-999 pour les sorties génerales en mode batterie. 0: Quand la valeur est “0”, le temps d’autonomie est de 10 secondes. -
Page 77: Codes De Référence Des Anomalies
3.7. Codes de référence des anomalies Nature du défaut Code du Icone Nature du défaut Code du Icône défaut défaut Défaut démarrage BUS Tension onduleur faible Surtension BUS Court-circuit sortie onduleur Sous tension BUS Tension batteries trop haute Déséquilibre BUS Tension batteries trop basse Défaut démarrage Température trop élevée... -
Page 78: Dépannage
4. Dépannage Utiliser le tableau ci-dessous lorsque l'onduleur ne fonctionne pas correctement. Symptôme Cause possible Remèdes Pas d'indication et alarme bien L'alimentation AC n'est Vérifier cordon que le secteur soit normal. correctement d'alimentation est solidement connectée. connecté au secteur. L'alimentation Brancher correctement connectée sur la sortie de... -
Page 79: Stockage Et Entretien
Symptôme Cause possible Remèdes Le code de défaut 14 est L'onduleur s'arrête Vérifier le câblage de automatiquement en raison sortie et vérifier que les affiché, l'icone s'allume d'un court-circuit sur la sortie dispositifs connectés ne sur l'écran LCD et l'alarme de l'onduleur. -
Page 80: Spécifications
6. Spécifications MODÈLE 1000 2000 2000 3000 CAPACITÉ* 1000 VA / 800 W 1500 VA/ 1200W 2000 VA / 1600 W 3000 VA / 2400 W ENTRÉE 80 VAC/70 VAC/60 VAC/50 VAC ± 5% ou 160 VAC/140 VAC/120 VAC/110 VAC Transfert Tension ±... - Page 81 Online UPS PowerWalker VFI 1000RM LCD PowerWalker VFI 1500RM LCD PowerWalker VFI 2000RM LCD PowerWalker VFI 3000RM LCD Manual d’uso Gruppi di Continuità...
- Page 82 INDICE 1. Importante avviso di sicurezza …………………………………....1.1. Trasporto 1.2. Preparazione 1.3. Installazione 1.4. Funzionamento 1.5. Manutenzione, assistenza e difetti 2. Installazione e configurazione …………………………………….... 2.1. Vista pannello posteriore 2.2. Rack-mounted the UPS 2.3. Impostazione dell’UPS 2.4. Sostiuzione delle batterie 2.5.
-
Page 83: Importante Avviso Di Sicurezza
1. Importante avviso di sicurezza Si prega di rispettare strettamente tutte le avvertenze e le istruzioni per l'uso in questo manuale. Conservare con cura questo manuale. Leggere attentamente le istruzioni seguenti prima d’installare l'unità. Non utilizzare l'apparecchiatura prima di procedere all’attenta lettura di tutte le informazioni sulla sicurezza e istruzioni. -
Page 84: Manutenzione, Assistenza E Difetti
1-5. Manutenzione, assistenza e difetti L'UPS funziona con tensioni pericolose. Le eventuali riparazioni possono essere eseguiti solamente da personale qualificato alla manutenzione. Attenzione - al rischio di scosse elettriche in uscita dell’UPS, anche dopo se scollegato dalla rete; il cablaggio dei parti interni è ancora collegato alla batteria e la tensione e pericoloso. -
Page 85: Installazione E Configurazione
2. Installazione e configurazione NOTA: Prima di eseguire l'installazione, si prega di controllare l'unità. Assicurarsi che nulla dentro il pacchetto è danneggiato. Si prega di mantenere la confezione originale in un luogo sicuro per un utilizzo futuro. NOTA: Ci sono due diversi tipi di UPS on-line: standard e lunga autonomia. Fare riferimento al seguente modello nella tabella. -
Page 86: Impostazione Dell'ups
2.3. Impostazione dell’UPS Fase 1: Collegamento dei cavi della batteria Per ragioni di sicurezza l'UPS è spedito dalla fabbrica con i cavi della batteria non collegati. Prima di installare l'UPS eseguire la procedura descritta di seguito per collegare i cavi della batteria. - Page 87 L’UPS è dotato dello slot intelligente per la scheda SNMP o AS400, per avere un’avanzata comunicazione o l’opzione migliore di monitorare l’UPS. Avvertenza: la porta USB e RS-232 non possono funzionare contemporaneamente. Fase 5: Collegamento rete Porte per rete: Fax/telefono La connessione è...
- Page 88 2.4 Sostituzione delle batterie AVVISO: l'UPS è dotato di batterie interne che possono essere sostituite senza spegnere l'UPS o i carichi collegati (batterie di tipo "hot-swappable"). La sostituzione è un'operazione sicura che non comporta rischi di tipo elettrico. ATTENZIONE! Prima di sostituire le batterie leggere attentamente tutte le avvertenze, le precauzioni e le note.
-
Page 89: Gruppo Del Kit Batterie (Opzionale)
Fase 8 Installare nuovamente il pannello anteriore sull'unità. 2.5. Gruppo del kit batterie (opzionale) AVVISO: assemblare il kit di batterie prima di installarlo all'interno dell'unità UPS. Per l'assemblaggio seguire la procedura corretta per il kit batterie in uso. Kit a 2 batterie Fase 1: rimuovere il nastro adesivo. - Page 90 Fase posizionare pacchi batteria Fase 4: coprire l'altro lato del guscio in plastica assemblati su un lato dei gusci in plastica. come indicato nello schema seguito. L'assemblaggio del kit batterie è completato. Kit a 6 batterie Fase 1: rimuovere il nastro adesivo. Fase 2: collegare tutti i terminali delle batterie come indicato nello schema di seguito.
-
Page 91: Operazioni
3. Operazioni 3.1. Pulsante di funzionamento Pulsante Funzione Accende l’UPS. Tenere premuto il pulsante ON/Mute per 2 secondi, per accendere l’UPS. Disattiva l'allarme: dopo che l'UPS è acceso in modo batteria, premere e tenere premuto questo pulsante per almeno 5 secondi per disattivare o attivare il sistema d’allarme. - Page 92 Display Funzione Informazioni del tempo di autonomia Indica il tempo di autonomia con orologio analogico. Indica il tempo d’autonomia con orologio digitale. H: ore, M: minuti, S: secondi. Informazioni del guasto Indica un allarme del guasto. Indica il codice del guasto, elencati in dettaglio nella sezione 3-5. Funzionamento senza allarmi Indica che l’allarme sonoro è...
-
Page 93: Allarme Acustico
3.3. Allarme acustico Modo batteria Suono ogni 4 secondi Batteria bassa Suono ogni secondo Overload Due suoni ogni secondo Guasto Suono continuato Modo bypass Suono ogni 10 secondi 3.4. Indicazione del display LCD Abbreviazioni Indicazione sul Display Significato Abile Disabile Interrotto Forte perdita Bassa perdita... - Page 94 01: Impostazione della tensione in uscita Interfaccia Impostazione Per modello 200/208/220/230/240 VAC, si possono scegliere le seguenti tensioni d’uscita: 200: indica tensione d’uscita = 200Vac 208: indica tensione d’uscita = 208Vac 220: indica tensione d’uscita = 220Vac 230: indica tensione d’uscita = 230Vac 240: indica tensione d’uscita = 240Vac Per modello 100/110/150/120/127 VAC , si possono scegliere le seguenti tensioni d’uscita:...
- Page 95 06: Bypass abilitato/disabilitato quando l’UPS è OFF Interfaccia Impostazione Parametro 3: Attiva o disattiva la funzione del by-pass. È possibile scegliere fra le seguenti due scelte: ENA: Bypass abilitato DIS: Bypass disabilitato 07: Bypass tensione accettabile d’impostazione Interfaccia Impostazione Parametro 2 e 3: Imposta il punto accettabile dell'alta e bassa tensione, per il funzionamento in modo Bypass, premendo il tasto Down key o Up key.
-
Page 96: Descrizione Modo Operativo
3.6. Descrizione modo operativo Modo operativo Descrizione LCD display Modo Online Quando la tensione d'ingresso è nella gamma di accettabilità, l'UPS fornirà la corrente alternata (CA), in uscita, pulita e stabile. Nello stesso tempo, l'UPS carica la batteria in modo online. Modo ECO Modo di risparmio energia: Quando la tensione d'ingresso è... -
Page 97: Indicatori D'avviso
3.8. Indicatori d’avviso Icona Allarme Avviso (lampeggiante) Batteria bassa Sondaggio ogni secondo Sovraccarico Sondaggio due volte ogni secondo Batteria non connessa Sondaggio ogni secondo UPS sovraccaricato Sondaggio ogni secondo Sondaggio ogni secondo Connessione non corretta Informazione dell’EPO Sondaggio ogni secondo Ventilatore guasto Sondaggio ogni secondo Alta temperatura... -
Page 98: Risoluzione Dei Problemi
4. Risoluzione dei problemi Se l’UPS non funziona correttamente, prego risolvere i problemi utilizzando la tabella sotto indicata. Sintomo Possibili cause Rimedio La linea AC di non è Controllare se il cavo di Nessuna indicazione di allarme collegata bene alla rete alimentazione d'ingresso è... -
Page 99: Stoccaggio E Manutenzione
Sintomo Possibili cause Rimedio Il guasto mostra il codice 14 e L'UPS si è spento Controllare il cablaggio in automaticamente, per uscita dell'UPS e i l’icona con lampeggio in causa di corto circuito, dispositivi collegati LCD display e avviso acustico verificatosi in uscita all'UPS, se sono in stato di continuo. -
Page 100: Specifiche
6. Specifiche MODÈLLO 1000 1500 2000 3000 CAPACITÁ* 1000 VA / 800 W 1500 VA / 1200 W 2000 VA / 1600 W 3000 VA / 2400 W ENTRATA 80 VAC/70 VAC/60 VAC/50 VAC ± 5% or 160 VAC/140 VAC/120 VAC/110 Volt trasferimento VAC ±... - Page 101 SAI Online PowerWalker VFI 1000RM LCD PowerWalker VFI 1500RM LCD PowerWalker VFI 2000RM LCD PowerWalker VFI 3000RM LCD Manual do Usuário Sistema de Alimentação Ininterrupta...
- Page 102 INDICE 1. Aviso importante de securança ………………………………………..1.1. Transporte 1.2. Preparação 1.3. Instalação 1.4. Funcionamento 1.5. Manutenção e reparação 2. Instalação y configuração ………………………………………….... 2.1. Vista traseira 2.2. Montagem do SAI em Rack 2.3. Configuração do SAI 2.4. Substituição da bateria 2.5.
-
Page 103: Aviso Importante De Securança
1. Aviso de securança importante Siga rigorosamente todos os avisos e instruções deste manual. Guarde este livro e ler atentamente as instruções seguintes antes de instalar a unidade. Não utilize este aparelho sem ler atentamente todas as informações e instruções de segurança. 1.1. -
Page 104: Manutenção E Reparação
1.5. Manutenção e reparação O SAI opera com voltagens perigosas. Os reparos devem ser realizados por pessoal qualificado. Cuidado - Risco de choque elétrico. Mesmo depois de se desconectar da rede, os cabos internos permanecem conectados à bateria ea tensão é perigosa.. Antes de qualquer tipo de serviço e / ou manutenção, desligue a bateria e verifique se há... -
Page 105: Instalação Y Configuração
2. Instalação y configuração NOTA: Antes da instalação, por favor revise a unidade. Assegure-se de que não existe nenhum item danificado no interior da embalagem. Por favor, mantenha o embalagem original em um lugar seguro para uso futuro. NOTA: Existem dois tipos diferentes de UPS on-line: standard e de longo alcance. Veja o modelo na tabela seguinte: Modelo Tipo... -
Page 106: Configuração Do Sai
2.3. Configuração do SAI Passo 1: Ligação dos fios da bateria Para maior segurança, o UPS é enviado da fábrica sem os fios da bateria ligados. Antes de proceder à instalação do UPS, siga os passos abaixo descritos para poder, em primeiro lugar, ligar os fios da bateria. - Page 107 uma comunicação avançada ou a melhor opção para controlar a UPS Nota: As portas USB e RS-232 não podem trabalhar juntos. Passo 5: Ligar a rede Portas de protecção Rede/Modem/Teléfono A ligação é para um modem, linha telefônica ou fax individual. "IN" é a entrada da linha de comunicação, "OUT"...
-
Page 108: Substituição Da Bateria
2.4. Substituição da Bateria AVISO: este UPS está equipado com baterias internas e o utilizador pode substitui-las sem encerrar o UPS ou as cargas eléctricas ligadas (design de bateria com substituição fácil). A substituição é um procedimento seguro, isolado de quaisquer perigos eléctricos. ATENÇÃO! Tenha em atenção todos os avisos, chamadas de atenção e notas antes de proceder à... -
Page 109: Montagem Do Kit De Baterias (Opcional)
7º Passo Volte a colocar o painel dianteiro na unidade. 2.5. Montagem do Kit de Baterias (opcional) AVISO: proceda à montagem do kit de baterias antes de instalá-lo no interior do UPS. Seleccione o procedimento correcto para o kit de baterias para proceder à sua montagem. Kit de 2 baterias 1º... - Page 110 Kit de 4 baterias 1º Passo: retire as fitas adesivas. 2º Passo: ligue todos os terminais da bateria seguindo o diagrama abaixo. Fitas adesivas Fitas adesivas 3º Passo: coloque os conjuntos de baterias 4º Passo: cubra o outro lado da caixa de plástico, montados num dos lados das caixas de tal como no diagrama abaixo.
-
Page 111: Operações
3. Operações 3.1. Botões de funcionamento Botão Função Acende o SAI. Mantenha pressionada a tecla de ON/Mute por 2 segundos para ligar o SAI. Para silenciar o alarme: quando o SAI entra em modo de bateria, pressione por pelo menos 5 segundos para activar ou desactivar o sistema de alarme. - Page 112 Display Função Informação do tempo de autonomia Indica o tempo de autonomia com relógio analógico Indica o tempo de autonomia com relógio digital. H: horas, M: minutos, S: segundos Informação do erro Indica um alarme de atenção e de erro. Indica o código de aviso e de erro, conforme detalhado na seção 3-5.
-
Page 113: Alarme Acústico
3.3. Alarme acústico Modo bateria Soando cada 4 segundos Bateria baixa Soando cada segundo Sobrecarga Dos sinais sonoroscada segundo Avaria Soando continuamente Modo bypass Soando cada 10 segundos 3.4. Indicação do display LCD Abreviatura Indicaçã do Display Significado Habilitado Deshabilitado Escape Grande perda Perda baixa... - Page 114 01: Ajuste da tensão de saída Interface Configuração Tensã o de saída (Parâmetro 3) Para os modelos 200/208/220/230/240 VAC, pode-se escolher a tensão de saída seguinte: 200: la tensão de saída é 200Vac 208: la tensão de saída é 208Vac 220: la tensão de saída é...
- Page 115 06: Bypass ativado / desativado quando o SAI é OFF Interface Configuração Parâmetro 3: Ativar o desativar la função do bypass. Pode-se elegir entre as seguintes duas opções: ENA: Bypass ativado DIS: Bypass desativado 07: Configuração da gama de tensão do Bypass Interface Configuração Parámetros 2 y 3: Ajuste os limites aceitáveis de alta e baixa...
- Page 116 3.6. Descripção do modo de operação Modo operativo Descripción Display LCD Modo Online Quando a tensão de entrada está dentro do intervalo aceitável, o SAI fornece uma corrente alternada (CA) a saída limpa e estável. Ao mesmo tempo, o SAI carrega a bateria em modo online. Modo ECO Modo poupança de energia: Quando a tensão de entrada está...
-
Page 117: Código De Erro
3.7. Código de erro Causa del fallo Nº error Icono Causa del fallo Nº error Icono Não há energia Tensão inverter baixo Tensão Entrada alto Curto inverter saída Tensão Entrada baixo Tensão bateria alto Entrada não balanceada Tensão Bateria baixo Erro arranque Inverter Superaquecimento Tensão inverter alto... -
Page 118: Solução De Problemas
4. Solução de problemas Se o aparelho não está funcionando corretamente, por favor, resolver o problema usando a tabela abaixo. Sintoma Causas Possíveis Remédio Sem indicação nem alarme, A entrada de alimentação Verifique se o cabo de mesmo se a energia está normal AC não está... -
Page 119: Armacenamento Y Mautenção
Sintoma Causas Possíveis Remédio O erro indica o código 14, o ícone desligado Verifique os cabos e se os automaticamente devido a dispositivos conectados à piscando no display LCD um curto-circuito na saída saída do SAI está em e o alarme suona continuamente do SAI. -
Page 120: Especificações
6. Especificações MODELO 1000 1500 2000 3000 CAPACIDADE* 1000 VA / 800 W 1500 VA / 1200 W 2000 VA / 1600 W 3000 VA / 2400 W ENTRADA 80 VAC/70 VAC/60 VAC/50 VAC ± 5% o 160 VAC/140 VAC/120 VAC/110 VAC ± Tensão transferência baixo ( base em % da carga: 100% - 80 % / 80 % - 70 % / 70 - 60 % / 60 % - 0) - Page 121 On-Line ИБП PowerWalker VFI 1000RM LCD PowerWalker VFI 1500RM LCD PowerWalker VFI 2000RM LCD PowerWalker VFI 3000RM LCD РУКОВОДСТВО ПОЛЬЗОВАТЕЛЯ Источник бесперебойного питания...
- Page 122 Содержание 1. Важное предупреждение о безопасности…………………………... 1.1. Транспортировкаn 1.2. Подготовка 1.3. Установка 1.4. Эксплуатация 1.5. Техническое обслуживание, ремонт и диагностика 2. Установка и настройка…………………………………………………… 2.1. Вид задней панели 2.2. Для монтажа в стойку ИБП 2.3. Настройка ИБП 2.4. Замена батареи 2.5.
-
Page 123: Важное Предупреждение О Безопасности
1. Важное предупреждение о безопасности Неукоснительно соблюдайте все предупреждения и инструкции, приведенные в настоящем руководстве. Сохраните данное руководство в надежном месте и внимательно прочтите следующие инструкции перед началом установки. Не приступайте к работе с устройством, не ознакомившись должным образом с информацией... -
Page 124: Техническое Обслуживание, Ремонт И Диагностика
1.5. Техническое обслуживание, ремонт и диагностика Система ИБП работает под высоким напряжением. Ремонт должен выполняться только квалифицированными специалистами. Осторожно ‐ имеется опасность поражения электрическим током. Даже после отключения блока от сети электропитания (сетевой розетки помещения) элементы внутри системы остаются подключенными к аккумулятору, находятся под... -
Page 125: Установка И Настройка
2. Установка и настройка ПРИМЕЧАНИЕ: Перед установкой осмотрите устройство. Проверьте комплектность и убедитесь в том, что никакие элементы не повреждены. Храните упаковку в надежном месте для повторного использования в будущем. ПРИМЕЧАНИЕ: Существует два различных типа сетевых ИБП: стандартные и длительного использования. См. таблицу ниже. Модель... -
Page 126: Настройка Ибп
2.3. Настройка ИБП Шаг 1: Подключение провода батареи Для вопросов безопасности, ИБП выходит с завода с батареей кабели отключены. Перед установкой ИБП, пожалуйста, следуйте ниже шагов, чтобы повторно подключить провода батареи в первую очередь. Шаг 1 Шаг 2 Шаг 3 Снимите... - Page 127 Для автоматического мониторинга включения/выключения и состояния ИБП подключите один конец коммуникационного кабеля к порту USB/RS-232, а другой конец - к коммуникационному разъему на компьютере. С помощью программного обеспечения для мониторинга, вы можете программировать время включения/выключения ИБП и осуществлять мониторинг его состояния на ПК. ИБП...
-
Page 128: Замена Батареи
2.4. Замена батареи ВНИМАНИЕ: Данный ИБП оснащен внутренней батареи и пользователь может заменить батареи без отключения ИБП или подключенных нагрузок (горячей замены батарей). Замена является безопасной процедурой, без опасности поражения электрическим током. ВНИМАНИЕ! Пожалуйста, соблюдайте все предупреждения, предостережения и примечания перед заменой батарей. Примечание: Если... -
Page 129: Аккумулятор Монтажный Комплект (Дополнительно)
Шаг 8 Поместите переднюю панель устройства. 2.5. Аккумулятор монтажный комплект (Дополнительно) ПРИМЕЧАНИЕ: Пожалуйста, первая батарея комплект для монтажа перед установкой его внутри ИБП. Пожалуйста, выберите правильную процедуру установки. комплект 2 батарей Шаг 1: Удалить клейкие ленты. Шаг 2: Соедините все клеммы батареи, в соответствии... - Page 130 комплект 4 батарей Шаг 1: Удалить клейкие ленты. Шаг 2: Соедините все клеммы батареи, в соответствии со следующим диаграмме клейкие ленты клейкие ленты Шаг 3: Поместите собранный батареи на Шаг 4: Обложка другой стороне пластиковой одной стороне пластиковой оболочки. оболочке, как показано ниже диаграмме. Затем аккумулятор...
-
Page 131: Управление
3. Управление 3.1. Управление кнопками Кнопка Функция Включение ИБП: Чтобы включить ИБП, удерживайте нажатой кнопку ON/Mute в течение 2 секунд. Выключение сигнализации: Когда ИБП работает от батареи, удерживайте нажатой эту кнопку в течение 5 секунд для включения/выключения сигнализации. Это не применимо для ситуаций, когда... - Page 132 Функция Дисплей Информация о времени резервного питания Показывает время резервного питания в виде круговой диаграммы. Показывает время резервного питания в цифрах. H: часы, M: минуты, S: секунды Информация об ошибках Показывает предупреждения и информацию о б ошибках. I Показывает предупреждения и коды ошибок; подробные описания кодов...
-
Page 133: Звуковая Сигнализация
3.3. Звуковая сигнализация Режим работы от батареи Сигнал подается каждые 4 секунды Низкий заряд батареи Сигнал подается каждую секунду Перегрузка Сигнал подается дважды каждую секунду Отказ Сигнал звучит постоянно Режим шунтирования Сигнал подается каждые 10 секунды 3.4. Индикация на ЖК‐дисплее Сокращение... - Page 134 01: Настройка выходного напряжения Интерфейс Настройка Параметр 3: Выходное напряжение Для моделей 200/208/220/230/240 В переменного тока можно выбрать следующее значение выходного напряжения: 200: выходное напряжение составляет 200 В переменного тока 208: выходное напряжение составляет 208 В переменного тока 220: выходное напряжение составляет 220 В переменного тока 230: выходное...
- Page 135 напряжения. LLS: Напряжение при низких потерях в экономичном режиме для параметра 2. Для моделей 200/208/220/230/240 В переменного тока диапазон настройки параметра 3 составляет от -7 В до -24 В номинального напряжения. Для моделей 100/110/115/120/127 В переменного тока диапазон настройки параметра 3 составляет от -3 В до -12 В номинального напряжения.
-
Page 136: Описание Рабочего Режима
10: Настройка общих выходов (критическое нагрузки) Интерфейс Настройка Параметр 3: настройка предельных значений времени резервного питания для общих выходов. 0‐999: настройка предельных значений времени резервного питания в минутах от 0 до 999 для общих выходов, используемых для подключения критическое устройств в режиме работы от батареи. 0: Если... -
Page 137: Коды Неисправностей
3.7. Коды неисправностей Неисправность Код Значок Неисправность Код Значок Сбой запуска шины Низкий уровень напряжения инвертора Перегрузка шины Недостаточное выходное напряжение инвертора Недостаточная нагрузка шины Слишком высокое напряжение батареи Дисбаланс шины Слишком низкоенапряжение батареи Сбой плавного запуска шины Превышение температуры. Высокое... -
Page 138: Диагностика И Устранение Неисправностей
4. Диагностика и устранение неисправностей В случае неправильной работы системы ИБП воспользуйтесь приведенной ниже таблицей для диагностики и устранения неисправности. Проявление Возможная причина Решение Проверьте надежность Неправильно одключено Отсутствует индикация и подключения шнура питание переменного тока. срабатывает сигнализация, питания к розетке. несмотря... -
Page 139: Хранение И Техническое Обслуживание
Проявление Возможная причина Решение Появляется код ошибки 14 и на ИБП выключается Проверьте проводку на ЖК-дисплее загорается значок автоматически в выходе и наличие короткого результате короткого замыкания подключенных , непрерывно звучит замыкания на выходе. устройств. сигнализация. Внутренний сбой ИБП. Это может... -
Page 140: Технические Характеристики
6. Технические характеристики МОДЕЛЬ 1000 1500 2000 3000 ЕМКОСТЬ* 1000 ВА / 800 Вт 1500 ВА / 1200 Вт 2000 ВА / 1600 Вт 3000 ВА / 2400 Вт ВХОДНЫЕ ХАРАКТЕРИСТИКИ 80 В перем. тока / 70 В перем. тока / 60 В перем. тока / 50 В перем. тока ± 5 % or 160 В Передача... - Page 141 Online UPS PowerWalker VFI 1000RM LCD PowerWalker VFI 1500RM LCD PowerWalker VFI 2000RM LCD PowerWalker VFI 3000RM LCD Instrukcja obsługi PL, EN, ES, DE, FR, IT, PT, RU...
- Page 142 Zawartość instrukcji 1. Ważne istrukcje dotyczące bezpieczeństwa ……………………… 1-1. Transport 1-2. Przygotowanie 1-3. Uwagi instalacyjne 1-4. Eksploatacja 1-5. Konserwacja, usterki, serwis 2. Instalacja i uruchomienie …………………………………………….. 2-1. Wygląd tylnego panelu 2-2. Montaż w szafie Rack 2-3. Uruchomienie UPSa 2-4. Wymiana baterii 3.
-
Page 143: Transport
WAŻNE INSTRUKCJE DOTYCZĄCE BEZPIECZEŃSTWA ZACHOWAJ TĄ INSTRUKCJĘ – Niniejszy podręcznik zawiera ważne instrukcje dla modeli Powe Walker FVI 1000/1500/2000/3000 RM LCD, które należy wykonywać podczas instalacji i konserwacji urządzenia i akumulatorów. Przed uruchomieniem zapoznaj się z informacjami znajdującymi się w instrukcji. 1.1. -
Page 144: Konserwacja, Usterki, Serwis
1.5. Konserwacja, usterki, serwis. • Ten produkt jest przeznaczony specjalnie do komputerów PC i nie zaleca się używania go w systemach podtrzymywania życia lub innych istotnych urządzeniach. • To urządzenie może być obsługiwane przez osobę bez specjalnego szkolenia. • Do gniazdek systemu zasilania awaryjnego nie podłączaj urządzeń domowych, takich jak suszarki. - Page 145 • Akumulatory należy wymieniać na akumulatory tego samego typu i o tej samej liczbie zapieczętowanych komór elektrolitu. • Maksymalna znamionowa temperatura otoczenia to 40°C. • To urządzenie typu A do podłączenia do sieci ma już zainstalowany przez sprzedawcę akumulator. Może być zainstalowane przez operatora i obsługiwane przez osoby bez przeszkolenia.
-
Page 146: Instalacja I Uruchomienie
2. Instalacja i uruchomienie. UWAGA: Sprawdź UPS po otrzymaniu. Jeśli opakowanie nosi ślady uszkodzenia podczas transportu, nie rozpakowuj urządzenia, powiadom przewoźnika i sprzedawcę. UWAGA: Panel tylni i umieszczone na nim gniazda mogą różną się w poszczególnych modelach serii. 2.1. Wygląd tylnego panelu 1KVA/1.5KVA/2KVA 3KVA 1. -
Page 147: Uruchomienie Upsa
2.3. Uruchomienie UPSa Krok 1: Podłącz baterie Dla bezpieczeństwa na czas transportu, UPS dostarczany jest z odłączonymi bateriami. Przed jego uruchomieniem należy podłączyć baterie. Postępuj zgodnie z instrukcjami: Step 1 Step 2 Step 3 Zdejmij panel przedni. Podłącz kabel Załóż panel przedni. połączeniowy UPSa z bateriami. - Page 148 Krok 5: Podłączenie portów RJ-11/45 Network/Fax/Phone surge port Podłącz jeden telefon/fax/modem do gniazda “IN” w urządzeniu, a następnie podłącz gniazdo “OUT” z innym kompatybilnym sprzętem. Krok 6: Wyłączenie/włączenie funkcji EPO W celu dezaktywacji funkcji EPO z mostkuj pin 1 i 2 za pomocą dołączonego adaptera. W celu aktywacji funkcji EPO –...
-
Page 149: Wymiana Baterii
2.4 Wymiana baterii Uwaga: Urządzenia tej serii posiadają baterie hot-swapp – można je wymienić bez konieczności wyłączania UPSa. Uwaga!! Zapoznaj się z instrukcją wymiany baterii zanim przystąpisz do tej czynności. Uwaga!! W trakcie wymiany baterii urządzenia podłączone do UPSa nie są zabezpieczone przed utratą... -
Page 150: Funkcje
3. Funkcje 3.1. Funkcje przycisków Przycisk Opis Włączenie UPSa: Naciśnij i przytrzymaj przycisk przez przynajmniej 2 sekundy. Wyłączenie alarmu dźwiękowego: Gdy UPS pracuje w trybie zasilania z baterii, naciśnij i przytrzymaj przez minimum 5 sekund Przycisk aby wyłączyć sygnał dźwiękowy. Nie ma możliwości wyłączenia w ON/Mute ten sposób sygnału dźwiękowego w przypadku błędu UPSa. -
Page 151: Panel Lcd
3.2. Panel LCD Wyświetlana Opis informacja Informacja o czasie podtrzymania baterii Ikona pokazująca podtrzymanie na baterii. Czas podtrzymania przy aktualnym obciążeniu. H: godziny, M: minuty, S: sekundy Informacja o błędzie Informacja graficzna oznaczająca błąd. Kod błędu. Wyciszenie Informacja o wyciszeniu sygnału dźwiękowego w trakcie pracy w trybie zasilania z baterii Dane wyjściowe Informacja pokazująca dane wyjściowe. -
Page 152: Sygnalizacja Dźwiękowa
Tryb pracy zasilania z baterii Tryb pracy bypass. Tryb pracy Eco. Informacja o pracy inwertera. Wskazuje pracę gniazd wyjściowych. Informacja o baterii. Informacja o poziomie naładowania baterii - 0-25%, 26-50%, 51-75%, and 76-100%. Błąd baterii. Słaba bateria. Dane wejściowe Informacja pokazująca dane wejściowe. Vac: Volty, Vdc: Voltaż... -
Page 153: Ustawienia Ups
3.5. Ustawienia UPS Wyświetlacz LCD pokazuje 3 parametry, które mogą być modyfikowane. Parametr 1 Parametr 1: Pozwala na modyfikację jednej z 10 opcji pracy UPSa. Dalsze informacje na następnej stronie. Parametr 2 i 3 – to opcje ustawień poszczególnych programów. Parametr 2 Parametr 3 01: Ustawienie napięcia wyjściowego... - Page 154 04: ECO enable/disable Interfejs Ustawienia Parametr 3: Umożliwia włączenie trybu ECO: ENA: Włączony DIS: Wyłączony 05: ECO voltage range setting Interfejs Ustawienia Parametr 2 i 3: Umożliwia ustawienie dopuszczalnej różnicy maksymalnego i minimalnego napięcia dla trybu ECO. HLS: Dla napięcia 200/208/220/230/240 VAC w trybie ECO możliwe jest ustawienie dopuszczalnej różnicy maksymalnego napięcia między +7V a +24V.
-
Page 155: Tryby Pracy
10: Backup time setting for outlets Interfejs Ustawienia Parameter 3: Pozwala na ustawienie czasu podtrzymania pracy na baterii –0-999 minut 0: - czas podtrzymania około 10 sekund 999: Nie aktywne ograniczenie czasu podtrzymania. 3.6. Tryby pracy Tryb pracy Opis Informacje na ekranie LCD Online Tryb pracy normalny, występuje w przypadku, gdy dostępne jest zasilanie z... -
Page 156: Kody Błędów
3.7. Kody błędów Fault event Fault code Icon Fault event Fault code Icon Bus start fail Inverter voltage Low Bus over Inverter output short Bus under Battery voltage too high Bus unbalance Battery voltage too low Inverter soft start fail Over temperature Inverter voltage high Over load... - Page 157 4. Problemy Najczęstsze problemy i sposób ich rozwiązania. Symptom Możliwe powody Rozwiązanie Brak komunikacji UPSem Źle podłączony kabel Sprawdź poprawność pomimo poprawnego zasilania z zasilający. podłączenia zasilania. sieci. Zasilanie podłączone jest Sprawdź poprawność do gniazda wyjściowego. podłączenia zasilania. Aktywna jest funkcja EPO. Włóż wtyczkę go gniazda Świeci się...
-
Page 158: Konserwacja I Przechowywanie
Symptom Możliwe powody Rozwiązanie Pojawia się kod błędu 14 I ikona UPS może restartować się Sprawdź gniazda sam, z powodu zwarcia w wyjściowe, czy któreś z na ekranie LCD, sygnał gnieździe wyjściowym. urządzeń powoduje dźwiękowy ciągły. zwarcia. Pojawia się kod błędu 1, 2, 3, 4, Błąd UPSa. - Page 159 6. Specyfikacja MODEL 1000 1500 2000 3000 POJEMNOŚĆ* 1000 VA / 800 W 1500 VA / 1200 W 2000 VA / 1600 W 3000 VA / 2400 W WEJŚCIA Low Line Transfer 80VAC/70VAC/60VAC/50VAC ± 5% lub 160VAC/140VAC/120VAC/110VAC ± 5% Low Line Comeback 85VAC/75VAC/65VAC/55VAC ±...
Need help?
Do you have a question about the VFI 1000RM LCD and is the answer not in the manual?
Questions and answers