Advertisement
Advertisement
Table of Contents

Related Manuals for Shark NV500NZ


Summary of Contents for Shark NV500NZ
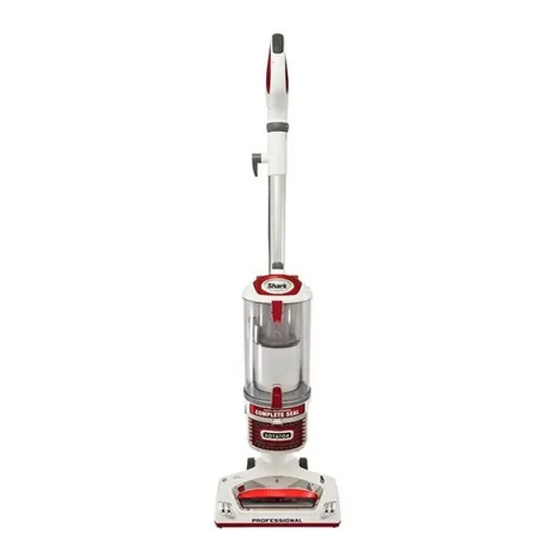
- Page 1 OWNER’S GUIDE NV500NZ ™...
-
Page 2: Technical Specifications
For a list of what is included with this model, refer to inside flap of box. ® This Owner’s Guide is designed to help you get a complete understanding of your If you should have a question about your Shark Rotator , please call ®... -
Page 3: Important Safeguards
READ ALL INSTRUCTIONS BEFORE USE IMPORTANT SAFEGUARDS When using an electrical appliance, basic safety precautions should 17 DO NOT put any objects into openings. DO NOT use with any opening always be observed, including the following: blocked; keep free of dust, lint, hair, and anything that may reduce air flow. 18 Keep your work area well lit. - Page 4 ASSEMBLY Place the vacuum pod onto power nozzle. Slide wand into base of the pod. Insert handle into the top of the wand. Attach flex hose into base of the pod. Insert the crevice tool and multi-tool into the accessory clips as shown. Tuck the hose between the two accessory clips.
-
Page 5: Brush Roll
WARNING: When vacuuming fine dust (sawdust, sand, flour, talcum powder, etc.) electrostatic charges build up naturally. Under certain conditions these electrostatic charges will be released. To avoid the unpleasant effects of static discharges, a metal strip has been incorporated into the right side of the handle. - Page 6 LIFT-AWAY ™ Press LIFT-AWAY to lift the pod off the power nozzle. CLEANING To clean with hose, press the WAND or HANDLE release button then lift handle up. Use for portable Attach desired cleaning tool. Should you need to increase or decrease the amount of suction, refer to Helpful Tips (page 14), SUCTION CONTROL. cleaning on stairs NOTE: Select cleaning accessories are included with this model.
- Page 7 CANISTER From the Lift-Away mode, place the pod onto the canister caddy. ™ CLEANING Press WAND release button then lift handle up. Convert your upright Attach straight suction floor nozzle or other accessory. to a convenient Use the posts on the caddy to store additional cleaning accessories while you clean. canister To release pod from caddy, press LIFT-AWAY and continue to use with cleaning wand or replace wand and pod on power nozzle per assembly instructions.
- Page 8 ACCESSORIES Crevice Tools Multi-Tool Dusting Brush 30 cm - 3002FC500GY 3006FC500GY 3000FC500GY NOTE: Select cleaning 45 cm Flexi - 3008FC500GY* 3-in-1 wide mouth combo Cleans hard surfaces and accessories are included. 60 cm Flexi - X24FLI500* tool cleans hard surfaces and upholstery.
- Page 9 Appliance Wand Backsaver Wand 3003FC500GY 3005FC500GY Extend to access areas Access low clearance areas under hard-to-move under furniture without appliances and furniture. bending over. Home & Car Detail Kit Dust-Away™ Hard Floor Tool - See page 10 XDST500EU XCD500 Vacuums and dusts bare floors using washable or disposable pads. Extension tubes and micro-tools Washable Microfibre Pad P200W...
-
Page 10: Swivel Head
ATTACHMENT & CLEANING PADS Use the Dust-Away ™ to clean dry bare floor surfaces. Do not use to clean damp floors or wet/sticky messes. Only use pads provided by Shark ® , which are designed to work with the Dust-Away attachment. - Page 11 HOME AND CAR Press the WAND release button to remove the floor nozzle and wand from the vacuum. DETAIL KIT Insert converter onto the vacuum. Insert micro-tool adaptor. Attach hose and desired extension tube and cleaning tool. 0800 002 999 N Z :...
- Page 12 BACKSAVER ASSEMBLY INSTRUCTIONS WAND Press button to release handle from vacuum. Align rib at top of bendable wand with groove inside vacuum handle and attach until it clicks in place. Insert desired floor attachment until it clicks in place. Press button while bending wand to activate backsaver. A U S T: 1 8 0 0 8 9 0 8 4 0...
-
Page 13: Helpful Tips
HELPFUL TIPS SUCTION CONTROL This unit is equipped with a suction control collar to help with push and pull on high pile carpets, area rugs and to release suction when dusting delicate objects or drapery. Located at base of top handle, rotate the collar 90° to minimize suction. Be sure to close again for maximum suction. POWER BUTTONS The POWER button turns on suction only. -
Page 14: Maintenance
MAINTENANCE EMPTY THE DUST CUP Pull up on the dust cup release latch and lift the dustcup off the pod. Holding the dust cup over a garbage bag or can, press the bottom empty release latch. Press the top dust cup release latch to access the dust screen and remove built-up debris as required. With the dust screen removed, turn the dust cup over and empty the upper chamber by holding it by the recessed handle underneath the dust cup. -
Page 15: Hose Cuff At Base Of Pod
MAINTENANCE CHECK FOR BLOCKAGES REMOVE AND INSPECT: HOSE AND TUBES Remove power nozzle, dustcup and hose and shine a flashlight in all the intake openings to check for possible blockage. BOTTOM OF POWER NOZZLE CAUTION: Nozzle contains live parts Using a coin, turn the locking screws to the unlock position and pull up to expose the airway. Remove any obstructions, close and relock. Remove any string, carpet fibers or hair that may be wrapped around the brushroll. - Page 16 Note: If vacuum still does not start, contact Customer care at: AUST: 1800 890 840 or NZ: 0800 002 999. Euro-Pro and Shark are registered trademarks of Euro-Pro Operating LLC. Rotator, Dust-Away and Lift-Away are trademarks of Euro-Pro Operating LLC.
- Page 17 NOTES 0800 002 999 N Z :...
- Page 18 NOTES A U S T: 1 8 0 0 8 9 0 8 4 0...
- Page 19 FIVE (5) YEAR LIMITED REPLACEMENT WARRANTY STATEMENT If your product becomes defective due to faulty material or workmanship within a period of 5 year from the date of purchase, we warrant to do the following: • For New Zealand Consumers: We will replace the product with a new product, free of charge, or repair the product at our cost, at our discretion. • For Australian Consumers: Our goods come with guarantees that cannot be excluded under the Australian Consumer Law.
- Page 20 NV500NZ�26�SAA�IB�ENG�150527�1 Printed in China © 2015 Euro-Pro Operating LLC Illustrations may differ from actual product.
Need help?
Do you have a question about the NV500NZ and is the answer not in the manual?
Questions and answers