Table of Contents
Advertisement
Warranty Registration System
Help us to serve you better by registering
your product for Warranty
Web
Register at w
ww.onida.com
Telephone
Call Centre No. 0XX-39889000(0XX-STD Code of
State Capital)
Post / Visit
Post the Warranty Registration Card &
Copy or Visit the Nearest Service Centre.
Service Centre
3 STAR
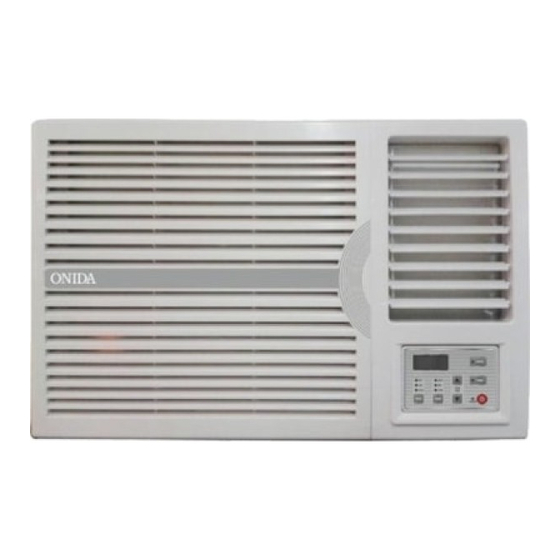
Model: W182FLT / W183FLT
The unit displayed is for representational purposes only. Actual unit may vary.
2 STAR
Advertisement
Table of Contents

Related Manuals for Onida W182FLT


Summary of Contents for Onida W182FLT
- Page 1 Call Centre No. 0XX-39889000(0XX-STD Code of State Capital) Post / Visit Post the Warranty Registration Card & Service Centre Copy or Visit the Nearest Service Centre. Model: W182FLT / W183FLT The unit displayed is for representational purposes only. Actual unit may vary.
- Page 2 Dear customer Congratulation on buying ONIDA Air Conditioner. Y our Air Conditioner comes with ONIDA Guarantee of Quality as detailed in the manual. ONIDA takes great pride in providing its customers with state- of-the-art products that adheres to international quality standards.
-
Page 3: Table Of Contents
CONTENTS Salient Features Inside Air Conditioner Control Panel Remote Overview Operations Safety Precautions Installation Electrical Requirements Take care of your Air Conditioner Precautions to be taken Trouble Shooting Chart Installation and Satisfaction Report Warranty Terms & Conditions Preventive Maintenance Service Coupon Warranty Card(Customer Copy) Warranty Card(service Center Copy) -
Page 4: Salient Features
SALIENT FEATURES 1.5T Window Air Conditioner Model Code : W182FLT / W183FLT • Aesthetics:- a) Unique Flat Panel • Performance:- a) 3 Star / 2 Star Energy Saver BEE Rated b) High BTU Compressor c) Trapezoidal Inner Grooved Tube d) Large Condenser Coil •... -
Page 5: Inside Air Conditioner
INSIDE THE AIR CONTROL PANEL CONDITIONER SWING ON/OFF ON/OFF HIGH TIMER TEMP COOL TIME MODE SPEED POWER 1. Front panel 2. Air filter 3. Frame FEATHER TOUCH: 1. “Power” Key 4. Cabinet MODE SWING Power button to ON/OFF the Air Conditioner. TIMER SLEEP Ÿ... -
Page 6: Remote Overview
REMOTE OVERVIEW OPERATIONS Signal ejecting window Operating Your Air Conditioner: Your Window Air Conditioner can be conveniently operated using the intelligent cordless remote control. Switch on the MCB. Press ON/OFF button on remote handset to switch ON the AC. All icons will glow once. Your AC switches on with parameters that were set before power was switched off. -
Page 7: Operations
OPERATIONS OPERATIONS Your Window AC operates in one of four modes, AUTO- COOL-DRY- . The modes button The FAN Mode: cyclically chooses between these operating modes. 1. Press "MODE" button to cyclically step through the AUTO-COOL-DRY-FAN modes and stop when FAN mode is selected. The AUTO Mode : 1. - Page 8 OPERATIONS OPERATIONS NOTE: Upto 10 hrs, setting time increment will be 0.5 hrs, after 10 hrs setting time Vent Control increment will be 1 hrs. The Vent control is located above the control knobs. The operation is different SLEEP Operation: on different models (see below figures).
-
Page 9: Safety Precautions
SAFETY PRECAUTIONS SAFETY PRECAUTIONS To prevent injury to the user or other people and property damage, the following instructions must be followed. Incorrect operation due to ignoring of instruction will cause harm or damage, the seriousness is Ÿ classified by the following indications. When cleaning the unit , first Do not put a pet or house Do no t us e for special... -
Page 10: Installation
INSTALLATION INSTALLATION Installation of the Housing Select the best location Step 1 Remove the air conditioner from it’s packaging, remove fixing screws and slide the air conditioner out of it’s housing (Refer to installation Steps). AWNING AWNING FENCE Step 2 FENCE Prepare the hole in the wall so that the bottom of the housing is well supported, the top has minimum clearance and the air inlet louvers have clearance as shown below in... - Page 11 INSTALLATION INSTALLATION Installation Steps Installation of the unit into the Housing (Figure 1) (Figure 2) Pull out the Air-return Remove the base fixing 1. Slide the unit into the housing until it is firmly against the rear of the housing. Care is required grids,and remove three plate (optional steps,The to ensure the foam sealing strips on the housing remain in position.
-
Page 12: Electrical Requirements
ELECTRICAL INSTALLATION REQUIREMENTS Treatment of condensing water There are two ways to handle the condensing water. Electrical requirements Please make your choice according to your needs. Treatment of condensing water (Figure 1-1). • Wiring up to the location of the air conditioner should be as under : Method I: - 7/20 gauge Block the drainage hole on one side of the unit base... -
Page 13: Take Care Of Your Air Conditioner
TAKE CARE OF YOUR PRECAUTIONS TO BE TAKEN AIR CONDITIONER Air Filter Do's ( The air filter behind the inlet grill should be checked and • Seal all air gaps in the room cleaned at least once every 2 weeks (or as necessary) to maintain optimal performance of the air conditioner. -
Page 14: Trouble Shooting Chart
TROUBLE SHOOTING CHART Symptoms Possible Causes Suggested Remedy Unit does not start MCB has tripped Reset MCB Fuse has burnt Replace fuse wire Input voltage to the If the input voltage to stabilizer is below the stabilizer is below acceptable range the acceptable range, the AC will not operate Press the On/Off key... -
Page 15: Installation And Satisfaction Report
INSTALLATION & SATISFACTION REPORT Customer Name : Address Phone[O] Unit Model Unit Serial Number Dealer Name Invoice Number Date of Purchase Date of Installation MCB Rating Current (Amps.) Cable Size Ambient Temp. ( C) Earthing Room Temp. ( C) Stabiliser Grill Temp. -
Page 16: Warranty Terms & Conditions
WARRANTY TERMS AND CONDITIONS M/S. MIRC ELECTRONICS LTD, WARRANTS THIS ONIDA AIR CONDITIONER[(except the front grill, knobs, remote unit and add-on plastic parts) TO THE ORIGINAL PURCHASER TO BE FREE FROM DEFECTS IN MATERIALS AND WORKMANSHIP WITHIN ONE YEAR FROM THE DATE OF PURCHASE AS PROVIDED IN THE WARRANTY REGISTERATION CARD. -
Page 17: Preventive Maintenance Service Coupon
Preventive Maintenance Service Customer Identification 8. It shall be the absolute discretion of the company to a) effect the repairs or replacement of parts Number: whether at the site of installation or at any service centre, and b) have the job attended to either by the Preventive Maintenance Service 1 Date: ________ Company's service personnel or its authorised dealer... -
Page 18: Warranty Card(Customer Copy)
We welcome your Valuable Suggestions, if any, to Improve our Products and Services : FOR OFFICE USE ONLY Customer Code: Branch: Mirc Electronics Ltd. For Other Details on Our Products & Services Log On To www.onida.com Note: Company Will Not Be Responsible For The Loss Of This Form During Transit. -
Page 19: Warranty Card(Service Center Copy)
Mirc Electronics Ltd. Mirc Electronics Ltd. For Other Details on Our Products & Services Log On To www.onida.com For Other Details on Our Products & Services Log On To www.onida.com Note: Company Will Not Be Responsible For The Loss Of This Form During Transit. - Page 20 BUSINESS REPLY ENVELOPE ONIDA CUSTOMER RELATION CENTRE Adonis Electronics Pvt Ltd. Onida House - II Mukund Ground Floor, Mahal Industrial Estate, off. Mahakali Caves Road, Andheri East, Mumbai, Maharashtra, India - 400093...
Need help?
Do you have a question about the W182FLT and is the answer not in the manual?
Questions and answers