Advertisement
Advertisement
Table of Contents

Related Manuals for Sherwood Scuba BRUT SRB 9110


Summary of Contents for Sherwood Scuba BRUT SRB 9110
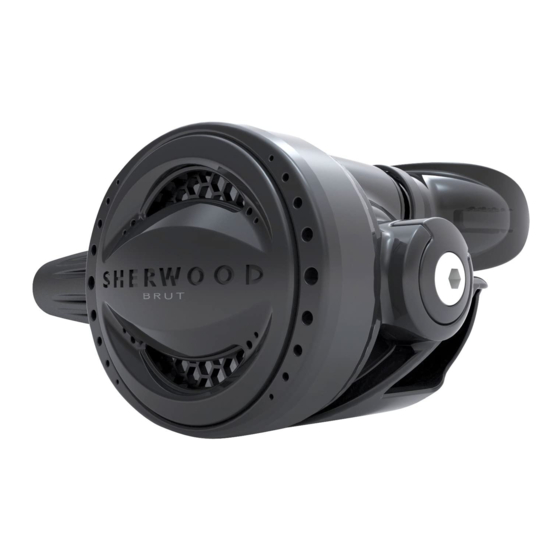
- Page 1 www.sherwoodscuba.com SRB 9110 SRB 9310 BRUT MAGNUM SECOND STAGE...
- Page 2 Before attempting to perform service read this manual in its entirety. There are warnings and cautions contained in the manual that may affect your safety or the safety of the regulator user. If you are uncertain as to whether you are qualified to perform this service contact your regional Sherwood Scuba Distributor for technical assistance.
- Page 3 Regulators that are used in extreme conditions, such as commercial use or rentals require more frequent service over- hauls of at least every 3 to 6 months. Sherwood Scuba offers a standard service kit that contains the parts recommended to be replaced in connection with the standard service overhaul.
-
Page 4: General Comments
www.sherwoodscuba.com GENERAL COMMENTS NOTE – Read this section before attempting to perform service. Read the entire set of procedures that follows before starting to service. Steps taken out of sequence or without the knowledge of the proper procedure could damage the regulator or otherwise complicate the service process. Refer to the Illustrated Parts List while performing service. - Page 5 www.sherwoodscuba.com ENRICHED AIR NITROX SERVICE The Sherwood regulator presented in this manual has been designed and manufactured to allow the use of Enriched Air Nitrox (EAN) gas with an oxygen component not to exceed 40%. In order to maintain this option the user must ensure that the regulator is protected from the introduction of hydrocarbons.
-
Page 6: First Stage
FIRST STAGE RECOMMENDED TOOLS AND SUPPLIERS The specialty tools identified below may be purchased from your Sherwood Scuba Distributor. Common tools are available from several sources. Common Tools Open End Wrenches - 9/16”, 5/8”,1/2” Box End Wrench – 3/4”... -
Page 7: Second Stage
SECOND STAGE RECOMMENDED TOOLS AND SUPPLIERS The specialty tools identified below may be purchased from your Sherwood Scuba Distributor. Common tools are available from several sources. Common Tools Open End Wrenches - 9/16”, 5/8”,1/2” Hex Tool 5/32” Small Flat Blade Screw Driver... -
Page 8: Disassembly Procedure
www.sherwoodscuba.com DISASSEMBLY PROCEDURE Use a 3/4” (19mm) open end wrench to stabilize the inlet connector (9) and a 5/8” (16mm) wrench to rotate the hose fitting nut counterclockwise to separate the hose assembly (26) from the inlet connector. Remove the tie wrap (17) and mouthpiece (25). CAUTION –... - Page 9 www.sherwoodscuba.com Remove the purge cover (22) by inserting a probe at the entry point on the housing and lift the edge of the cover. Slide the tool clockwise about the pivot point until cover comes loose. Make sure to hold the cover with your hand to keep the cover from flying off.
- Page 10 www.sherwoodscuba.com Remove the O-ring (11) from the access plug and set aside for cleaning (it will be reused). Use a 3/4” (19mm) wrench to remove the inlet connector from the housing. Remove O-ring and set aside for cleaning. Slide valve body (1) back and lift upward to remove it from the housing. 10.
- Page 11 www.sherwoodscuba.com 11. Remove and discard O-ring (10). 12. Remove the exhaust tee (16) from the housing by removing the two screws (15). 13. Remove the exhaust valve (13) from the housing by grasping the valve and stretching the tab to release it from the housing.
- Page 12 www.sherwoodscuba.com 16. From the opposite side, push the cam slightly, only until the other leg of the lever is free CAUTION – Do not push the cam all the way through or the poppit will shoot out at the end of the valve body.
- Page 13 www.sherwoodscuba.com 18. Remove Adjusting Screw by rotating it counterclockwise completely until it is out. 19. Grasp the Poppet Seat and pull to separate it from the Poppet. Discard the Seat. This concludes the disassembly process. Proceed to Cleaning and Inspection before beginning reassembly.
-
Page 14: General Cleaning Procedure
www.sherwoodscuba.com GENERAL CLEANING PROCEDURE 20. Thermoplastic, silicone rubber and anodized aluminum parts, such as diaphragms, accent trim, adjustment knobs, static O-rings, and thermoplastic housings. a. Soak in a solution of warm water and ordinary liquid dish detergent. Scrub with a soft nylon bristle brush to remove deposits. -
Page 15: Reassembly Procedures
www.sherwoodscuba.com REASSEMBLY PROCEDURES 23. Install a new poppet seat into the poppet. 24. Install the adjustment screw into the valve body with an initial insertion of only one or two threads showing. 25. Place spring (7) inside valve body (1). 26. - Page 16 www.sherwoodscuba.com 28. Install the cleaned O-ring (11) onto the inlet connector. Note the O-ring groove is closest to the end with fine threads. 29. Install a new generally lubricated O-ring (10) onto the Adjustable Orifice and then insert the adjustable orifice into the Inlet Connector.
- Page 17 www.sherwoodscuba.com CAUTION – Before performing the next step retract the Poppet from the Adjustable Orifice by fully depressing the Demand Lever. Rotation of the Adjustable Orifice without retracting the Poppet may result in damage to the Poppet Seat necessitating replacement of the seat. 33.
- Page 18 www.sherwoodscuba.com 37. Pressurize the regulator so that intermediate pressure acts on the second stage. The pre-set performed on step 29 will potentially lead to a slight air leak by the poppet until a final adjustment is made. Use the in-line Adjustment Tool to correct the air leak if present.
- Page 19 www.sherwoodscuba.com BRUT – MAGNUM SECOND STAGE ITEM PART # DESCRIPTION ITEM PART # DESCRIPTION SHV9050 Valve Body w Vanes, Oasis (Chrome) SHV7027 Screw 1a SHV8975 Valve Body w Vane, Blizzard (Black) SHV7024 Exhaust Tee SHV7020 Poppet SHV7026 Tie Wrap SHV7019 Adjustment Screw SHV7025 C Clip...
Need help?
Do you have a question about the BRUT SRB 9110 and is the answer not in the manual?
Questions and answers