
Subscribe to Our Youtube Channel
Related Manuals for Sherwood Scuba Oasis


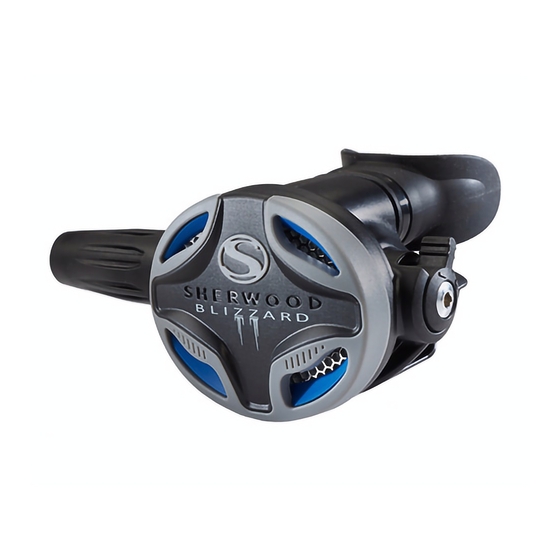
Summary of Contents for Sherwood Scuba Oasis
- Page 1 SR B975 0 | SR B 9 95 0 OASIS & BLIZZARD SECOND STAGES SERVICE GUIDE www.SherwoodScuba.com...
- Page 2 If you are uncertain as to whether or not you are qualified to perform this service contact your regional Sherwood Scuba Distributor for technical assistance.
- Page 3 3 to 6 months, consult with Sherwood’s technical support if in doubt about this subject. Sherwood Scuba offers a standard service kit that contains the parts recommended to be replaced in connection with the standard service overhaul.
-
Page 4: General Comments
www.sherwoodscuba.com GENERAL COMMENTS NOTE – Read this section before attempting to perform service. Read the entire set of procedures that follows before starting to service. Steps taken out of sequence or without the knowledge of the proper procedure could damage the regulator or otherwise complicate the service process. Refer to the Illustrated Parts List while performing service. -
Page 5: Facility Requirements
During the mentioned steps where the procedure clearly indicates the use of a specialty tool, Sherwood Scuba strongly discourages technicians the use of substitute or make-shift tools to perform such steps. Sherwood specialty tools are required to perform service are listed on the fol-... - Page 6 Oasis Pro & Blizzard Pro SECOND STAGES RECOMMENDED TOOLS AND SERVICE KIT The specialty tools identified below may be purchased from your Sherwood Scuba Distributor. Common tools are available from several sources. Common Tools Open End Wrenches - 11/16”, 5/8”, 9/16”...
-
Page 7: Disassembly Procedure
Oasis Pro & Blizzard Pro SECOND STAGES - DISASSEMBLY PROCEDURES DISASSEMBLY PROCEDURE Use a 3/4” (19mm) open end wrench to stabilize the inlet connector (9) and a 5/8” (16mm) w the hose fitting nut counterclockwise to separate the hose assembly (26) from the inlet connecto 1. - Page 8 www.sherwoodscuba.com 3. Locate notch at the bottom of the 4. Carefully continue inserting the screw driver until it passes through one housing (33) and start inserting a small of the openings at the top of the purge cover. Use that orifice area as a flat screwdriver in between the Purge pivoting point for the next step.
- Page 9 www.sherwoodscuba.com 9. Extract Venturi Switch (8) from 8. Pull clip upwards and at an angle until it gets completely housing.. off the Venturi Switch (8). 10. Using any ¼” nut driver or 20-612-200 Blizzard Pro Nut Driver remove Poppet Nut (17) by rotating it counterclockwise.
- Page 10 www.sherwoodscuba.com 12. Using a 11/16 open end wrench remove the Retaining Nut (14) and pull out the Retaining Washer (15). 13. Carefully push the partially disassembled Valve Body inwards, collect the o-ring (6) that will likely fall off after it loses contact with the Valve Body.
- Page 11 www.sherwoodscuba.com 15. Using Orifice Driver 20-675-200 unthread the orifice (20) by rotating it counterclockwise until it is only spinning. This will release some of the pressure from the spring loaded components inside facilitating removal at a later step. CAUTION – The following step is crucial to ensure a proper demand lever alignment during reassembly.
- Page 12 www.sherwoodscuba.com 16. Using a #0 Phillips screw driver remove the setting screw from the valve body. Ensure you place your finger over and then aim the valve end against a hard surface to prevent the spring loaded components from being projected off the valve body.
- Page 13 www.sherwoodscuba.com 19. Using a curved pick remove LP seat from poppet. Discard used LP seat. 20. Remove o-ring (26) from Orifice (20) using a soft material pick. Discard the used o-ring.
- Page 14 NOT necessarily required on every single overhaul. Exert caution to avoid thread damage. 21. Using a Phillips screwdriver remove the Exhaust Tee screws (1). If working on Oasis those screws also hold the Vanes (35 & 36), carefully remove those and place them on a safe location for later inspection & re-assembly.
- Page 15 www.sherwoodscuba.com 2nd STAGES - GENERAL CLEANING AND INSPECTION PROCEDURES CLEANING: 24. Thermoplastic, silicone rubber and anodized aluminum parts, such as diaphragms, accent trim, adjustment knobs, static/ replaceable O-rings, and thermoplastic housings. a. Soak in a solution of warm water and ordinary liquid dish detergent. Scrub with a soft nylon bristle brush to remove deposits.
- Page 16 (insertion area) then pinch it and pull it slowly until it passes through. Run finger around and ensure valve sits evenly. NOTE – Blizzard Pro is the only one with Blue Exhaust Valve (SHV7078) and Oasis Pro is the only one with Moisture Retention Vanes (SHV5071 & SHV5071).
- Page 17 Replace Exhaust Tee cover and thread the screws avoiding over-torque. Blizzard Pro model only requires screws & is the only one that uses a blue exhaust valve PN# SHV7078. Oasis Pro requires the vanes to be secured with the same screws as well; ensure grilled vane goes on top and flat vane goes on bottom.
- Page 18 www.sherwoodscuba.com 33. Install Poppet Guide & Spring Bushing. Note the correct orientation of Poppet Guide (21) and ensure bushing soft surface is oriented upwards 35. Install spring (22). 36. Note the square features from both the poppet’s tip and the valve end. Those must coincide when assembled to prevent poppet from rotating.
- Page 19 www.sherwoodscuba.com 39. Push down the Valve End so more of the poppet’s threads are exposed. If square features do not coincide, while placing poppet against a rubber mat to prevent sliding, slightly rotate valve end and push down again until poppet and valve end locked up against each other and poppet does not turn.
- Page 20 www.sherwoodscuba.com WARNING – It is imperative that the valve end is correctly aligned in relationship with the valve body using the index mark created in Step 16. Failure to do so will cause damage to the valve end and potentially could also cause the demand lever to be off center compromising the regulator’s function. 42.
- Page 21 www.sherwoodscuba.com 46. Insert partially assembled Valve Body and ensure correct orientation and secure placement into the Valve Flange inner square feature. CAUTION – Ensure both square index features from Valve Body and Valve Flange coincide and the air flow orifice from the valve body points towards mouth breathing area.
- Page 22 www.sherwoodscuba.com 51. Locate Demand Lever (13) and, while holding the housing in the same 52. Remove tool from valve body by position, install lever at the valve’s end receiving point ensuring the cams unthreading counterclockwise; Demand Lever will rise upwards. are in between the washer and the plastic surface of the Valve End.
- Page 23 www.sherwoodscuba.com 57. Insert C-clip (4) to secure the 58. Locate Diaphragm, Diaphragm 59. Ensure proper placement of Ventury Switch. Retainer and Accent Ring. Accent Ring, (All index marks go at the bottom). 60. Locate alignment marks on Diaphragm, Diaphragm Retainer and Accent Ring (9) and ensure they meet; see examples below.
- Page 24 Ensure purge cover is evenly distributed around the housing. Oasis Pro & Blizzard Pro - CALIBRATION PROCEDURES CAUTION – On the next step, ensure the purge is depressed every time the in-line adjuster wheel is rotated.
- Page 25 LOAD RESPONSE. POPPET NUT ADJUSTMENT ALSO AFFECTS DEMAND LEVER HEIGHT. CAUTION – Oasis/Blizzard PRO Valve Bodies require that both adjustments (Orifice calibration and Poppet Nut adjustment) be tuned in conjunction to obtain optimal regulator performance. A proper calibration will produce a 2nd stage that is easy to breath from and it’s purge is also easy to be actuated during normal operation.
- Page 26 970010 O-RING 970011 O-RING SHV7023 LP PORT PLUG SHV8359 VENTURI SWITCH SHV7530 HOSE ASSEMBLY SHV8363 OASIS PURGE ACCENT RING (green) SHV7031 HOSE PROTECTOR, LONG SHV8362 CHROME DIAPRAGM RETAINER SHV7032 HOSE PROTECTOR, SHORT 9000-9 POPPET WASHER SHV5033 OASIS MOUTHPIECE (green) SHV7030...
- Page 27 www.sherwoodscuba.com BLIZZARD SECOND STAGE Item No. Part Number Description SHV8354 POPPET SHV7027 EXHAUST TEE RETAINING SCREWS SHV7016S ORIFICE SHV7024 EXHAUST TEE SHV8358 POPPET GUIDE SHV7026 TIE WRAP SHV7017 SPRING SHV7025 C CLIP SHV8350 VALVE FLANGE SHV7006 BLIZZARD EXHAUST VALVE (Blue) SHV8360 VALVE END 970015...
- Page 28 www.sherwoodscuba.com NOTES:...
Need help?
Do you have a question about the Oasis and is the answer not in the manual?
Questions and answers