Advertisement
Quick Links
Advertisement

Related Manuals for Sherwood Scuba SR1 SRB1000


Summary of Contents for Sherwood Scuba SR1 SRB1000
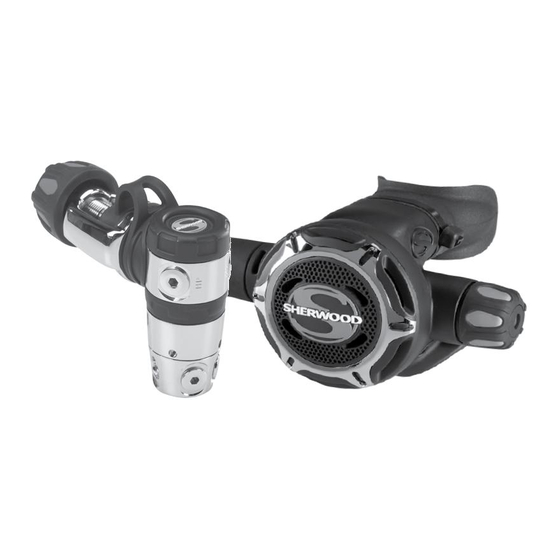
- Page 1 SRB1000...
- Page 2 Regulator Design & Function...
- Page 3 Design and Function Second Stage Operation 135 PSI...
- Page 4 Design and Function Balanced Second Stage 135 PSI 135 PSI...
- Page 5 Design and Function Balanced Second Stage Pressure decreased 135 PSI Demand created...
- Page 6 Design and Function Balanced Second Stage Valve open Demand created...
- Page 7 Design and Function Balanced Second Stage Flow stops - Pressure increased seat closed 135 PSI Demand stops...
- Page 8 Design and Function Balanced Second Stage Exhaust valve open 135 PSI Diver exhales...
- Page 9 Design and Function Turn knob clockwise. Increase breathing Regulator Adjustment resistance. Decrease venturi effect. 135 PSI...
- Page 10 Design and Function Turn knob counter clockwise. Decrease Regulator Adjustment breathing resistance. Increase venturi effect.
- Page 11 Regulator Design and Function Turn knob • clockwise. Hole covered Increase • breathing resistance. Decrease venturi • effect. Spring tension increased...
- Page 12 Regulator Design and Function Turn knob • counter clockwise. Hole uncovered Decrease • breathing resistance. Increase venturi • effect. Spring tension decreased...
-
Page 13: Disassembly Procedures
Disassembly Procedures... - Page 14 Disassembly Procedures Exploded view 2nd stage. •...
- Page 15 Disassembly Procedures Removal of hose. • - Retract hose protector. - Use a 5/8” open end wrench.
- Page 16 Disassembly Procedures Removal and • discard of hose swivel o-ring.
- Page 17 Disassembly Procedures Disassembly of cover • assembly. - Unscrew counter clockwise by hand.
- Page 18 Disassembly Procedures Note: generally it is unnecessary to disassemble • front cover assembly when performing standard service. Cleaning can be adequately accomplished by rinsing and scrubbing if necessary with a soft brush. However if damage to the cover is observed and it must be disassembled to replace parts, proceed as described.
- Page 19 Disassembly Procedures Disassembly of cover • assembly. Tabs - Use cover retainer tool P/N 20-703-100. - Align tab with slots. Slots...
- Page 20 Disassembly Procedures Disassembly of cover • assembly. - Turn cover retainer tool counter clockwise.
- Page 21 Disassembly Procedures Separate cove • retainer from cover ring. Separate cover and • accent ring from cover ring.
- Page 22 Disassembly Procedures Remove • diaphragm.
- Page 23 Disassembly Procedures Remove and discard • strap. - Carefully use wire pliers.
- Page 24 Disassembly Procedures Remove • mouthpiece. Pull...
- Page 25 Disassembly Procedures Caution: Be sure to use a padded or protected • tool to lift the exhaust cover from the tabs on the housing use of an unprotected tool will damage the exhaust cover and may require replacement of the part.
- Page 26 Disassembly Procedures Removal of exhaust • cover. - Carefully insert Pivot down padded bar shaped tool (snap ring pliers P/N 20-101-500). - Gently and carefully pry and lift edge up and away from tab on Pry up housing.
- Page 27 Disassembly Procedures Removal of exhaust • cover. Hold first side with thumb - Repeat procedure on opposite side of exhaust cover. - Hold first side with thumb.
- Page 28 Disassembly Procedures Removal of exhaust • Slots cover. Tabs - Lift up toward top of housing.
- Page 29 Disassembly Procedures Removal of retaining • nut. - Use 3/4” box end wrench.
- Page 30 Disassembly Procedures Removal of • retaining nut.
- Page 31 Disassembly Procedures Removal of clip. • - Use small flat blade screwdriver.
- Page 32 Disassembly Procedures Removal of clip. •...
- Page 33 Disassembly Procedures Removal of valve • body. Push threaded end - While lever is depressed. - Push threaded end. While lever is depressed...
- Page 34 Disassembly Procedures Removal of valve • body. - As valve body thread pass through housing o-ring will release.
- Page 35 Disassembly Procedures Removal of valve • body. - Set valve body aside.
- Page 36 Disassembly Procedures Removal of exhaust • valve. - Fold in half and pull while gently pulling tab.
- Page 37 Disassembly Procedures Disassembly of valve • body. - Removal of adjustment nut. - Unthread counter clockwise.
- Page 38 Disassembly Procedures Disassembly of valve • body. - Remove adjustment nut.
- Page 39 Disassembly Procedures Disassembly of valve • body. - Remove o-ring. - Use floss tool and squeeze.
- Page 40 Disassembly Procedures Removal of o-ring. •...
- Page 41 Disassembly Procedures Disassembly of valve • body. - Removal of lever. - Gently pull one leg at a time.
- Page 42 Disassembly Procedures Disassembly of valve • body. - Removal of lever. - Gently pull opposite leg to release lever.
- Page 43 Disassembly Procedures Disassembly of valve • body. Push - Disassembly of level saddle. Push - Push up on both sides to open diameter.
- Page 44 Disassembly Procedures Disassembly of valve • body. - Removal of lever saddle.
- Page 45 Disassembly Procedures Disassembly of valve • body. - Removal of diverter. - Lift and pull to separate.
- Page 46 Disassembly Procedures Disassembly of valve • body. - Removal of diverter.
- Page 47 Disassembly Procedures Disassembly of valve • body. - Removal of ring seal. Slide off body - Slide off body.
- Page 48 Disassembly Procedures Disassembly of valve • body. - Removal of ring seal.
- Page 49 Disassembly Procedures Disassembly of valve • body. - Removal of knob assembly. - Rotate counter clockwise.
- Page 50 Disassembly Procedures Disassembly of valve • body. - Removal of knob assembly. - Set knob assembly aside.
- Page 51 Disassembly Procedures Disassembly of valve • body. - Dump out balance chamber, spring and poppet.
- Page 52 Disassembly Procedures Disassembly of poppet, • spring and balance chamber. - Separate all components.
- Page 53 Disassembly Procedures Disassembly of poppet. • - Remove and discard o-ring. - Use floss tool.
- Page 54 Disassembly Procedures Disassembly of poppet. • - Remove seat from end of poppet.
- Page 55 Disassembly Procedures Disassembly of poppet. • - Discard used seat.
- Page 56 Disassembly Procedures Disassembly of valve • body assembly. - Removal of orifice. - Use 1/4” wooden dowel. - Push orifice out.
- Page 57 Disassembly Procedures Disassembly of valve • assembly. - Removal of orifice. Push...
- Page 58 Disassembly Procedures Disassembly of orifice. • - Removal and discard o-ring.
- Page 59 Disassembly Procedures Disassembly of knob • assembly. - Remove o-ring.
- Page 60 Disassembly Procedures Disassembly of knob • assembly. - Discard used o-ring.
- Page 61 Disassembly Procedures Disassembly of knob • assembly. - Removal of knob retainer. - Use 5/32” hex key.
- Page 62 Disassembly Procedures Disassembly of knob • assembly. - Removal of knob. - Pull knob off adjustment body.
- Page 63 Disassembly Procedures Disassembly of • adjustment body. - Use 1/8” hex key remove adjustment stem.
- Page 64 Disassembly Procedures Disassembly of • adjustment body. - Back out adjustment stem until released from body.
- Page 65 Disassembly Procedures Disassembly of • adjustment stem. - Remove o-ring.
- Page 66 Disassembly Procedures Disassembly of • adjustment stem. - Discard used o-ring.
-
Page 67: Cleaning Procedures
Cleaning Procedures... - Page 68 Cleaning Procedures Thermoplastic, silicone rubber, rubber and anodized • aluminum parts. i.e. diaphragms, adj. knobs static o-rings 2nd stage housing. A. Soak - warm water and liquid dish detergent. B. Scrub - with soft nylon brush. C. Rinse - fresh water. D.
- Page 69 Cleaning Procedures Chrome plated brass, stainless steel part and hoses. • A. Degrease - warm water and liquid detergent. B. Rinse - fresh water. C. Soak - vinegar and water solution (50% water) for 30 minutes. D. Rinse - fresh water. E.
- Page 70 Cleaning Procedures Cleaning procedures • warm soapy water nylon brush.
-
Page 71: Inspection Procedures
Inspection Procedures... - Page 72 Inspection Procedures All reusable chrome plated brass and stainless steel parts. • Sealing Surfaces - A. Scratches B. Nicks C. Cuts D. Deformation E. Debris Sealing Surfaces - A. Damage to threads...
- Page 73 Inspection Procedures Inspection procedures • - Use magnifier.
-
Page 74: Lubrication Procedures
Lubrication Procedures... - Page 75 Lubrication Procedures O-ring lubrication • Use only Christo-Lube 111. • A. General - o-rings in most instances should receive only enough lubrication to ensure they are supple. A light coating of lubrication should present a surface that glistens but without a defined layer of lubrication visible. B.
- Page 76 Lubrication Procedures Lubricating procedures. • - Use only Christo-Lube P/N MCG-111.
- Page 77 Lubrication Procedures General (left) Ample • (right).
-
Page 78: Service Kit
Service Kit... - Page 79 SR1 Service Kit P/N 1000-PK Kit includes: 972016 O-ring 980111 O-ring 1105-33 Filter 970010 (2) O-ring 1105-16 HP seat 7206-1 Tie strap 980013 O-ring 7206-98N Seat 98009 O-ring 970410 O-ring 105009 Backup ring 972005 O-ring 970008 O-ring 972010 O-ring 980020 O-ring...
-
Page 80: Reassembly Procedures
Reassembly Procedures... - Page 81 Reassembly Procedures Install new amply • lubricated o-ring on orifice.
- Page 82 Reassembly Procedures Insert orifice seating • surface end first into threaded end of valve body.
- Page 83 Reassembly Procedures Installation of orifice in • valve body using 1/4” wooden dowel. - Push orifice in valve body until it stops.
- Page 84 Reassembly Procedures Install ring seal • taper side last over threaded end of valve body.
- Page 85 Reassembly Procedures Installation of ring seal. • - Continue to slide ring seal along valve body until up against shoulder of valve body. - Taper surface smallest diameter.
- Page 86 Reassembly Procedures Install level saddle. • - Align tab of saddle with notch in valve body. Notch...
- Page 87 Reassembly Procedures Installation of lever • Threads against shoulder saddle. - Inspect - tab and notch aligned. - Threads of saddle against shoulder of valve body.
- Page 88 Reassembly Procedures Install lever one leg at a • time. - Insert leg in hole in saddle.
- Page 89 Reassembly Procedures Installation of lever. • - Inspect - both legs inserted in saddle/body holes.
- Page 90 Reassembly Procedures Install amply • lubricated o-ring on thread end of valve body.
- Page 91 Reassembly Procedures Installation of o-ring on • valve body. - Inspect - fully seated in groove.
- Page 92 Reassembly Procedures Additional lubricant • required in this application to minimize friction allowing the adjustment sleeve to move easily during adjustment procedures.
- Page 93 Reassembly Procedures Install adjustment • sleeve thread in place over lever saddle notched end of sleeve facing away from lever.
- Page 94 Reassembly Procedures Installation of adjustment • One thread showing sleeve. - Continue to thread over lever saddle until only one thread is visible on lever saddle.
- Page 95 Reassembly Procedures Install new • lubricated o-ring on stem.
- Page 96 Reassembly Procedures • Installation of o-ring on stem. - Inspect - fully seated in groove.
- Page 97 Reassembly Procedures Install stem in • adjustment body. - Use 1/8” hex key.
- Page 98 Reassembly Procedures installation of stem in • adjustment body. End of stem - Thread until stem end is sticking out of body.
- Page 99 Reassembly Procedures Install new • lubricated o-ring on adjustment body.
- Page 100 Reassembly Procedures Installation of o-ring on • adjustment body. - Inspect - fully seated in groove.
- Page 101 Reassembly Procedures Install new seat in • end of poppet.
- Page 102 Reassembly Procedures Installation of seat in • poppet. - Inspect - properly seated.
- Page 103 Reassembly Procedures Install new amply • lubricated o-ring on poppet.
- Page 104 Reassembly Procedures installation of o-ring on • poppet. - Inspect - fully seated in groove.
- Page 105 Reassembly Procedures Installation of poppet • assembly in valve body. - Mount poppet in end of poppet installation tool P/N 20-706-100. - Note-position of lever contact tabs must be facing down. Lever contact tabs...
- Page 106 Reassembly Procedures Installation of • Hold lever 90° with poppet assembly axis of valve body in valve body. Lever contact tabs facing down...
- Page 107 Reassembly Procedures Installation of poppet • assembly in valve body. - Continue to insert poppet installation tool until poppet contacts lever. - Lightly push on tool lever should move up and down.
- Page 108 Reassembly Procedures Install spring in • valve body.
- Page 109 Reassembly Procedures Installation of spring in • valve body. - Inspect - use 1/4” wooden dowel. - Lever still moves up and down.
- Page 110 Reassembly Procedures Installation of balance • chamber. - Place lubricant in open end of balance chamber.
- Page 111 Reassembly Procedures Install balance • chamber in valve body.
- Page 112 Reassembly Procedures Installation of balance • chamber in valve body. - Inspect - use 1/4” wooden dowel push dowel lightly to versify lever action.
- Page 113 Reassembly Procedures Install adjustment body. • - Thread clockwise just until thread engage.
- Page 114 Reassembly Procedures Installation of adjustment • body in valve body assembly. - When threads engage lever should move up.
- Page 115 Reassembly Procedures Installation of adjustment • Groove centered in body in valve body hole of valve body assembly. - Use know to continue threading adjustment body just until the groove in adjustment body is centered in the hold of the valve body.
- Page 116 Reassembly Procedures Installation of adjustment • body in valve body. - Remove knob and set aside for later installation.
- Page 117 Reassembly Procedures Install diverter on valve • body. Rectangular tab - Align rectangular tab in diverter with centered groove of adjustment body in valve body assembly. Centered groove...
- Page 118 Reassembly Procedures Installation of • diverter on valve body.
- Page 119 Reassembly Procedures Install knob on valve • body.
- Page 120 Reassembly Procedures Installation of knob • retainer. - Secure knob to valve body by threading knob retainer in end of knob. - Use 5/32” hex key.
- Page 121 Reassembly Procedures Installation of knob • retainer using 5/32” hex key. - Snug finger tight. - Set valve body aside.
- Page 122 Reassembly Procedures Install exhaust valve. • - Insert valve tab in housing.
- Page 123 Reassembly Procedures Installation of exhaust • valve. - Fold in half and pull tab through hole in housing.
- Page 124 Reassembly Procedures Install valve body in • housing. - Depress lever.
- Page 125 Reassembly Procedures Installation of valve body • housing. - Continue to depress lever until it passes into the housing.
- Page 126 Reassembly Procedures Installation of valve body • housing. - Once valve body is completely inserted in housing lever can be released.
- Page 127 Reassembly Procedures Installation of valve body • housing. Notched adj. sleeve - Inspect - notched area of adjustment sleeve visable.
- Page 128 Reassembly Procedures Install lubricated o- • ring over adjustment sleeve.
- Page 129 Reassembly Procedures Install clip on valve • body.
- Page 130 Reassembly Procedures Install retaining nut. •...
- Page 131 Reassembly Procedures Installation of retaining • nut. - Thread nut clockwise first by hand.
- Page 132 Reassembly Procedures Installation of retaining • nut. - Snug with 3/4” box end wrench.
- Page 133 Reassembly Procedures Install exhaust cover. • Tabs - Align slots on top of cover with tabs on shoulder of housing. Slots...
- Page 134 Reassembly Procedures Installation of exhaust • cover. - Snap bottom slots of cover over bottom tab on housing. Slots and tabs...
- Page 135 Reassembly Procedures Install new • lubricated o-ring on hose swivel.
- Page 136 Reassembly Procedures Thread hose swivel • end to valve body first clockwise by hand.
- Page 137 Reassembly Procedures Installation of hose. • - Torque hose to 40” lbs using a 5/8” crows foot and torque wrench.
- Page 138 Second Stage Regulator Testing Procedures...
- Page 139 Second Stage Regulator Testing Procedures 1. Attach partially assembled second stage to a properly • functioning first stage regulator with an intermediate pressure set at 135 ±10 PSI. 2. Rotate the adjustment knob to the full counter clockwise • position. •...
- Page 140 Second Stage Regulator Testing Procedures 6. Rotate adjustment sleeve counter clockwise with the • probe until a slight leak is detected. 7. Next, rotate the adjustment sleeve clockwise with the • probe until the leak just stops. • 8. From this position, rotate the adjustment sleeve clockwise through an arc equal in length to one of the slots in the retaining nut.
- Page 141 Second Stage Adjustment Procedures Insert a small probe • in the slot of retaining nut to engage one of the linear slots in adjustment sleeve. Rotate sleeve • counter clockwise to create slight leak.
- Page 142 Second Stage Adjustment Procedures Next, turn • adjustment sleeve clockwise to just stop leak. Then, continue to • Turn until leak stops turn clockwise in an arc equal in length to one slot in retaining nut.
- Page 143 Second Stage Regulator Fine Adjustment Procedures 1. Knob still fully rotated counter clockwise. • 2. Use 1/8” hex key. • • 3. Rotate adjustment stem counter clockwise with 1/8” hex key to create a leak. 4. Rotate adjustment stem clockwise to stop leak. •...
- Page 144 Second Stage Regulator Fine Adjustment Procedures • Rotate adjustment stem counter clockwise to create slight leak then turn clockwise to stop leak. - Use 1/8” hex key. Create leak Stop leak...
- Page 145 Second Stage Regulator Fine Adjustment Procedures Install diaphragm. •...
- Page 146 Second Stage Regulator Fine Adjustment Procedures Install cover assembly • housing. - Thread clockwise to align logo.
- Page 147 Second Stage Regulator Fine Adjustment Procedures Note: If installation of cover assembly causes • second stage to leak the lever height may be slightly out of adjustment. Repeat steps that cover adjustment of the adjustment sleeve. Do these steps with the cover in place.
- Page 148 Second Stage Regulator Fine Adjustment Procedures Install mouth piece. •...
- Page 149 Second Stage Regulator Fine Adjustment Procedures Install tie strap. • - Use tie strap pliers or needle nose pliers. - Trim excess strap.
- Page 150 Test Bench Specifications I.P. 135 ±10 PSI. • Control knob turned fully counter clockwise. O.E. no greater than • 1.5” water. Less than 4.0” water • at 15 SCFM.
- Page 151 Trouble Shooting PROBLEM CAUSE REMEDY 1. Second stage leaks when 1. a.Orifice not seated on poppet 1. a.Turn air off and back on pressurized. seat. quickly. b. Orifice or orifice o-ring dirty, b. Clean or replace orifice or damaged or worn. orifice o-ring.
- Page 152 Reassembly of Cover Assembly...
- Page 153 Reassembly of Cover Assembly Alignment of cover ring. • Arrow tip 12 o’clock Arrow tip...
- Page 154 Reassembly of Cover Assembly Install accent ring on • cover ring.
- Page 155 Reassembly of Cover Assembly Place cover retainer in • soapy water. - Makes reassembly easier.
- Page 156 Reassembly of Cover Assembly Place cover in soapy • water. - Makes reassembly easier.
- Page 157 Reassembly of Cover Assembly Arrow tip 12 o’clock Arrow tip 9 o’clock 3 o’clock...
- Page 158 Reassembly of Cover Assembly Use cover retainer • tool P/N 20- 703-100. Align tabs on • Slots retainer tool with slots in cover retainer.
- Page 159 Reassembly of Cover Assembly Thread cover • retainer with retainer tool into cover ring.
- Page 160 Reassembly of Cover Assembly Hand tight snug. •...
- Page 161 This Concludes the Servicing and Testing of the SR1 Second Stage Regulator...
Need help?
Do you have a question about the SR1 SRB1000 and is the answer not in the manual?
Questions and answers