Table of Contents
Advertisement
Advertisement
Table of Contents

Related Manuals for Gree GPC08AI-A3NNC6A


Summary of Contents for Gree GPC08AI-A3NNC6A
- Page 1 Change for Life Portable Air Conditioner Owner's Manual Residential Air Conditioners Models: GPC08AI-A3NNC6A GPC09AI-A3NNC6A GPC10AI-A3NNC6A Thank you for choosing Residential Air Conditioners,please read this owner’s manual carefully before operation and retain it for future reference.
-
Page 2: Table Of Contents
CONTENTS PRECAUTIONS........................1 LOCATION ..........................3 ..........................4 INCLUDE STRUCTURE........................5 INSTALLATION OF THE POWER CORD HOOK ..............6 INSTALLATION OF DRAINAGE HOSE ................7 DRAINAGE METHOD ......................8 INSTALL WINDOW PANEL ....................9 INSTALLATION AND REMOVAL OF THE EXHAUST HOSE..........13 CONTROL PANEL DISPLAY & OPERATING INSTRUCTIONS ........15 HOW TO USE THE REMOTE CONTROL .................16 OPERATION OF WIRELESS REMOTE CONTROL ............17... -
Page 3: Precautions
PRECAUTIONS WARNINGS FOR USE Install the air conditioner in accordance with the installation instructions in the latter section of this manual. Do not modify any part of this product. Do not insert anything into any part of the unit. Ensure the power supply used has an appropriate voltage rating. Only use a three-pin grounded electrical AC socket rated 125V, 60Hz, and 15 amps or more as shown on the right. - Page 4 PRECAUTIONS USAGE CAUTIONS Intended for indoor use only. Ventilate the room periodically during use, especially if using gas appliances. Be sure to turn the unit off and disconnect the power supply cord before performing any mainte-nance or cleaning. Do not splash or pour water directly onto the unit. Water can cause electrical shock or equipment damage.
-
Page 5: Location
PRECAUTIONS OPERATING CONDITIONS The air conditioner must be operated with in the temperature range indicated below. MODE Room temperature Cool 64°F ~ 95°F A built-in safety device may cut off operation if the temperature exceeds these limits. ENERGY EFFICIENCY TIPS Avoid direct sunlight. -
Page 6: Include
INCLUDE PARTS INCLUDED Window Exhaust Adapter A Exhaust Hose Window Exhaust Adapter B Window Exhaust Adapter C Screw (8) Foam Seal B (2) Adjustable Window Slider (3) Foam Seal A Window Locking Bracket Window Slider Bracket (4) Battery (2) Power cord Drain hose Hose Clamp Hose clip (2) -
Page 7: Structure
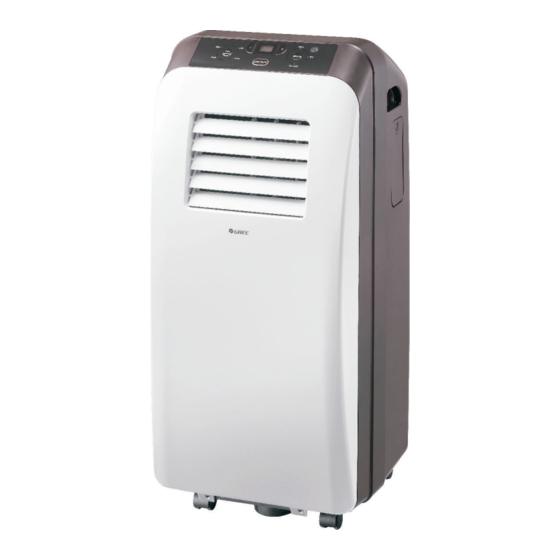
STRUCTURE Front 1, Control panel and display lamp 2, Remove control signal receiver window 3, Handel 4, Remote controller box 5, Air outlet 6, Vertical louvers 7, Horizontal louvers 8, Wheel 9, Air inlet 10, Grille 11, Air outlet 12,Air inlet 13,Power cord hook 14, Power cord 15, Window exhaust adapter A... -
Page 8: Installation Of The Power Cord Hook
INSTALLATION OF THE POWER CORD HOOK Attach the hooks to the back of air conditioner with the screws. hoook screw Wind the power cord round the power cord hooks. -
Page 9: Installation Of Drainage Hose
INSTALLATION OF DRAINAGE HOSE Installof drainage hose(as shown in following figure): Note:Drainage hose must be installed before using other wise block of drain may occur and affects normal run of unit. Remove drain cap from drain port. Drain port Drain cap 2. -
Page 10: Drainage Method
DRAINAGE METHOD When COOL or DRY is running, condensate will drain to water tank. When water tank is filled, Buzzer will sound 8 times, LED window show error code "H8". In this case, plug out drain hose from fixing clamp,unsecure the clip, pull out the rubber plug from the drain hose, then drain out water in tank. -
Page 11: Install Window Panel
INSTALL WINDOW PANEL Installation in a double-hung sash window Cut the foam seal B to the proper length and attach it to the window stool . Foam seal B Attach the window exhaust adapter C to Window panel the window panel inside opening . Window exhaust adapter C Inside Attach the protective screen to the... - Page 12 INSTALL WINDOW PANEL Window slider bracket Adjustment panel If the inner width of the window is between 28" (718mm) and 36.5" (927mm) inclusive. (1) Open the window sash and place the window panel on the window stool. (2) Slide the adjustment panel to fit the window frame width.
-
Page 13: Installation In A Sliding Sash Window
INSTALL WINDOW PANEL INSTALL WINDOW PANEL Installation in a sliding sash window Cut the foam seal B to the proper length and attach it to the window frame. Foam seal B Attach the window exhaust adapter C to Window panel the window panel inside opening. - Page 14 INSTALL WINDOW PANEL If the inner height of the window is between 28" (718mm) and 36.5" (927mm) inclusive. Adjustment panel (1) Open the window sash and place the window panel on the window frame. Window slider 28"~36.5" bracket (2) Slide the adjustment panel to fit the window frame height.
-
Page 15: Installation And Removal Of The Exhaust Hose
INSTALLATION AND REMOVAL OF THE EXHAUST HOSE Installation of the exhaust hose Attach the window exhaust adapter B and C to the exhaust hose. Extend both ends of the exhaust hose and insert them into the window exhaust adapter A and B respectively, and turn Window exhaust adapter B them until they stop. - Page 16 INSTALLATION AND REMOVAL OF THE EXHAUST HOSE Removal of the exhaust hose Remove the window exhaust adapter B Remove the window exhaust adapter B from the window exhaust adapter C. window exhaust adapter B Window exhaust adapter C Remove the window exhaust adapter A from the unit.
-
Page 17: Control Panel Display & Operating Instructions
CONTROL PANEL DISPLAY & OPERATING INSTRUCTIONS & CONTROL PANEL DISPLAY LED window Temperature selection button COOL mode lamp Receiver window DRY mode lamp FAN Speed lamp ON/OFF button FAN mode lamp MODE button Fan speed button OPERATING INSTRUCTIONS When pressing key is valid, buzzer makes a sound, indicate dlamp indicates relevant state, system will last for 2 seconds. -
Page 18: How To Use The Remote Control
HOW TO USE THE REMOTE CONTROL Point the remote control towards the units signal receiver window and press the desired button. A beep will sound when the unit re- ceives the signal. Make sure nothing, such as curtains, blocks the signal receiver window. For good receive, the distance between operator and the unit no more than 5 meters. -
Page 19: Operation Of Wireless Remote Control
OPERATION OF WIRELESS REMOTE CONTROL Notice: This is a general use remote controller, it could be used for the air conditioners with multifunction; For some function, which the model doesn't have, if press the corresponding button on the remote controller that the unit will keep the original runningstatus. - Page 20 OPERATION OF WIRELESS REMOTE CONTROL TIMER TIMER button By pressing this key under switch-off state,you may set the time for auto switch-on. The range of setting is 0.5 ~ 24 hours. The characters "T-ON" and "H" will flash for 5 seconds. Within 5 seconds, you may make one press of this key to complete the sttingand send the message.If the setting is valid, the set time will be displayed for 2 seconds...
- Page 21 OPERATION OF WIRELESS REMOTE CONTROL Guide for operation- General operation 1. After powered on, press ON/OFF button, the unit will start to run. 2. Press MODE button, select desired running mode, enter into the corresponding operation directly. 3. Pressing + or - button, to set the desired temperature. (It is unnecessary set the temp.
-
Page 22: Maintenance
MAINTENANCE There are wheels at bottom of mobile air conditioner that enable the unit moves among Mobile AC rooms conveniently according to need. Plug off power plug from socket and cut off power before any maintenance to Warning prevent creepage occurs. Clean air filter If too much duct deposed onfilter,performance of air conditioner will reduce, thus it is better to clean filter at least once 2 weeks. -
Page 23: Malfunction Analysis
MALFUNCTION ANALYSIS If malfunction occur, please check the following before maintenance: Possible Causes Solutions Troubles 1. Insert the power plug tightly. The air conditioner doesn't start. The power supply is not connected well. 2. Replace the power plug or socket. The power plug is not inserted tightly. -
Page 24: Safe Note And Notice
SAFE NOTE AND NOTICE Location Don't place the unit in narrow location. Guarantee better ventilation for unit to prevent malfunction occurs. Don't place the unit in where there is direct sunburn to prevent fade and reduce of effect. The unit should be at least 50cm away from surface of flammable thing. -
Page 25: After Sales Service
For disposal there are several possibilities: a) The municipality has established collection systems, where electronic waste can be disposed of at least free of charge to the user. b) When buying a new product, the retailer will take back the old product at least free of charge c) The manufacturer will take back the old appliance for disposal at least free of charge to the user. - Page 26 GREE ELECTRIC APPLIANCES, INC. OF ZHUHAI Add: West Jinji Rd, Qianshan, Zhuhai, Guangdong, China, 519070 Tel: (+86-756) 8522218 Fax: (+86-756) 8669426 E-mail: gree@gree.com.cn www.gree.com 66166081...
Need help?
Do you have a question about the GPC08AI-A3NNC6A and is the answer not in the manual?
Questions and answers