Table of Contents
Advertisement
Operation Manual
Model: TU-R160HA
Digital TV Recorder
REC
MENU
OK
TU-R160HA
Important : This product can only receive Digital Terrestrial TV signals, subject to
coverage and an aerial upgrade may be required.
1. Please check coverage by phoning 08708 80 99 80 or use your mobile to SMS text
0845 880 0421
Advertisement
Table of Contents

Related Manuals for Sharp TU-R160HA


Summary of Contents for Sharp TU-R160HA
-
Page 1: Operation Manual
Operation Manual Model: TU-R160HA Digital TV Recorder MENU TU-R160HA Important : This product can only receive Digital Terrestrial TV signals, subject to coverage and an aerial upgrade may be required. 1. Please check coverage by phoning 08708 80 99 80 or use your mobile to SMS text... -
Page 2: Table Of Contents
INDEX POWER CORD (MAINS LEAD) ................................2 SUPPLIED ACCESSORIES ................................5 GENERAL PROPERTIES..................................6 REMOTE CONTROL ..................................6 FRONT AND BACK PANEL ................................7 GETTING STARTED ..................................8 CONNECTION DIAGRAMS................................8 REMOTE CONTROL & FUNCTIONS ...............................9 MENU INTERFACE ..................................11 FIRST TIME INSTALLATION ................................11 MAIN MENU.....................................11 1. CHANNEL LIST ...................................11 1.1. -
Page 3: Power Cord (Mains Lead)
POWER CORD (MAINS LEAD) Do not place the product where a piece of furniture or other heavy object could trap the power cord (mains lead). Handle the power cord by the plug. Do not pull out the plug by tugging the cord and never touch the power cord when your hands are wet as this could cause a short circuit or electric shock. - Page 4 CAUTION: Please read all of these instructions before you operate this product and save these instructions for later use. Electrical energy can perform many useful functions. This product has been engineered and manufactured to assure your personal safety. BUT IMPROPER USE CAN RESULT IN POTENTIAL ELECTRICAL SHOCK OR FIRE HAZARDS.
- Page 5 11. Power Sources This product should be operated only from the type of power source indicated on the marking label. If you are not sure of the type of power supply to your home, consult your product dealer or local power company.
-
Page 6: Supplied Accessories
18. Damage Requiring Service Unplug this product from the wall outlet and refer servicing to qualified service personnel under the following conditions: a. When the power-supply cord or plug is damaged. b. If liquid has been spilt, or objects have fallen into the product. c. -
Page 7: General Properties
GENERAL PROPERTIES 1. Menu Language : English 2. Channel lock, Menu lock 3. Channel list sorted by D-book logical channel numbers. 4. Channel list name editing option. 5. BBC UK Compliant Over Air Download. 6. PIP (Picture in picture) 7. Time shift – pause live TV. 8. -
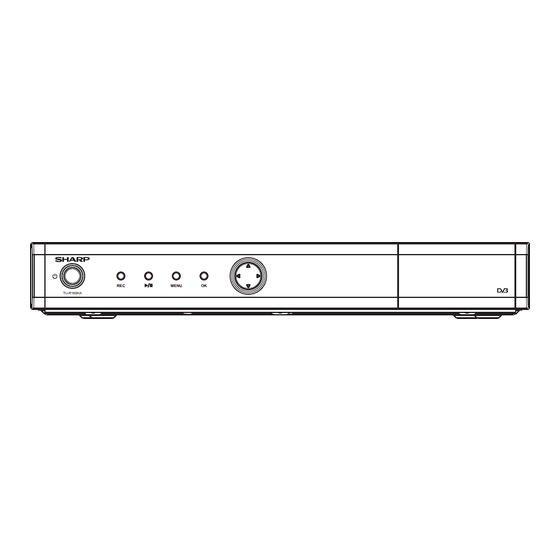
Page 8: Front And Back Panel
FRONT AND BACK PANEL FRONT PANEL MENU TU-R160HA RECORD MENU MENU PLAY /PAUSE UP/DOWN ON/OFF LEFT/RIGHT BACK PANEL DO NOT REMOVE LEFT AC IN ANTENNA 2 OUT ANTENNA 2 IN ANTENNA 1 OUT ANTENNA 1 IN RIGHT CVBS RS 232... -
Page 9: Getting Started
GETTING STARTED Before connecting, ensure that the power cord of the unit is unplugged from the AC outlet and turn off the devices to be connected. After making all connections (Diagrams on page 8), turn on the unit first and then the other devices. "NOTE"... -
Page 10: Remote Control & Functions
REMOTE CONTROL & FUNCTIONS USING THE CONTROLS ON THE FRONT PANEL You can enter the main menu by pressing the menu button on the front of the unit. Then navigate through the menu's with the four arrow buttons on the front of the unit.and make a selection with the OK button. - Page 11 FUNCTION 1.STAND BY Standby ON/OFF 2. 8 Fast Forward 3. LIB. Library of recordings 4. TIMERS Schedule recording information Record key 6. INFO Displays Info window 7. Arrow keys/OK Menu Navigation 8. BACK Exit from menu (Without saving) / Page back 9.
-
Page 12: Menu Interface
MENU INTERFACE FIRST TIME INSTALLATION When the unit is operated for the first time or if there is no channel stored in the database, “First Time Installation” Menu window is displayed on the screen. In this window, set the TV type with “3/4” keys and press OK to continue. -
Page 13: Navigating Channel List
1.1. NAVIGATING CHANNEL LIST In the “channel table” “5/6” keys can be used to move the selection to the previous or next. To exit menu and watch a specific channel, highlight it using, “5/6” then press OK key while the "SELECT" option at the bottom of the screen is highlighted. -
Page 14: Programme Guide (8 Days)
2. PROGRAMME GUIDE (8 DAYS) Press the “Guide” button to access EPG menu. “Electronic Program Guide” appears on the screen. It is able to get Information of the channel - programs weekly by means of 8-DAY–EPG. All programs of channels are displayed. -
Page 15: Recordings Library
Change /Delete: Permit or prohibit any modifications for other users. When a timer Start time is reached, the receiver starts to record the desired program, then when the end time is reached, the record stops. Save the adjustments by means of “GREEN” key or cancel with “RED”... -
Page 16: Play Options
4.1. PLAY OPTIONS 4.1.1. PLAY FROM START Plays the recording from the beginning. 4.1.2. RESUME Begins with playing from the last stopped position. 4.1.3. PLAY FROM OFFSET Begins with playing, from the time which is entered. 4.1.4 MANAGE CHAPTERS It will display any marked chapters (To set chapter marks, press the Menu button during playback and enter the “Chapter Options”... -
Page 17: Main Title
Here, only the “Start recording at” and “ Stop recording at” options are active. If you have already separated recording, you can select any chapter to begin with the archiving and stop it. If it is not separated in chapters, the beginning and ending time of the recording will be automatically the beginning and ending time of the archiving. -
Page 18: Chapter Options
4.2. CHAPTER OPTIONS During playback of a recording, if you press the “MENU” button, you will get to the “Chapter Options” menu. The chapter options menu includes following options: 4.2.1. CREATE NEW CHAPTER MARK Using the “5/6” buttons select this option and press the “OK” button, to create a chapter mark. You can set a chapter mark anywhere you want. -
Page 19: Setup
5. SETUP All the settings for the unit are adjusted in the “SETUP” window. The adjustments in this menu are: 5.1. RECORDINGS The internal hard drive can store up to 80 hours of digital TV broadcast (depending on the data rate of the recorded programme, which is set automatically by the broadcaster). -
Page 20: Format Disk
Shortest: Starting with the shortest, recordings will be deleted to make space for the requested timer. Unplayed: If this option is set to "EXCLUDED" any unplayed recordings will NOT be deleted. If this option is set to "INCLUDED", unplayed recordings WILL be deleted. 5.1.3. -
Page 21: Recording Format
In the unlikely event that there is some problem like loss of recorded video or audio content due to an HDD malfunction, please be aware beforehand that Sharp will bear no responsibility to compensate for the content which could not be recorded or edited, for the loss of recorded or edited video, or for other related direct or indirect damages. -
Page 22: Configuration
5.2. CONFIGURATION You can configure the settings of your set top box. Select Configuration from Setup menu and press “OK” to enter this menu. Press the “BACK” button on the remote to exit 5.2.1. TV TYPE Digital terrestrial television channels can broadcast programmes in a widescreen format which must be output differently to normal and widescreen TV sets. -
Page 23: Receiver Upgrade - Oad
5.2.7. RECEIVER UPGRADE - OAD Over Air Download (OAD): To ensure your DTR always has the most up to date information, please ensure that after use the unit is set to standby mode. The DTR automatically powers up at 3.00 A.M. each day and searches for any new information which may be broadcast and will download this to your receiver automatically. -
Page 24: Language
5.3. LANGUAGE In this menu you can adjust the preferred language. Language is changed by pressing “OK” key. Menu: shows the language of the system Preferred These settings will be used if available. Otherwise the current settings will be used. Ø... -
Page 25: First Time Installation
5.4.3. FIRST TIME INSTALLATION “Automatic channel scan” is activated by selecting “OK” when the line is highlighted. A pop-up menu appears on the screen, select “YES” the automatic scan begins. All the multiplexes are searched and a channel table is created automatically. All channels found are stored in a sorted form with respect to their channel numbers. - Page 26 The second press of the info button brings up a box containing a brief description of the currently viewed programme. You can now use the button to change the programme description to that of the next programme on the current channel. PR+ / PR –...
-
Page 27: Time Shifting (Pause Live Recording)
TIME SHIFTING (PAUSE LIVE RECORDING) Pause Live Recording is a feature that enables you to pause a live broadcast if, say the phone rings you can go back to the same spot that you were at when you left. The live broadcasting can be stopped any time. -
Page 28: Software Upgrade Through Rs232
4x3 picture on normal TV 8. SOFTWARE UPGRADE THROUGH RS232 The RS232 socket is for use by qualified Sharp engineers to install software updates and is not intended for every day use. NOTE: This unit cannot be controlled or connected to an RS-232C command system. -
Page 29: Notes
9. NOTES PIN CODE reminder NOTE: You need to insert the PIN code here and refer it to the pages in the manual where this is covered. NOTE: Removal of a PIN code could be subject to a service charge and if you would like to use this feature the PIN number should be written down. -
Page 30: Trouble Shooting Guide
Where this is not possible please visit our web site www.sharp.co.uk/customersupport.aspx Customers without Internet access may phone 0845 880 0421 during office hours. -
Page 31: Technical Specifications
11. TECHNICAL SPECIFICATIONS GENERAL CHARACTERISTICS Supply Voltage 220 - 240 V AC ~ 50Hz Input Frequency 470Mhz-862Mhz Maximum Power consumption 21 W Standby Power Consumption 11.7 W Operating temperature 5ºC to +45ºC Storage temperature -15ºC to +55ºC Humidity 25 to 75 % rel Physical dimensions 360x280x48 mm Weight... - Page 32 REMOTE CONTROL Operating Distance 10m Max. Batteries 2x1.5V Micro (R-03/AAA) TUNERS 2 xRF In IEC-type, female (75Ohm) 2 x RF Out (loop through) IEC-type, male (75Ohm) HARD DISK Hard Disk capacity 160 GB FRONT PANEL Display Standby ON/OFF,Record,Play, Menu, OK,PR+ / Remote Control Keys PR-, V+ / V -,Standby Led, Record Led, AUDIO R / L...
-
Page 33: Important Notice
12. IMPORTANT NOTICE: DIGITAL SWITCHOVER AND YOUR TV EQUIPMENT WHAT YOU NEED TO DO TO ENJOY WATCHING TV DURING AND FOLLOWING DIGITAL SWITCHOVER Starting in 2008* and ending in 2012, television services in the UK will go completely digital, TV region by TV region. -
Page 34: Information About Product Disposal
If the product is used for business purposes and you want to discard it: Please contact your SHARP dealer who will inform you about the take-back of the product. Y ou might be charged for the costs arising from take-back and recycling. Small products (and small amounts) might be taken back by your local collection facilities. -
Page 35: Terms Of Guarantee
3. To benefit from this guarantee, any fault which occurs must be notified to Sharp, or its appointed Service Facility within one year from the date this product was purchased.
Need help?
Do you have a question about the TU-R160HA and is the answer not in the manual?
Questions and answers