Table of Contents
Advertisement
TU-T2HR32_GB.indd 1
TU-T2HR32_GB.indd 1
Manufactured under license
from Dolby Laboratories.
Dolby and the double-D
symbol are trademarks of
Dolby Laboratories.
HDMI, the HDMI logo and
High-Definition Multimedia
Interface are trademarks or
registered trademarks of
HDMI Licensing LLC.
Important: This product can only receive Digital Terrestrial TV
signals, subject to coverage an aerial upgrade may be required.
Text your postcode followed by your house name or number to
83331* or go to www.freeview.co.uk/availability (*Costs no more
than a normal text).
1
Read this operation manual carefully.
2
If you still encounter a problem, please call our service help
line on 0845 880 0421 during normal weekday office hours.
+
29/06/2010 15:10:58
29/06/2010 15:10:58
Advertisement
Table of Contents

Subscribe to Our Youtube Channel
Related Manuals for Sharp TU-T2HR32


Summary of Contents for Sharp TU-T2HR32
- Page 1 Manufactured under license from Dolby Laboratories. Dolby and the double-D symbol are trademarks of Dolby Laboratories. HDMI, the HDMI logo and High-Definition Multimedia Interface are trademarks or registered trademarks of HDMI Licensing LLC. TU-T2HR32_GB.indd 1 TU-T2HR32_GB.indd 1 Important: This product can only receive Digital Terrestrial TV signals, subject to coverage an aerial upgrade may be required.
-
Page 2: Table Of Contents
• Dear SHARP customer Thank you for your purchase of the SHARP Digital Terrestrial HD Recorder. To ensure safety and many years of trouble- free operation of your product, please read Important safety precautions carefully before using this product. Contents Contents ... -
Page 3: Introduction
Introduction Important safety precautions Cleaning—Unplug the AC power adapter from the AC outlet before cleaning the product. Use a damp cloth to clean the product. Do • not use liquid cleaners or aerosol cleaners. Use a soft damp cloth to gently wipe the product when it is dirty. To protect the product, do not use a chemical cloth to clean it. •... -
Page 4: Remote Control Unit
Introduction Remote control unit MUTE Volume on/off. NUMERIC BUTTONS Set the channel Enter desired numbers Set the page in Digital Text Mode. Record selection (Page 14). PLAYBACK NAVIGATION Play, Pause, Stop, Fast Fwd Fast Rwd, Skip Fwd, Skip Rwd. CURSOR Select a desired item on the “MENU”... -
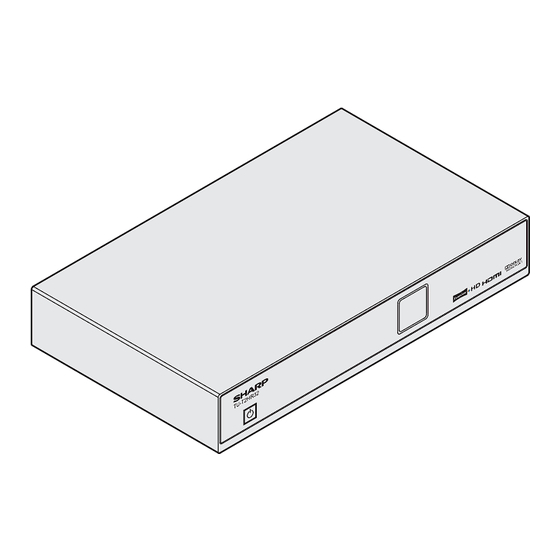
Page 5: Recorder (Front View)
Introduction Recorder (front view) TU-T2HR32 Recorder (rear view) DOLBY RF IN RF OUT HIGH DEFINITION MULTIMEDIA INTERFACE HDMI ETHERNET TU-T2HR32_GB.indd 5 TU-T2HR32_GB.indd 5 SPDIF DC 12V DC OPTICAL RS-232 (Power button) Display RF IN (Antenna in) terminal RF OUT (Antenna out) terminal TV (SCART) terminal SPDIF (Digital audio... -
Page 6: Preparation
Preparation Supplied accessories Remote Control Unit ( x 1) MUTE LIBRARY LAST GUIDE PROG – – MENU BACK INFO TEXT EXIT AUDIO SUBT WIDE MENU Page 4 Operation manual (this publication) • “AAA” size zinc-carbon battery (x2) Page 7 • TU-T2HR32_GB.indd 6 TU-T2HR32_GB.indd 6 Power Adaptor ( x 1) -
Page 7: Inserting The Batteries
Preparation Inserting the batteries Before using the Recorder for the first time, insert the two supplied “AAA” size zinc-carbon batteries. When the batteries become depleted and the remote control unit fails to operate, replace the batteries with new “AAA” size batteries. Open the battery cover. -
Page 8: Quick Guide
Quick guide Initial installation overview Follow the steps below one by one when using the Recorder for the first time. Preparation Connect the antenna cable to the RF IN terminal (Page 9). RF IN RF OUT ETHERNET Connect the Recorder to your TV using the supplied HDMI cable (Page 9). -
Page 9: Before Turning On The Power
Quick guide Before turning on the power RF IN RF OUT ETHERNET Connect the antenna (standard DIN45325 plug (IEC 169-2) 75 q coaxial cable) Connect the HDMI cable Connect the p ower adapter Initial auto installation When the Recorder is powered on for the first time after purchase, the first time installation screen appears. Follow the on-screen instructions to search for all available channels. -
Page 10: Watching Tv
Watching TV Daily operation Switching on/off Standby mode Select standby mode If the Recorder is switched on, you can switch it to standby by pressing a on the remote control unit. Switching on from standby From standby, press a on the remote control unit. MUTE LIBRARY NOTE... -
Page 11: Channel List
Watching TV Channel List Basic operation Display/close the Channel guide Press Menu. a/b to select channels setting. Press Press PROG – – MENU BACK INFO Channels All Channels BBC 1 BBC 2 ITV1 CHANNEL 4 FIVE ITV2 BBC THREE BBC FOUR ITV3 Watch EXIT... -
Page 12: Selecting A Programme Using The Epg
Watching TV Selecting a programme using the Basic operation Display/close the EPG screen Press GUIDE. GUIDE Programme Guide Royal Ascot 2/5. Clare Baldingpresents day two of Royal Ascot. The feature race is The Pronce of Wale’s Stakes at 3:50pm. Willie Carson and Rishi Persad are on hand with news and interviews. [S] [SPORT] Wed 16 Jun 4:000pm... -
Page 13: Digital Text
Watching TV Trailer bookings When the receiver detects a trailer booking suggestion is being broadcast, it will raise the following menu: This menu consists of an icon on the screen, indicating that you can press the GREEN coloured button to invoke the trailer booking menu. -
Page 14: Recording Tv
Recording TV Recording a programme Record a programme now Press the REC button on the remote control. A message will appear briefly to confirm the current recording operation for the selected programme. NOTE • The programme being recorded will appear in the Library (see Page 26). -
Page 15: Connecting External Devices
Connecting external devices Before connecting ... Be sure to turn off the Recorder and any external equipment before making connections. • Firmly connect a cable to a terminal or socket. • Carefully read the operation manual of each external device for possible connection types. This also helps you get the best audiovisual •... -
Page 16: Scart Connection
Connecting external devices SCART connection Example of connectable devices HD Ready TV DVD Recorder CB/PB CR/PR COAXIAL VIDEO S-VIDEO HDMI 2-CH AUDIO OUT VIDEO OUT / DIGITAL AUDIO OUT TU-T2HR32_GB.indd 16 TU-T2HR32_GB.indd 16 DOLBY RF IN RF OUT HIGH DEFINITION MULTIMEDIA INTERFACE HDMI ETHERNET SCART OUTPUT... -
Page 17: Audio Connections
Connecting external devices Audio connections SPDIF connection Example of connectable devices Dolby Digital Surround Sound System DOLBY RF IN RF OUT SPDIF HIGH DEFINITION MULTIMEDIA INTERFACE OPTICAL HDMI ETHERNET After connecting Digital audio output setting After connecting to a surround sound system with a SPDIF cable, you should set an audio output format compatible with the programme you are watching or the device connected. -
Page 18: Menu Operation
Menu operation What is the MAIN MENU? You need to call up the on screen display (OSD) to perform settings for the Recorder. The OSD for the settings is called “MAIN MENU” • The “MAIN MENU” enables various settings and adjustments. •... -
Page 19: Basic Adjustment
Basic adjustment AV Settings Settings AV Settings Default Recording Mode Add to Start of Recording Languages Add to End of Recording Live Pause Length Parental Control Skip Forwards Time Skip Backwards Time Freeview + Auto Disk Management Show Available Space As General Format Hard Disk Drive Select... -
Page 20: Audio Description
Basic adjustment AV Settings Menu Transparency This function allows you to adjust the transparency of the OSDs. Item The picture will not be visible behind the OSD. The picture will be partially visible behind the OSD. The picture will be mostly visible behind the OSD. -
Page 21: Languages
Basic adjustment Languages Settings AV Settings Subtitle \Language Audio Language Languages Audio Description Language Parental Control Freeview + General Select Exit Exit Menu Languages Subtitle Language This function allows you to set the default subtitle language to English, Welsh, Gaelic or Irish. NOTE Some subtitle languages are available with enhanced subtitles. -
Page 22: Parental Control
Basic adjustment Parental Control The Parental Control feature allows you to prevent accidental changes being made to the Recorder. In addition channels can be locked to prevent children viewing scenes of a violent or sexual nature. Parental Settings PIN Settings AV Settings Parental Settings PIN This menu is PIN protected. -
Page 23: Freeview
Basic adjustment Freeview+ Settings AV Settings Default Recording Mode Add to Start of Recording Languages Add to End of Recording Live Pause Length Parental Control Skip Forwards Time Skip Backwards Time Freeview + Auto Disk Management Show Available Space As General Format Hard Disk Drive Select... -
Page 24: General
Basic adjustment General Settings AV Settings Auto Standby Power Save in Standby Mode Upgrade Software Languages Auto Retune Auto Retune Messages Network Configuration Parental Control Manual Tune First Time Installation General Select Exit Exit Menu General Auto Standby This function allows you to automatically switch the Recorder into standby mode when there is no user activity for 3 hours. -
Page 25: First Time Installation
Basic adjustment Manually tuning channels General Manual tune You can manually tune new services after the first time installation has been completed. Manual Tune UHF Channel Frequency (kHz) 641787 Bandwidth 8MHz System DVBT Mode Guard 1/32 QAM16 ==== TSID ==== Systems Found / Added == / == Tuner Lock... -
Page 26: Library
Basic adjustment Library Display/close the LIBRARY screen Press the LIBRARY button on the remote control or select Library from the Main Menu. Library Wed 16 Jun 2010 BBC ONE 2:38pm - 2:39pm MOTD Live: Spain v Switzerland Gary Lineker introduces live coverage from Durban. Spain are favourites to win a first-ever World Cup. -
Page 27: Appendix
In the unlikely event that there is some problem like loss of recorded video or audio content due to HDD malfunction, please be aware beforehand that Sharp will bear no responsibility to compensate for the content that could not be recorded or edited, for the loss of recorded or edited video, or for other related direct or indirect damages. -
Page 28: Specifications
Appendix Specifications Item Receiving Signal Type (DVB-T) Tuner / Demodulator Receiving Signal Type (DVB-T2) CPU / Clock Transport Hard Disk Drive System Flash Memory System Memory Software CPU Core Video Standards Field / Frame Rate HD/SD Decoding Capability Aspect Ratio Video Video Input / Output Output Modes... -
Page 29: Pin Code Reminder
Appendix Item Over Air Download Software Upgrade USB Port Display Front Panel Keypad IR Sensor RF Input Connector Loop Through Output Connector Stereo (left & right) Audio output CVBS, R/G/B video output Rear Panel Digital Video & Audio Output Optical Digital Audio SPDIF RJ 45 RS 232 Power... -
Page 30: End Of Life Disposal
If the product is used for business purposes and you want to discard it: Please contact your SHARP dealer who will inform you about the take-back of the product. You might be charged for the costs arising from take-back and recycling. Small products (and small amounts) might be taken back by your local collection facilities. -
Page 31: Important Notice
Important Notice Digital Switchover and Your TV Equipment WHAT YOU NEED TO DO TO ENJOY WATCHING TV DURING AND FOLLOWING DIGITAL SWITCHOVER Starting in 2008 and ending in 2012, television services in the UK will go completely digital, TV region by TV region. To continue using this digital TV equipment during and following digital switchover, you will need to “reset”... - Page 32 TU-T2HR32_GB.indd 32 TU-T2HR32_GB.indd 32 29/06/2010 15:16:47 29/06/2010 15:16:47...
- Page 33 Notes TU-T2HR32_GB.indd 33 TU-T2HR32_GB.indd 33 29/06/2010 15:16:49 29/06/2010 15:16:49...
- Page 34 TU-T2HR32_GB.indd 34 TU-T2HR32_GB.indd 34 TU-T2HR32 EN-05/10-dcs-8670 29/06/2010 15:16:49 29/06/2010 15:16:49...
Need help?
Do you have a question about the TU-T2HR32 and is the answer not in the manual?
Questions and answers