Table of Contents
Advertisement
Advertisement
Table of Contents

Related Manuals for Denver CAU-437BT


Summary of Contents for Denver CAU-437BT
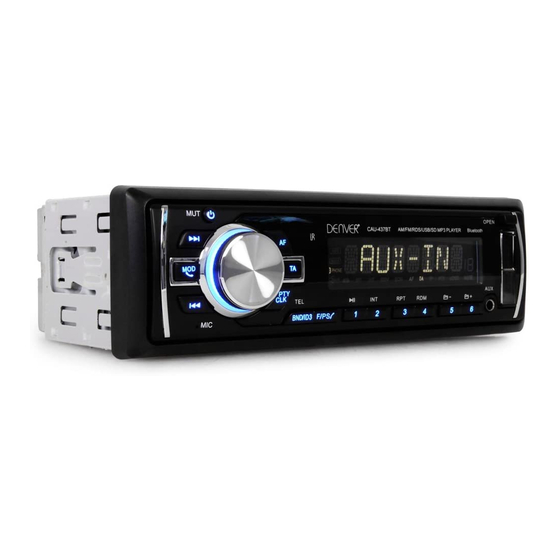
- Page 1 CAU-437BT Car AM/FM Radio with USB/SD Control...
-
Page 2: Table Of Contents
Contents Warnings Before Installation...........3-5 Before You Install...............6 Installation (DIN Front Mount).............7 Installation (Vehicle's Brackets)..........8 Wiring Connections...............9 Bluetooth Operation..............10 Basic Operation..............11 Radio Operation..............12 RDS Operation...............13 USB/SD Operation..............14 Remote Control...............15 Simple Troubleshooting Guide..........16 Specifications................16 Welcome! Thank you for purchasing this high-technology car stereo with USB, SD/MMC control. -
Page 3: Warnings Before Installation
Warnings Before Installation Important Warnings to Take Note of BEFORE Com- mencing Installation Damage Caused By Incorrect Installation or Usage is NOT Covered By Warranty. PLEASE Take The Time To Read The Installation Notes Carefully. To Validate The Warranty Please Ensure That The Unit Is Installed By A Professional, VAT Registered Car Au- dio Installation Company. - Page 4 Warnings Before Installation and the speakers. Check the condition of your speakers care- fully- connecting this unit to old or degraded speakers may re- sult in a fault which will damage the audio IC and invalidate the warranty. • If this unit is installed in a vehicle that does not have an ACC (accessory) position on the ignition switch, the red lead of the unit should be connected to a terminal coupled with ignition switch ON/Off operations.
- Page 5 Warnings Before Installation for details on connecting the power amp and other units, then make the connections correctly. • Do not block any vents or heater panels. Blocking them will cause heat to build up and may result in fire. •...
-
Page 6: Before You Install
Before You Install Automotive audio equipment installations can be troublesome at times, even to the most experienced of installation technicians. If you are not confident working with electrical wiring, removing and reinstalling interior panels, carpeting, dashboards or other components of your vehicle, please call your dealer in order to have the unit professionally installed. -
Page 7: Installation (Din Front Mount)
Installation WARNING! Disconnect negative battery terminal from battery before starting installation. Consult the vehicle’s owner’s manual for proper instructions. NOTE: Mark the polarity of the existing speaker wires before disconnecting battery. NOTE: Remove the two transport screws from the top of the unit before installing. -
Page 8: Installation (Vehicle's Brackets)
Installation NOTE: Outer trim frame, hook, and mounting sleeve are not used for this installation. This is only intended as a general guide; contact the vehicle's manufacturer for specific instructions. This method of installation uses the screw holes at the sides of the unit and the holes of the existing vehicle mounting bracket. -
Page 9: Wiring Connections
Wiring Connections Make sure that you have a good chassis ground. Good ground connections will eliminate most electrical noise problems. A good chassis ground requires a tight connection to the vehi- cle's metal chassis. The area around the ground connection should be clean, bare metal without rust, paint, plastic, dust, or dirt for a good electrical connection. -
Page 10: Bluetooth Operation
Bluetooth Operation 1. Pairing 4. Rejecting Calls The bluetooth of this radio is always in During ringing or conversation, press standby mode the “EJECT” button to end the call or for pairing and connection, signalled reject the call. “END CALL” will be by a blinking shown on the display and the unit will bluetooth icon on the LCD Display. -
Page 11: Basic Operation
Basic Operation 1. Tuning the unit On / Off 9. Fader Press POWER button to turn the unit Press SEL Button repeatly until the on. Press again to turn the unit off. display shows “FAD”, Rotate the VOL Button to adjust the balance between 2. -
Page 12: Radio Operation
Radio Operation 1. Choose Radio Band B. Scan Saved Stations Press the BND Button anytime to ac- Press the F/PS button once to per- cess the radio function. form the scanning functions. In FM The unit comes with five bands- three mode, press the F/PS button and FM Bands (FM1, FM2, and FM3) and the stations in that FM band will... -
Page 13: Rds Operation
RDS Operation RDS Function 3. PTY - PROGRAMME TYPE RDS ( Radio Data System) service This radio will allow you to select the availability varies with areas. Please type of programme required, and will understand if RDS service is not search for a station broadcasting that available in you area, the following type of programme. -
Page 14: Usb/Sd Operation
USB/SD Operation 1. Play MP3 / WMA from USB/SD is operating. Press “3 RPT” button to Plug the USB or SD card into the cancel. USB/SD port. The MP3 and WMA 8. Random files in the USB or SD card will be played automatically. -
Page 15: Remote Control
Remote Control 1. Power On/off 2. Mute Sound Button MODE 3. Stations Tune/ Seek Down Track Down MUTE 4. Band Switch 5. TA Control 6. Radio Memory 1-6 7. Mode Select 8. Sound + 9. Time Clock Display 10. Sound Select Key 11. -
Page 16: Simple Troubleshooting Guide
Simple Troubleshooting Guide PROBLEM CAUSE/SOLUTION Check wiring connections. Check and make sure the fuse is not No Power blown. Replace with the proper rating/size fuse. Press the RESET Button . Some errors occur in the LCD or nothing functions when buttons are pressed. - Page 17 Hereby, Inter Sales A/S, declares that this product CAU-437BT is in compli- ance with the essential requirements and other relevant provisions of Directive 1999/5/EC. A copy of the Declaration of conformity may be obtained at: Inter Sales A/S Stavneagervej 22,...
Need help?
Do you have a question about the CAU-437BT and is the answer not in the manual?
Questions and answers