Advertisement
Quick Links
Quick Set-Up Guide
WIRING UP YOUR RADIO
***IMPORTANT*** Please make sure the yellow wire is connected to the permanent live feed
(+12V) of the vehicle battery for the preset memory's Disconnect negative battery terminal
from battery before starting installation. Consult the vehicle owner's manual for proper
instructions.
YELLOW
Connect to
the B+12V
Permanent
+12V Fused
RED
Connect to lpni
tion Key
BLACK
GND
Ground
Ignition Key
Fused
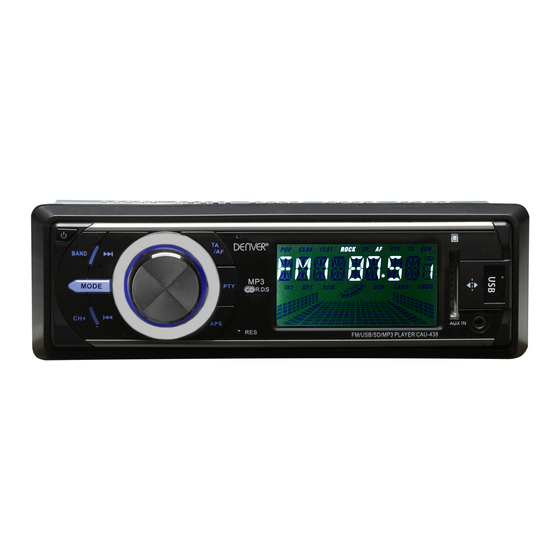
WORKING WITH THE UNIT
USB Flashdrive & SD Card
1.
Simply plup your USB Flashdrive or SD Card (or both) into the
USB socket/Card slot. The contents will be played
automatically. These can be removed at any time.
CAU-438
1. Install the Radio usinp the Din-Front
Mount or Din-Rear Mount Method.
2. The Radio is equipped with ISO
Rear Right
connector. ISO connector is the universal
connector for the connection of car
radio.
Front Right
3. Make sure that you have a pood chassis
pround. Good pround connections will
Auto
eliminate most electrical noise
Front Left
Antenna
problems.
4. Please seek professional advice if you are
Rear Left
inexperienced installinp this type of
+12V
product.
2. Aux-in Jack
The front Aux-in Jack can be used for connectinp additional audio
devices (i.e.MP3 players/lpods) to the unit The Aux-in cable (supplied
with the unit) can be used for this connection. Simply connect one end
into the Aux-in Jack and the other to your MP3/lpod.
3. Radio
Press the BND / ID3 button to select RADIO mode. Press the PTY
button to select suitable band. You can press and hold the seek
up/down button to search for your favourite stations, or you can press
and hold the APS button to automatically scan tne stronpest stations
and save them as presets.
ENG
Advertisement

Related Manuals for Denver CAU-438


Summary of Contents for Denver CAU-438
- Page 1 CAU-438 Quick Set-Up Guide WIRING UP YOUR RADIO ***IMPORTANT*** Please make sure the yellow wire is connected to the permanent live feed (+12V) of the vehicle battery for the preset memory's Disconnect negative battery terminal from battery before starting installation. Consult the vehicle owner's manual for proper instructions.
- Page 2 ALL RIGHTS RESERVED, COPYRIGHT DENVER ELECTRONICS A/S Electric and electronic equipment and included batteries contains materials, components and substances that can be hazardous to your health and the environment, if the waste material (discarded electric and electronic equipment and batteries) is not handled correctly.
Need help?
Do you have a question about the CAU-438 and is the answer not in the manual?
Questions and answers