Table of Contents
Advertisement
Advertisement
Table of Contents

Related Manuals for Zanussi ZCG552GNC


Summary of Contents for Zanussi ZCG552GNC
- Page 1 User Manual Cooker ZCG552GNC ZCG552GWC ZCG552GXC...
-
Page 2: Table Of Contents
Contents Safety information Oven - Daily use Safety instructions Oven - Clock functions Product description Oven - Hints and tips Before first use Oven - Care and cleaning Hob - Daily use Troubleshooting Hob - Hints and tips Installation Hob - Care and cleaning Subject to change without notice. -
Page 3: Safety Instructions
Unattended cooking on a hob with fat or oil can be dangerous • and may result in fire. Never try to extinguish a fire with water, but switch off the • appliance and then cover flame e.g. with a lid or a fire blanket. Do not store items on the cooking surfaces. -
Page 4: Electrical Connection
Electrical Connection appliance according to current installation regulations. Pay attention to requirements WARNING! regarding adequate ventilation. Risk of fire and electrical shock. • All electrical connections should be made by a qualified electrician. WARNING! • The appliance must be earthed. Risk of injury and burns. -
Page 5: Care And Cleaning
– do not keep moist dishes and food in the • Clean regularly the appliance to prevent the appliance after you finish the cooking. deterioration of the surface material. – be careful when you remove or install • Remaining fat or food in the appliance can the accessories. -
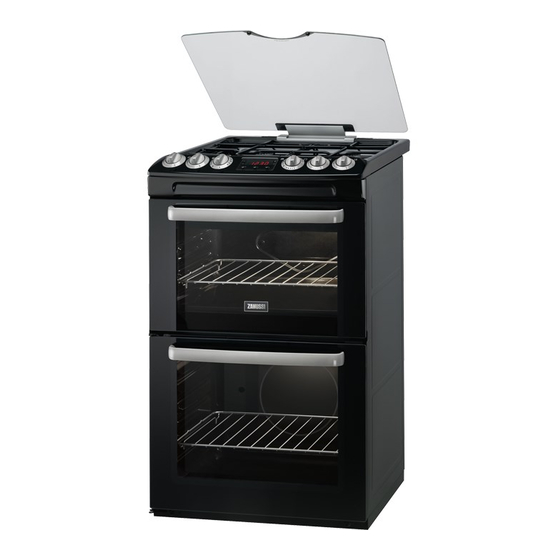
Page 6: Product Description
• Do not put the oven shelf with food on the • Disconnect the appliance from the mains highest shelf level. supply. • Cut off the mains cable and discard it. Disposal • Remove the door catch to prevent children and pets to get closed in the appliance. -
Page 7: Before First Use
Control panel Knobs for the hob Knob for the main oven Electronic programmer Knob for the top oven Accessories • Trivet For roasting and grilling. • Wire shelf Use the trivet only with the Grill- / For cookware, cake tins, roasts. roasting pan. - Page 8 Burner overview WARNING! Do not keep the knob pushed for more than 15 seconds. If the burner does not light after 15 seconds, release the knob, turn it into the off position and try to light the burner again after minimum 1 minute. If after some tries the burner does not light, check if the crown and its cap are in the correct position.
-
Page 9: Hob - Hints And Tips
Turning the burner off Lid Safety Device To put the flame out, turn the knob to the off Lid has safety device, which cuts off the gas supply for the hob. It works only when the lid is position closed. WARNING! Always turn the flame down or WARNING! -
Page 10: Oven - Daily Use
• Remove when the hob is sufficiently Be very careful when you cool: limescale rings, water rings, fat stains, replace the pan supports to shiny metallic discoloration. Clean the hob prevent the hob top from with a moist cloth and some detergent. After damage. - Page 11 The main oven has an automatic ignition system, If the oven burner accidentally goes which ignites the burner again if the flame out, turn the knob for the oven accidentally goes out. functions to the off position and try to light the burner again after If the gas supply is cut out the automatic minimum 1 minute.
-
Page 12: Oven - Clock Functions
You can use the trivet to roast larger pieces of meat or poultry on one shelf position. 1. Put the trivet into the deep pan so that the supports of the wire shelf point up. 2. Put the deep pan into the oven on the necessary shelf position. -
Page 13: Oven - Hints And Tips
Cancelling the clock functions The Minute Minder starts automatically after five seconds. 3. When the set time is completed, an 1. Press the again and again until the necessary function indicator flashes. acoustic signal sounds. Press any button to stop the clock function. 2. - Page 14 Baking results Possible cause Remedy The cake sinks and becomes There is too much liquid in the Use less liquid. Be careful with soggy, lumpy or streaky. mixture. mixing times, especially if you use a mixing machine. The cake is too dry. The oven temperature is too low.
- Page 15 Food Heat setting Total prepara- Shelf posi- tion time tion (min) Quiche, Tarts, Flans 25 - 45 1 - 2 Shepherd’s Pie 30 - 40 1 - 2 Soufflés 20 - 30 1 - 2 Fish 20 - 30 1 - 2 Fish Pie 20 - 25 1 - 2...
- Page 16 Food Heat setting Total preparation Shelf posi- time (min) tion Milk Puddings 90 - 120 Scones 8 - 12 1 + 4 Choux Pastry 30 - 35 Éclairs / Profiteroles 20 - 30 Flaky Pastry 25 - 40 Mince Pies 15 - 20 1 + 4 Pasta Lasagne etc.
- Page 17 Roasting Food Heat setting Total preparation time (min) Shelf po- sition Beef / Beef boned 20 - 35 minutes per 500g (1lb) and 20 - 35 minutes over Mutton / Lamb 25 - 35 minutes per 500g (1lb) and 25 - 35 minutes over Pork / Veal / Ham 30 - 40 minutes per 500g (1lb)
-
Page 18: Oven - Care And Cleaning
Food Total preparation time Shelf position (min) Pork Chops 20 - 30 2 - 3 Whole Trout / Mackerel 15 - 25 2 - 3 Plaice / Cod Fillets 10 - 15 2 - 3 Kebabs 20 - 30 2 - 3 Kidneys –... - Page 19 CAUTION! Always turn the oven light on while using the catalytic cleaning (if applicable). Before activating the catalytic cleaning remove all the accessories from the oven. The walls with a catalytic coating are self- cleaning. They absorb fat which collects on the walls while the appliance operates.
-
Page 20: Troubleshooting
The back lamp To replace the glass panels, do the same steps in reverse. Before you The lamp glass cover is at the back lower the trim, attach the A trim part of the cavity. to the door. Refer to the graphic. 1. -
Page 21: Installation
Problem Possible cause Remedy The flame colour is orange or yel- The flame can look orange or yel- low. low in some areas of the burner. This is normal. The oven does not heat up. The oven is deactivated. Activate the oven. The oven does not heat up. - Page 22 Dimensions Dimension Depth 600 mm Top oven capacity 34 l Main oven capacity 79 l Location of the appliance less than 400 You can install your freestanding appliance with cabinets on one or two sides and in the corner. Levelling of the appliance For the minimal distances of fitting check the table.
- Page 23 BURNER NORMAL POWER Natural Gas INJECTOR MARK 1 / 100 Btu / h Grill 9212 Top Oven 6483 Main Oven 6483 Gas Connection Use a flexible pipe in compliance with the regulation in force. Make sure they do not come in touch with mobile parts and are not squeezed.
-
Page 24: Electrical Installation
Pressure test To light the oven burner refer to the "Ignition of the oven burners". The Rapid injector is used as a pressure test Check each of the burners. point. 3. Turn the knob to the off position. 1. Connect the pressure gauge to the Rapid Checking the Lid Safety Device injector. - Page 28 www.zanussi.com/shop...
Need help?
Do you have a question about the ZCG552GNC and is the answer not in the manual?
Questions and answers