Table of Contents

Related Manuals for Gastroback advanced pro g


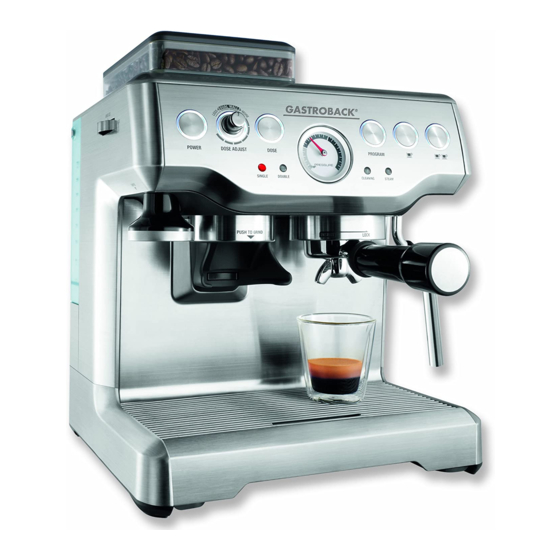
Summary of Contents for Gastroback advanced pro g
-
Page 1: Operating Instructions
Operating Instructions Design espresso Maschine aDvanceD pro g Art.-Nr. 42612 »Design Espresso Maschine Advanced Pro G« Read all provided instructions before first usage! Model and attachments are subject to change! For household use only! -
Page 2: Table Of Contents
Important Safeguards for all Electrical Appliances ............48 High Temperatures—Risk of Burns ...................49 Technical Specifications .....................49 Features of Your »Design Espresso Machine Advanced Pro G« ..........50 Integrated Conical Burr Grinder ..................50 Preset or Adjustable Grind Size ..................50 Preset or Adjustable Grind Amount .................50 Hands Free, Driect Grinding ..................50... - Page 3 With the Gastroback »Design Espresso Machi- ne Advanced Pro G« you can be the barista and explore the art of espresso at home. These instructions for use will inform you about the various functions and features, which make it easy to take pleasure in your new Gastroback »Design Espresso Machine Advanced...
-
Page 4: Important Warning Notes
iMporTanT warning noTes • Never leave small children unsupervised with the appliance or the parts of the appliance! Always make sure that the appliance is properly and fully assembled before you plug the power cord into the outlet and turn on the appliance. • Do not Take the steam wand out of the milk, as long as steam escapes. Otherwise hot milk may splash out of the frothing jug. -
Page 7: Important Safeguards
iMporTanT safeguarDs carefully read all instructions before operating this appliance and save for further reference. Do not attempt to use this appliance for any other than the intended use described in these instructions. Any other use, especially misuse, can cause severe inju- ries or damage by electric shock, heat or fire. - Page 8 • The appliance is not intended to be operated by means of an external timer or separate remote control system. • Do not use attachments other than those provided with the appliance. The use of accesso- ry attachments not recommended by Gastroback may result in fire, electric shock or injury to persons. • Do not attempt to operate the appliance by any method other than those described in this book. • Do not operate the grinder without the hopper lid in position. Keep fingers, hands, hair, clothing and utensils away from the hopper during operation. Avoid contacting moving parts.
- Page 9 cord may never touch hot surfaces. Do not place the appliance or any part of it on or near hot surfaces (e.g. burner, heater or oven). Do not use any part of the appliance (e.g. pot, steamer) with any other device. • The appliance is designed for brewing espresso and coffee. Therefore, some components, such as the group head, the portafilter and the steam wand become very hot during opera- tion and hot water or steam escape.
-
Page 10: Important Safeguards For All Electrical Appliances
important safeguards for all electrical appliances The appliance is heated electrically. Place the appliance near a suitable wall power socket to connect the appliance directly to a protected mains power supply with protective conduc- tor (earth/ground) connected properly. Ensure that the voltage rating of your mains power supply corresponds to the voltage requirements of the appliance (220 - 240 V, 50 Hz, AC, rated for at least 8 A). -
Page 11: High Temperatures-Risk Of Burns
(not the drip tray!) If you want to move the appliance. Technical specificaTions Model: Art. No. 42612 »Design Espresso Machine Advanced Pro G« Power supply: 220 - 240 V, 50 Hz Power consumption: 1,200 - 1,450 W Length of power cord: ca. -
Page 12: Features Of Your »Design Espresso Machine Advanced Pro G
Your »Design espres- so Machine aDvanceD pro g« integrated conical Burr grinder The integrated conical burr grinder allows each espresso pro- duced from the appliance to be created using freshly ground beans - the key to achieving your ideal espresso. -
Page 13: Integrated / Removable Tamper
integrated / removable Tamper Tamping is the application of even and consistent pressure to the espresso grinds. The tam- per is conveniently located ›on board‹ the machine and can be used both in the ›on board‹ position or whilst removed depending on your preference. Tamper ›on board‹... -
Page 14: Commercial Style Steam Wand
note: While the Pressure Gauge is a great guide to the quality of the extraction, the best indicator is the look and taste of the espresso. commercial style steam wand The swivel-action steam wand with stainless steel frothing attachment easily adjusts to the perfect position for texturing milk. The wand has a commercial style 360° ball joint. note for frothing milk: About half of the steam wand must be immersed in the milk. -
Page 15: Energy Saving Features
Dual wall filters Dual Wall Filters for Beginners Eliminates the guesswork for fast and easy to make espresso. The appliance is supplied with two Dual Wall Filters - 1 x single shot and 1 x double shot. These filters are designed to intentionally slow the water flow rate during brewing, resulting in an espresso that has been extracted at the correct pressure, leading to a rich, golden crema. -
Page 16: Operation
operaTion Before first use The appliance has the drip tray, water tank and storage tray in place when you unpack it from the box. The drip tray is located in the base of the machine towards the front. The water tank is located in the back of the machine. -
Page 17: Using Your »Design Espresso Machine Advanced Pro G
»Design espresso Machine advanced pro g« Dual wall filters for Beginners Eliminates the guesswork for fast and easy to make espresso. The appliance is supplied with two Dual Wall Filters - 1 x single shot and 1 x double shot. These filters are designed to intentionally slow the water flow rate during brewing, resulting in an espresso that has been extracted at the correct pressure, leading to a rich, golden crema. -
Page 18: Single Wall Filters For Aspiring Baristas
single wall filters for aspiring Baristas Experiment with grind size, grind amount and tamp The appliance is supplied with two Single Wall Filters - 1 x single shot and 1 x double shot. These filters provide no additional slowing of the water flow rate, hence experimentation with the grind size, grind amount and tamp force is required to achieve favorable results. These filters are suited to both pre-ground vacuum packed espresso as well as beans ground fresh in the integrated grinder. -
Page 19: Adjusting The Grind Size
• Preheat the portafilter by placing underneath the group head. Rinse with hot water from the group head by holding down the double shot button on the front, right hand side of the machine. Dry the portafilter thoroughly before use. Unlike the Dual Wall Filters, the Single Wall Filters have no markings on the underside of the filter. -
Page 20: Tamping The Ground Espresso
sTep 7 - TaMping The grounD espresso For ease of use, the appliance provides two handy ways to tamp your espresso: 1. Tamper on Board: The tamper device is held in place, on the machine, allowing for convenient tamping. a. Once the grind function has been completed, remove the portafil- ter from the grinding cradle. -
Page 21: Extraction
sTep 9 – eXTracTion • Ensure all the button surrounds on the control panel are illuminated, indicating the machi- ne has reached the correct temperature for brewing, and is ready for use. • Ensure the drip tray and portafilter are in place. • Place one or two pre-warmed cups beneath the portafilter outlet. note: pre-Brew funcTion: When a preset shot size on the front, right hand side of the machine is selected, the machine will pump water momentarily, followed by a pause then continue to pump the water through to the grounds in the portafilter. - Page 22 4. Press the -button once. The machine will commence normal pour function, and -button surround will begin to flash. 5. When the desired amount of espresso has poured into the cup, press the -button to stop the pour. The machine will beep twice, indicating it has saved your preferred pour quantity and exited programming mode.
-
Page 23: Emptying The Portafilter
sTep 10 – eMpTYing The porTafilTer • Remove the portafilter from the group head by rotating the portafilter to the left until it releases. • To empty the used grounds, turn the portafilter upside down in a bin and gently knock out the grounds. Used grounds should be thrown away with domestic waste. Discarding of used grounds in a sink can cause drains to become blocked. - Page 24 There are two phases to texture milk: Stretching the milk to aerate it and swirling the milk to make it silky smooth and the right temperature. In practice these two operations should blend into one. sTep 1 - sTreTching The MilK Hold the jug so the tip of the steam wand is just below the surface of the milk and with your free hand engage the steam.
-
Page 25: Espresso Making Tips
espresso MaKing Tips... - Page 26 warMing Your cup or glass A warm cup will help maintain the espresso optimal temperature. Preheat your cup by holding down the one cup button and running hot water into the cups from the group head without the portafilter inserted and place the cups on the warming tray. warMing The porTafilTer A cold portafilter can drop the extraction temperature enough to significantly affect the qua- lity of your espresso.
-
Page 27: Care And Cleaning
The appliance features an inbuilt cleaning cycle which should be carried out periodically. The CLEAN ME light will automatically illuminate to indicate to the user when a cleaning cycle is required. Make sure to use Gastroback Cleaning Tablets 97830. cleaning cYcle process guiDe 1 Use a cleaning tablet. 2. Insert the cleaning disc into the single or double shot filter. - Page 28 Using the Gastroback Premium Descaler a mixture of 50 ml descaler and max. 750 ml of water is recommended. Due to the differences of water hardness and we can not make any precise specifications on the frequency on the decalcifying. The following table is a non-binding...
- Page 29 • Remove the portafilter and frothing attachment. Pour the mixture of the discaler and water into the water tank. • Plug the machine into the power outlet. • Press the POWER button to the on-position. • Place a large container under the group head and steam wand. • When the brewing temperature has been reached all the button surrounds on the control panel will illuminate. Press and hold the one cup and two cup button to commence manual pour. Release the button once half the mixture of white vinegar and water has run through the group head.
-
Page 30: Cleaning The Drip Tray
• If the steam wand remains blocked, use the pin on the cleaning tool to clear the opening. • If the steam wand continues to be blocked, the tip of the steam wand can be removed by using the fitting in the middle of the cleaning tool. • Unscrew the tip with the cleaning tool. • Soak the tip in hot water before using the pin on the cleaning tool to unblock. Replace the tip back onto the steam wand and secure with the cleaning tool. cleaning / unBlocKing The filTers, porTafilTer anD group heaD Periodically run water through the machine with the portafilter in place, but without any ground espresso in the filter, to rinse out any residual coffee particles. -
Page 31: Storage
cleaning The sTorage TraY The storage tray can be removed after the drip tray is removed then cleaned with a soft, damp cloth (do not use abrasive cleansers, pads or cloths which can scratch the surface). sTorage Before storing, press the POWER-button to off, turn the steam dial to off and unplug. Remove unused beans from the hopper, empty the water tank and the drip tray. - Page 32 PROBLEM POSSIBLE CAUSES WHAT TO DO Machine is making pulsing/ The machine is carrying out the normal No action require as this is the normal operation of pumping sound while extracting operation of the 15 bar pump the machine. espresso or steaming milk Espresso runs out around the Filter holder is not inserted in the group Refer to ›Inserting The Portafilter‹, page 55.
-
Page 33: Notes For Disposal
Please check www.gastroback.de for further information. For technical support, please contact Gastroback Customer Care Center by phone: +49 (0)4165/22 25-0 or e-mail: info@gastroback.de. warranTY We guarantee that all our products are free of defects at the time of purchase. -
Page 34: Coffee-Recipes
Coffee-Recepies espresso cappuccino Intense and aromatic, The real thing is served very light and luke an espresso or short warm with espresso to steamed milk black as it’s also and a generous final known uses about ¼ of creamy froth. oz of ground espres- For added finesse, so. - Page 35 con panna Tiramisu Meaning ›with cream‹ Makes 4 this heart warmer is 1½ c ups mascarpone a chic variation on 1¼ cups cream old-fashioned Vienna 2½ t ablespoons powdered sugar Coffee. In a 3-4 oz ½ cup strong espresso coffee, cooled cup, dress a double ½ cup coffee liqueur shot of espresso with 16 sponge fingers a dollop of fresh cream, whipped until lossy.
- Page 36 coffee, cinnamon and walnut Muffins rich eespresso icing Makes 12 2 cups powdered sugar, sifted 2½ c ups (375 g) plain flour 1 tablespoon butter, softened 2 teaspoons baking powder ¼ cup strong espresso coffee, warm 1 teaspoon ground cinnamon 1. Combine powdered sugar, butter and ¾...
-
Page 37: Index
inDeX ADJUSTING THE GRIND AMOUNT 57 Information and service 71 ADJUSTING THE GRIND SIZE 57 Notes for disposal 71 Bean Hopper 44, 71 Ppressure Gauge 51 Care & Cleaning 65 PROGRAMMING DOUBLE ESPRESSO 60 CLEAN ME 43, 66 PROGRAMMING SINGLE ESPRESSO 59 Conical Burr Grinder 44, 50 Coffee Recipes 72 Steam Dial 43, 70 Steam Wand 44, 52, 70 DECALCIFYING 66... - Page 38 Gewerbestraße 20 . 21279 Hollenstedt / Germany Telefon +49 (0)41 65/22 25-0 . Telefax +49 (0)41 65/22 25-29 info@gastroback.de . www.gastroback.de...
Need help?
Do you have a question about the advanced pro g and is the answer not in the manual?
Questions and answers