Table of Contents
Advertisement
Quick Links
Download this manual
See also:
User Manual
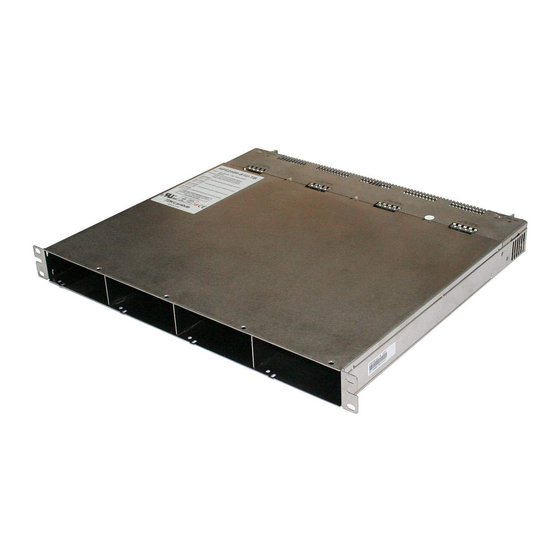
HFE2500-S1U RACK INSTRUCTION MANUAL
HFE2500-S1U SERIES RACK SPECIFICATIONS
1 Number of power supply
modules to be inserted
2 Maximum output power
3 Maximum output current
4 Input voltage / frequency range (*2) --- 85~265Vac continuous, 47~63Hz, Single phase, separate input for each PS module.
Maximum input current
5
(at 115/230Vac)
6 Maximum Line Regulation
7 Maximum Load Regulation
8 AC input connector
9 Output terminals
10 Remote sensing
11 Parallel operation
12 Series operation
13 Remote On/Off control
(INHIBIT)
14 Remote On/Off control
(ENABLE)
15 DC OK signal
16 AC fail signal
17 Over Temperature alarm signal
18 Output voltage trimming
19 Output voltage programming
by external voltage
20 OCP programming by external voltage
21 Output voltage programming
via PMbus interface
22 OCP programming via PMbus interface
23 Auxiliary power supply
24 Operating temperature
25 Storage temperature
26 Operating humidity
27 Storage humidity
28 Vibration
29 Shock
30 Applicable safety standards
31 Withstand voltage
32 Insulation resistance
33 Weight (Typ) (with accessories)
34 Size (W*H*D)
Notes:
*1. Mixing of PMBus option units (HFE2500-xx/s) and standard units (HFE2500-xx) is not allowed.
The Output of all HFE2500 Modules are connected in parallel in the Rack.
*2. For cases where conformance to various safety standards (UL, EN etc.) is required, Input Voltage is to be described as 100-240Vac (50/60Hz).
*3. Maximum voltage drop on load connection: HFE2500-12: 0.25V/wire, HFE2500-24: 0.5V/wire, HFE2500-48: 1V/wire.
*4. From 85~132Vac or 170~265Vac constant load.
*5. From No-load to rated load, constant input voltage. Measured at the sensing point in remote sense.
*6 Use UL approved Insulated terminal lugs.
(*1) --- Maximum of 4 x HFE2500 of the same model (output voltage rating and options).
W 9500W for 4 units inserted, refer to HFE2500 specifications for derating.
A
320A per output (Total 640A)
A
15/12 for each HFE2500 power supply module.
(*4)
Less than 0.25% of rated output voltage
(*5)
Less than 0.8% of rated output Current
(*6) --- Separate for each power supply.
--- Two bus-bars outputs for each output terminal (two sides).
Refer to outline drawing.
(*3) V
Possible. Refer to Fig 3.2.
--- Possible. Refer to Fig 3.9.
--- Possible. Refer to Fig 3.10.
--- Separate control for each PS unit, by electrical signal or dry contact.
"OFF": 0~0.6V or short. "ON": 2~15V or open. Refer to Fig 3.4.
--- Common for all PS units, by electrical signal or dry contact.
"ON": 0~0.6V or short. "OFF": 2~15V or open. Refer to Fig 3.3.
Separate signal for each PS unit, Open collector signal. Maximum sink current:
---
10mA. Tracking output setting, "LOW" when Vout>90+/-5% from output voltage
setting. Refer to Fig 3.5
--- Separate signal for each PS unit. Open collector signal. Maximum sink current:
10mA "LOW" when input voltage is 85Vac<Vin<270Vac. Refer to Fig 3.5
Separate signal for each PS unit. Open collector signal. Maximum sink current 10mA
---
"LOW" when the internal temperature of the unit is within safe limit,
"HIGH" approximately 10°C below Thermal shut down. Refer to Fig 3.5
--- Common for all PS units, by built-in potentiometer. Refer to Sec 1.4.
--- Common for all PS units, by 0~5V signal. Refer to Fig 3.6.
--- Common for all PS units, by 0~5V signal. Refer to Fig 3.6.1.
--- Common for all PS units. Refer to Instruction Manual Fig 3.7.
--- Common for all PS units. Refer to Instruction Manual. Refer to Fig 3.7.1.
11.2~12.5VDC. Maximum output current: 0.5A.
-10~+50°C -- 100% load.
---
+50°C to +60°C -- Derating 2%/°C.
+60°C to +70°C -- Derating 2.5%/°C.
--- -30~+85°C
--- 10~90% RH, no condensation.
--- 10~95% RH, no condensation.
--- Built to meet IEC60068-2-64 (Basic Transportation)
--- Built to meet IEC60068-2-27 (Basic Transportation)
UL60950-1 Second Edition, EN60950-1 Second Edition
Input-Output: 3000Vrms, 1min. Input-Ground: 2000Vrms, 1min.
---
Output-Ground: 12V,24V models - 500Vrms, 1min.
Output-Ground: 48V model - 2250Vdc, 1min.
--- More than 100Mohm at 25°C and 70% RH. Output-Ground: 500Vdc
kg 5.0
mm 445x43.6x401 Refer to Outline Drawing.
1
HFE2500-S1U: IEC inlet, type C20.
* HFE2500-S1U /TB: Terminal Block.
Advertisement
Table of Contents

Subscribe to Our Youtube Channel
Related Manuals for TDK-Lambda HFE2500-S1U


Summary of Contents for TDK-Lambda HFE2500-S1U
- Page 1 7 Maximum Load Regulation (*5) Less than 0.8% of rated output Current (*6) --- Separate for each power supply. HFE2500-S1U: IEC inlet, type C20. 8 AC input connector * HFE2500-S1U /TB: Terminal Block. --- Two bus-bars outputs for each output terminal (two sides).
-
Page 2: Safety Approvals
A “Declaration of Conformity” in accordance with the preceding directives and standards has been made and is on file at our EU representative TDK LAMBDA UK, located at Kingsley Avenue, Ilfracombe, Devon EX34 8ES, UK. A “Declaration of Conformity” may be accessed via company website www.uk.tdk-lambda.com/technical-data... -
Page 3: Safety Instructions
ENERGY HAZARD The main output of HFE2500-S1U is capable of providing hazardous energy. Due to hazardous energy level the output bus bars and connections therefore must not be user accessible. Manufacturer’s final equipment must provide protection to service personnel... -
Page 4: Overcurrent Protection
A readily accessible branch circuit over current protective device rated 30A max. per each input must be incorporated in the building wiring. The protective device must disconnect both supply line simultaneously. FUSES There are no fuses in the HFE2500-S1U rack. SYMBOLS CAUTION Risk of Electrical Shock. - Page 5 Schutzfunktionen beeinträchtigt werden. TDK-Lambda ist nicht haftbar für Schäden, die durch Missachtung dieser Sicherheitsvorschriften entstehen können. Vorsicht Das HFE2500-S1U-Rack ist nicht für die Verwendung als kritische Komponente in nuklearen Steuerungssystemen, lebenserhaltenden Systemen oder Geräte für den Einsatz in gefährlichen Umgebungen, ohne die ausdrückliche schriftliche Genehmigung durch TDK- Lambda zugelassen Betriebsbedingungen und Umweltbedingungen Das HFE2500-S1U-Rack ist zur Installation gemäss Überspannungs-Kategorie 2 evaluiert worden.
- Page 6 Sicherheits- und Warnsymbole VORSICHT Spannungsführende Teile-Gefahr durch elektrischen Schlag bzw. Energieinhalte. Handbuch-Symbol. Das Gerät bzw. Geräteteile warden mit diesem Symbol gekennzeichnet, wenn es für den Benutzer notwendig ist, sich auf die Anweisungen im Handbuch zu beziehen. Zeigt “spannungsführende Teile” mit gefährlicher Spannung an. Dieses Symbol weist auf das Vorhandensein einer heißen Oberfläche oder Komponente.
-
Page 7: Rear Panel Connections And Controls
1. REAR PANEL CONNECTIONS AND CONTROLS Fig 1.1 Rear view of HFE2500-S1U series AC Line Inputs HFE2500-S1U Address Selection Adjustment trimmer Output Bus Bars Output Bus Bars HFE2500-S1U/TB AC Line Inputs 1.1. J1 Connector for Control and Monitoring Mating for J1 Control Plug (provided) or custom made plug/ cable should be inserted to J1 for proper operation of HFE2500 rack. - Page 8 Table 1.1 J1 Connector Pin Allocation Chart Control Pin # Name Description Pos. # Referenced to plug J1 1,10 -SENSE Negative sense Connected to –LS for local sensing, or –V on Load side. Short Connected to Negative Output bus bar through 3 Ohm resistor. +SENSE Positive sense Connected to +LS for local sensing, or +V on Load side.
- Page 9 SMB_ALERT 1.3. Output Bus Bar Connections The HFE2500-S1U has two identical Output Bus Bar connections on both sides of Rear Panel. They are connected in parallel in the Rack. Each or both of them can be used for output connections.
- Page 10 1.5. PMBus address Each slot in the Rack (see fig-2.2) has its own address for PMBus communication. Valid only if /S option power supply is being used. In case parallel connection of two racks is used, SW1 located at the rear panel is used to differentiate between addresses for the same slots. see Table 1.5.
- Page 11 2.3 Keying Option to define the Rack’s Voltage Keying Option can be installed to ensure that only the correct Power Supply can be inserted into the Rack. The Key Option consists of two parts: Power Supply Key (one per unit Fig 2.3a) and Rack Keys (5 per Rack Fig 2.3b). Power Supply Key and Rack Keys should be fixed (by Flat head screws M3x6) in position corresponding to Output Voltage.
- Page 12 2.5 Rack mounting options Rack can be mounted into 19” Rack Cabinet which suits both USA and European Standards: OPTION BRACKET IA706-32-07_ SEMS SCREW M5x10 2 PLACES MARKED "A" FIX OPTION BRACKET IA706-32-07_ TO THE RACK ASSEMBLY IA706-32-01-00_ OPTION BRACKET IA706-32-06_ SEMS SCREW M5x10 2 PLACES MARKED "A"...
-
Page 13: Typical Applications
3. Typical applications 3.1 Basic connection For basic connection, the supplied Control Plug should be inserted to J1. Fig 3.1 Basic connection diagram. 3.2 Remote sensing ATTENTION: 1. Maximum voltage drop on load wires: HFE2500-12: 0.25V/wire, HFE2500-24: 0.5V/wire, 48: 1V/wire. 2. - Page 14 3.4 Individual On/Off control for each PS Switch closed: Output OFF Switch open: Output ON Fig 3.4 individual units On/Off diagram. 3.5 Supervisory signals. Following signals are accessible from each power supply at J1: DC OK AC FAIL PS EXIST TEMP ALARM These signals are Open Collector type (Max 15V, 10mA), isolated from Output and referenced to SIGNAL RETURN.
-
Page 15: Signal Name
3.6.1 Output Current programming by External Voltage. Fig 3.6.1 Output Current programming by External Voltage. 3.7 Output Voltage programming by PMBus. Fig 3.7 Output Voltage programming by PMBus 3.7.1 Output Current programming by PMBus. Fig 3.7.1 Output Current programming by PMBus 3.8 PMBus Host connection To connect the rack to the Host computer, connect communication cable (refer to table 3.8 for cable connection) between J2 and computer:... - Page 16 3.9 Parallel connection of two Racks To connect two Racks in parallel for higher Output Current: • Connect Main Output (Bus-Bars) in parallel. Make the connections as short as possible and with equal length. • Connect Sense (twisted pairs) to Load point. •...
- Page 17 3.10 Series Rack connection Up to 2 racks with the same number of power supplies and rating (voltage and current) can be used to increase the output voltage. To connect two Racks in series: • Connect Main Output (bus bars) in series; •...
- Page 18 HFE2500 - S1U Outline Drawing...
- Page 19 HFE2500 - S1U-TB Outline Drawing...
Need help?
Do you have a question about the HFE2500-S1U and is the answer not in the manual?
Questions and answers