Table of Contents
Advertisement
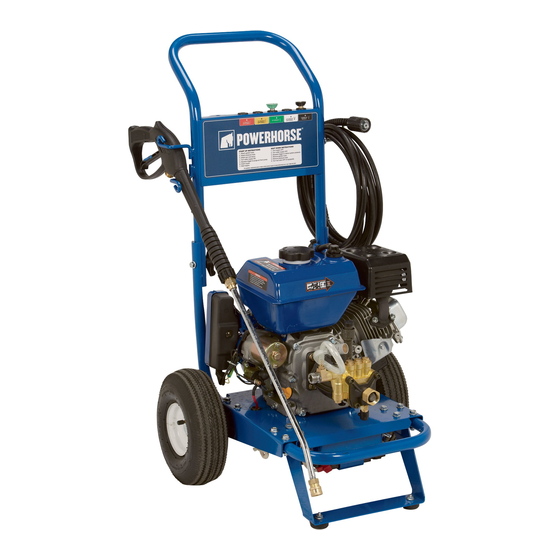
Owner's Manual
M1577149A.3
Pressure Washer: Machine that cleans dirty surfaces with high pressure water
Instructions for Installation/Set-up, Operation, Maintenance, & Storage
This pressure washer produces cold water high pressure spray. Cleaning chemicals may be incorporated into the
spray if desired. The pressure pump for this equipment is powered by a gasoline internal combustion engine.
WARNING: SPECIAL HAZARDS
CO Poisoning: Exhaust from engine contains carbon monoxide, a poisonous gas that can cause carbon monoxide
poisoning and possible death if inhaled.
Injection Injury: High-pressure spray can pierce skin and underlying tissues, leading to serious injury and possible
amputation. Such an injection injury can result in blood poisoning and/or severe tissue damage.
Flying Debris: High-pressure spray can cause flying debris and possible surface damage.
Electric shock: Operating equipment in wet conditions or near water can cause electric shock.
Chemical Exposure: Cleaning chemical vapors or contact with skin may be hazardous.
Fire/Explosion: Engine sparking can ignite fuel or other flammable liquids or vapors in the vicinity. Hot exhaust from engine
can ignite combustible materials.
Burns: Pressure Washer pump and engine are hot surfaces that can cause burn injuries.
Detailed safety information about these hazards appears throughout this manual.
Inspect Upon Delivery: FIRST! Inspect for missing or damaged components. See "Initial Set-Up/Installation" section
for where to report missing or damaged parts.
Add Engine Oil: Engine is shipped without oil. See "Engine Manual" section of this manual for instructions on
capacity and viscosity recommendations.
Replace Temporary Pump Oil Plug: Pump is shipped with oil but with temporary shipping plug. Check pump oil
level before starting and replace temporary shipping plug with permanent oil fill plug provided within plastic bag
containing this Owner's Manual.
Water Flow Requirements: Make sure your supply water flow rate is 20% higher than the pressure washer's flow
rate (see "Operations", section for detail), and that your water is clean and particle free.
Chemical Spraying: Use only approved pressure washer chemicals designed for high-pressure use. Use soap
adjustment knob to regulate cleaning power (on select units).
Storage: Do not allow water to freeze in the pump, hose, or spray gun(s). See "Storage" for more information.
Maintenance Schedule: Engine and pump require periodic inspection and servicing to keep pressure washer
functioning efficiently. See "Maintenance Schedule Summary" for frequency of servicing.
Battery Required: A battery is not included. A battery must be installed before starting the engine or damage to the
engine voltage regulator will result. Purchase a standard 12 VDC, 10 Ah battery. Further detail in "Specifications"
section.
Equipment Protection Quick Facts
Any Questions, Comments, Problems, or Parts Orders
Call Powerhorse Product Support 1-866-443-2576
ITEM NUMBER: 1577149, 1577249
SERIAL NUMBER: _____________
Advertisement
Table of Contents

Related Manuals for Powerhorse M1577149A.3


Summary of Contents for Powerhorse M1577149A.3
-
Page 1: Equipment Protection Quick Facts
Battery Required: A battery is not included. A battery must be installed before starting the engine or damage to the engine voltage regulator will result. Purchase a standard 12 VDC, 10 Ah battery. Further detail in “Specifications” section. Any Questions, Comments, Problems, or Parts Orders Call Powerhorse Product Support 1-866-443-2576... -
Page 2: Table Of Contents
Table of Contents Equipment Protection Quick Facts ............................1 TABLE OF CONTENTS ..............................2 ABOUT YOUR PRESSURE WASHER ......................... 4 SPECIFICATIONS ................................ 5 COMPONENT IDENTIFICATION ..........................6 SAFETY ..................................7 Hazard Signal Word Definitions ............................7 SAFETY LABELING ..............................8 Safety Decal Locations ................................. - Page 3 Inspect Spray System ................................. 29 Do not start pressure washer until all needed repairs have been completed..............29 Check Tire Pressure ................................29 Change Pump Oil ................................30 TROUBLESHOOTING ..............................31 PARTS EXPLOSION- MODELS 1577149, 1577249- REV A.3 .................. 32 PARTS LIST-MODELS 1577149, 1577249- REV A.3 ....................
-
Page 4: About Your Pressure Washer
About Your Pressure Washer Thank you for purchasing a Powerhorse Pressure Site Location. Intended for outdoor use only. Washer! It is designed for long life, dependability, and Personal Protection. Wear safety apparel during top performance. operation, including safety glasses with side and top Intended Use. -
Page 5: Specifications
PSI (bar) 3000 (207) 3000 (207) GPM (l/min) 2.5 (9.4) 2.5 (9.4) Max Water Temp 140F (60C) 140F (60C) ENGINE Engine Powerhorse Powerhorse w/ Electric Start Horsepower 208CC 208CC DIMENSIONS / COMPONENTS Length 27.5” 27.5” Width 23” 23” Height 38.5”... -
Page 6: Component Identification
Component Identification 1. Pressure Washer Pump: Inspect for 9. Engine: The air-cooled engine powers the pump. loose/broken parts prior to each use. 10. Gun Holder: Store gun here. 2. Pump Oil Fill: Add pump oil here. Replace 11. Nozzles: Change nozzles for different spray shipping plug with vented dipstick. -
Page 7: Safety
Safety Hazard Signal Word Definitions This is the safety alert symbol. It is used to alert you to potential personal injury hazards. Obey all safety messages that follow this symbol to avoid possible injury or death. DANGER (red) indicates a hazardous situation, which if DANGER not avoided, will result in death or serious injury. -
Page 8: Safety Labeling
Safety Decal Locations WARNING: ALWAYS make sure safety labels are in place and in good condition. If a safety label is missing or not legible, order new labels from Powerhorse Product Support at 1-866-443-2576 On-Product Warning Labels Location Part numbers... -
Page 9: Safety Decals
Safety Decals To order replacement safety labels, call Powerhorse Product Support at 1-866-443-2576... -
Page 10: Initial Set-Up
Initial Set-Up Step 1. Inspect & Unpack Upon receiving your item check for missing or damaged parts. See “Component Identification” section of this manual for a diagram of the pressure washer and its components. For missing or damaged components, contact Product Support at 1-800-270-0810. ... -
Page 11: Hardware Bag
Hardware Bag 5/16 x 2" Bolt 5/16 x 1 1/2" Bolt 5/16" Nut (1577249) Qty-4 Qty-10 Qty-18 Part# 82018 Part# 82017 Part# 82019 5/16" x 3/4" Bolt Grommet 5/16" x 2" Carriage Bolt (1577149) Qty-6 Qty-2 (1577149) Qty-5 (1577249) Qty-2 (1577249) Qty-6 Part# 82233 Part# 82015... -
Page 12: Step 2. Assembly
Step 2. Assembly 3. Bolt the rubber bumpers (feet) to the leg of the pressure washer cart using: Note: Remove contents from pallet and assembly can (2) 5/16-18 x ¾” HHSF Flange Bolts (82015) occur at this time (2) 5/16-18 Flange Nut (82019) Base Assembly 1. - Page 13 Handle to Base Assembly Mounting Engine to Base 5. Bolt the pressure washer handle on to cart 7. Mount engine to cart assembly using: assembly using: (1) Engine & Pump (2) 5/16-18 x 2” Carriage Bolt (82233) (4) /16-18 Flange Nut (82019) ...
-
Page 14: Install Battery (1577249 Only)
Install Battery (1577249 Only) 11. Connecting the Battery Always connect the cables in the following 10. Route battery cables as shown. Note: Ignition sequence to avoid possible shock: switch and starter removed for clarity. a. Connect the red cable to the positive (+) terminal of the battery. -
Page 15: Step 3. Select Suitable Location
Step 3. Select Suitable Location 12. Install battery and battery bracket using: (1) Battery, Customer to Purchase Separately Moving and Handling (1) Battery Bracket (788911) Moving your pressure washer around (4) 5/16-18 Wing Nuts (777450) Use the handles to manually move the pressure washer. -
Page 16: Install Spark Arrestor (If Required)
Positioning: 3. Keep a fire extinguisher rated "ABC" nearby. 1. The pressure washer should be positioned Keep it properly charged and be familiar with on a firm, level (less than 3 degree slope), its use. heat-resistant surface with good drainage 4. -
Page 17: Operation
Operation Follow Safety Rules for Operation Conditions for Use Know how to stop. Be thoroughly familiar with proper After you have checked and fueled the equipment use of the equipment and all controls and connections. and positioned it in a suitable worksite, it is time to Know how to stop the pressure washer and start your pressure washer. -
Page 18: Preparing For Operation
Preparing for Operation result in catastrophic high pressure release of fluid as well as hose whipping. Make sure that any regular maintenance has been Avoid sharp objects. Keep hose away from sharp performed as prescribed in “Maintenance & Repair” objects. Bursting hoses may cause injury. section. -
Page 19: Check/Add Engine Oil
4. Thread the pump breather plug tube back into 3) Stay away from all sources of heat, sparks, and the pump housing. flames. Do not smoke. 5. Align the arrow on the dipstick cap with the 4) Never pump fuel directly into the gas tank at a arrow on the breather plug tube, insert it, and gas station –... -
Page 20: Inspect Fuel System/Check For Leaks
Connect Hoses, Water Supply, and Spray 4) Store extra gasoline in a cool, dry place in a UL approved tightly sealed container. Nozzle Inspect Fuel System/Check for Leaks Position pressure washer for use Inspect the engine fuel system and check for leaks For detailed instruction on positioning your pressure ... - Page 21 Color of Nozzle: Spray Used For: Angle *Red Highest Impact *Yellow Tough Stains/Stripping Green General *White Light Cleaning Black-Low pressure Chemicals *Please call Powerhorse Customer Service to order additional nozzles. NOTE: You must use the low pressure black nozzle for spraying chemicals.
-
Page 22: Prime The Water Supply
Prime the Water Supply It mixes the cleaning chemical into a low pressure spray. Cleaning chemicals applied under low Turn on water supply and squeeze the pressure adhere better to the surface being cleaned, trigger allowing the formula time to react and remove dirt CAUTION: Water Pressure more effectively. -
Page 23: Start-Up Procedures
Start-Up Procedures 7. Rinse with high-pressure spray as instructed below. Start the Engine to Power the Pump. 1. Make sure water supply is connected and primed. Pressure Adjustment CAUTION: Warranty Void (Unloader) Chemical Injector Running the pump dry will cause damage and void Water Outlet the warranty. -
Page 24: Begin High Pressure Spray
Begin High Pressure Spray Procedure: WARNING: High Pressure Spraying 1. Put on the high-pressure spray nozzle (always Safety relieve system pressure first and follow Keep spray away from people. Never direct instructions for attaching a nozzle). discharge stream at or near any person. Do not 2. -
Page 25: Shutdown
Shutdown Spray Gun Safety Lock When not spraying, use the spray gun safety lock Stop the engine using the following steps: to prevent accidental high pressure discharge. WARNING: Injury Never disconnect the high-pressure hose from the pump or spray gun while the system is pressurized. -
Page 26: Storage
Storage When you are finished using the pressure washer, you 1. Drain the water from the high pressure hose and must prepare the sprayer for storage and store it in a spray gun by depressing the trigger on the spray proper location. -
Page 27: Prepare Engine For Long Term Storage
Prepare Pressure Washer for Storage Prepare Engine for Long Term Storage Prepare the pressure washer for storage. First prepare the engine for long term storage if you will not be using the pressure washer for more than 1. Make sure the engine start switch is OFF. 30 days. -
Page 28: Maintenance & Repair
(Note: For end-of-the-season storage instructions, see the "Storage" section of this manual.) See detailed instructions for each maintenance item below. Detailed Instructions – Maintenance & Repair parts from Powerhorse Product Support at 1-800-270- No modifications. Never modify or alter the pressure 0810. -
Page 29: Inspect Spray System
Inspect Spray System Inspect Fuel System Inspect spray system for damage and leaks before Inspect the engine fuel system and check for leaks each use. before each use. Do not start pressure washer until all needed repairs have been completed. Do not start pressure washer until all needed repairs have been completed. -
Page 30: Change Pump Oil
All mechanical equipment, no matter how well designed, Change the pump oil after the first 50 hours of use, will need maintenance and repairs. A Powerhorse and then after every 3 months or 500 hours of use after pressure washer is no exception. At times, a that. -
Page 31: Troubleshooting
Troubleshooting This section provides a list of the more frequently encountered pressure washer malfunctions, their causes and corrective actions. Some corrective actions can be performed by the operator or maintenance personnel, and others may require assistance of a qualified electrician or Service Center. ENGINE WILL NOT START Causes Solutions... -
Page 32: Parts Explosion- Models 1577149, 1577249- Rev A.3
Parts Explosion- Models 1577149, 1577249- Rev A.3... -
Page 33: Parts List-Models 1577149, 1577249- Rev A.3
18.5” Lance 38509 Threaded Gun Hook 780828 Spray Gun, 3000 PSI, 22mm Coupler 789703 Powerhorse 208cc Engine, Recoil 1577149 788704 Powerhorse 208cc Engine, Electric Start 1577249 789459 Pump, 2.5 GPM, 3000PSI, Easy Start 788421 Base 788529 788568 Base Tube 788569... -
Page 34: Pump Exploded View- Rev A.3
Pump Exploded View- Rev A.3... -
Page 35: Pump Parts List- Rev A.3
Pump Parts List- Rev A.3 Item Description Part # Item Description Part # Kit #4 Socket head screw 781361 32 O-ring 14.2X1.9 or Kit #5 Pump basal flange Kit #1 33 Hose barb seat Kit #4 O-ring 80X2.4 Kit #1 34 Outlet nut M22×1.5-14 Kit #4 Radial shaft seal FB36-50-7... -
Page 36: Pump Kit Parts List-Rev A.3
Pump Kit Parts List-Rev A.3 Kit Qty Kit # Description Item # Items Included Kit Part # Needed Pump basal flange Flange w/ Seal Kit O-ring 80X2.4 782837 Radial shaft seal FB36-50-7 Oil seal O-ring 15X2.2 Spacer Seal Kit 782843 O-ring 21.8X1.9 Water seal Compaction washer... -
Page 37: Engine Exploded View (1577149)- Rev A.3
Engine Exploded View (1577149)- Rev A.3... -
Page 38: Engine Parts List (1577149)-Rev A.3
Engine Parts List (1577149)-Rev A.3 Ref# Part # Description Ref# Part # Description Crankshaft Packing, Head Cover Kit # 8 Ball bearing Cover Comp, Cylinder Head Oil Seal Wind Shield Comp. Governor Assembly Bolt Shaft, Governor Arm Flywheel Assembly Washer, Governor arm shaft Fan, Recoil starter Pin, Lock Kit # 1... -
Page 39: Engine Kit Parts List (1577149)-Rev A.3
Engine Kit Parts List (1577149)-Rev A.3 Kit Ref # Kit Part # Description 786734 Recoil & Fan Kit 789690 Air Filter Kit 789691 Fuel Cap Kit 789262 Fuel Cap Kit 789692 Tank Kit 789693 Muffler Kit 789694 Carburetor Kit 789695 Valve Cover Kit 789696 Ignition Coil Kit... -
Page 40: Engine Exploded View (1577249)-Rev A.3
Engine Exploded View (1577249)-Rev A.3... -
Page 41: Engine Parts List (1577249)-Rev A.3
Engine Parts List (1577249)-Rev A.3 Ref# Part # Description Ref# Part # Description Crankshaft Packing, Head Cover Kit # 8 Ball bearing Cover Comp, Cylinder Head Oil Seal Wind Shield Comp. Governor Assembly Bolt Shaft, Governor Arm Flywheel Assembly Washer, Governor arm shaft Fan, Recoil starter Pin, Lock Kit # 1... -
Page 42: Engine Kits Parts Lists (1577249)-Rev A.3
Engine Kits Parts Lists (1577249)-Rev A.3 Kit Ref # Kit Part # Description 789698 Recoil & Fan Kit 789690 Air Filter Kit 789691 Vent Hose Kit 789262 Fuel Cap Kit 789692 Tank Kit 789693 Muffler Kit 789694 Carburetor Kit 789695 Valve Cover Kit 789696 Ignition Coil Kit... -
Page 43: Engine Manual
Engine Manual CAUTION... -
Page 51: Limited Warranty
Transportation costs to and from service center is the responsibility of the customer. In addition to the normal warranty, Powerhorse shall warrant any normal wear item from defects in material or workmanship for a period of 90 days from the date of purchase by user. - Page 52 Assembled by Northern Tool & Equipment Company, Inc. Burnsville, MN 55306 NorthernTool.com...
Need help?
Do you have a question about the M1577149A.3 and is the answer not in the manual?
Questions and answers