
Related Manuals for Impecca IPAC16-BRB


Summary of Contents for Impecca IPAC16-BRB
- Page 1 Portable Air Conditioner—User Manual Aire acondicionado—Manual de usuario Models: IPAC16-BRB www.impecca.com V 1.3...
- Page 2 WARNING: To avoid permanent damage to unit: Ensure it is in the upright position for a MINIMUM of 6 hours and a RECOMMENDED time of 24 hours before pow- ering on the first time. ADVERTENCIA: Para evitar daños permanentes a la unidad: Asegúrese de que está...
-
Page 3: Table Of Contents
TABLE OF CONTENTS Important Safety Notices Introduction What's In The Box Getting to Know Your Air Conditioner Control Panel Overview Remote Controller Pre-Installation Instructions Installing Your Unit Air Exhaust Port Installation Cleaning & Maintenance Troubleshooting Unit Error Codes Technical Support –iii–... - Page 4 READ THESE NOTICES CAREFULLY—THEY ARE IMPORTANT! WARNING Do not start or stop the unit by inserting or Do not damage power cord or replace Plug in power plug completely. pulling out the power plug. with a non-original power cord. •...
- Page 5 CAUTION Stop operation and remove window filler Hold the plug by the head of the power Unplug the power cord when not using panels from window during severe storm plug when unplugging unit. the unit for extended periods of time. or hurricane.
-
Page 6: Introduction
INTRODUCTION Thank you for purchasing this quality Impecca portable air conditioner unit. To ensure the lon- gest life and highest energy efficiency of your unit, please follow these operating instructions carefully. Keep these instructions in a safe place and consult them as needed. Please note that... - Page 7 • Do not splash or pour water on air conditioner to avoid causing a short circuit or damage to the unit. • Do not put or hang dripping objects above the air conditioner. • If using a drainage hose, ensure the ambient temperature remains well above freezing (32°F or 0°C) to avoid cracking or damaging the unit.
-
Page 8: Whats In The Box
WHATS IN THE BOX AUTO HEALTH X-FAN HUMIDITY FILTER TURBO HOUR ON/OFF ON/OFF MODE X-FAN TEMP TIMER LIGHT TURBO SLEEP 1. Air conditioning unit 9. Pipe Hoop 2. Joint A 10. Water Drainage pipe 3. Window Exhaust Adapter 11. Foam Seal (adhesive type) 4. -
Page 9: Getting To Know Your Air Conditioner
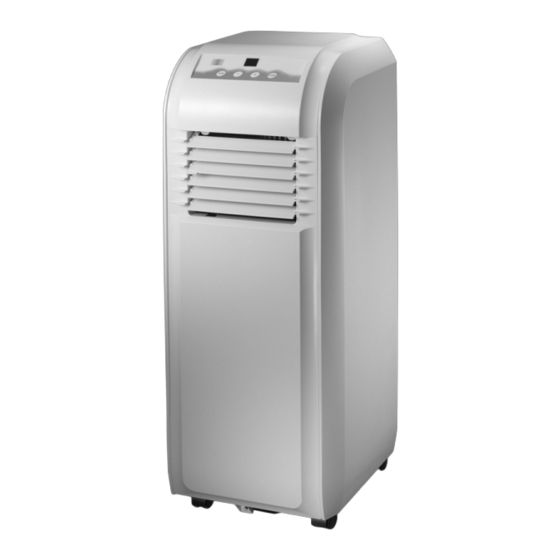
GETTING TO KNOW YOUR AIR CONDITIONER 1. Air outlet 2. Control Panel 3. Handle 4. Remote Control Storage Compartment 5. Wheel 6. Upper Air Inlet grille 7. Air Exhaust Outlet 8. Lower Air Inlet Grille 9. Drainage Port –9–... -
Page 10: Pre-Installation Instructions
PRE INSTALLATION INSTRUCTIONS You must vent your portable air conditioner when operating in cooling mode. Your unit includes a window exhaust kit that can be installed on a horizontal or vertical sliding win- dow as shown in the picture below. Please follow the installation instructions carefully to ensure maximum efficiency and to avoid personal injury or damage. -
Page 11: Installing Your Unit
INSTALLING YOUR UNIT INSTALL WINDOW FILLER PANELS The set of window filler panels is designed for installation in most vertical or horizontal sash windows. You may be required to slightly modify your specific installation to ensure safe and proper use of your air conditioner unit. NOTE: The window panel cannot be installed in windows less than 22"(559mm) wide as you will be unable to shut the exhaust cover. - Page 12 B) If the inner width of the window is between 24"(609mm) and 36½"(927mm) wide: Open the window and place the window panel on the windowsill. Slide the adjustment panel to fit the window frame width. Secure the window panel to the windowsill with 3 screws. Adjustment panel Screws 24"...
- Page 13 USING YOUR AIR CONDITIONER CONTROL PANEL OVERVIEW IR Signal Receiver Cool Mode indicator Dry Mode indicator Water Full indicator LED Display Fan Mode indicator MODE ON/OFF button MODE button ON/OFF button 1. IR SIgnal receiver (Remote controller sensor) 2. Water condensation build-up alter (when illuminated) 3.
- Page 14 REMOTE CONTROLLER Power ON/OFF button Mode selector Temperature adjustment (-/+) Fan speed selector Swing button (not applicable to this unit) Sleep function Timer REMOTE CONTROLLER DISPLAY OVERVIEW Phillips screwdriver Flat-head screwdriver Hacksaw* Tape measure Scissors Pencil –14–...
-
Page 15: Using The Remote Controller
1. Signal transmission 9. Fan mode Swing operation (not applicable to this unit) 10. Dehumidifier mode 3. Sleep mode operation 11. Cooling mode 4. Remote control lock 12. Automatic operation (not applicable 5. Fan speed to this unit) 6. Set timer 13. - Page 16 FAN SPEED SELECTOR Cycle through different fan speeds from one to four bars (low to high) and AUTO. Auto speed selects an appropriate fan speed based on ambient temperature and most effi- cient unit operation. SWING BUTTON Not applicable for this model. SLEEP BUTTON During cooling mode, the sleep button will allow the room temperature to slightly in- crease for more energy efficient operation.
- Page 17 to save the power on program. • To check the remaining time after a program has been set, simply press the TIMER button once. To cancel the program, press the TIMER button again. Note: Delayed start and stop can be set between 30 minutes and 24 hours in 30 minute (.5h) increments.
- Page 18 REMOTE CONTROLLER LOCK The remote controller is equipped with a child lock to prevent inadvertent changes to unit settings. This is indicated on the remote’s LCD. 1. To activate the lock: Press the and buttons simultaneously. 2. To deactivate the lock: Press the and buttons simultaneously. CHANGE TEMPERATURE UNITS (C°...
- Page 19 sash windows. You may be required to slightly modify your specific installation to ensure safe and proper use of your air conditioner unit. 1. Adjust the Window Filler Panels: If the inner window frame opening is less 20½ inches in width, cut the Main Panel (A).
- Page 20 The number of screws needed to secure the filler panels will depend on how many pan- els used as follows: Full Main panel (A) used with nothing else: 2 screws* Main panel (A) used along with Adjustment plate (B): 3 screws Main Panel (A), Adjustment plate (B) and Extension Panel (C): 4 screws *If you cut more than 1"...
- Page 21 AIR EXHAUST PORT MOUNTING If you have an existing air exhaust port of the same size, you may be able to directly con- nect your portable air conditioning unit to the port. For the best energy efficiency and to preserve the longest life of your unit, avoid bending the hose and keep the exhaust hose length as short as possible.
- Page 22 Step 3: Insert connector B into connector C which has already been inserted into the window filler panels, and slightly twist connector B for a snug fit. Note: For optimal performance, avoid any kinks or bends in the air exhaust duct. DRAINAGE PIPE SETUP Condensation buildup in humid environments will severely impact the efficiency and normal operation of your unit.
- Page 23 Step 2: Using the provided screw (#1), attach the drainage pipe clip (#2) near the drainage port. Step 3: Place the drainage pipe (#1) onto the drainage port (#2) and fasten with the drain- age pipe spring clip (#3). Place the rubber stopper (#4) at the top of the pipe, securing with the second spring clip and clip the hose to the unit (#5).
-
Page 24: Cleaning & Maintenance
CLEANING & MAINTENANCE SAFETY WARNING To avoid electric shock, fire, damage, or injury while performing maintenance on your unit: • Always turn off and disconnect the air conditioner from electric power. • Never submerge the unit in water or spray liquids directly on the unit. •... -
Page 25: Troubleshooting
• Is the internal collection tank or partition drain full/blocked and the FULL light illuminated? Empty the tank. • Is the ambient temperature lower than 61°F (16°C)? A safety device prevents the © 2016 Impecca, a division of LT Inc., Wilkes Barre, PA...
Need help?
Do you have a question about the IPAC16-BRB and is the answer not in the manual?
Questions and answers