Table of Contents
Advertisement
Quick Links
Installation Guidelines
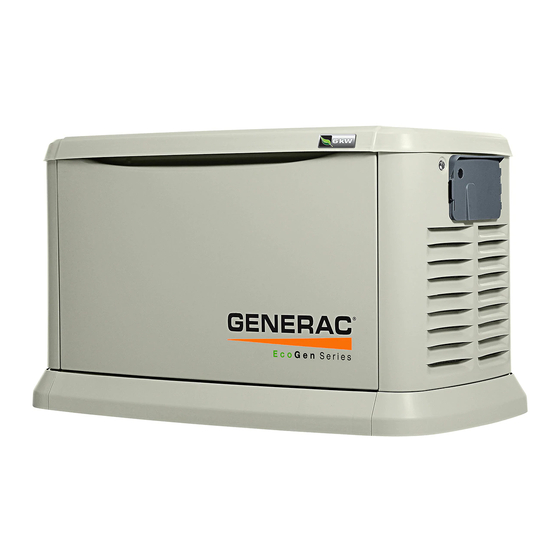
Automatic Standby Generator
*
NOT INTENDED FOR USE IN CRITICAL
LIFE SUPPORT APPLICATIONS.
*
ONLY QUALIFIED ELECTRICIANS OR
CONTRACTORS SHOULD ATTEMPT
INSTALLATION!
*
DEADLY EXHAUST FUMES! OUTDOOR
INSTALLATION ONLY!
This manual should remain with the unit.
This manual must be used in conjunction
with the appropriate owner's manual.
To locate in Spanish, go to
To locate in French, go to
For
15 kW EcoGen
http://www.generac.com/service‐support/product‐support‐lookup
http://www.generac.com/service‐support/product‐support‐lookup
™
Advertisement
Table of Contents
Troubleshooting

Subscribe to Our Youtube Channel
Related Manuals for Generac Power Systems 6103 EcoGen


Summary of Contents for Generac Power Systems 6103 EcoGen
-
Page 1: Installation Guidelines
Installation Guidelines Automatic Standby Generator ™ 15 kW EcoGen NOT INTENDED FOR USE IN CRITICAL LIFE SUPPORT APPLICATIONS. ONLY QUALIFIED ELECTRICIANS OR CONTRACTORS SHOULD ATTEMPT INSTALLATION! DEADLY EXHAUST FUMES! OUTDOOR INSTALLATION ONLY! This manual should remain with the unit. This manual must be used in conjunction with the appropriate owner’s manual. - Page 2 WARNING! California Proposition 65 Engine exhaust and some of its constituents are known to the state of California to cause cancer, birth defects, and other reproductive harm. WARNING! California Proposition 65 This product contains or emits chemicals known to the state of California to cause cancer, birth defects, and other reproductive harm.
-
Page 3: Table Of Contents
Table of Contents Section 1 1.1 Introduction .......................... 1 1.1.1 Read This Manual Thoroughly ...................... 1 1.1.2 How to Obtain Service ........................2 1.2 Safety Rules .......................... 2 1.2.1 General Hazards ........................... 3 1.2.2 Electrical Hazards ......................... 3 1.2.3 Fire Hazards ..........................3 1.2.4 Explosion Hazards ........................ - Page 4 Table of Contents Section 6 Electrical Connections 6.1 Generator Connections ......................27 6.2 Control Wiring ........................27 6.3 Main AC Wiring ........................29 6.4 Automatic Voltage Regulator (AVR) Cooling Fans ............29 6.5 Battery Requirements ......................30 6.6 Battery Installation ......................30 Section 7 Operation 7.1 Control Pad .........................31 7.2 Auto/Manual/Off ........................32 7.3 Menu Navigation .........................33 7.4 Change Time and Date .......................33...
-
Page 5: Introduction
Section 1 Safety and General Information 1.1 — Introduction Thank you for purchasing this compact, high performance, variable speed, air-cooled, engine-driven stationary auto- matic standby generator set. Every effort has been made to ensure that the information and instructions in this manual are both accurate and complete at the time of release. -
Page 6: How To Obtain Service
This symbol points out important safety information that, if not followed, could endanger personnel and/or property. This symbol represents the potential for an Explosion Hazard. This symbol represents the potential for a Fire Hazard. This symbol represents the potential for an Electrical Shock Hazard. The operator is responsible for proper and safe use of the equipment. -
Page 7: General Hazards
1.2.1— General Hazards • For safety reasons, the manufacturer recommends that this equipment be installed by an independent Sales or Service Dealer or other competent, qualified electrician or installation technician who is familiar with applicable codes, standards and regulations. The operator also must comply with all such codes, standards and regula- tions. -
Page 8: Explosion Hazards
ing codes. Comply with regulations the Occupational Safety and Health Administration (OSHA) has established. Also, ensure that the generator is installed in accordance with the manufacturer’s instructions and recommenda- tions. Following proper installation, do nothing that might alter a safe installation and render the unit in noncom- pliance with the aforementioned codes, standards, laws and regulations. - Page 9 NFPA 54: National Fuel Gas Code * NFPA 58: Standard for Storage And Handling Of Liquefied Petroleum Gases * NFPA 68: Standard On Explosion Protection By Deflagration Venting * NFPA 70E: Standard For Electrical Safety In The Workplace * NFPA 211: Standard for Chimneys, Fireplaces, Vents, and Solid Fuel Burning Appliances * NFPA 220: Standard on Types of Building Construction * NFPA 5000: Building Code * International Building Code **...
- Page 10 This page intentionally left blank. Installation Guidelines for Air-Cooled Generators...
-
Page 11: Section 2 Unpacking And Inspection
Unpacking and Inspection Section 2 2.1 — General NOTE: After unpacking, carefully inspect the contents for damage. Thoroughly inspect the unit immediately upon delivery to determine if any damage occurred in transit. Any claims for shipping damage need to be filed with the freight carrier as soon as possible. -
Page 12: Unpacking
Unpacking and Inspection 2.3 — Unpacking Remove shipping carton. See Figure 2-1. Wooden Frame 15 kW Generator Figure 2-1. Unpack Generator Remove four bolts with crating clamps. Carefully lift the generator off the wooden pallet. Do NOT drag the gener- ator off the pallet or damage to the base will occur. - Page 13 Unpacking and Inspection The lid of the generator enclosure is locked. Open the side door compartment and carefully cut the cable strap to release the keys from the circuit breaker switch. See Figure 2-3. Figure 2-3. Open Side Door Compartment to Obtain Keys The lid is secured by two locks, one on each side of the enclosure.
- Page 14 Unpacking and Inspection Connection Area (Under Control Pad) Fuel Regulator Battery Compartment Loose Parts Figure 2-4. Customer Connection Area/Loose Parts Location Figure 2-4 illustrates the following: Customer connection area (beneath and behind the control pad) • • Fuel regulator • Battery compartment •...
-
Page 15: Parts Shipped Loose
Unpacking and Inspection 2.4 — Parts Shipped Loose The generator is shipped with the following loose parts: Rubber Mounts (units that include fascia) • • Battery Terminal Cap Main Line Circuit Breaker (MLCB) Terminal Caps • • Main Line Circuit Breaker (MLCB) Locking Mechanism •... - Page 16 Unpacking and Inspection This page intentionally left blank. Installation Guidelines for Air-Cooled Generators...
-
Page 17: Section 3 Site Selection And Preparation
Site Selection and Preparation Section 3 3.1 — Site Selection No operable windows or openings in the wall permitted within 5 ft (1.52 m) from any point of the generator. Existing Wall 18 in (457 mm) 60 in (1524 mm) 60 in (1524 mm) Minimum Distance Clearance from operable... -
Page 18: Installation Guidelines
Site Selection and Preparation Install the generator outdoors in its protective enclosure where adequate cooling and ventilating air is always available. Also consider these other factors: • Installation must strictly comply with NFPA 37, NFPA 54, NFPA 58, and NFPA 70 standards. Install the generator where air inlet and outlet openings will not be obstructed by leaves, grass, snow, etc. -
Page 19: Site Preparation
Site Selection and Preparation Figure 3-2. Southwest Research Institute Decal Southwest Research Institute Decal (located inside the generator, next to the generator’s data decal) http://www.swri.org/4org/d01/fire/listlab/listprod/director.htm Based on this testing and the requirements of NFPA 37, Sec 4.1.4, the guidelines for installation of the genera- tors listed above are changed to 18 inches (457 mm) from any point of the generator enclosure to a stationary wall, building or structure. -
Page 20: Material Sufficient For Level Installation
Site Selection and Preparation 3.2.1— Material Sufficient for Level Installation • Dig a rectangular area approximately 5 inches (127 mm) deep and about 6 inches (152 mm) longer and wider than the footprint of the generator. Fill with pea gravel, crushed stone or any other non-combustible material suf- ficient for level installation. -
Page 21: Section 4 Generator Placement
Generator Placement Section 4 4.1 — Generator With the Site Selection and Preparation performed, proceed with placement and installation of the generator itself. See Figure 4-1. All air-cooled generators come with a composite pad. The composite pad elevates the generator and helps prevent water from pooling around the bottom. -
Page 22: Fascia Skirt Installation (If Applicable)
Generator Placement 4.2 — Fascia Skirt Installation (If Applicable) Install base fascia as follows: Remove four rubber mounts from Owner’s Manual bag. Screw two rubber mounts into threaded holes of end piece. See A of Figure 4-3. Snap end piece into side piece. See B of Figure 4-3. Fit rubber mounts in end piece into lifting holes at base of generator. -
Page 23: Section 5 Fuel Conversion/Gas Connections 5.1 Fuel Conversion
Fuel Conversion/Gas Connections Section 5 5.1 — Fuel Conversion Although the generator is configured at the factory for operating on natural gas, provision is made to switch over to LP Vapor. NOTE: The fuel selection (NG/LP) can be changed using the Installation Wizard at initial power up, or by accessing the EDIT Menu thereafter. -
Page 24: Fuel Consumption
Fuel Conversion/Gas Connections NOTE: All pipe sizing, construction and layout must comply with NFPA 54 for natural gas applications and NFPA 58 for liquid propane applications. Once the generator is installed, verify that the fuel pressure NEVER drops below its required fuel pressure rating. For more information regarding NFPA requirements, refer to www.nfpa.org. -
Page 25: Natural Gas Pipe Sizing
Fuel Conversion/Gas Connections When measuring pipe length, add 2.5 feet (0.76m) for each angle or bend in the pipe run and add that to the overall pipe distance. 5.4.1— Natural Gas Pipe Sizing The following table indicates the maximum length (measured in feet / meters) allowed for various pipe sizes. The pipe sizes are measured by inside diameter (ID) to include any fittings, valves (must be full flow), elbows, tees or angles. -
Page 26: Gas Installation Summary
Fuel Conversion/Gas Connections 5.4.3— Gas Installation Summary Mistakes frequently occur when sizing gas pipe. A properly sized gas pipe is critical to the proper operation of the gen- erator. The generator inlet size has no bearing on the proper gas pipe size. If using a piping method other than black pipe, refer to local codes and the pipe manufacturer’s specifications for sizing and installation information. - Page 27 Fuel Conversion/Gas Connections Sediment Trap Figure 5-3. Sediment Trap Figure 5-4. Incorrect Routing of Flexible Hose When connecting the gas line to the generator, use the provided section of UL Listed or AGA-approved flexible fuel line in accordance with local regulations. The flexible fuel line ensures that vibration from the generator does not cause a gas leak at one of the connection points.
- Page 28 Fuel Conversion/Gas Connections Check gas pressure at the generator fuel pressure regulator as follows: – Close gas supply valve. – Remove top test port from fuel pressure regulator. – Install gas pressure tester (manometer). See Figure 5-5. – Open gas supply valve. –...
- Page 29 Fuel Conversion/Gas Connections Check Distance with LP Provider Primary Fuel Pressure Regulator BTU and Per LP Provider Manual Pressure Decal Shut Off Valve Secondary Fuel Pressure Check Distance with Regulator Manufacturer Regulator Flexible Fuel Line Fuel Tank Size Fuel Tank Large Enough to Provide Required BTUs for Generator and ALL Connected Appliance Loads.
- Page 30 Fuel Conversion/Gas Connections This page intentionally left blank. Installation Guidelines for Air-Cooled Generators...
-
Page 31: Section 6 Electrical Connections
Electrical Connections Section 6 6.1 — Generator Connections NOTE: Wiring must be performed in accordance with local jurisdiction and codes. Remove the appropriate Main AC/Control Wiring knock-out plug at back of generator. Install the generator feeder and control wiring between the generator and inverter or electrical loads to be pow- ered by the generator per the applicable NEC codes for the wiring method selected. - Page 32 Electrical Connections 4-6 AWG: 35 in-lbs (4 Nm) 8 AWG: 25 in-lbs (3 Nm) 10-14 AWG: 20 in-lbs (3 Nm) Large Ground 2/0 to 14 AWG: 120 in-lbs (14 Nm) Figure 6-1. Control Wiring Torque Specifications NOTE: To separate low voltage from high voltage wires, unless NEC Section 300.3(c)(1) requirements are met, run 2-wire start and T1 wires through wire shielding provided (see Subsection 2.4 —Parts Shipped Loose).
-
Page 33: Main Ac Wiring
Electrical Connections 6.3 — Main AC Wiring Figure 6-3. Main AC Wiring NOTE: Main AC (E1, E2 and Neutral) wiring must be in accordance with local jurisdiction and codes. Strip insulation from wire ends. Do not remove excessive insulation. Remove two cap plugs located behind the breaker door and to the right of the Main Breaker. Loosen the lugs of the Main Breaker through the access holes. -
Page 34: Battery Requirements
Electrical Connections NOTE: The AVR cooling air inlet includes a filter. Verify the filter is installed and properly seated at time the unit is installed. Check the filter at regular maintenance intervals to verify proper airflow. See the Maintenance section of the Owner’s Manual for details. 6.5 —... -
Page 35: Section 7 Operation
Operation Section 7 7.1 — Control Pad The control pad is intended for use by qualified service personnel only. See Figure 7-1. The control pad is located under the lid of the enclosure. The lid is secured by two locks, one on each side of the enclosure. -
Page 36: Auto/Manual/Off
Operation With the control pad set to AUTO, the engine may crank and start at any time without warning. To prevent possible injury that might occur during sudden starts, always set the control pad to OFF and remove the 7.5 amp fuse before working on or around the generator or the electri- cal loads that are to be powered by the generator. -
Page 37: Menu Navigation
Operation 7.3 — Menu Navigation Feature Description System Menus The system returns to the Home screen if the control pad is not used for five minutes. The screen normally displays a Status message, such as Ready to Run (Auto mode) or Switched to OFF (Off mode), and the total Hours of Protection. -
Page 38: Before Initial Start-Up
Operation 7.7 — Before Initial Start-Up NOTE: This unit has been run and tested at the factory prior to shipment and does not require any break-in. Operating the engine with the oil level below the ADD mark on the dipstick can cause engine damage. - Page 39 Operation Figure 7-4. Navigation Menu Installation Guidelines for Air-Cooled Generators...
-
Page 40: Before Starting
Operation 7.7.2— Before Starting Complete the following: Verify that the generator is OFF. A red LED illuminates to confirm that system is in OFF mode. Move the Generator Disconnect Circuit Breaker switch to the OFF (Open) position. Turn off all circuit breakers/electrical loads that are to be powered by the generator. Check engine oil level. -
Page 41: Checking Automatic Operation
Operation Close the disconnect switch if the appropriate voltage and frequency are present. Check voltage and frequency at the Alternative Power Management System by closing the breakers one at a time (if applicable). Allow the generator to run under load for 20-30 minutes while checking for unusual noises, vibration or other indi- cations of abnormal operation, such as oil leaks or overheating. - Page 42 Operation This page intentionally left blank. Installation Guidelines for Air-Cooled Generators...
-
Page 43: Section 8 Troubleshooting
Troubleshooting Section 8 8.1 — Engine Troubleshooting Table 8-1. Engine Diagnostics Problem Cause Correction Engine will not crank. 1) Fuse blown. 1) Correct short circuit condition by replacing 7.5 Amp fuse. 2) Loose, corroded or defective battery 2) Tighten, clean or replace as necessary.* cables. -
Page 44: Generator Troubleshooting
Troubleshooting 8.2 — Generator Troubleshooting Table 8-2. Generator Diagnostics Things to Active Alarm Problem Solution Check NONE GREEN Unit running in AUTO but no Check Gener- Contact servicing dealer if Generator power in house. ator Discon- Disconnect circuit breaker is in the ON nect circuit position. - Page 45 Troubleshooting Table 8-2. Generator Diagnostics (Continued) Things to Active Alarm Problem Solution Check STEPPER Unit will not start in AUTO with 2- Check the Contact servicing dealer. OVERCUR- wire start signal. LEDs/Screen RENT for alarms. MISWIRE Unit will not start in AUTO with 2- Check the Contact servicing dealer.
-
Page 46: G-Flex™ Troubleshooting
Troubleshooting 8.3 — G-Flex™ Troubleshooting Table 8-3. G-Flex™ Diagnostics Ecode/Active Things to Problem Possible Causes/Solution Alarm Check 1048 VSCF Overload Unit shuts down Check the Alternator, AVR or wiring is damaged. during operation. LEDs/Screen Contact servicing dealer. for alarms. 1049 VSCF Overload Unit shuts down Check the Generator output is shorted or severely overloaded. - Page 47 Troubleshooting Table 8-3. G-Flex™ Diagnostics (Continued) Ecode/Active Things to Problem Possible Causes/Solution Alarm Check 1057 VSCF Unit shuts down Check the Probable causes are: Overvoltage during operation LEDs/Screen 1) The generator has been overloaded. Remove load and or starting. for alarms. attempt to restart unit.
- Page 48 Troubleshooting Table 8-4. G-Flex™ Diagnostics (Continued) Symptom Possible Causes Generator stalls when large load is Total load is too big for the generator. Loads must be less than 10 kW or 2 hp supplied. when operating under 3600 rpm.Contact installing dealer to correct installation. Output voltage is low/high.
-
Page 49: Section 9 Accessories
Accessories Section 9 9.1 — Descriptions NOTE: Contact an independent Authorized Dealer for additional information on accessories. Table 9-1. Accessories Accessory Description Cold Weather Kit Required in areas where temperatures regularly fall below 32 º F (0 º C). Scheduled Maintenance Kit Includes all pieces necessary to perform maintenance on the generator along with oil recom- mendations. - Page 50 Accessories This page intentionally left blank. Installation Guidelines for Air-Cooled Generators...
-
Page 51: Section 10 Installation Diagrams
Installation Diagrams Section 10 10.1 — Installation Drawing Installation Guidelines for Air-Cooled Generators... -
Page 52: Off Grid Mode Application Schematic
Installation Diagrams 10.2 — Off Grid Mode Application Schematic Installation Guidelines for Air-Cooled Generators... -
Page 53: Oil Make Up System Schematic
Installation Diagrams 10.3 — Oil Make Up System Schematic Installation Guidelines for Air-Cooled Generators... - Page 54 Installation Diagrams This page intentionally left blank. Installation Guidelines for Air-Cooled Generators...
- Page 56 Part No. 0K6047 Rev. B 09/08/2014 Printed in USA Generac Power Systems, Inc. © Generac Power Systems, Inc. All rights reserved S45 W29290 Hwy. 59 Specifications are subject to change without notice. Waukesha, WI 53189 No reproduction allowed in any form without prior written 1-888-GENERAC (1-888-436-3722) consent from Generac Power Systems, Inc.
Need help?
Do you have a question about the 6103 EcoGen and is the answer not in the manual?
Questions and answers