Table of Contents
Advertisement
Quick Links
Advertisement
Table of Contents

Related Manuals for Ventus w177


Summary of Contents for Ventus w177
- Page 1 s Edh^ t...
-
Page 2: Installation
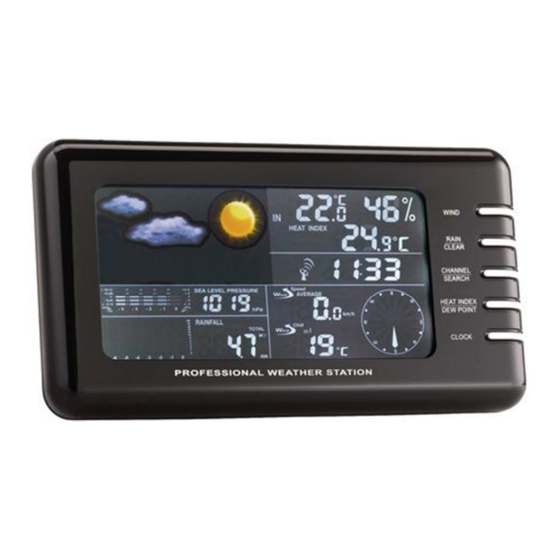
Ventus Wireless Weather station Owner’s Manual Thank you for purchasing the new generation of professional weather station. Designed and engineered with the state-of-art technology and components, this instrument will provide accurate and reliable measurement of wind speed & direction, wind chill, daily/weekly/monthly/accumulated rainfall, barometric pressure, weather forecast, indoor/outdoor humidity, temperature, heat index &... - Page 3 Sea level pressure setting After battery/adapter installation, the monitor will enter sea level pressure setting mode directly and the pressure reading will flash. Press “▲” or “▼” to set the sea level pressure value. Press “PRESSURE” to confirm the setting and exit. This allows the unit to provide a more accurate weather forecast & pressure reading.
- Page 4 3. Mounting the anemometer Important: Before mounting, be sure the monitor & anemometer are within the effective transmission range. Note: To mount the anemometer, you need a mast (not supplied) about 1 – 1.25 inches (2.54 – 3.1 cm) in diameter, and the hardware necessary to fasten it to the mounting location. If you previously installed such a mast (for mounting antenna, for example), you can mount the anemometer on that mast.
- Page 5 3. Hold the wind vane pointing due north and do not allow it to turn. Insert 2 pieces of AA batteries according to the polarity indicated. The red LED indicator above the battery cover of the anemometer will flash few times right after battery installation.
- Page 6 too close to the trees or plants Battery Installation for the rain gauge 1. Press the tabs back as indicated below to unlock the rain gauge cover 2. Lift the rain gauge cover off its base. Then carefully remove the packing tape from the bucket assembly 3.
-
Page 7: Operation
Installing additional remote thermo-hygrometer sensor(s) Additional remote thermo-hygrometer sensors can be purchased separately (not supplied in the package). 1. Select a location for the remote thermo-hygrometer that is within the effective transmission range of 100 meters (328 feet). Shorten the distance if obstacle is between the monitor & remote sensor. 2. - Page 8 MEMORY Read maximum/minimum records Clear memory record HEAT INDEX/ Read Heat Index & Dew Point DEW POINT CLOCK Read time, calendar and day-of-week Set Clock & Calendar ALARM Read alarm time; enable/disable alarm Alarm time setting ▲ UP 1 step forward in setting Fast advance ▼...
- Page 9 to search for the sensors. If that continues to fail, shorten the distance between the sensor & monitor and reinstall the sensors if necessary (Details refer “INSTALLATION” section) Anemometer (with built-in temperature & humidity sensor): Important: Wind direction calibration is needed whenever the anemometer is reset (or during battery replacement) Searching mode display: Wind direction, temperature &...
- Page 10 pressure change and is about 70-75% correct. As weather conditions cannot be 100% correctly forecasted, we cannot be responsible for any loss caused by an incorrect forecast. SUNNY PARTLY CLOUDY CLOUDY RAINY STORMY To obtain an accurate weather forecast & barometric pressure reading, you need to input your current local sea level pressure.
-
Page 11: Rainfall History
IN/OUT DEW POINT Dew point is the saturation point of the air, or the temperature to which the air has to be cooled in order to get condensation. Press HEAT INDEX / DEW POINT button twice to show the respective indoor or outdoor dew point reading on the display. -
Page 12: Wind Chill
monitor to display the wind speed in miles per hour (mph), kilometers per hour (km/h), meters per second (m/s), knots and Beaufort. Press “WIND UNIT” on the back casing until the desired unit appears. The monitor displays 16 wind directions (N for north, S for south, SW for south-west and so on). Press “WIND”... -
Page 13: Maximum & Minimum Records
limit. Press “WIND ALARM” to silence the alarm sound. The related high alarm icons will continue to flash until the alarm condition is no longer met. High Gust Wind Alarm Setting: Press “WIND ALARM” to show high gust wind alarm display. “ALARM” icons appear in the gust wind display area Hold “WIND ALARM”... -
Page 14: Clock And Calendar
Searching for Radio-Controlled Clock Signal Reception is successful Reception is fail Reception is disabled Antenna icon without signal strength indicates the past reception is not successful (Daily synchronization is still enabled). To enforce searching of radio-controlled time signal immediately, press “... -
Page 15: Low Battery Indication
LOW BATTERY INDICATION Low battery indication is available for the monitor itself and all of the remote sensors. Replace the batteries and follow the setup procedure in this instruction manual. Important: Wind direction calibration is required for the anemometer during battery replacement (Details refer “Calibrating the anemometer &... - Page 16 If at any time in the future you need to dispose of this product please note that: Waste electrical products sjould not be disposed together with household waste. Please recycle where facilities exist. Check with your local Authority or retailer For recycling advice (Waste Electrical and Electronic Equipment directive) CE tested to comply with CE standards...
Need help?
Do you have a question about the w177 and is the answer not in the manual?
Questions and answers