Table of Contents
Advertisement
Advertisement
Table of Contents

Related Manuals for Tennant t5e


Summary of Contents for Tennant t5e
- Page 1 Walk-Behind Scrubber English Operator Manual The Safe Scrubbing Alternative TennantTrue Parts IRIS a Tennant Technology North America / International 9002337 For the latest Parts manuals and other Rev. 06 (10-2015) language Operator manuals, visit: *9002337* www.tennantco.com/manuals...
-
Page 2: Intended Use
It provides necessary operation and maintenance INTENDED USE instructions. Read this manual completely and understand the The T5e walk-behind scrubber is designed to scrub machine before operating or servicing it. hard surfaces (concrete, asphalt, stone, synthetic, etc) in an indoor environment. Typical applications include This machine will provide excellent service. -
Page 3: Table Of Contents
....... . USING AN OFF- BOARD BATTERY CHARGER ......Tennant T5e (10- 15) -
Page 4: Immportant Safety Instructions
The electric motors will spark upon start With pads or accessories not supplied or up and during operation which could cause a flash approved by Tennant. The use of other fire or explosion if machine is used in an area pads may impair safety. - Page 5 All repairs must be performed by trained personnel. Do not modify the machine from its original design. Use Tennant supplied or approved replacement parts. Wear personal protective equipment as needed and where recommended in this manual. For Safety: wear protective gloves.
-
Page 6: Safety Labels
Hazard. Batteries Emit Hydrogen Gas. Keep Sparks And Open Flame Away. Keep Battery Compartment Open When Charging. SPINNING BRUSH LABEL - Located on scrub head WARNING: Spinning Brush. Keep Hands Away. Turn Off Power Before Working On Machine. Tennant T5e (10- 15) -
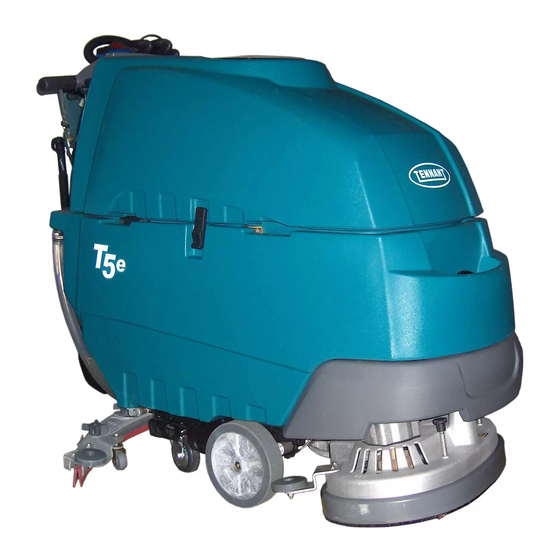
Page 7: Machine Components
11. Solution Tank Level/Drain Hose 24. Pad Release Plunger 12. Rear Fill Port 25. Pad Driver Window 13. Recovery Tank Support Stand 26. Scrub Head Skirt 14. Circuit Breaker Panel 27. Parking Brake (option) 28. Cylindrical Brush Scrub Head Tennant T5e (09- 08) -
Page 8: Control Panel Components
4. Brush Pressure Meter ec-H2O system on/off switch (ec-H2O Model) 5. Control Console Height Adjustment Lever 10. ec-H2O system indicator light (ec-H2O Model) 6. Speed Control Knob 11. Main Power on/off Key Switch 12. Hour Meter Tennant T5e (09- 08) -
Page 9: Machine Installation
1. Park the machine on a level surface, remove the key and set the parking brake, if equipped. FOR SAFETY: Before leaving or servicing machine, stop on level surface, set parking brake if equipped, turn off machine and remove key. Tennant T5e (10- 15) -
Page 10: How The Machine Works
Strong action on any surface. Performs well on buildup, grease, or tire marks. Polishing Pad (White) - Used to maintain highly polished or burnished floors. Buffing Pad (Red) - Used for light duty scrubbing FIG. 4 without removing floor finish. Tennant T5e (10- 15) -
Page 11: Installing Brushes/Pads
(Figure 7). FIG. 9 4. Align the pad driver or brush under the motor hub and push it upward to engage hub (Figure 10). 2 mm FIG. 7 FIG. 10 Tennant T5e (10- 15) -
Page 12: Ec-H2O Nanoclean Water Conditioning
(Figure 13). Install brush. when it’s time to replace cartridge (Figure 15). Double row of bristles FIG. 15 FIG. 13 4. Check the brushes to ensure they are properly adjusted (See ADJUSTING SCRUB HEAD BRUSHES). Tennant T5e (10- 15) -
Page 13: Installing Fast- Pak Carton (Fast Model)
Pull the control console height adjustment lever and lift drying out and clogging up the hose. (Figure 18). or lower the console to a comfortable operating height. Release lever to lock in position (Figure 20). FIG. 18 FIG. 20 Tennant T5e (10- 15) -
Page 14: Machine Operation
( I ) position (Figure 22). ec-H2O model: Press the ec-H2O system switch to the on ( I ) position (Figure 22). The ec-H2O system indicator light will not turn on until the machine starts scrubbing. FIG. 24 Tennant T5e (03- 15) - Page 15 FIG. 29 10. To stop scrubbing, release the triggers, raise the scrub head and squeegee and turn the key to the off position. FIG. 27 Tennant T5e (03- 15)
-
Page 16: Emergency Stopping
8. ec-H2O NanoClean Models (ec-H2O models labeled ec- H2O NanoClean) If the ec-H2O system indicator light begins to blink green/red, the water conditioning cartridge needs to be replaced (Figure 31). See ec-H2O NanoClean WATER CONDITIONING CARTRIDGE REPLACEMENT. Tennant T5e (03- 15) -
Page 17: Battery Meter
The hour meter records the number of total hours the FIG. 34 brush motors have been powered on. Use the hour meter to determine when to perform recommended maintenance procedures and to record service history (Figure 34). See MACHINE MAINTENANCE. FIG. 33 Tennant T5e (09- 08) -
Page 18: Off- Aisle Wand Setup And Operation
4. Attach the off- aisle wand to the hoses (Figure 37). FIG. 40 4. After scrubbing, turn off the wand switch and squeeze the trigger for five seconds to relieve the FIG. 37 water pressure before disconnecting the solution hose. Tennant T5e (10- 15) -
Page 19: Draining And Cleaning Tanks
(Figure 44). Make sure the solution tank is empty before removing filter. FIG. 41 3. Remove the recovery tank cover and rinse out the tank. Clean the float shut-off screen located inside the recovery tank (Figure 42). FIG. 44 FIG. 42 Tennant T5e (10- 15) -
Page 20: Charging Batteries
OUTPUT VOLTAGE - 24 VOLTS OUTPUT CURRENT - 20 AMPS AUTOMATIC SHUTOFF CIRCUIT FOR DEEP CYCLE BATTERY CHARGING Sealed Battery Wet Battery (AGM Discover) Sealed Battery Sealed Battery (AGM MK) Chargers mfd before 09/2012 FIG. 46 Tennant T5e (10- 15) -
Page 21: Using The On- Board Battery Charger (220- 240V Chargers)
4. Open the battery compartment and attach the red the cord is connected (Figure 49). handle battery connector harness to the battery Three- digits + the following code: charger connector as shown (Figure 50). A = Charging current Tennant T5e (10- 15) - Page 22 (Figure 53). If the charger detects a problem, the charger will display an error code (See ON- BOARD BATTERY CHARGER ERROR CODES). Tennant T5e (03- 2015)
-
Page 23: On- Board Battery Charger Error Codes
3. If charging wet (lead acid) batteries, check the fluid level before charging (See BATTERY FIG. 56 MAINTENANCE). 5. Connect the charger’s AC power supply cord into a properly grounded receptacle. 6. Connect the charger’s DC cord into the machine’s battery receptacle (Figure 57). Tennant T5e (10- 06) -
Page 24: Adjusting Scrub Head Brushes
FIG. 58 4. If scrub head is not level, loosen the lock nut and turn the scrub head leveling screw to level. Tighten down the lock nut once head is level (Figure 59). Lock FIG. 59 Tennant T5e (10- 15) -
Page 25: Cylindrical Brush Model
5. Pull the triggers to create a brush pattern on the floor. 6. Raise the scrub head and pull the machine away. 7. Observe the brush pattern on floor. If the brush pattern is uneven or tapered, adjustment is required. 8. Reconnect drive motor wire. Tennant T5e (10- 15) - Page 26 4. To lower the brush end, turn the shaft clockwise for the front brush and counter- clockwise for the rear brush. Retighten hex screw (Figure 66). FIG. 66 5. Recheck brush pattern. NOTE: Replace brushes when bristles are worn to 15 Tennant T5e (10- 15)
-
Page 27: Machine Maintenance
(Figure 68). FIG. 71 6. Empty and rinse out the debris trough (Figure 72). FIG. 68 3. Drain the solution tank (Figure 69). Cylindrical Brush Model FIG. 72 FIG. 69 Tennant T5e (10- 15) - Page 28 FIG. 75 FIG. 78 13. FaST Model: Connect the FaST- PAK supply hose to the storage plug when not in use (Figure 79). Remove any dried concentrate from the hose connector by soaking it in warm water. Tennant T5e (10- 15)
-
Page 29: Monthly Maintenance
Make sure the solution tank is empty before removing filter. FIG. 84 6. Clean the parking brake clamp with a cleaning FIG. 81 solvent. 7. Check the machine for loose nuts and bolts. 8. Check the machine for leaks. Tennant T5e (10- 15) -
Page 30: Battery Maintenance
3 mm (0.12 in) below the sight tubes. Before Charging After Charging FIG. 85 NOTE: Make sure the battery caps are in place while charging. There may be a sulfur smell after charging batteries. This is normal. Tennant T5e (10- 15) -
Page 31: Squeegee Blades
Replacing Squeegee Blades: 1. Loosen the band clamp and remove the band from the squeegee assembly (Figure 88). FIG. 90 MOTOR MAINTENANCE Contact an Authorized Tennant Service Center for carbon brush replacement. Carbon Brush Replacement Hours Drive Transaxle Motor Vacuum Motor Disk Brush Motors FIG. -
Page 32: Fast System Maintenance
(Figure 95). Replace the water and air filter. An 8mm hex wrench required to install new water filter (Figure 93). Water Filter (50 Mesh/Brown) Gray Collar FIG. 95 Air Filter (50 Mesh/Brown) FIG. 93 Tennant T5e (10- 15) -
Page 33: Ec-H2O Module Flush Procedure
Repeat process if the three indicator lights do not blink three times. FIG. 98 Service switch 4. Turn the key to the on ( I ) position. 3 indicator lights Solution flow button FIG. 97 Tennant T5e (03- 15) -
Page 34: Jacking Up Machine
5. Open the recovery tank cover to promote air circulation. ATTENTION: Do not expose machine to rain, store indoors. 6. If storing machine in freezing temperatures, follow the FREEZE PROTECTION instructions below. Tennant T5e (10- 15) -
Page 35: Freeze Protection
When the water turns clear, press the module switch again to stop the flush cycle. Dispose the antifreeze in an environmentally safe way according to local waste disposal regulations. 5. The machine is now ready for scrubbing. Tennant T5e (03- 15) - Page 36 1 and 2. Dispose of the antifreeze in an environmentally FIG. 106 safe way according to local waste disposal regulations. 3. Pour the recreational vehicle (RV) antifreeze into the supply hose until full (Figure 107). Tennant T5e (10- 15)
-
Page 37: Troubleshooting
Clean solution tank filter Discharged batteries Charge batteries Clogged solution valve Remove valve and clean Solution flow control knob set too low Adjust solution control flow knob Loose screw on control knob Calibrate knob and retighten screw. Tennant T5e (10- 06) - Page 38 Drain solution tank. Remove solution tank filter, clean and reinstall Clogged detergent orifice/filter screen Replace orifice/filter screen (See FaST SYSTEM MAINTENANCE) Clogged FaST solution inlet filter Contact Service Center FaST Pump fuse blown Replace 7.5A fuse Tennant T5e (10- 06)
-
Page 39: Battery Meter Led Fault Codes
Four Battery lockout. Recharge batteries immediately. Eight Controller tripped. Contact Service Center. High battery voltage reading. Check battery connections. No Bars Sleep mode. Turn key to restore. Bars Rippling Throttle engaged at start up. Release triggers. Tennant T5e (03- 15) -
Page 40: Machine Specifications
GRADE LEVEL, MAX. Scrubbing 5%, Transporting 8%, Ramp Loading 19.5% * Run times are based on Continuous Scrubbing Run Times. ** Sound levels (ISO 11201) as recommended by the American Association of Cleaning Equipment Manufacturers (AACEM) and OSHA. Tennant T5e (03- 15) -
Page 41: Machine Dimensions
800 mm Disk Disk Disk Cylindrical Cylindrical 1,357 mm 1,408 mm 1,471 mm 1,399 mm 1,399 mm 645 mm 737 mm 838 mm 711 mm 864 mm 908 mm 1,051 mm 1,185 mm 1,051 mm 1,185 mm Tennant T5e (03- 15)
Need help?
Do you have a question about the t5e and is the answer not in the manual?
Questions and answers