
Related Manuals for M2TECH HIFACE EVO TWO


Summary of Contents for M2TECH HIFACE EVO TWO
- Page 1 M2TECH HIFACE EVO TWO UNIVERSAL D-TO-D CONVERTER USER MANUAL M2TECH HIFACE EVO TWO UNIVERSAL D-TO-D CONVERTER REV. P A – 8/2015...
- Page 2 M2Tech HIFACE EVO TWO UNIVERSAL D-TO-D CONVERTER REVISION P A – AUGUST 2015 www.m2tech.biz Copyright © 2015, M2Tech Srl...
- Page 3 WARNING: the information contained in this manual are considered to be reliable and accurate. M2Tech reserves the right to change or modify the information any time, without prior advice. It’s up to the customer to ensure that the manual being consulted is the latest version.
- Page 4 USB bus 5V. HIFACE EVO TWO is provided with a wide range of outputs in all the most used formats, therefore it’s able to interface with virtually every device accepting digital audio signals on its input.
-
Page 5: Table Of Contents
9.3.2. Windows driver uninstall ...................36 9.3.3. Windows Driver Panel ..................41 9.3.4. Using the HIFACE Evo Two as Windows predefined audio device ....45 9.3.5. Configuring the player: FooBar and JRiver Media Center ........46 9.3.6. Connecting the HIFACE Evo Two to an USB 1.1 port ........52 10. - Page 6 M2Tech HIFACE EVO TWO UNIVERSAL D-TO-D CONVERTER REVISION P A – AUGUST 2015 www.m2tech.biz Copyright © 2015, M2Tech Srl...
-
Page 7: Unpacking And Placing The Unit
Remove the HIFACE EVO TWO from the foam enclosure and place it onto a stable base, far from heat sources. Avoid full sunlight on the unit. Allow for ample room around the unit for venting. - Page 8 M2Tech HIFACE EVO TWO UNIVERSAL D-TO-D CONVERTER REVISION P A – AUGUST 2015 www.m2tech.biz Copyright © 2015, M2Tech Srl...
-
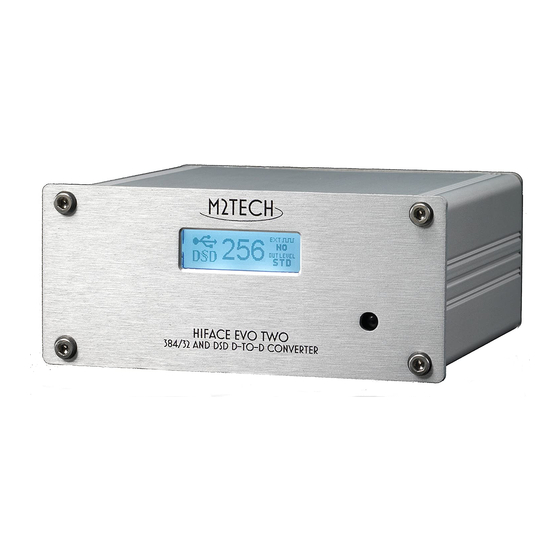
Page 9: Front Panel
2) Remote control IR receiver. Aim the remote at this point to send command to the device. NOTE: the remote control provided with the HIFACE EVO TWO is the same used for the JOPLIN and JOPLIN MKII . For this reason, whenever the user owns both units, it may happen that a command sent to one of them will also affect the other. - Page 10 M2Tech HIFACE EVO TWO UNIVERSAL D-TO-D CONVERTER REVISION P A – AUGUST 2015 www.m2tech.biz Copyright © 2015, M2Tech Srl...
-
Page 11: Rear Panel
EVO CLOCK Two master clock output, anyway it also accepts standard word clocks and even the reference 10MHz clock. Female BNC connector. 10) USB port. Connect to a 2.0 or 3.0 USB port of a computer. The HIFACE EVO TWO exchanges audio data with a computer through this connection. - Page 12 HIFACE EVO TWO UNIVERSAL D-TO-D CONVERTER REVISION P A – AUGUST 2015 www.m2tech.biz 11) Optical output for clock information. Connect to the clock info input of the EVO CLOCK Two using a Toslink™ fibre cable. Toslink™ transmitter. Copyright © 2015, M2Tech Srl...
-
Page 13: Remote Control
MENU/ESC > Figure 3 1) Standby. This button has no effect on the HIFACE EVO TWO . 2) Menu/Esc. Press this button to access the menu and to exit the menu without affecting the current settings. 3) Navigation buttons. They have various functions, both during menu navigation and when the menu is not active, as explained in detail in the following chapters. - Page 14 M2Tech HIFACE EVO TWO UNIVERSAL D-TO-D CONVERTER REVISION P A – AUGUST 2015 www.m2tech.biz Copyright © 2015, M2Tech Srl...
-
Page 15: Connecting And Powering The Unit
75 Ohms matched lines. If the EVO CLOCK TWO is used, connect its clock info optical input to the HIFACE EVO TWO clock info output (Fig. 2, 11) using a Toslink™ fibre interconnect (not in stock) to make the EVO CLOCK TWO clock switching automatic. - Page 16 M2Tech HIFACE EVO TWO UNIVERSAL D-TO-D CONVERTER REVISION P A – AUGUST 2015 www.m2tech.biz Copyright © 2015, M2Tech Srl...
-
Page 17: Cleaning The Unit
6. Cleaning the Unit The HIFACE EVO TWO should be cleaned with a soft, slightly damp cloth. Do not use alcohol or any other types of cleaning fluids as they could damage the unit. Avoid fluids from dropping or leaking inside the unit. Fluids of any type poured into the unit will void your warranty. - Page 18 M2Tech HIFACE EVO TWO UNIVERSAL D-TO-D CONVERTER REVISION P A – AUGUST 2015 www.m2tech.biz Copyright © 2015, M2Tech Srl...
-
Page 19: Using The Hiface Evo Two
HIFACE EVO TWO 7.1. Input selection The HIFACE Evo Two is provided with two inputs: one is the USB port (Fig. 2, 10) and the other is the S/PDIF input (Fig. 2, 5). They are selected using the navigation buttons on the remote control: press the “arrow up”... -
Page 20: External Clock
7.4. External clock The HIFACE Evo Two is provided with an input for an external clock. This input is very versatile, as it’s able to recognize the frequency of the clock applied and, when needed, synthesize the needed master clock. -
Page 21: Configuring The Hiface Evo Two
• BACK: go to level 1; • NO: forces the HIFACE Evo Two to always use the internal oscillators; • AUTO: sets the HIFACE Evo Two to use any valid external clock present on the external clock input, otherwise the internal oscillators are used. -
Page 22: Menu Exit (Exit)
“arrow left” e “arrow right” buttons of the remote; • BYPASS: the sample rate converter is not active: on all HIFACE Evo Two digital audio outputs the audio signal applied to the S/PDIF input (when this input is selected) will be delivered with its original sampling rate. -
Page 23: Using A Computer As Digital Source
Apple OSX since the 10.6.4 release, without the need for any driver: It is sufficient to connect the HIFACE Evo Two to own Mac with an USB cable (not in stock) to have it recognized by the Mac, which will then include it in the audio devices list, as shown in Fig. - Page 24 REVISION P A – AUGUST 2015 www.m2tech.biz Figure 4 To send the computer audio to the HIFACE Evo Two it is necessary to select it in the “Sound” window as shown in Fig. 4. Figure 5 Copyright © 2015, M2Tech Srl...
-
Page 25: Dsd Files Playback With Mac
The HIFACE Evo Two is able to transfer music files recorded with the DSD format. A player able to send DSD data to the HIFACE Evo Two in a standard format handled by the DAC must be used. As an example, the configuration of Audirvana necessary for DSD files playback is shown in Fig. -
Page 26: Plug'n'play Operation With Linux
The window displayed in the figure lists two M2Tech audio devices: they are actually the same device that is the HIFACE Evo Two , it is therefore sufficient to select any one to choose the HIFACE Evo Two as the output audio device. - Page 27 A – AUGUST 2015 www.m2tech.biz By setting the HIFACE Evo Two as predefined audio output device, we make it available to all those apps which rely on the operating system to transport audio. This is mandatory to listen to streaming music by a browser, for example. This operation mode already allows for high quality playback (sampling frequency up to 192kHz).
-
Page 28: Dsd Files Playback With Linux
USB Audio Device Class 2. To listen to music files with the HIFACE Evo Two connected to a computer running Windows it is therefore necessary to install a driver. The following paragraph describes the driver installation procedure. -
Page 29: Installing The Windows Driver
NOTE: The HIFACE Evo Two HIFACE Evo Two is designed to implement the HID interface for remote HIFACE Evo Two HIFACE Evo Two control of the player running on a computer attached by USB (see chapter 9). This could lead to compatibility problems with Windows XP. - Page 30 A – AUGUST 2015 www.m2tech.biz Figure 11 Once the files are extracted, open the temporary folder or the folder you have designated and run the setup application by double-clicking on “setup.exe” (Fig. 12). Figure 12 Copyright © 2015, M2Tech Srl...
- Page 31 “OK” button to let the setup program free to proceed. Connect the HIFACE Evo Two to the computer and switch it on. Then, click on the “Next” button to proceed with installation. The window shown in Fig. 14 will appear.
- Page 32 When the HIFACE Evo Two is off or when the computer doesn’t recognize the connection to the HIFACE Evo Two , then window shown in Fig. 15b may appear. In this case, follow the instructions displayed in red and then click on the “Next” button.
- Page 33 M2Tech HIFACE EVO TWO UNIVERSAL D-TO-D CONVERTER REVISION P A – AUGUST 2015 www.m2tech.biz Figure 15a Figure 15b Copyright © 2015, M2Tech Srl...
- Page 34 Figure 16 At the end of installation, the windows will show the complete list of installed files and will enable the buttons located in the lower right angle of the window border, as shown in Fig. Copyright © 2015, M2Tech Srl...
- Page 35 REVISION P A – AUGUST 2015 www.m2tech.biz Figure 17 As suggested by the instructions, click on the “Next” button to confirm the installation. The final setup window will appear as shown in Fig. 18. Figure 18 Copyright © 2015, M2Tech Srl...
-
Page 36: Windows Driver Uninstall
9.3.2. Windows driver uninstall The HIFACE Evo Two driver uninstall may be required for various reasons. For sure, it is mandatory to uninstall any previous driver version before installing the latest one. - Page 37 HIFACE EVO TWO UNIVERSAL D-TO-D CONVERTER REVISION P A – AUGUST 2015 www.m2tech.biz Figure 20 By double-clicking “USB Audio Driver for M2Tech…” the uninstall application is launched, which shows itself like in Fig. 21. Figure 21 Copyright © 2015, M2Tech Srl...
- Page 38 Figure 22 At uninstall completion, the window will show the entire list of deleted files and will enable the buttons located to the lower right corner of the window border, as shown in Fig. 23. Copyright © 2015, M2Tech Srl...
- Page 39 UNIVERSAL D-TO-D CONVERTER REVISION P A – AUGUST 2015 www.m2tech.biz Figure 23 Click on the “Next” button to confirm uninstall completion and to close the uninstall utility. One last window will appear as shown in Fig. 24 Copyright © 2015, M2Tech Srl...
- Page 40 Clock on the “Finish” button to close the application. At this point if the user launched uninstall from the Control Panel, it is possible to verify that the driver has really been uninstalled by checking for its absence from the applications list, as shown in Fig. 25. Copyright © 2015, M2Tech Srl...
-
Page 41: Windows Driver Panel
Windows bar or in the peripherals window, depending on the operating system version installed on your computer. When the HIFACE Evo Two or any other M2Tech device is not connected to the computer, the window shown in Fig. 26 will appear. - Page 42 As a general rule, a small buffer is to be preferred when low latency is required (e.g. when the HIFACE Evo Two is used to listen to a movie’s audio). In any event, a small buffer needs frequent data transfers, which may result in “holes” in the audio stream when the CPU is heavily loaded or when one of the active drivers doesn’t comply with the time...
- Page 43 The XMOS-based system used in the HIFACE Evo Two allows for digital volume setting. Anyway, we suggest not to use this feature as its operation will reduce the sonic performance, even more so for low volume settings.
- Page 44 M2Tech HIFACE EVO TWO UNIVERSAL D-TO-D CONVERTER REVISION P A – AUGUST 2015 www.m2tech.biz Figure 30 To end up, the panel allows for setting the default format for data samples (Fig. 31). Figure 31 Copyright © 2015, M2Tech Srl...
-
Page 45: Using The Hiface Evo Two As Windows Predefined Audio Device
It is also possible to tell the operating system which sampling frequency and resolution are to be used to operate the HIFACE Evo Two . To this purpose, it is sufficient to click on the “Properties” button, thus opening the window shown in Fig. 33. -
Page 46: Configuring The Player: Foobar And Jriver Media Center
Should the user need the operating system not to process the audio to be sent to the HIFACE Evo Two , or when the limits of system settings need to be overcome, it is necessary to use a player able to directly interface to the driver, using a transfer mode like Kernel Streaming, WASAPI or ASIO, all are “bit-perfect”... - Page 47 Select “ASIO: MUSBAudio ASIO Driver” in the dropdown menu called “Device”. FooBar is then ready to use the HIFACE Evo Two as the output device in ASIO mode, to play bit- perfect PCM audio up to 384kHz and 32 bit.
- Page 48 SACD ISO files, plus a proxy file to send DSD to a compatible audio device provided with an ASIO compliant driver, like the HIFACE Evo Two . After installing DLL and proxy, in the “ASIO” section of “Output” two ASIO objects will appear (Fig.
- Page 49 Figure 36 Configure the parameters as in the figure: FooBar is now ready to send DSD streams from DSD files to the HIFACE Evo Two . The second player used as an example is JRiver Media Center (www.jriver.com). JRiver is a commercial player, a “closet”...
- Page 50 Figure 38 At this point, JRiver recognizes the capability to handle DSD in DoP (DSD over PCM) format. From the dropdown menu which is selected by clicking on “Bitstreaming”, select “Custom…” as shown in Fig. 39 Copyright © 2015, M2Tech Srl...
- Page 51 REVISION P A – AUGUST 2015 www.m2tech.biz Figure 39 A window will automatically appear in which the user can manually set the bitstream configuration parameters (Fig. 40). Set parameters as shown in figure. Figure 40 Copyright © 2015, M2Tech Srl...
-
Page 52: Connecting The Hiface Evo Two To An Usb 1.1 Port
HIFACE Evo Two to an USB 1.1 port It is possible to connect the HIFACE EVO TWO to an USB 1.1 port under Windows. In this case, the driver will scale the DAC’s performance to comply with USB Audio Device Class 1 specifications. -
Page 53: Updating The Hiface Evo Two
HIFACE Evo Two HIFACE Evo Two The user can update the firmware of the HIFACE EVO TWO straight from her/his Windows PC. To this purpose it is necessary to download the latest firmware from M2Tech website and use the app named "MUSBAudioDfu.exe" which can be found in the "C:\Program Files\M2Tech\M2TECH_USBAudio_Driver"... - Page 54 Figure 43 Click on the “Browse” button to select the file previously downloaded from M2Tech website, which contains the new firmware. Then, click on “Start” button to launch the update procedure. Wait for the update completion, which will be indicated by the control panel showing a new firmware version.
-
Page 55: Specifications
S/PDIF input sensitivity: ....0.5V S/PDIF input impedance: ....75 Ohms Supply voltage: ......... 7.5-15V Current requirement:......250mA Size:..........110x55x100mm (w x h x d) Weight..........0.5kg (device only) 0.8kg (packaging) * on I S output only Copyright © 2015, M2Tech Srl...
Need help?
Do you have a question about the HIFACE EVO TWO and is the answer not in the manual?
Questions and answers