Table of Contents
Advertisement
Quick Links
Advertisement
Table of Contents

Related Manuals for M2TECH HiFace DAC


Summary of Contents for M2TECH HiFace DAC
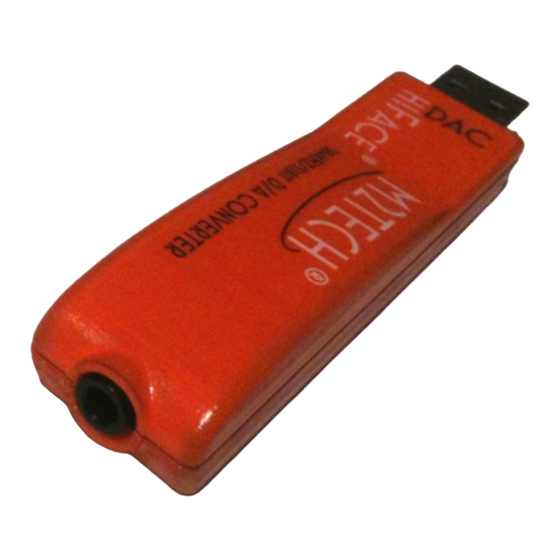
- Page 1 M2TECH ACE DAC /32BIT DIGITAL-TO-ANALOG CONVERTER USER MANUAL...
- Page 2 REV. 1.1 – 5/2013...
-
Page 3: Revision 1.1 – May
WARNING: the information contained in this manual are considered to be reliable and accurate. M2Tech reserves the right to change or modify the information any time, without prior advice. It’s up to the customer to ensure that the manual being consulted is the latest version. - Page 4 DAC performance largely exceed those of similar units costing a lot more: you’ll be amazed by how good the hiFace DAC can sound, even with CD-standard files. And a whole new world will be at reach when listening to high-resolution files.
-
Page 5: Table Of Contents
10.1. Precision oscillators ....................31 10.2. Asynchronous transfer mode ................31 10.3. 384/32 operation ....................31 10.4. Driving headphones ....................31 10.4. Powering the hiFace DAC with an external power supply ........31 11. Technical Specifications ................... 33 Copyright © 2013, M2Tech Srl... -
Page 6: Connections
2) Stereo analog output. Connect to the amplifier or preamplifier input with a 3.5mm jack- to-RCA interconnect or to a medium- or high-impedance headphones. 3.5mm stereo jack female connector. * hiFace DAC performance on USB 1.1 are limited to 96kHz. Please note that 1.0 ports won’t work. Copyright © 2013, M2Tech Srl... -
Page 7: Connection To The Host And The Amplifier/Headphones
Please refer to section 1, “Connections”. Connect the hiFace DAC to the host USB 2.0 port by inserting its USB plug (Figure 1, 1) into the host socket. If straight insertion is difficult or when in need of avoiding straight insertion, an USB 2.0 extender cable (A male to A female) can be used. -
Page 8: True Plug'n'play Operation With Mac
OS need update to use the hiFace DAC. To use hiFace DAC as output device for your Mac, you need to select it as default output device from the Audio Control Panel (Preferences -> Sound) as shown in Figure 2:... - Page 9 M2Tec hiFace DAC /32bit digital-TO-ANALOG CONVERTER REVISION 1.1 – MAY 2013 Figure 3 Copyright © 2013, M2Tech Srl...
-
Page 10: True Plug'n'play Operation With Linux
ALSA. This means that the driver is already included in the operating system and the user needs not to install anything: just connect the hiFace DAC to your PC with Linux and it will be immediately recognized by the OS and ready to use. ALSA version needs to be 1.0.24 or later. -
Page 11: Operation With Ipad And Android-Based Tablets
USB Audio Class 2.0. This means that it is possible to connect the hiFace DAC to an iPad through the latter’s camera kit, which exports a high speed host USB port. The limited supply current required by the hiFace DAC makes it possible to power it even by the reduced current capabilities provided by the iPad. -
Page 12: Windows Driver Installation
5. Windows driver installation 5.1. Obtaining the driver The Windows driver for hiFace DAC is available on the M2Tech website, in the download page (www.m2tech.biz/download.asp). Download the exe file containing the driver package and save it to a folder in your PC. This is a self-extracting file which will deliver a folder. - Page 13 REVISION 1.1 – MAY 2013 Figure 5 Then, the wizard will check for system features. At a certain point, it will ask you to plug the hiFace DAC in one of the USB ports (Figure 6). Figure 6 Copyright © 2013, M2Tech Srl...
- Page 14 Follow the indications and plug the device in one port, then click on “Install”. You will be asked to follow the destination folder (Figure 7). Figure 7 The installation process continues showing the progress (Figure 8). Figure 8 Copyright © 2013, M2Tech Srl...
- Page 15 REVISION 1.1 – MAY 2013 At the end of the installation process, the wizard notify the completion (Figure 9). Figure 9 Clock on “Next”: the installation is almost completed (Figure 10). Click on “Finish” to complete the installation. Copyright © 2013, M2Tech Srl...
-
Page 16: Checking For Right Installation And Trying The Interface
From Control Panel -> Audio select the hiFace DAC in the “Playback” tab and then choose Properties. This windows also allows you to set hiFace DAC as default output device, which is mandatory when user needs to use hiFace DAC to listen to Youtube files audio and other streaming sources (Figure 12). - Page 17 M2Tec hiFace DAC /32bit digital-TO-ANALOG CONVERTER REVISION 1.1 – MAY 2013 Figure 12 Copyright © 2013, M2Tech Srl...
-
Page 18: Unistalling The Driver
Go to the control panel and launch the “Application Installation” utility (Figure 13). Look for the hiFace DAC driver item in the list. Double-click on it to launch uninstalling. Figure 13 The installation wizard, which also handles uninstalling, will show up (Figure 14 on next page). - Page 19 M2Tec hiFace DAC /32bit digital-TO-ANALOG CONVERTER REVISION 1.1 – MAY 2013 Figure 14 At this point, the wizard will show up the installation progress (Figure 15), up to the end. Figure 15 Copyright © 2013, M2Tech Srl...
- Page 20 After the uninstalling of all files related to the driver is complete, the “Next” button will be enabled. Click on it. The final message will appear (Figure 16). Click on “Finish” to complete uninstalling. Figure 16 Copyright © 2013, M2Tech Srl...
-
Page 21: Configuring The Computer To Use Hiface Dac
6. Configuring the computer to use hiFace DAC 6.1. Configuring a PC with Windows XP A PC with Windows XP can use hiFace DAC in two different ways: Direct Sound (DS)* and ASIO. The first mode is suitable for most players, such as Windows Media Player and iTunes, or for Internet streaming, while the second can be chosen (for better performance) with players which can operate in ASIO mode. -
Page 22: Configuring For Asio With Windows Xp
“kernel streaming”, it will operate in Direct Sound mode when listed here. From now on, unless hiFace DAC is disconnected or settings are changed again, hiFace DAC is the audio peripheral all audio programs will use when operating in direct sound mode. 6.1.2. Configuring for ASIO with Windows XP ASIO has no standard setting in Windows XP. -
Page 23: Configuring A Pc With Windows Vista, Windows 7 Or Windows 8
6.2. Configuring a PC with Windows Vista, Windows 7 or Windows 8 A PC with Windows Vista or Windows 7 can use hiFace DAC in four different ways: Direct Sound (DS)*, Kernel Streaming (KS), WASAPI and ASIO. DS is suitable for players which can’t operate in Kernel Streaming mode nor with WASAPI or for Internet streaming;... -
Page 24: Configuring For Kernel Streaming With Windows Vista, Windows 7 Or Windows 8
Windows 7. KS must be selected in the specific player you choose to use. For example, when using FooBar, with hiFace DAC connected to the PC, go to the File/Preferences/Playback /Output tab and select “KS: M2Tech Audio 2.0 Output” as output device. -
Page 25: Configuring The Player For Kernel Streaming: Two Examples
(click on Download). It is a zip folder which contains the DLL. Extract it from the zip and copy to the Components folder. Then, restart FooBar, go to the File/Preferences/Playback/Output window and set parameters as in figure 19. Figure 19 Copyright © 2013, M2Tech Srl... -
Page 26: Winamp And Mediamonkey
The Preferences window of Winamp will open (see figure 20). Figure 20 Go to Plug-in/Output and select “M2Tech Audio 2.0 Output”. Then click on Configure button. Choose HIFACE DAC Kernel Streaming in the output device list (Figure 21). Copyright © 2013, M2Tech Srl... - Page 27 M2Tec hiFace DAC /32bit digital-TO-ANALOG CONVERTER REVISION 1.1 – MAY 2013 Figure 21 Copyright © 2013, M2Tech Srl...
-
Page 28: Configuring The Player For Wasapi: Two Examples
Then, restart FooBar, go to the File/Preferences/Playback/Output window and set parameters as in figure 22. Figure 22 Please note that 24 bits is OK for WASAPI. Please refer to the Foobar2000 technical notes for more info. Copyright © 2013, M2Tech Srl... -
Page 29: Jriver
(click on Download). It is a zip folder which contains the DLL. Extract it from the zip and copy to the Components folder. Then, restart FooBar, go to the File/Preferences/Playback/Output window and set parameters as in figure 24. Copyright © 2013, M2Tech Srl... - Page 30 M2Tec hiFace DAC /32bit digital-TO-ANALOG CONVERTER REVISION 1.1 – MAY 2013 Figure 24 Copyright © 2013, M2Tech Srl...
-
Page 31: Interface Special Features
USB interface. 10.3. 384/32 operation hiFace DAC is a true 32-bit DAC. This means that 16-,20- and 24-bit files are reproduced with highest fidelity. The extra bits available are used to save the maximum resolution of the original audio data even when setting volume in software mode by the player. - Page 32 M2Tec hiFace DAC /32bit digital-TO-ANALOG CONVERTER REVISION 1.1 – MAY 2013 purposely made for that and available on the computer market. Please use a 5V power supply with 500mA current capability. Copyright © 2013, M2Tech Srl...
-
Page 33: Technical Specifications
Power Supply ........5V from USB Power Consumption: ......150mA Minimal requirements:....... 1.3GHz CPU clock, 1GB RAM, 2.0 USB port Size ........... 88x14x20mm (with connectors) Weight: ..........20g Note: 1) DS and ASIO modes only. Copyright © 2013, M2Tech Srl...
Need help?
Do you have a question about the HiFace DAC and is the answer not in the manual?
Questions and answers