Advertisement
Quick Links
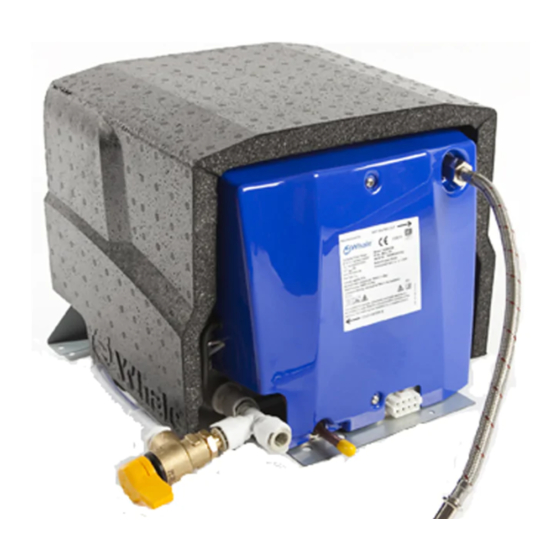
Gas and Electric Water Heater
INSTALLATION & USER INSTRUCTIONS
Thank you for purchasing this Whale® product.
For over 60 years Whale has led the way in the design and manufacturer of freshwater and waste systems
including:- plumbing, faucets, showers and pumps for low voltage applications. The company and its products have
built a reputation for quality, reliability and innovation backed up by excellent customer service.
For information on our full product range visit: www.whalepumps.com
CONTENTS
1.
Principles of Operation
2.
Specification
3.
Application
4.
Warnings
5.
Parts List
6.
Instructions for Installation
7.
Instructions for Use
8.
Maintenance
9.
Trouble Shooting
10.
Winterising
11.
Service Support Details
12.
EU Declaration of Conformity
13.
Patents and Trademarks
14.
Warranty
LIST OF IMAGES
Fig. 1
Components Drawing
Fig. 2
Dimensions – Side View
Fig. 3
Dimensions – Plan View
Fig. 4
Dimensions – Front View
Fig. 5
Installation Locating Diagram
Fig. 6
Cut Out Hole For Flue
Fig. 7
Flue Dimensions
Fig. 8
Reinforce Flue Hole
Fig. 9
Flue Sealing
Fig. 10
Attaching Flue Box
Fig. 11
Installation And Securing Of Flue Cover
Fig. 12
Connect Water Heater To Flue
Fig. 13
Water Heater Position
Fig. 14
Fitting The Drain Valve
Fig. 15
Secure Water Heater To Floor
Fig. 16
Connect To The Gas Supply
Fig. 17
Insert Control Panel
Fig. 18
Secure Control Panel
Fig. 19
Installed Control Panel
Fig. 20
Connect 12V d.c. Connector
Fig. 21
Mains Electrical Connection
Fig. 22
Mains Connection
Fig. 23
Connect Cold Water Supply
Fig. 24
Installed Cold Water Supply
Fig. 25
Connect Braided Hose
Fig. 26
Connect Hot Water Supply
Fig. 27
Completed Installation - Vehicle Manufacturer Version
Fig. 28
Completed Installation - Retail Version
Fig. 29
Whale Water Heater Control Panel
Fig. 30
Whale Duo Control Panel
Fig. 31
Whale iVan® Control Panel
WH0802 / WH0802B / WI0802B
1
Advertisement

Related Manuals for Whale WH0802


Summary of Contents for Whale WH0802
- Page 1 Thank you for purchasing this Whale® product. For over 60 years Whale has led the way in the design and manufacturer of freshwater and waste systems including:- plumbing, faucets, showers and pumps for low voltage applications. The company and its products have built a reputation for quality, reliability and innovation backed up by excellent customer service.
- Page 2 PRINCIPLES OF OPERATION The Whale® 8L Water Heater is a gas and electric storage water heater. The unique design has a 8.5L capacity hot water tank and incorporates versatile controls for low current draw or fast heat up settings. With robust insulation and no removable flue cover the Whale®...
- Page 3 • Do not smoke • Shut off gas connection The system must be thoroughly checked by a Whale® Service Engineer or Whale Approved Service Centre or by a member of the Whale Service Engineer Network. The Water Heater must not be operated in the following situations: •...
- Page 4 PARTS LIST WI0802B WH0802 WH0802B Water heater Flue assembly inc. 6 screws Control panel inc. 4 screws 3.5m control panel extension cable Pressure relief / Drain valve 1 Male adaptor 3/8" flexible hose plumbing fitting 2 Male adaptor 1/2" flexible hose plumbing fitting...
- Page 5 Before installation, ensure the appliance has been supplied in good condition and if damaged, do not install and contact Whale® Support +44 (0)845 217 2933. A competent person must install the appliance in accordance with the appliance installation instructions. This appliance is for use with LPG (see appliance data plate) and mains electricity (230V a.c.).
- Page 6 Step 1 Find Suitable Location For Water Heater Installation Consider the following 7 points: Where possible, for weight distribution in caravans, the Water Heater must be positioned as close to the axle as possible. The installer must avoid locating the Water Heater at the very rear and the very front of the vehicle.
- Page 7 iv) Reinforce the cut out with wooden batons (minimum 20mm wide).This may require insulation in the wall to be removed. Flue Hole Wooden Batons Fig. 8 Reinforce Flue Hole Step 3 Attaching The Flue To The Caravan Apply sealant to seal flue box on the caravan side wall of the flue sealing face, ensuring each screw hole is surrounded by sealant.
- Page 8 Step 6 Fitting the Drain Pipe (see Fig. 14) When the Water Heater is in place on the floor, mark a location for where the pressure relief / drain valve discharge pipe will come through the floor. Carefully remove the Water Heater and drill a hole in the floor, minimum diameter 20mm, ensuring that there are no obstructions on the underside of the vehicle i.e.
- Page 9 Option 2 - Installing Whale® Duo Control Panel The Whale Duo Control Panel requires a cut out 118mm wide x 64mm high. Feed the wires through the cut out in the wall and locate into desired position. Secure with 2 screws (No.4 x ⁄...
- Page 10 The Water Heater and Control Panels come complete with electrical connectors fitted. The Whale® Water Heater and Control Panels are designed to be integrated into the caravan’s wiring loom. The Water Heater is provided with a JST VL series 8 way socket, and the Control Panels with a JST VL 6 way socket. 6 wires are required to connect the Water Heater to the Control Panel.
- Page 11 The electrical supply must be connected to a 10 amp fused spur provided with an all-pole disconnection and the appliance must be earthed. If the supply cord is damaged, it must be replaced by Whale, a Whale Approved Service Engineer or a Whale Approved Service Centre.
- Page 12 Step 12 Connection to Cold Water Supply (see Figs. 23 & 24) The Whale® Water Heater is fitted with a Whale® 12mm Quick Connect fitting on the cold water inlet to fit to Whale® semi rigid tubing. Various plumbing adaptors are included to assist with these connections as follows:- To connect directly to 10mm ( ⁄...
- Page 13 Please note: In cold temperatures, the water in the supply pipework may freeze and prevent filling. Check that all the gas and/or electricity supplies are turned on. Option 1 - Whale ® Water Heater Control Panel Diagnostic LED Gas Lit LED...
- Page 14 (O). If the Water Heater is not going to be used for some time, isolate the gas supply and drain water if there is a risk of freezing. Option 2 - Whale ® Duo Control Panel WATER HEATING...
- Page 15 Option 3 - Operating Whale iVan ® Wireless Control Panel Master Switch Lights Awning Light Water Heater Space Heater Timers Amps in Use Pump Isolator (Heating System only) Battery Voltage Home Button / Setup and Options Fig. 31 - Whale iVan® Control Panel Operating the Space Heater 1.
- Page 16 Operating the Pump The Whale Watermaster® Exterior Pump works on a pressurised system. This means it will pump up the system until working pressure is reached and then switch itself off. When the pressure drops when a tap is opened, the pump will start to run and will continue to run until the pressure builds up again after the tap is closed.
- Page 17 Note: A cycling of the power supply to the unit will not clear a lockout. Some gas lockouts, e.g. ignition lockout and combustion air faults will still permit use of the appliance in electric only operation. If the problem persists contact Whale Support on +44 (0)845 217 2933. Table 2: Water Heater Fault Finding...
- Page 18 The Space Heater is not getting enough air through the flues – check the flue ends and clear any obstructions away from them. “Fault on Space Heater” Contact Whale ® Heater Support on +44 (0)845 217 2933 and quote the fault number shown on the screen. Water Heating Fault Screens: “Check gas supply”...
- Page 19 “Fault on Water Heater” Contact Whale Heater Support on +44 (0)845 217 2933 and quote the fault number shown on the screen. WINTERISING / DRAINING When using the Water Heater in winter, ensure the flue is not blocked by snow or fallen leaves etc. When not in use, the Water Heater must be fully drained.
- Page 20 Illustrations are for guidance purposes only. Please note that by contacting Whale Support you will be indicating your consent to receiving product updates, recall information, help guides and appropriate marketing messages from us via post, email or telephone unless you indicated an objection to receiving such messages.
Need help?
Do you have a question about the WH0802 and is the answer not in the manual?
Questions and answers