Table of Contents
Advertisement
Advertisement
Table of Contents

Related Manuals for LevelOne GNS-4000


Summary of Contents for LevelOne GNS-4000
-
Page 1: User Manual
LevelOne GNS-4000 4-Bay SATA NAS w/ Gigabit LAN User Manual v1.0 - 0706... - Page 2 Ver. 1.0-0706...
-
Page 3: Limited Warranty
Notice Although LevelOne has attempted to ensure the accuracy of the content of this manual, it is possible that this document may contain technical inaccuracies, typographical, or other errors. LevelOne assumes no liability for any error in this publication, and for damages, whether direct, indirect, incidental, consequential or otherwise, that may result from such error, including, but not limited to loss of data or profits. -
Page 4: About This Manual
About This Manual This User Manual describes how to setup, use, and maintain the Network Storage GNS-4000. It also describes how to use the NAS Setup Wizard, SmartSYNC utility, and Advanced Storage Management. This manual includes a full table of contents, chapter task lists, and numerous cross-references to help you find the specific information you are looking for. -
Page 5: Table Of Contents
Table of Contents INTRODUCTION ................. 1 1.1. K ..................... 1 EATURE Specifications ..................2 Compatible Backup Software .............. 3 Client OS Support ................. 3 Browser Support ................... 3 1.2. P ................... 4 ACKAGE ONTENT 1.3. F ..................... 4 RONT ANEL 1.4. - Page 6 ONE TOUCH BACKUP ..............49 4.1. E .............. 49 NABLING OUCH ACKUP 4.2. C ............. 50 REATING A ACKUP CHEDULE 4.3. P ............. 52 ERFORMING A OUCH ACKUP 4.4. V ..............53 IEWING ACKUP ILES 4.5. R ............54 ESTORING ACKUP ILES SMARTSYNC ...................
- Page 7 Removing Members from a Group ........... 76 Deleting a Group ................. 76 Viewing Quotas ................... 77 Setting Quotas ..................77 6.6. M & P ............78 ANAGING RINT ERVICES Setting up Windows Access .............. 78 Setting up UNIX/Linux Access ............79 Setting up for Macintosh Access ............
- Page 8 Deleting an Email Alert Recipient ............. 98 Upgrading the System Firmware ............98 Installing an Application Plug-in ............98 Enabling and Disabling the Buzzer ..........98 Viewing UPS Status ................99 Setting up a UPS ................99 6.11. M ................100 ANAGING ERVICES Setting System Date and Time ............
- Page 9 Responding to an Invalid RAID Volume ........118 8.5. C ASM ..........119 HECKING YSTEM TATUS IN Rebuilding the File System .............. 119 8.6. C ASM ............120 HECKING THE VENT OG IN Responding to Events ..............120 8.7. C ASM ..........
-
Page 11: Introduction
1. Introduction LevelOne Network Storage GNS-4000 is a network attached storage (NAS) solution for external storage targeted for small and medium business (SMB) users and small office/home office (SOHO) users. With a NAS product, users can save their work and have access to files over the network without having to carry around a disk drive or memory stick. -
Page 12: Specifications
Specifications Disk drive support: Four 1.5 Gb/s or 3 Gb/s SATA 3.5-inch disk drives Conforms to Serial ATA 1.0 specification and Serial ATA II: Extensions to Serial ATA 1.0 specification (SATA II, phase I specification) SATA specification of 3 Gb/s transfers with CRC error-checking Hot-swapping of disk drives Tagged command queuing Native command queuing... -
Page 13: Compatible Backup Software
Compatible Backup Software Network Storage GNS-4000 is compatible with the following backup software products: VERITAS® NetBackup/Backup Exec™ CA BrightStor™ARCserve/Enterprise LEGATO® NetWorker™ Syncsort Backup Express Microsoft Backup Software for Windows 95/98/NT/2000/ME/XP Dantz Retrospect for Macintosh Client OS Support Microsoft Windows: Vista, Server 2003, XP Professional, 2000... -
Page 14: Package Content
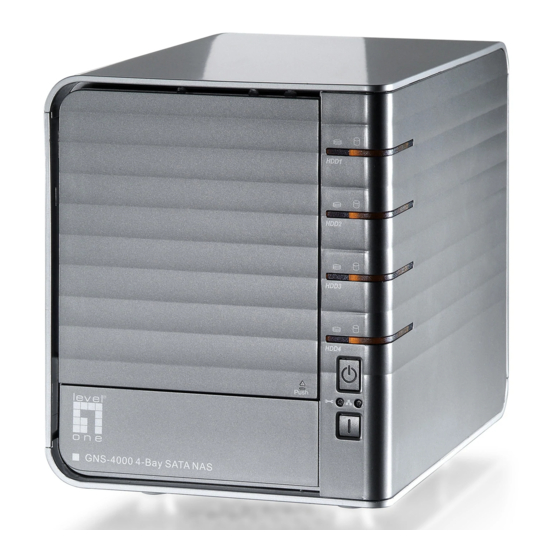
1.2. Package Content The Network Storage GNS-4000 box contains the following items: – GNS-4000 – Power Cord – Ethernet cable – Screws for disk drives (16, including 4 spares) – CD with User Manual / NAS Utilities 1.3. Front Panel... -
Page 15: Rear Panel
1.4. Rear Panel Disk Drive Cooling Fan RJ45 Network Connection Connection Power Supply Power Connection... -
Page 17: Chapter 2: Installation And Setup
2000. 2.1. Installing Disk Drives You can populate the Network Storage GNS-4000 with SATA 1.5 Gb/s or 3.0 Gb/s disk drives. For optimal performance, install disk drives of the same model and capacity. Your disk drives will become a RAID Volume on the Network Storage. -
Page 18: Connecting To The Network
2.2. Connecting to the Network To connect the Network Storage to your network: Attach one end of the network cable to the RJ45 network connection. Attach the other end of the network cable to your Ethernet hub or switch Important If there are multiple networks at your facility, note the network to which you connect the Network Storage. -
Page 19: Installing The Software
2.4. Installing the Software When you install the software onto your Windows PC, three new items are added to the Windows Start menu: NAS Setup Wizard – Sets up the Network Storage SmartSYNC – Connects your PC to the Network Storage, sets up network drives on your PC, and performs backups Configuration Tool –... - Page 20 The installer screen appears. Click the Next button to begin installation. The License Agreement screen appears. Click the “I accept the terms...” option, then click the Next button. The Customer Information screen appears.
- Page 21 Type a user name and organization name into the respective fields or leave them unchanged to accept the default entries. Click the Install option for: Anyone who uses this computer (all users) Only for me (the current user) Click the Next button. The Ready to Install screen appears.
- Page 22 When the installation is finished, the final installation screen appears. Click to Finish button to close the installer.
-
Page 23: Selecting Your Network
Network Storage, NAS Setup Wizard, and SmartSYNC utility are all connected to the same network. The Configuration Tool performs that function. To make your network selection: From the Windows Start menu, choose Programs, then LevelOne NAS Utility, and then Configuration Tool. The Change system configuration screen appears. -
Page 24: Setting Up The Network Storage
The NAS Setup Wizard performs the setup procedures on your Network Storage. To set up your Network Storage: From the Windows Start menu, choose Programs, then LevelOne NAS Utility, then NAS Setup Wizard. The NAS Setup Wizard welcome screen appears. - Page 25 Advanced mode, see “Appendix A: Setup Wizard Advanced Mode” Click Next >> to continue. The Discovering LevelOne NAS screen appears. The Network Storage is listed as a GNS-4000. Highlight the Network Storage you are initiating, then click Next >> to continue.
- Page 26 The Login dialog box appears. Type admin into the Password field, then click OK The password is case sensitive. The Select a Device Name screen appears. Select a Device Name (drive letter) to represent the default folder on the Network Storage as a network drive on your PC. The list begins with Z and goes in reverse alphabetical order.
- Page 27 The System Message appears. Click the Yes button to begin the system initiation. The Wizard requires several minutes to configure your Network Storage, depending on the size of your disk drives. When the Wizard is done another System Message appears. Click OK to finish the system initiation.
-
Page 28: Connecting To Asm
To access the Network Storage in your browser, you must know the Network Storage’s IP address. Use SmartSYNC for this purpose. From the Windows Start menu, choose Programs, then LevelOne NAS Utility, and then SmartSYNC. To open the SmartSYNC window, in the Windows... -
Page 29: Asm In Your Browser
ASM in your Browser To log into ASM in your browser: Start your Browser. In the Browser address field, type in the IP address of the Network Storage. Note that the IP address shown below is only an example. The IP address you type into your browser will be different. -
Page 30: Asm In Smartsync
ASM in SmartSYNC To log into ASM in SmartSYNC: SmartSYNC icon In the Windows application tray (lower right corner of the screen), double-click on the SmartSYNC icon (right). SmartSYNC opens with the Server Information tab displayed. Click on the Open GUI button (right). Your default browser starts and the ASM login screen Open GUI button displays. -
Page 31: Connecting To The Network Storage
3. Connecting to the Network Storage To copy files to and from a folder on the Network Storage, you must make the folder a network drive on your PC. To use the Network Storage as a print server, you must connect the USB printer, enable Network Storage’s print server, and set up printing on your PC. - Page 32 The Network Storage appears in the search results list. Double-click on the Network Storage to show the Public folder and any other folders you have created.
- Page 33 Right-click on the folder you want and choose Map Network Drive from the dropdown menu. The Map Network Drive dialog box appears. In the Map Network Drive dialog box, choose a drive letter and click the Finish button. Double-click on the My Computer icon on your Windows desktop.
- Page 34 The folder on the Network Storage appears under My Computer as a network drive. You can now copy files to and from the folder on the Network Storage.
-
Page 35: Setting Up A Network Drive On Aunix Or Linux Pc
3.2. Setting up a Network Drive on a UNIX or Linux PC Before you can access the Network Storage from a UNIX or Linux PC, you must configure the Network Storage to communicate with UNIX and Linux. On the Windows PC Start ASM. - Page 36 Check the Unix/Linux box, then click the OK button. The UNIX/Linux file sharing enables UNIX and Linux PCs to access folders on the Network Storage. In this case, access is given for the PUBLIC folder. Click on the Sharing Setup icon in the tree. Click on the UNIX/Linux Sharing tab.
-
Page 37: On The Unix/Linux Pc With Command Line Interface
Linux, you might have to adapt the procedure. See your OS documentation. From the Applications menu, choose Network Servers. In the Network window, double-click on Windows Network. Double-click on the Network Storage (GNS-4000) on the network. Double-click on the folder you want... - Page 38 If this is the first time you accessed this folder, an Authentication dialog box opens. Type the user name and password in the respective fields, then click the OK button. The default user name is admin. The default password is admin The user name and password are case sensitive.
-
Page 39: Setting Up A Network Drive On A Macintosh Pc
3.3. Setting up a Network Drive on a Macintosh Before you can access the Network Storage from a Macintosh (Mac OS X) PC, you must configure the Network Storage to communicate with the Mac OS. On the Windows PC Start ASM. In the Tree, click on the + beside the File &... - Page 40 On the Macintosh PC From the Go menu, choose Connect to Server. In the Connect to Server dialog box, type afp://192.168.1.194 and click the Connect button. Note that the IP address shown below is only an example. The IP address you type in the dialog box on your Macintosh will be different.
- Page 41 Type the user name and password in the respective fields, then click the Connect button. The default user name is admin. The default password is admin. The user name and password are case sensitive. In the GNS-4000 dialog box, click on the folder you want, then click the OK button.
- Page 42 In the GNS-4000 Welcome screen, click the OK button. A window opens on the Macintosh desktop to access the folder on the Network Storage. You can now copy files to and from the folder on the Network Storage.
-
Page 43: Connecting Ausb Printer
3.4. Connecting a USB Printer To connect a USB printer to the Network Storage: Set up your printer according to the printer’s Setup Guide or User Manual. Install the printer drivers onto your PC as described in the printer’s Setup Guide or User Manual. -
Page 44: Setting Up The Print Server On Network Storage
3.5. Setting up the Print Server on Network Storage To set up the Network Storage’s print server: Start ASM. In the Tree, on the left side of the ASM screen, click on the + beside the File & Print icon to expand the Tree. Click on the Protocol Control icon, then click on the Windows tab. -
Page 45: Setting Up Windows Printing
3.6. Setting up Windows Printing To set up printing on a Windows PC: On the Windows desktop, double-click on the My Network Places icon. Click the Search button in the toolbar. If the Search button is not shown, from the View menu, choose Toolbars, then Standard Buttons. - Page 46 Right-click on the usbptr1 icon folder and choose Connect... from the dropdown menu. When the warning message about printer drivers appears, click the OK button to continue. In the Add Printer Wizard, click on the Manufacturer and model name of your USB printer, then click the OK button.
- Page 47 In the Add Printer Wizard, click the OK button. To verify printer installation, in the Windows Start menu, choose Settings, then Printers and Faxes. The Printers and Faxes screen appears. The usbptr1 is the USB printer on the Network Storage.
-
Page 48: Setting Up Linux Printing
Forward button. From the Select a queue type dropdown menu, choose Network Windows (SMB). Scroll the list and click on the triangle icon beside GNS-4000. USBPTR01 appears below GNS-4000. USBPTR01 represents the USB printer connected to the Network Storage. - Page 49 Highlight USBPTR01 and click the Forward button. The Authentication dialog box opens. In the User name and Password fields, type admin, then click the OK button. The user name and password are case sensitive. The Printer Model dialog box opens.
- Page 50 From the dropdown menu, choose the manufacturer of your printer. From the model list, highlight the model of your computer. Then click the Forward button. Click the Finish button. USBPTR01 is added to your printer list.
-
Page 51: Setting Up Macintosh Printing
3.8. Setting up Macintosh Printing To set up printing on a Macintosh PC: From the Apple Menu, choose System Preferences. Double-click on the Print & Fax icon. Click on the Setup Printers button. In the Printer List, click on the Add icon. The Printer List displays a new panel. - Page 52 A user name and password dialog box appears. Type the user name and password in the respective fields, then click the OK button. The default user name is admin. The default password is admin. The user name and password are case sensitive. The printer list displays a new panel.
- Page 53 In the Printer Model popup menu, choose the make of your printer. 10. In the Model Name list, choose the model of your printer. 11. Click the Add button. USBPTR01 is added to your printer list.
-
Page 54: Connecting Ausb Drive
3.9. Connecting a USB Drive To connect a USB drive to the Network Storage, attach the USB cable from your external drive to one of the USB connections on the back of the Network Storage. If you have a USB memory stick, attach it directly to one of the USB connections or use a USB cable, whichever is more convenient. -
Page 55: Windows Pc
Windows PC The USB drive appears as a folder on the Network Storage when you create a network drive on a Windows PC. Follow the procedure “Setting up a Network Drive”, but select the usbdisk folder instead of the public folder. -
Page 56: Linux Pc
Linux PC The USB drive appears as a folder on the Network Storage when you create a network drive on a Linux PC. Follow the procedure “Setting up a Network Drive on a UNIX or Linux PC”, but select the USBDISK folder instead of the PUBLIC folder. -
Page 57: Macintosh Pc
Macintosh PC The USB drive appears as a folder on the Network Storage when you create a network drive on a Macintosh PC. Follow the procedure “Setting up a Network Drive on a Macintosh PC”, but select the USBDISK folder instead of the PUBLIC folder. 3.10. -
Page 59: One Touch Backup
4. One Touch Backup One Touch Backup enables you to make a quick, automated backup of a selected folder on your PC, at the touch of a button. You can backup the files in a single folder, multiple folders, or your complete hard disk drive. This feature works on the Windows PC where you installed the Network Storage software. -
Page 60: Creating A Backup Schedule
4.2. Creating a Backup Schedule For each folder you want to backup, you must create a backup schedule. To create a Backup Schedule in SmartSYNC: SmartSYNC icon On the Windows desktop, double-click on the SmartSYNC icon (right). In SmartSYNC, click on the Schedule tab. Click the Create button. - Page 61 Choose a setting: • If you chose hours, choose the number of hours from the dropdown menu. • If you chose daily, choose the time of day in the hour (24-hour clock) and minutes dropdown menu. If you chose weekly, choose the time of day and day of the week in the hour (24- hour clock), minutes, and day dropdown menus.
-
Page 62: Performing A One Touch Backup
4.3. Performing a One Touch Backup To perform a One Touch Backup, press the One Touch Backup button on the front of the Network Storage. One Touch Button Within moments, the folders you specified are backed up onto the Network Storage. The One Touch Backup function backs up all of the folders on your PC for which you created a backup schedule. -
Page 63: Viewing Your Backup Files
4.4. Viewing Your Backup Files To view your backup files on the Network Storage: On the Windows PC desktop, double-click on the My Computer icon. Under Network Drives, double-click on the Network Storage. On the Network Storage, find the folder called BACKUPDATA. The BACKUPDATA folder contains the results of the One Touch Backup from your PC. -
Page 64: Restoring Your Backup Files
4.5. Restoring Your Backup Files Caution The Restore function will overwrite files in the destination folder on your PC. If the backup files on the Network Storage match the names of the files in the restore location folder on your PC, the Restore function will overwrite those files on your PC. - Page 65 In the Folder List, folders are identified by their file structure as it was copied from your PC. The lowest folder in the structure is the one that actually contains the files. Choose a restore location: Original location -- The same folder on your PC from which the files were copied for the backup.
-
Page 67: Smartsync
SmartSYNC icon. The SmartSYNC window opens. If the SmartSYNC icon does not appear in the Windows application tray, from the Windows Start menu, choose Programs, then LevelOne NAS Utility, and then SmartSYNC. Selecting a Language To select a language, click on Language menu and choose the language you prefer. -
Page 68: Displaying The Network Storages On Your Network
The SmartSYNC window opens with the Server Information tab selected. A list of servers appears in the Server List on the Server Information tab. Starting ASM LevelOne Advanced Storage Management (ASM) displays in the default browser. To start the default browser and display ASM: Open the SmartSYNC window. -
Page 69: Changing The Network Settings
5.1. Changing the Network Settings To change the Network Storage’s network settings: Open the SmartSYNC window. Assign IP Click on the Server Information tab. button Click on the Assign IP button (right). The Assign IP login dialog box appears. Type the user name and password in the respective fields, then click OK. The default user name is admin. -
Page 70: Connecting A Network Drive
The Share Folder list represents the folders you have created on the Network Storage. Click the OK button. On the Windows desktop, double-click on the My Computer icon. The Public folder on the Network Storage (GNS-4000) appears under My Computer as a network drive. -
Page 71: Deleting Device (Network Drive) Records
5.3. Deleting Device (Network Drive) Records To delete a drive record only affects SmartSYNC. Deleting a drive record does NOT delete your network drive under My Computer and it does NOT affect the data stored in your Network Storage’s folders. To delete a device record: Open the SmartSYNC window. -
Page 72: Performing A Backup
5.4. Performing a Backup A Backup copies folders from your PC to the Network Storage. Caution The Network Storage and SmartSYNC cannot restore a failed boot drive in your PC. However, you can use the Network Storage to save your system backup file. See your Windows documentation for information about system backups. -
Page 73: Viewing Your Backup Folders
5.5. Viewing Your Backup Folders To view your backup folders on the Network Storage: On the Windows desktop, double-click on the My Computer icon. Under Network Drives, double-click on the Network Storage. On the Network Storage, find the folder called BACKUPDATA. The BACKUPDATA folder contains the results of the One Touch Backup from your PC. -
Page 74: Performing A Restore
5.6. Performing a Restore Caution The Restore function will overwrite files in the destination folder on your PC. Note If you want to run the Windows Backup or Restore Wizard, access the Network Storage as a network drive. A Restore copies folders from the Network Storage to your PC. To perform a Restore of a selected folder: Open the SmartSYNC window. -
Page 75: Scheduling A Backup
5.7. Scheduling a Backup A Backup copies folders from your PC to the Network Storage. Caution The Network Storage and SmartSYNC cannot restore a failed boot drive in your PC. However, you can use the Network Storage to save your system backup file. See your Windows documentation for information about system backups. -
Page 76: Modifying A Backup Schedule
Choose a setting: If you chose hours, choose the number of hours from the dropdown menu. If you chose daily, choose the time of day in the hour (24-hour clock) and minutes dropdown menu. If you chose weekly, choose the time of day and day of the week in the hour (24-hour clock), minutes, and day dropdown menus. -
Page 77: Setting The Default Browser For Asm
5.8. Setting the Default Browser for ASM To set the default browser for ASM: Open the SmartSYNC window. Click on the Option menu and choose Browser Path... The Setup Browser Path dialog box displays. Click on the ... button, then navigate to the browser’s .exe file. Highlight the browser’s .exe file, then click the Open button. -
Page 79: Advanced Storage Manager
6. Advanced Storage Manager 6.1. Connecting to ASM The LevelOne Advanced Storage Management (ASM) software is factory- installed on the Network Storage system. ASM runs in the browser on your PC. You can access ASM: • Directly in your browser. -
Page 80: Asm In Smartsync
ASM in SmartSYNC To log into ASM through SmartSYNC: SmartSYNC icon In the Windows application tray (lower right corner of the screen), double-click on the SmartSYNC icon (right). SmartSYNC opens with the Server Information tab displayed. Click on the Open GUI button (right). Your default browser starts and the ASM login screen Open GUI button displays. -
Page 81: Selecting A Language
6.2. Selecting a Language To select a language, click on Language menu in the ASM Header and choose the language you prefer. 6.3. Navigating in ASM The Tree is the primary navigation tool in ASM. Categories of functions listed with a + sign before the icon. Icons for specific functions are listed under the categories. -
Page 82: Setting Up Network Storage With The Setup Wizard
6.4. Setting up Network Storage with the Setup Wizard If you used the NAS Setup Wizard utility to set up your Network Storage, you do not need to run the Setup Wizard in ASM. If you have not yet set up your Network Storage: In the Tree, click on the + beside the Wizard icon, then on the Setup Wizard icon to display the Setup Wizard screen. - Page 83 • Windows – Enables file access from Windows PCs. Also required to use the Network Storage as a print server. • Unix/Linux – Enables file access from Unix and Linux PCs • Macintosh – Enables file access from Macintosh PCs •...
-
Page 84: Managing Users And Groups
6.5. Managing Users and Groups Viewing a List of Users To view the list of Users: In the Tree, click on the + beside the Users & Groups icon. Click on the User Management icon. A list of users appears on the Information tab. Creating a User You can create up to 512 Users. -
Page 85: Deleting A User
Deleting a User You cannot delete the Administrator or the Guest. To delete any other user: In the Tree, click on the + beside the Users & Groups icon. Click on the User Management icon. Click on the Delete User tab. Click on the option button to the left of the user you want to delete. -
Page 86: Adding Members To A Group
Adding Members to a Group You must create a group before you can assign members to it. To add members to a group: In the Tree, click on the + beside the Users & Groups icon. Click on the Group Management icon. Click on the Group Members tab. -
Page 87: Viewing Quotas
Viewing Quotas Quotas are portions of storage space that you assign to each user or group. To view a quota: In the Tree, click on the + beside the Users & Groups icon. Click on the Quota icon. A list of users and groups, and the following data appear on the screen: •... -
Page 88: Managing File & Print Services
6.6. Managing File & Print Services Setting up Windows Access Follow this procedure to set up access from a Windows PC: In the Tree, click on the + beside the File & Print icon. Click on the Protocol Control icon. Click on the Windows tab. -
Page 89: Setting Up Unix/Linux Access
Setting up UNIX/Linux Access Follow this procedure to set up access from a UNIX or Linux PC: In the Tree, click on the + beside the File & Print icon. Click on the Protocol Control icon. Click on the UNIX/Linux tab. Click the Enable option button beside Services. -
Page 90: Setting Up For Macintosh Access
Setting up for Macintosh Access Follow this procedure to set up access from a Macintosh PC: In the Tree, click on the + beside the File & Print icon. Click on the Protocol Control icon. Click on the Macintosh tab. Click the Enable option button beside Services. -
Page 91: Setting Up Your Print Server
Setting up your Print Server Follow this procedure to set up the Network Storage as a printer server: In the Tree, click on the + beside the File & Print icon. Click on the Protocol Control icon. Click on the Windows tab. Click the Enable option button beside Services. -
Page 92: Viewing A List Of Folders
Viewing a List of Folders A folder is the entity that appears as a Network Drive on your PC. To view the list of folders: In the Tree, click on the + beside the File & Print icon. Click on the File Sharing icon. A list of current folders appears in the Information tab. -
Page 93: Deleting A Folder
Deleting a Folder Caution When you delete a folder, you delete all the data saved in the folder. Back up any important data before you delete a folder. To delete a folder: In the Tree, click on the + beside the File & Print icon. Click on the File Sharing icon. -
Page 94: Setting Up Unix And Linux Sharing For A Folder
Setting up UNIX and Linux Sharing for a Folder UNIX and Linux sharing designates which UNIX and Linux PCs can access the folders on your Network Storage. You specify a UNIX or Linux PC by its IP address. You can add up to 256 IP addresses for all of your folders. You must designate the IP addresses for each folder individually. -
Page 95: Managing Raid Volumes
6.7. Managing RAID Volumes Viewing RAID Volume Status RAID status refers to the disk drives on your Network Storage and how they are arranged into a RAID Volume. To view the status of your RAID Volume: In the Tree, click on the + beside the RAID & File System icon. Click on the RAID Management icon. -
Page 96: Creating A Raid Volume
Creating a RAID Volume On Network Storage, the term RAID Volume refers to one or more disk drives working together as a RAID logical drive. You can also use a USB disk to create a RAID Volume. You must have unassigned disk drives in your Network Storage to create a new RAID. -
Page 97: Migrating A Raid Volume
Migrating a RAID Volume To migrate a RAID Volume means to change its RAID level or to add disk drives. See “RAID Volume Migration” on page 105 for more information. To migrate a RAID Volume: In the Tree, click on the + beside the RAID & File System icon. Click on the RAID Management icon. -
Page 98: Deleting A Raid Volume
Deleting a RAID Volume Caution When you delete a RAID Volume, you delete all the folders in the RAID volume and all the data saved in the folders. Back up any important data before you delete a RAID Volume. Note You cannot delete a RAID Volume while a background activity is running, such as Migration or Rebuild. -
Page 99: Viewing An External Usb Drive Or Memory Stick
Viewing an External USB Drive or Memory Stick To view a USB drive or memory stick attached to the Network Storage: In the Tree, click on the + beside the RAID & File System icon. Click on the RAID Management icon. The USB drive or memory stick appears as a USB External Disk Click on the File System Management icon. -
Page 100: Managing Backups
6.8. Managing Backups Viewing a List of Snapshot Backups To view the list of Snapshot backups: In the Tree, click on the + beside the Backup icon. Click on the Snapshot Backup icon. The current list of Snapshots displays on the Information tab. Setting up a Snapshot Backup Caution Setting up a Snapshot will delete all existing snapshots. -
Page 101: Viewing The Nas Replication Schedule
Viewing the NAS Replication Schedule NAS Replication is a feature that uses one Network Storage to backup the data on another Network Storage. The two Network Storage systems must be on the same network. To view the NAS Replication schedule: In the Tree, click on the + beside the Backup icon. -
Page 102: Setting Up Nas Replication
Setting up NAS Replication To set up NAS replication: In the Tree, click on the + beside the Backup icon. Click on the NAS Replication icon. Click on the Setup tab. Under Settings, click the option button to assign a role to this Network Storage: •... -
Page 103: Enabling One Touch Backup
Enabling One Touch Backup One Touch Backup is a feature that enables you to backup specified folders from your PC to the Network Storage by pressing a button on the front of the Network Storage. One Touch Backup Button To enable One Touch Backup: In the Tree, click on the + beside the Backup icon. -
Page 104: Managing The Network Connection
6.9. Managing the Network Connection Viewing Network Setup Information To view network setup information: In the Tree, click on the + beside the Network icon. Click on the Network Setup icon. The current network setup for this Network Storage displays on the Information tab: •... -
Page 105: Working With Jumbo Frames
Working with Jumbo Frames The term jumbo frame refers to a frame on a local area network that is larger than the standard 1518 byte size. Network Storage supports jumbo frames up to 9000 bytes. On Network Storage, the frame size setting is called Maximum Transmission Unit (MTU). -
Page 106: Making Management Settings
6.10. Making Management Settings Viewing Service Status The Network Storage runs services to enable PCs to access the folders on the Network Storage and to work as a print server. To view Service Status: In the Tree, click on the + beside the Management icon. Click on the Service Status icon. -
Page 107: Setting Up Smtp Authentication
Setting up SMTP Authentication In order to set up email alerts over a network, you must enable the SMTP service, specify a SMTP server, and in most cases, supply authentication information. See your Network Administrator for help with these settings. To set up SMTP authentication: In the Tree, click on the + beside the Management icon. -
Page 108: Adding An Email Alert Recipient
The Network Storage has a buzzer that sounds when the Network Storage is finished booting and when a problem is detected. The buzzer is enabled by default. LevelOne recommends that you leave the buzzer enabled. To disable the buzzer: In the Tree, click on the + beside the Management icon. -
Page 109: Viewing Ups Status
Viewing UPS Status If you have an APC Uninterruptible Power Supply (UPS) attached to the Network Storage, you can check its status in ASM. To view UPS status: In the Tree, click on the + beside the Management icon. Click on the APC UPS icon. The Information tab displays the status of the UPS. -
Page 110: Managing Services
6.11. Managing Services Setting System Date and Time To set the date and time on the Network Storage: In the Tree, click on the + beside the System icon. Click on the Date / Time icon. Click on the Setup tab. From the dropdown menus, choose the time and date values. -
Page 111: Viewing The Results Of Ntp Synchronization
Viewing the Results of NTP Synchronization To view the results of an NTP synchronization: In the Tree, click on the + beside the System icon. Click on the Date / Time icon. Click on the NTP tab. The results of the latest synchronization are displayed: •... -
Page 112: Shutting Down The Network Storage
Shutting Down the Network Storage The only time you need to shut down the Network Storage is to replace the disk drive cooling fan or the power supply. During and after the shutdown, none of your folders will be accessible from your networked PCs. -
Page 113: Viewing System Information
Viewing System Information To view system information: In the Tree, click on the + beside the System icon. Click on the Reboot / Shutdown icon. Click on the System Information tab. System Information includes: • Operating System – Embedded Linux •... -
Page 115: Raid Technology
7. RAID Technology 7.1. Introduction to RAID RAID (Redundant Array of Independent Disks) allows multiple disk drives to be combined together into a RAID Volume. You create a RAID Volume on your Network Storage when you perform the setup procedure, either in the NAS Setup Wizard or the ASM Setup Wizard. -
Page 116: Raid 0 - Stripe
Because RAID 0 does not offer Fault Tolerance, meaning that you cannot recover your data after a disk drive failure, LevelOne does not recommend a RAID 0 Volume for your Network Storage. RAID 0 Volumes on Network Storage consist of one or more disk drives. -
Page 117: Raid 1 - Mirror
RAID 1 – Mirror When a RAID Volume is mirrored, identical data is written to a pair of disk drives, while reads are performed in parallel. The reads are performed using elevator seek and load balancing techniques where the workload is distributed in the most efficient manner. -
Page 118: Raid 5 - Block Striping With Distributed Parity
RAID 5 – Block Striping with Distributed Parity RAID 5 organizes block data and parity data across the disk drives. Generally, RAID level 5 tends to exhibit lower random write performance due to the heavy workload of parity recalculation for each I/O. RAID 5 works well for file, database, application and web servers. -
Page 119: Raid 10 - Mirror / Stripe
RAID 10 – Mirror / Stripe Mirror/Stripe combines both of the RAID 0 and RAID 1 types. RAID 10 can increase performance by reading and writing data in parallel while protecting data with duplication. At least four disk drives are needed for RAID 10 to be installed. With a four-disk-drive RAID Volume, one drive pair is mirrored together then striped over a second drive pair. -
Page 120: Choosing Araid Level
7.2. Choosing a RAID Level There are several issues to consider when choosing the RAID level for your Volume. The following discussion summarizes some advantages, disadvantages and applications for each choice. RAID 0 Advantages Disadvantages Implements a striped disk RAID Not a true RAID because it is not fault- Volume, the data is broken down into tolerant... -
Page 121: Raid 5
RAID 5 Advantages Disadvantages High Read data transaction rate Disk failure has a medium impact on throughput Medium Write data transaction rate Good aggregate transfer rate Most versatile RAID level Recommended applications for RAID 5: • File and Application servers •... -
Page 122: Tb Limitation
7.3. 2 TB Limitation In order to be compatible with different Operating Systems and the files systems that each one supports, the largest RAID Volume you can create on Network Storage is 2 TB. 7.4. Spare Drive A spare is a disk drive that has been designated to replace a failed disk drive in a RAID Volume. -
Page 123: Partition And Format
7.6. Partition and Format When you create a RAID Volume on Network Storage, the RAID Volume is automatically partitioned and formatted for you. To use your RAID Volume, you must create Folders on the RAID Volume and assign services to those Folders according to your requirements. Network Storage provides file services for Windows, UNIX/Linux and Macintosh, so all of those PCs can access the folders on the Network Storage, even though each PC might have a different file system. -
Page 124: Raid 0
RAID 0 A RAID 0 source Volume can migrate to the following target RAID levels: Target Requirements RAID 0 Add disk drives. RAID 1 2 disk drives only. Only a 1-drive RAID 0 can migrate to RAID 1. Add 1 disk drive. -
Page 125: Troubleshooting
8. Troubleshooting This chapter deals problems you might encounter with your Network Storage and how to resolve them. 8.1. Responding to an Audible Alarm The Network Storage has two beep patterns • Single beep, not repeated – The Network Storage is online •... -
Page 126: Checking Disk Status Leds
8.3. Checking Disk Status LEDs The disk status LEDs report the condition of the disk drives: • Green – Normal disk drive function • Amber – Rebuilding to this disk drive • Red – Failed disk drive • Dark – No disk drive is installed Disk Status System Status If a disk drive fails, the Disk Status LED is red. -
Page 127: Checking Raid Volume Status In Asm
8.4. Checking RAID Volume Status in ASM To view RAID Volume status: Start ASM. In the Tree, click on the + beside the RAID & File System icon. Click on the RAID Management icon. The status is displayed in the RAID Status tab. Responds to a Critical RAID Volume How the Network Storage responds to a Critical RAID Volume depends on the RAID level of your Volume and whether you have a spare drive available:... -
Page 128: Responding To An Invalid Raid Volume
Responding to an Invalid RAID Volume The Network Storage considers a RAID Volume invalid when the RAID Volume was created by a different Network Storage. However, the RAID Volume itself remains functional and the data on it is safe. This condition could happen when you: Move the disk drives from one Network Storage to a different Network Storage. -
Page 129: Checking File System Status In Asm
8.5. Checking File System Status in ASM Typically the first indication of a problem with the Network Storage’s file system is when your network drive becomes unavailable. You might also see the message, “File system contains errors. Please check.” when you click on the icons under the File & Print menu. To view File System status: Start ASM. -
Page 130: Checking The Event Log In Asm
8.6. Checking the Event Log in ASM To view the Event Log in ASM: To check Enclosure status: Start ASM. In the Tree, click on the + beside the Management icon. Click on the Event Log icon. Check the Event Log for reports of disk drive failure or other problems. Responding to Events All events are reported in the Event Log. - Page 131 Reported Event Corrective Action File System The file system has a problem. Reboot the Network File system of volume X Storage and check file system again. If the event content errors! Check the appears again, the file system has crashed. Rebuild system before continuing.
- Page 132 Reported Event Corrective Action Snapshots The snapshot capacity Move the snapshot volume to another storage usage which timestamp is location. [date and time] of volume X Or delete the snapshot and then create a new one. is over 90%. The RAID Volume is currently formatting, rebuilding, System is busy.
- Page 133 Reported Event Corrective Action Disk Drives Task X timeout on disk Y at LBA [address] A LBA error. Check the disk drives. Check the RAID Volume. Replace the disk drive or rebuild the RAID Task X disk error on disk Volume as needed.
- Page 134 Volume. RAID status: "OFFLINE". Check the disk drives. Replace the failed drive. Create a The GNS-4000 X volume Y new RAID Volume. is offline. RAID status: "CRITICAL". Check the disk drives. Replace the failed drive. The RAID The GNS-4000 X volume Y Volume will rebuild automatically.
-
Page 135: Checking Enclosure Status In Asm
8.7. Checking Enclosure Status in ASM To check Enclosure status: Start ASM. In the Tree, click on the + beside the System icon. Click on the System Information icon. Click on the Enclosure Information tab. Overheat icon Failed Fan icon Out-of-spec Power icon The corrective action you take depends on the nature of the problem:... -
Page 136: Resolving Connections With Smartsync
8.8. Resolving Connections with SmartSYNC The SmartSYNC utility is designed to detect the Network Storage on your network. If SmartSYNC does not detect your Network Storage, check the following items: • Be sure the Network Storage is powered up and fully booted. The Power Button and System Status LED should be green. -
Page 137: Multiple Network Connections
Multiple Network Connections If your PC has multiple network connections, you must verify that SmartSYNC is looking on the network where the Network Storage is installed: Open SmartSYNC. SmartSYNC icon In the Windows application tray (lower right corner of the screen), double-click on the SmartSYNC icon. -
Page 138: Solving Network Connection Problems
8.9. Solving Network Connection Problems Most network connection problems are the result of poor connections. When the Network Storage is fully booted and connected to the network, the Ethernet Activity LED indicates status and activity: • Green – Network link is properly connected •... -
Page 139: Checking Your Email Inbox
8.10. Checking Your Email Inbox If you enabled Mail Alert in ASM, the Network Storage will send you an email message when a problem arises. Look for a message from “root.” See “Adding an Email Alert Recipient” for more information about email alerts. -
Page 140: Restoring The Default Password
8.11. Restoring the Default Password Normally, you change your password in ASM. See “Changing the Administrator’s Password” Section If you changed the password and then forgot the new password, you can reset the Network Storage to the default password: admin. Use a straightened paper clip or the tip of a ball-point pen as a reset tool. -
Page 141: Resolving A Windows Firewall Issue
Click the Add button. The Service Settings dialog box opens. In the Description of service field, type LevelOne NAS utility. In the Name or IP address field, type the IP address of the Network Storage. See “Finding the Network Storage’s IP Address”... -
Page 143: Setup Wizard Advanced Mode
The NAS Setup Wizard performs the setup procedures on your Network Storage. To set up your Network Storage: From the Windows Start menu, choose Programs, then LevelOne NAS Utility, and then NAS Setup Wizard. The NAS Setup Wizard welcome screen appears. - Page 144 The rest of the setup instructions describe Advanced mode. For setup instructions using Express mode, see “Setting up the Network Storage” Click Next >> to continue. The Discovering LevelOne NAS screen appears. Highlight the Network Storage you are initiating, then click Next >> to continue.
- Page 145 Type admin into the Password field, then click OK. The Administrator and password are case sensitive. The Time Zone, Date and Time screen appears. From the dropdown menus, choose your: • Time Zone • Year • Month • Date • Time in hours (24 hour clock), minutes and seconds Click Next >>...
- Page 146 The Making Network Settings screen appears. In the Making Network Settings screen, choose one of the following: • Obtain network settings automatically... – If you have a DHCP server on your network with IP addresses available, and you want the Network Storage to obtain the network settings from the DHCP server, choose this option.
- Page 147 Secondary DNS Note See your Network Administrator for help in making these settings. LevelOne suggests that you set the first three octets of the Network Storage’s IP address to match the first three octets of your PC’s IP address. After initiation, you can change your network settings in SmartSYNC or in ASM.
- Page 148 10. In the Protecting Your Data screen: • Check the Create new storage box if you are setting up the Network Storage for the first time. The Wizard creates a RAID array, a default volume, and a default folder called Public. •...
- Page 149 If you checked the Create new storage box, choose one of the following options: • Data Protection -- Creates a fault-tolerant RAID Volume on your Network Storage. If two disk drives are installed, the Wizard creates a RAID 1 Volume. If three or four disk drives are installed, the Wizard creates a RAID 5 Volume.
- Page 150 The Reviewing Your Settings screen appears. 12. Review your settings and click Finish to begin the system initiation. A System Message appears. 13. In the System Message, click OK to finish the system initiation. The Wizard creates a RAID Volume and a default folder called Public. If two disk drives are installed in your Network Storage, the Wizard creates a RAID 1 Volume.
- Page 151 The Public folder on the Network Storage appears under My Computer as a network drive. You can now copy files to and from the folder on the Network Storage. To access this folder from other PCs, see “Connecting to the Network Storage”...
-
Page 153: Maintenance
Follow this procedure to upgrade the firmware on your Network Storage. Downloading the Upgrade File To download the upgrade file: Download the latest firmware upgrade file from the LevelOne website onto your PC. Copy the firmware upgrade file from your PC to a folder on the Network Storage. -
Page 154: Installing Application Plug-Ins
Follow this procedure to install an application plug-in on your Network Storage. Downloading the Plug-in File To download the plug-in file: Download the plug-in file you want from the LevelOne website onto your Copy the plug-in file from your PC to a folder on the Network Storage. Installing the Plug-in File Start the ASM interface. -
Page 155: Replacing The Fan
Warning Do not disconnect the power or shut down the Network Storage while the installation is running! When the installation is done, a system message appears. Click the OK button on the system message. Rebooting the Network Storage To reboot the Network Storage after a plug-in installation: In the Tree, click on the + beside the System icon. - Page 156 Remove and Replace the Fan Remove the four screws on the back of the enclosure. Carefully remove the back panel from the enclosure. Disconnect the fan power harness from its connector on the motherboard. Gently pull the two retainer clips away from the cooling fan. Lift the cooling fan off the locating pins.
-
Page 157: Replacing The Power Supply
10.4. Replacing the Power Supply Follow this procedure to replace the power supply on the Network Storage: Shutdown and Disconnect In the Tree, click on the + beside the System icon. Click on the Reboot / Shutdown icon. Click the Shutdown option, then click the OK button. In the confirmation box, click the OK button. - Page 158 Connect the power supply wiring harness to the power connector on the motherboard. Place the power supply onto the chassis. Be sure all of the screw holes line up. Gently push the power supply wiring harness into the chassis. Be sure to route the wires are away from metal edges. 10.
-
Page 159: Connection Problems After Restart
Reconnect and Power-up Reconnect the power cord, network cable, and USB cable. Reinstall the disk drive carriers into the Network Storage and close the front door. Press the power button on the front of the Power Network Storage (right). Button When the Network Storage is fully booted: •... -
Page 161: Support
11. Support 11.1. Frequently Asked Questions The Network Storage worked OK until I turned it off. When I turned it on again, my Windows network drive connection no longer works. When you powered up the Network Storage, the DHCP server assigned a different IP address to the Network Storage. - Page 162 If you want to perform a backup, you must first disable protection on your folders and files. Which FTP clients are compatible with the Network Storage’s FTP server? LevelOne recommends FTP clients that support Unicode, such as Filezilla or Smart FTP for Windows, Filezilla for Linux, and Transmit v3.5.5 for Macintosh.
- Page 163 If your FTP client does not support Unicode, only use ASCII characters to name your shared folders on Network Storage. I cannot find the DLNA Server tab under Protocol Control in ASM. You must download and install the DLNA plug-in on your Network Storage to access this feature.
-
Page 164: Gnu General Public License
11.2. GNU GENERAL PUBLIC LICENSE Version 2, June 1991 Copyright (C) 1989, 1991 Free Software Foundation, Inc. 59 Temple Place, Suite 330, Boston, MA 02111-1307 USA Everyone is permitted to copy and distribute verbatim copies of this license document, but changing it is not allowed. Preamble The licenses for most software are designed to take away your freedom to share and change it. - Page 165 by the copyright holder saying it may be distributed under the terms of this General Public License. The "Program", below, refers to any such program or work, and a "work based on the Program" means either the Program or any derivative work under copyright law: that is to say, a work containing the Program or a portion of it, either verbatim or with modifications and/or translated into another language.
- Page 166 on the Program. In addition, mere aggregation of another work not based on the Program with the Program (or with a work based on the Program) on a volume of a storage or distribution medium does not bring the other work under the scope of this License. 3.
- Page 167 impose any further restrictions on the recipients' exercise of the rights granted herein. You are not responsible for enforcing compliance by third parties to this License. 7. If, as a consequence of a court judgment or allegation of patent infringement or for any other reason (not limited to patent issues), conditions are imposed on you (whether by court order, agreement or otherwise) that contradict the conditions of this License, they do not excuse you from the conditions of this License.
- Page 168 BY YOU OR THIRD PARTIES OR A FAILURE OF THE PROGRAM TO OPERATE WITH ANY OTHER PROGRAMS), EVEN IF SUCH HOLDER OR OTHER PARTY HAS BEEN ADVISED OF THE POSSIBILITY OF SUCH DAMAGES. All the source code of LevelOne GPL products are uploaded to http://www.level1.com All the users can download freely.
Need help?
Do you have a question about the GNS-4000 and is the answer not in the manual?
Questions and answers