Table of Contents
Advertisement
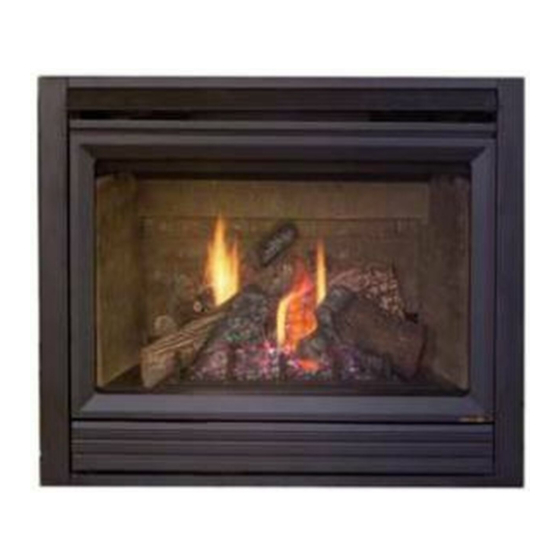
Models:
6000TRI
WARNING: IF THE INFORMATION
IN THESE INSTRUCTIONS IS NOT
FOLLOWED EXACTLY, A FIRE OR
EXPLOSION MAY RESULT CAUS-
ING PROPERTY DAMAGE, PER-
SONAL INJURY, OR DEATH.
- Do not store or use gasoline or other flam-
mable vapors and liquids in the vicinity of this
or any other appliance.
- What to do if you smell gas
• Do not try to light any appliance.
• Do not touch any electrical switch.
• Do not use any phone in your building.
• Immediately call your gas supplier from a
neighbor's phone. Follow the gas supplier's
instructions.
• If you cannot reach your gas supplier, call
the fire department.
- Installation and service must be performed by a
qualified installer, service agency, or the gas
supplier.
Printed in U.S.A. Copyright 2003,
Heat-N-Glo, a brand of Hearth & Home Technologies Inc.
20802 Kensington Boulevard, Lakeville, MN 55044
This product is covered by one or more of the following patents: (United States) 4,112,913; 4,408,594; 4,422,426; 4,424,792; 4,520,791; 4,793,322;
4,852,548; 4,875,464; 5,000,162; 5,016,609; 5,076,254 5,191,877; 5,218,953; 5,328,356; 5,429,495; 5,452,708; 5,542,407; 5,613,487; (Australia)
543790; 586383; (Canada) 1,123,296; 1,297,746; 2,195,264; (Mexico) 97-0457; (New Zealand) 200265; or other U.S. and foreign patents pending.
READ THIS MANUAL BEFORE INSTALLING OR
OPERATING THIS APPLIANCE. THIS INSTALLERS
GUIDE MUST BE LEFT WITH APPLIANCE FOR
FUTURE REFERENCE.
WARNING: IMPROPER INSTALLA-
TION, ADJUSTMENT, ALTERATION,
SERVICE OR MAINTENANCE CAN
CAUSE INJURY OR PROPERTY DAM-
AGE. REFER TO THIS MANUAL. FOR
ASSISTANCE OR ADDITIONAL INFOR-
MATION CONSULT A QUALIFIED IN-
STALLER, SERVICE AGENCY, OR THE
GAS SUPPLIER.
1. This appliance may be installed in an af-
termarket, permanently located, manufac-
tured (mobile) home, where not prohibited
by local codes.
2. This appliance is only for use with the type
of gas indicated on the rating plate. This
appliance is not convertible for use with
other gases, unless a certified kit is used.
Please contact your Heat-N-Glo dealer with any
questions or concerns. For the number of your nearest
Heat-N-Glo dealer, please call 1-888-427-3973.
1
Installers Guide
Underwriters
Laboratories Listed
385-900 Rev. O 10/03
Advertisement
Table of Contents

Related Manuals for Heat-N-Glo 6000 TRI


Summary of Contents for Heat-N-Glo 6000 TRI
- Page 1 Printed in U.S.A. Copyright 2003, Please contact your Heat-N-Glo dealer with any questions or concerns. For the number of your nearest Heat-N-Glo, a brand of Hearth & Home Technologies Inc. Heat-N-Glo dealer, please call 1-888-427-3973. 20802 Kensington Boulevard, Lakeville, MN 55044 This product is covered by one or more of the following patents: (United States) 4,112,913;...
-
Page 2: Service Parts Lists
SAFETY AND WARNING INFORMATION These units MUST use one of the vent systems READ and UNDERSTAND all instructions carefully described in the Installing the Fireplace section of before starting the installation. FAILURE TO the Installers Guide. NO OTHER vent systems or FOLLOW these installation instructions may result components MAY BE USED. -
Page 3: Table Of Contents
Appliance Certification ..............6 Installation Codes ................6 High Altitude Installations ..............6 Section 2: Getting Started ............7 Introducing the Heat-N-Glo Gas Fireplaces ........7 Pre-installation Preparation ............7 Section 3: Installing the Fireplace ..........9 Constructing the Fireplace Chase ..........9 Step 1 Locating the Fireplace ............ -
Page 4: Section 1: Approvals And Codes
High Altitude Installations Appliance Certification U.L. Listed gas appliances are tested and approved with- The Heat-N-Glo fireplace models discussed in this Installers out requiring changes for elevations from 0 to 2,000 feet in Guide have been tested to certification standards and listed the U. -
Page 5: Section 2: Getting Started
Getting Started The Heat-N-Glo Warranty will be voided by, and Heat-N-Glo Introducing the Heat-N-Glo Gas Fireplaces disclaims any responsibility for, the following actions: Heat-N-Glo direct vent gas fireplaces are designed to oper- • Installation of any damaged fireplace or vent system ate with all combustion air siphoned from outside of the component. - Page 6 28 1/2 [724mm] 14 1/4 [362mm] 21 1/2 [548mm] 8 5/8 [219mm] 11 5/8 [297mm] VENT COLLARS 8 5/8 ELECTRICAL [219mm] ACCESS VENT COLLARS GAS LINE ACCESS 34 5/8 25 1/4 [879mm] [965mm] [642mm] 26 7/8 2 1/8 3 1/2 [682mm] [55mm] [90mm]...
-
Page 7: Section 3: Installing The Fireplace
1” MIN. (25mm) Installing the Fireplace Constructing the Fireplace Chase A chase is a vertical box-like structure built to enclose the gas fireplace and/or its vent system. Vertical vents that run on the outside of a building may be, but are not required to be, installed inside a chase. -
Page 8: Step 2 Framing The Fireplace
Step 2. Framing the Fireplace Fireplace framing can be built before or after the fireplace is CAUTION: MEASURE FIREPLACE DIMENSIONS AND set in place. Framing should be positioned to accommo- VERIFY FRAMING METHODS AND WALL COVERING date wall coverings and fireplace facing material. The dia- DETAILS BEFORE FRAMING. - Page 9 6 7/16” 6 5/32” (164mm) (156mm) 8 1/2” (216mm) 8 1/2” 11 5/8” (216mm) (295mm) 11 1/16” 7 3/8” 5 7/8” (281mm) (187mm) (149mm) 6 1/2” 5 1/16” (165mm) (129mm) 8 5/8” 8 5/8” (220mm) (220mm) 11 15/16” (303mm) DV-90D DV-48D DV-36D DV-09D...
-
Page 10: Step 3 Installing The Vent System
Step 3. Installing the Vent System A. Vent System Approvals Identifying Vent Components The vent systems installed on this gas fireplace may in- These models are approved to use D-series direct vent pipe clude one, two, or three 90° elbow assemblies. The rela- components and terminations (see Figures 4 and 5). - Page 11 Flex Vent Flue Restrictor Instructions The flex vent must be supported with the spacing be- 1. Remove Exhaust Shield using a 1/4” nut driver by tween support intervals not exceeding 4 feet, with no removing the four screws securing it in place (see more than ½...
- Page 12 4. Center the Flue Restrictor on vent and secure in place by using two self-tapping screws (see Fig- HORIZONTAL VENTING ure 10). Kit No. H Max. Run DVK-01TRD 24" (610 mm) 5. Reinstall the Exhaust Shield. SETTINGS 90-DEGREE Figure 10 ELBOWS 45-DEGREE ELBOW...
- Page 13 VENTING WITH ONE (1) 90° ELBOW 1' MIN. (305mm) 2' MAX. (610mm) 2' MIN. (610mm) 4' MAX. (1.22m) 3' MIN. (914mm) 6' MAX. (1.86m) 4' MIN. (1.22m) 8' MAX. (2.4m) V+H=40' MAX. (12.4m) H = 8' MAX. (2.4m) NOTE: On vertical venting configurations where the vertical component is over 10 feet, you may want to install the vertical baffle included in the manual bag assembly to improve flame...
- Page 14 VENTING WITH TWO (2) 90° ELBOWS H + H 1´ MIN. (305 mm) 2´ MAX. (610 mm) 5´ MAX. (1.52m) 2´ MIN. (610 mm) 4´ MAX. (1.22 m) 10´ MAX. (3.1m) 3´ MIN. (914 mm) 6´ MAX. (1.86 m) 15´ MAX. (4.65m) NOTE: There MUST be a 25% reduction in 4´...
- Page 15 VENTING WITH THREE (3) 90° ELBOWS H + H 1´MIN. (305mm) 2´MAX. (610mm) 5´MAX. (1.52m) 2´MIN. (610mm) 4´MAX. (1.22m) 10´MAX. (3.1m) 3´MIN. (914mm) 6´MAX. (1.86m) 15´MAX. (4.65m) 4´MIN. (1.22m) 8´MAX. (2.48m) 20´MAX. (6.2m) +V+H+H = 40 MAX.(12.4 m) H = 8´MAX.(2.48 m) H+H = 20´MAX.(6.2 m) ´...
- Page 16 VENTING WITH THREE (3) 90° ELBOWS V (FT.) H (FT.) 1' MIN. (305mm) 5' MAX. (1.52m) 2' MIN. (610mm) 10' MAX. (3.1m) 3' MIN. (914mm) 15' MAX. (4.65m) 4' MIN. (1.22m) 20' MAX. (6.2m) NOTE: H + H = 20' MAX. (6.2m) V + V + H + H = 40' MAX.
-
Page 17: Installing Vent Components
B. Installing Vent Components • Apply a 3/8 inch (9.5mm) bead of stove cement around the 5 inch (127mm) fireplace starting collar (see Figure 19). After determining which set of starting collars will be used • Make sure that the fiberglass gasket supplied in the (top or rear), follow venting instructions accordingly. - Page 18 • If the combustible materials are not in place at the time WARNING: ENSURE THAT THE FIBERGLASS of install the elbow heat shield may be screwed to the GASKET SUPPLIED WITH THE FIREPLACE exhaust pipe (see Figure 23). Cut the tabs as shown SEALS BETWEEN THE FIRST VENT COMPONENT and bend down.
- Page 19 For Vertical Runs - The vent system must be supported • Position the firestops on both sides of the hole previ- every eight (8) feet (2.4m) above the fireplace flue outlet by ously cut and secure the firestops with nails or screws. wall brackets.
- Page 20 For Vertical Runs - One ceiling firestop is REQUIRED at If the area above the ceiling is NOT an attic, position and the hole in each ceiling through which the vent passes. secure the ceiling firestop on the ceiling side of the previously cut and framed hole.
-
Page 21: Vent Termination
C. Vent Termination For Horizontal Terminations - To attach and secure the termination to the last section of horizontal vent: • Rotate and interlock the ends as described at the begin- ning of the Installing Vent Components section. • The termination kit should pass through the wall firestops from the exterior of the building. - Page 22 3. All gravity air intakes within 3 feet of a termination cap must be a minimum of 1 foot below the termination cap. Heat-N-Glo assumes no responsibility for the improper perfor- mance of the fireplace when the venting system does not meet these requirements.
-
Page 23: Step 4 Positioning, Leveling, And Securing The Fireplace
WARNING: MAJOR U.S. BUILDING CODES HORIZONTAL OVERHANG SPECIFY MINIMUM CHIMNEY AND/OR VENT HEIGHT ABOVE THE ROOF TOP. THESE MIN- IMUM HEIGHTS ARE NECESSARY IN THE INTER- 2 FT. 2 FT. MIN. VERTICAL MIN. EST OF SAFETY. SEE THE FOLLOWING DIAGRAM WALL LOWEST FOR MINIMUM HEIGHTS, PROVIDED THE TERMI-... -
Page 24: Step 5 Installing The Optional Heat-Zone Kit
Step 5. installing the Optional Heat-Zone Kit Step 6. The Gas Control Systems NOTE: There must be NO INSULATION or other com- WARNING: THIS UNIT IS NOT FOR USE WITH bustibles inside the framed firestop opening. SOLID FUEL. Two types of gas control systems are used with these models: Standing Pilot Ignition and Intermittent Pilot Ignition (IPI). -
Page 25: Step 7 The Gas Supply Line
Step 8. Gas Pressure Requirements • Locate the gas line access hole in the outer casing of Pressure requirements for Heat-N-Glo gas fireplaces are the fireplace. shown in the table below. • The gas line may be run from either side of the fireplace provided the hole in the outer wrap does not exceed 2 1/2”... -
Page 26: Step 9 Wiring The Fireplace
BLACK S2 REMOTE SWITCH 3/16” PIGGYBACK CONNECTOR PIGTAIL ON/OFF WHITE T2 SWITCH GAS VALUE RED T1 THERMOPILE THERMOCOUPLE OPTIONAL WALL SWITCH, BLACK S1 THERMOSTAT OR REMOTE Figure 38. Standing Pilot Ignition Wiring Diagram Step 9. Wiring the Fireplace Optional Accessories Optional fan and remote control kits require that 110-120 NOTE: Electrical wiring must be installed by a licensed VAC be wired to the factory installed junction box before... - Page 27 TRANSFORMER SPARK TO TRANSFORMER OUTLET PILOT IGNITOR 120 VAC JUNCTION BOX IGNITOR MODULE BLACK (IGNITOR) PLUG-IN 3V TRANSFORMER BLACK (SENSOR) BLACK LOW VOLTAGE PILOT ASSEMBLY FLAME SPARKER / SEE NOTE 1 AND VALVE ASSEMBLY SENSOR MUST BE GROUNDED GROUND TO (COMMON GROUND IGNITION FIREPLACE...
-
Page 28: Step 10 Finishing
CAUTION: IF JOINTS BETWEEN THE FINISHED WALLS Step 10. Finishing AND THE FIREPLACE SURROUND (TOP AND SIDES) Figure 41 shows the minimum vertical and corresponding ARE SEALED, A 300° F. MINIMUM SEALANT MATE- maximum horizontal dimensions of fireplace mantels or other RIAL MUST BE USED. -
Page 29: Step 11 Installing Trim, Logs, And Ember Material
Step 11. Installing Trim, Logs, Placing the Ember Material and Ember Material Ember material is shipped with this gas fireplace. To place the ember material: Installing the Trim Combustible materials may be brought up to the specified • Pull the four glass latches out of the groove on the glass frame. -
Page 30: Glass Specifications
Turn it off and let it cool completely. Remove and clean the glass. Replace the glass and run the fireplace Heat-N-Glo fireplaces manufactured with tempered glass may for an additional 8 hours. This will help to cure the chemicals be installed in hazardous locations such as bathtub enclo- used in the paint and logs. -
Page 31: Section 4: Maintaining And Servicing Your Fireplace
Maintaining and Servicing Your Fireplace Fireplace Maintenance Although the frequency of your fireplace servicing and main- tenance will depend on use and the type of installation, you should have a qualified service technician perform an appli- ance check-up at the beginning of each heating season. See the table below for specific guidelines regarding each fireplace maintenance task.
Need help?
Do you have a question about the 6000 TRI and is the answer not in the manual?
Questions and answers