Advertisement
Quick Links
Advertisement

Subscribe to Our Youtube Channel
Related Manuals for York Fitness Active 110 Rower


Summary of Contents for York Fitness Active 110 Rower
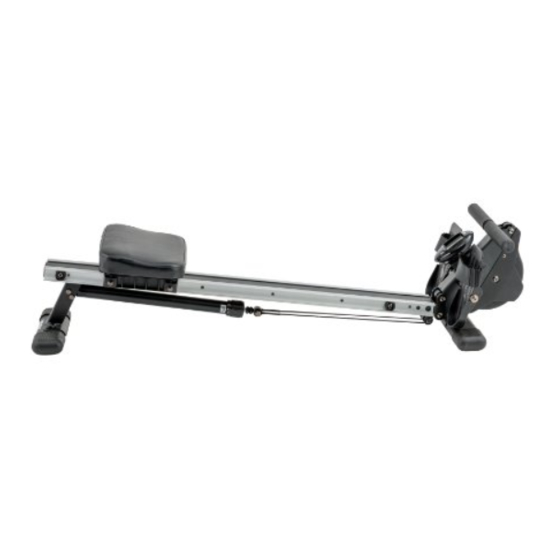
- Page 1 Owner’s Manual Active 110 Rower Item #56021 May 20, 2013 www.yorkfitness.com...
-
Page 2: Table Of Contents
Table of contents Congratulations on CONTENTS purchasing your exercise equipment from Safety information Customer support Assembly instructions Operational instructions You have chosen a high quality, safe and innovative piece of equipment as your Troubleshooting training partner and we are certain it will keep you motivated on the way to achieving your personal fitness goals. -
Page 3: Safety Information
Replace defective components immediately and • Due to our continuous policy of product keep the equipment out of use until it is repaired. development, York Fitness reserves the right to • Use only the adjustment setting as described in the change specifications without notice. -
Page 4: Customer Support
IMPORTANT!! - Please retain your sales receipt, York Fitness Customer Care may request proof of purchase to validate eligibility for warranty service. Warranty cover starts from the date shown on the proof of purchase. -
Page 5: Assembly Instructions
Assembly instructions Care & Maintenance • This equipment should not be placed outdoors, in a garage or an outbuilding. Keep the equipment in a dry place with as little temperature variation as possible. • We recommend placing a mat beneath the equipment to protect both the equipment and your flooring. •... - Page 6 Assembly instructions P-6 x 2 - Rubber Stopper P-5 x 2 P-12 x 1 / P-13 x 1 Foot Pedal Spacer Aluminum Track End Cap (L/R) P-4 x 4 - Domed Nut M8 P-3 x 4 - Nylon Nut M8 P-14 x 3 - Truss Head Screw P-11 x 4 - Truss Head Screw (M6*40)
- Page 7 P-4 x 4 P-1 x 4 P-3 x 4 P-9 x 4 P-14 P-14 x 3 www.yorkfitness.com...
- Page 8 Assembly instructions P-10 x 2 P-10 P-9 x 2 P-12 x 1 P-12 P-13 x 1 P-13 www.yorkfitness.com...
- Page 9 P-11 P-11 x 4 www.yorkfitness.com...
- Page 10 Assembly instructions P-2 x 2 P-8 x 2 Final Check Your equipment is now assembled. Please make the following final checks: • Make sure all screws / bolts are tightened. • Make sure the equipment is on a flat, level surface. www.yorkfitness.com...
- Page 11 Adjusting the resistance Hold the cylinder in the correct position while adjusting Hold here the resistance. Adjusting the resistance here Batteries Replacement Instructions: Remove the meter from the exercise equipment. Open the battery compartment cover. Remove battery by pulling the battery in direction of spring and lift opposite end upwards.
-
Page 12: Operational Instructions
operational instructions Console MODE Display Function: ITeM DeSCrIPTIon SCAn • The sequence of display: TIME » COUNT » CALORIES » TOTAL CNT • In SCAN mode, press MODE key to choose other functions. • Automatically scan through each mode in sequence every 6 seconds. -
Page 13: Troubleshooting
Key Function: FUnCTIon DeSCrIPTIon To set up workout value for: • TIME setting range: 0:00~99:00 (Each increment is 1:00) • CAL setting range: 0~9990 (Each increment is 10) • CNT setting range: 0~9990 (Each increment is 10) MoDe • Choose each function by pressing MODE key. In SCAN mode, press MODE key can lock the current function. -
Page 14: Fitness Guide
Fitness guide Exercising with your rower Rowing is an extremely effective form of exercise. It strengthens the heart, improves circulation, as well as exercising all the major muscle groups - back, waist, arms, shoulders, hips & legs. How to row: 1. - Page 15 How Long Should I Exercise For? That really depends on your current level of fitness. If you’re just starting out on a new exercise program, you should start gradually and build up - do not try to do too much too quickly. 30 minutes, 3 times a week should be enough.
-
Page 16: Exploded Drawing
exploded drawing www.yorkfitness.com... - Page 17 L-10 www.yorkfitness.com...
-
Page 18: Part List
Part list yORK REF. REF. DEscRiptiOn Qty. yORK REF. REF. DEscRiptiOn Qty. 56021A00 CONSOLE SET 56021L03 ALUMINUM TRACK ( R ) 56021A01 CONSOLE 56021L04 HEX SOCKET HEAD SCREW (M8*20MM) 56021A02 MAGNET 56021L05 FLAT WASHER (Φ8.5*Φ16*T1.5MM) 56021A03 SENSOR W/CABLE 56021L06 RUBBER STOPPER 56021A04 SELF TAPPING SCREW (Φ4*10MM) 56021L07... - Page 19 www.yorkfitness.com...
- Page 20 www.yorkfitness.com...
Need help?
Do you have a question about the Active 110 Rower and is the answer not in the manual?
Questions and answers