Table of Contents
Advertisement
Available languages
Available languages
MODELS/MODÈLES
MODELS/MODÈLES
BVSTEM7701
BVSTEM7701
MODELOS
MODELOS
Instruction Manual
SEMI-AUTOMATIC PUMP ESPRESSO/CAPPUCCINO MAKER
READ ALL INSTRUCTIONS BEFORE USING THIS APPLIANCE
Manuel d'Instructions
MACHINE EXPRESSO/CAPPUCCINO SEMI-AUTOMATIqUE à POMPE
LIRE TOUTES LES INSTRUCTIONS AVANT D ' UTILISER CET APPAREIL
Manual de Instrucciones
CAFETERA SEMI-AUTOMÁTICA PARA ESPRESSO Y CAPPUCCINO
LEA TODAS LAS INSTRUCCIONES ANTES DE USAR ESTE APARATO
Manual de Instruções
CAFETEIRA SEMI-AUTOMÁTICA PARA EXPRESSO E CAPPUCCINO
LEIA TODAS AS INSTRUÇÕES ANTES DE USAR ESTE APARELHO
Advertisement
Table of Contents

Related Manuals for Oster BVSTEM7701


Summary of Contents for Oster BVSTEM7701
- Page 1 MODELS/MODÈLES MODELS/MODÈLES BVSTEM7701 BVSTEM7701 MODELOS MODELOS Instruction Manual SEMI-AUTOMATIC PUMP ESPRESSO/CAPPUCCINO MAKER READ ALL INSTRUCTIONS BEFORE USING THIS APPLIANCE Manuel d’Instructions MACHINE EXPRESSO/CAPPUCCINO SEMI-AUTOMATIqUE à POMPE LIRE TOUTES LES INSTRUCTIONS AVANT D ’ UTILISER CET APPAREIL Manual de Instrucciones CAFETERA SEMI-AUTOMÁTICA PARA ESPRESSO Y CAPPUCCINO LEA TODAS LAS INSTRUCCIONES ANTES DE USAR ESTE APARATO Manual de Instruções...
- Page 2 Return this appliance only to the nearest Authorized Oster Service Center for examination, repair or adjustment. ® 6. The use of accessory attachments not recommended for Oster products may result ® in fire, electric shock or injury to persons.
- Page 3 In order to avoid possible burns to body parts and/or other injury from hot steam and water or damages to the unit, never remove the water reservoir or the porta-filter while your Oster espresso/cappuccino maker is brewing coffee or frothing.
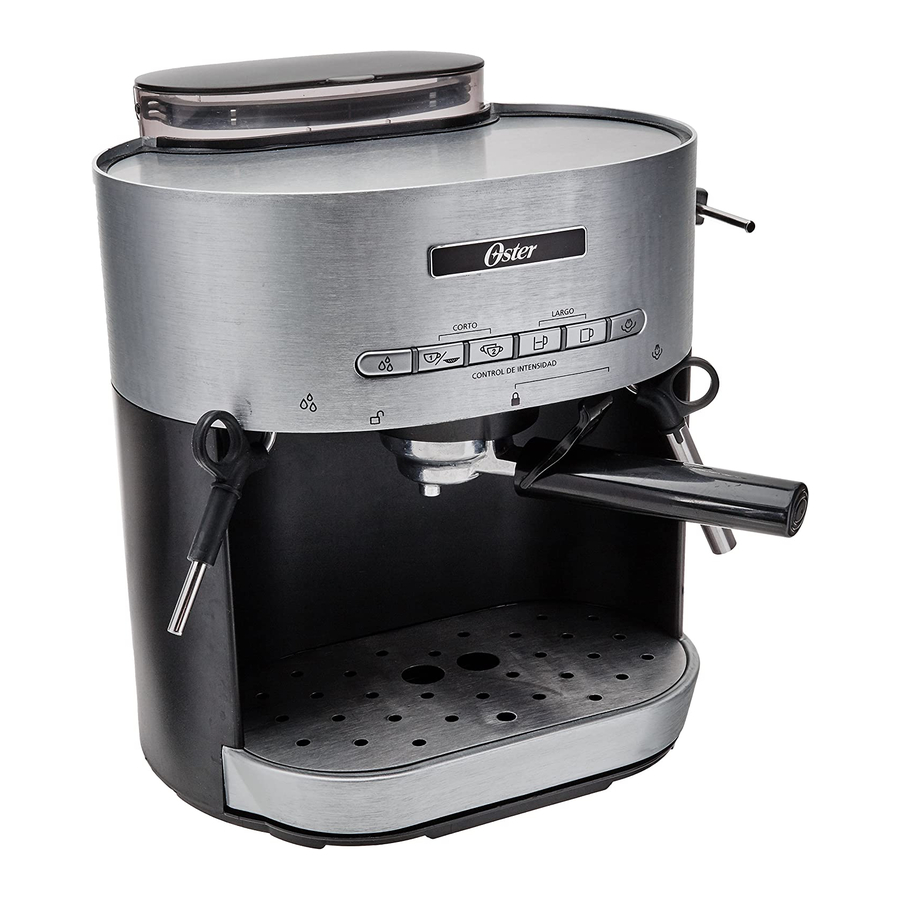
- Page 4 DE S C R IP T I O N O F T H E A P P L IA N C E 1. Warming Plate (to warm up your demitasses) 11. Control Knob: a. Steam-Froth “ ” 2. Hot Water Button “ ”...
- Page 5 Instruction Manual carefully before you begin to use this appliance. When this unit is used, some parts and accessories get hot and need to cool down. Proper care and maintenance will ensure the long life of the Oster Espresso/Cappuccino Maker and its ®...
- Page 6 BE FO R E US I NG YO U R ES P R E SSO M AKER FO R TH E FI R S T T IME CLEANING AND PRIMING THE UNIT PRIOR TO FIRST USE Please refer to the “Description of the Appliance” section to familiarize with the product and identify all parts.
- Page 7 S EL E C T I N G T H E R I G H T C O FF E E THE COFFEE The coffee should be freshly ground and dark roasted. You may want to try a French or Italian roast. Pre-ground coffee will only retain its flavor for 7 – 8 days, provided it is stored in an airtight container and in a cool, dark area.
- Page 8 NOTE: Tamp or compress coffee using the tamper as shown Figure 3 (see figure 3). Do not overfill the filter. This might cause clogging or overflow. 3. FOR PODS: place the pod filter in the porta-filter and insert the pod in it. 4.
- Page 9 NOTE: To brew less coffee than the preset serving, press the function button to stop the brewing process when the amount of coffee desired is reached. The unit will beep three times indicating the customized process has been completed. 9. Turn off the unit off “O” by pressing the button on the back of it. Let it cool down before you clean it.
- Page 10 4. Make sure to place two cups or a small pitcher under the porta-filter. 5. Plug in the unit and turn it on “I” by pressing the button located in the back of the unit. 6. The control panel lights (4 lights in the center) will start Figure 13 blinking.
- Page 11 6. When the milk has doubled in volume, or, if you are using a beverage thermometer, when the milk has reached 38°C (100°F), insert the frothing aid deeper into the milk to further heat the milk. Do not heat milk above 65°C (150°F). To avoid splattering of hot milk, do not let the tip of the frothing tube go above its surface.
- Page 12 4. Discard the remaining water by removing the reservoir and turning it upside down over the sink. It is recommended to empty the water reservoir between uses. Do not immerse appliance in water. 5. Wipe housing with a soft wet cloth. Do not use abrasive cleaners or scouring pads, as they will scratch the finish.
- Page 13 6. To clean the frothing tube internally, place a cup with cold water under the tip of the frothing tube. Press the steam button and wait until the steam button light “ ” becomes solid blue. Insert the frothing tube into the water, turn the side knob clockwise to the steam position “...
- Page 14 • Water is not flowing. If the • Unit should be taken indicators lights same condition occurred after to nearest Authorized in the control brewing several cycles, it Oster Service Center for ® panel are flashing means the internal flow meter examination and repair. alternatively and is broken.
- Page 15 RECI P E S CAFÉ MOCHA CAFÉ LATTE 30 ml (1oz.) of chocolate syrup, one shot 1/4 espresso and 3/4 steamed milk, pour of espresso, 237 ml (1 cup) frothed milk both in a mug at the same time CAFÉ AMERICANO CAFÉ...
- Page 16 5. NE PAS utiliser un appareil lorsque le cordon ou la fiche électrique est endommagé, ni lorsque cet appareil ne fonctionne pas normalement ou qu’il a subi quelque dommage que ce soit. En cas de réparation, veuillez retourner cet appareil uniquement au Centre de Service autorisé Oster le plus proche ®...
- Page 17 Afin d’éviter des brûlures et/ou autres blessures provoquées par la vapeur et l’eau très chaude, NE JAMAIS retirer le réservoir d’eau ou le panier à café pendant que votre cafetière Oster expresso/cappuccino est en train de passer le café ou de faire mousser.
- Page 18 DE S C R I P T I O N D E L ’A P PA R E IL 1. Chauffe-plat (pour chauffer vos tasses) 11. Bouton de Commande: 2. Bouton Eau Chaude “ ” a. Vapeur-Mousse “ ” 3. Distributeur d’Eau Chaude “ ”...
- Page 19 I N T RO D U C T I O N Félicitations ! Vous venez d’acheter une cafetière Oster expresso/cappuccino de qualité. ® Cet appareil unique et pratique est conçu pour vous donner un délicieux café expresso/ cappuccino et ceci rapidement.
- Page 20 AVANT D’UTILISER VOTRE CAFETIERE EXPRESSO POUR LA PREMIERE FOIS NETTOYAGE ET AMORCE DE L’APPAREIL POUR UN PREMIER USAGE Pour vous familiariser avec l’appareil et identifier les différents éléments qui le constituent, veuillez vous reporter au paragraphe intitulé “Description de l’Appareil”. 1.
- Page 21 MOUDRE LE CAFÉ C’est une étape très importante dans la préparation du café et requiert de la pratique. Le café doit être finement moulu. • Le grain du café moulu doit être de la taille du grain de sel. • Si le grain est trop fin, l’eau ne passera pas à travers le café même sous pression. Un café...
- Page 22 5. Assurez-vous de mettre une demi-tasse pour expresso sous le porte-filtre. 6. Assurez-vous que l’appareil est bien branché. 7. Allumer la cafetière en appuyant sur la position “I” de l’interrupteur situé à l’arrière de l’appareil. 8. Les voyants du tableau de commande (4 voyants situés au Schéma 4 centre) commenceront à...
- Page 23 si vous désirez faire passer moins de café que ce qui est spécifié, REMARqUE: appuyer sur la touche de commande de la fonction pour arrêter l’infusion lorsque la quantité de café désirée est atteinte. L’appareil émettra alors trois signaux sonores pour vous indiquer que la préparation du café...
- Page 24 Tasser ou comprimer le café en utilisant un REMARqUE: Schéma 12 poussoir comme vous l’indique le schéma 12. Ne pas surcharger le filtre. Ceci pourrait provoquer engorgement ou débordement. 3. Placer le porte-filtre sous la tête à infusion. Pour attacher le porte-filtre, retirer d’abord l’agrafe de maintien, placer la poignée de telle façon qu’elle soit alignée avec le symbole d’ouverture “...
- Page 25 4. Vous avez fait passer le café et vous êtes maintenant prêt Schéma 14 à faire chauffer le lait à la vapeur et à le faire mousser. Les voyants du tableau de commande (4 voyants au centre) devraient être d’un bleu permanent. Maintenir le pichet sous le moussoir en vous assurant que l’extrémité...
- Page 26 3. Retirer la tasse ou le récipient et placer le tube au dessus du plateau à égouttement pour capturer les gouttes d’eau. ne pas toucher le tube en métal, utiliser l’anneau en caoutchouc pour ATTENTION: saisir le tube EN T R E T IE N D E V OT RE C A FET IERE PO U R CA F É...
- Page 27 4. Retourner le réservoir au dessus de l’évier et jeter le vinaigre. 5. Bien rincer le réservoir en le remplissant à moitié d’eau du robinet puis en jetant l’eau, répéter deux fois. POUR ÉLIMINER LE CALCAIRE À L’INTÉRIEUR DE L’APAREIL: 1.
- Page 28 P RO BL EM ES ET C A USES PROBLEME CAUSES SOLUTIONS Le café ne passe • Il n’y a pas d’eau dans le • Ajuter de l’eau. réservoir. • Moudre le café jusqu’à ob- • Le café est moulu trop fin. tention d’un grain moyen.
- Page 29 Oster pour inspection et ® alternance puis est en panne. réparation retournent à la normale 10 secondes plus tard.
- Page 30 R EC E T T ES CAFÉ MOCCHA CAFÉ LATTE 30 ml (1 once) de sirop de chocolat, une 1/4 de café expresso et 3/4 de lait goutte d’expresso et 237 ml (1 tasse) de chauffé à la vapeur, verser en même mousse de lait temps dans un bol CAFÉ...
- Page 31 Devuelva el artefacto al Centro de Servicio Autorizado Oster más cercano para su ® inspección, reparación o ajuste. 6. El uso de aditamentos no recomendados para productos Oster puede ocasionar ® incendios, descargas eléctricas o lesiones personales. 7. NO utilice en exteriores ni para fines comerciales.
- Page 32 Con el fin de evitar posibles quemaduras corporales y otras lesiones asociadas con el vapor y el agua caliente, o daños a la unidad, nunca saque el tanque de agua ni el portafiltro mientras su Cafetera para Espresso/Cappuccino Oster esté colando café o ®...
- Page 33 D E SC R I P C I Ó N D E L A RTE FA C TO 1. Placa calefactora (para calentar las tazas) 11. Perilla de control: 2. Botón de agua caliente “ ” a. Vapor-Espumar “ ” 3.
- Page 34 I N T R O D U C C I Ó N ¡Felicitaciones! Ha escogido una Cafetera para Espresso/Cappuccino Oster . Este ® electrodoméstico excepcional ha sido diseñado para brindarle deliciosas tazas de café espresso o cappuccino de forma rápida y conveniente.
- Page 35 A N TES DE US AR SU C A F ET E R A PA R A E SPRE S SO P OR P RI M ER A V EZ LIMPIEZA Y PREPARACIÓN DE LA UNIDAD ANTES DE USARLA POR PRIMERA VEZ Refiérase a la sección “Descripción del artefacto”...
- Page 36 C ÓMO SEL ECCIO NA R EL CA F É A DECU ADO TIPO DE CAFÉ El café debe tener un tueste oscuro y estar recién molido. Tal vez convendría que probara un tueste francés o italiano. El café previamente molido retendrá su sabor únicamente durante 7 a 8 días, siempre que se almacene en un envase de cierre hermético y en un lugar fresco y oscuro.
- Page 37 2. Coloque el filtro seleccionado en el portafiltro y llénelo con Figura 3 café espresso recién molido finamente. Elimine los excesos de café del borde del portafiltro. Esto garantizará que encaje bien en el cabezal de colado. NOTA: prense o compacte el café con el compactador tal como se muestra (ver figura 3).
- Page 38 4. Asegúrese de colocar dos tacitas para café espresso o una jarrita debajo del portafiltro. 5. Cerciórese de que la unidad esté enchufada. 6. Encienda la unidad “I” oprimiendo el botón localizado en su parte posterior. 7. Las luces del panel de control (4 luces en el centro) Figura 7 comenzarán a parpadear.
- Page 39 8. Apague la unidad “O” oprimiendo el botón localizado en su parte posterior. Deje que se enfríe antes de limpiarla. Consulte la sección “Limpieza de su cafetera para espresso” para obtener más detalles. CÓMO PREPARAR ESPRESSO LARGO DOBLE (LUNGO DOPPIO) 1.
- Page 40 Un cappuccino es un café espresso cubierto con leche calentada al vapor y espumada. El espumado de la leche para el cappuccino requiere práctica. No se desaliente si la primera vez no le queda perfecto. La leche debe estar mitad calentada al vapor (parte inferior de la jarra) y mitad espumada (parte superior de la jarra).
- Page 41 8. Apague la unidad “O” y desenchúfela del tomacorriente. Deje que la unidad se enfríe. 9. Siga las instrucciones que se describen en la sección “Limpieza de su Cafetera para Espresso/Cappuccino” sobre cómo eliminar los residuos que queden en el tubo para espumar. Es importante que limpie bien el tubo para espumar y que lave la cubierta removible después de cada uso para garantizar que siga funcionando adecuadamente.
- Page 42 PRECAUCIÓN: no sumerja el electrodoméstico en agua. 4. Deseche el agua restante sacando el tanque y volteándolo sobre el fregadero. Se recomienda vaciar el tanque de agua entre cada uso. No sumerja el electrodoméstico en agua. 5. Limpie la carcasa con un paño suave húmedo. No utilice limpiadores abrasivos ni estropajos ya que éstos podrían rayar la superficie.
- Page 43 4. Enchufe el cable de alimentación en el tomacorriente. 5. Oprima el botón rojo para encender la unidad “I”. Cuando las luces del panel de control de intensidad del café (4 luces) queden fijas en color azul, la unidad estará lista para colar;...
- Page 44 PR OBL EM AS Y C A U SA S PROBLEMA CAUSAS SOLUCIONES No sale café. • No hay agua en el tanque. • Añada agua. • Se ha molido demasiado • Muela el café a un grosor finamente el café. medio.
- Page 45 Centro de simultáneamente. sensor de temperatura Servicio Autorizado Oster ® no está funcionando más cercano para ser adecuadamente. revisado y reparado. Español-15...
- Page 46 Centro de simultáneamente. sensor de temperatura Servicio Autorizado Oster ® no está funcionando más cercano para ser adecuadamente. revisado y reparado. Esp añol-16...
- Page 47 RE C E TA S CAFÉ MOCHA CAFÉ LATTE 30 ml (1 onza) de jarabe de chocolate; 1/4 de espresso y 3/4 de leche un espresso sencillo; 237 ml (1 taza) de calentada al vapor; vierta ambos al leche espumada mismo tiempo en una taza grande.
- Page 48 5. NÃO utilize nenhum eletrodoméstico com fio ou plugue danificados, caso o eletrodoméstico tenha falhado ou caído no chão ou tenha sido danificado de alguma maneira. Envie o eletrodoméstico ao Posto de Serviço Autorizado Oster mais ® próxima para ser examinado ou para reparos mecânicos ou elétricos.
- Page 49 Para evitar possíveis queimaduras ou outras lesões corporais que possam ser causadas pelo vapor ou a água quente, ou que o aparelho seja danificado, nunca retire o tanque de água nem o porta-filtro enquanto sua Cafeteira para Expresso/Cappuccino Oster ®...
- Page 50 DE SC R I Ç Ã O D O A PA R E LH O 1. Plataforma aquecedora (para esquentar 11. Alavanca de controle: as xícaras) a. Vapor - Espumar “ ” 2. Botão para água quente “ ” b. Preparar expresso/Desligar “ ”...
- Page 51 I N T R O D U Ç Ã O Parabéns! Você escolheu uma Cafeteira para Expresso/ Cappuccino Oster . Este ® eletrodoméstico excepcional foi desenvolvido para proporcionar-lhe deliciosos cafés expresso ou cappuccinos de forma rápida e conveniente. O café expresso é um método exclusivo de preparo do café no qual a água quente penetra a pressão através do pó...
- Page 52 A N T ES DE US AR S UA C AF E I T ER A PA RA EX PRES SO P E LA P R I M ER A V EZ LIMPEZA E PREPARO DO APARELHO ANTES DE USÁ-LO PELA PRIMERA VEZ Consulte a seção “Descrição do Aparelho”...
- Page 53 C O M O SEL EC IO NAR O CA F É A D Eq U A DO TIPO DE CAFÉ O café deve ser torrado escuro e o café deve ser moído na hora. Recomenda-se o torrar ao estilo francês ou italiano. O café previamente moído somente manterá seu sabor por 7 a 8 dias, sempre e quando for guardado em um recipiente hermético e em um lugar fresco e escuro.
- Page 54 2. Coloque o filtro selecionado no porta-filtro e encha-o com Figura 3 café para expresso moído na hora. Elimine o excesso de café da borda do porta-filtro. Isso irá garantir que o porta- filtro encaixe bem no cabeçote de preparo. OBSERVAÇÃO: comprima e compacte o café...
- Page 55 5. Certifique-se de que o aparelho está ligado na tomada. 6. Ligue a unidade “I” pressionando o botão que fica na atrás do mesmo. 7. As luzes do painel de controle (4 luzes do centro) Figura 7 começarão a piscar. Quando as luzes azuis estiverem acessas (sem piscar), pressione o botão para expresso duplo (Doppio) “...
- Page 56 COMO PREPARAR EXPRESSO LONGO DUPLO (LUNGO DOPPIO) 1. Selecione o filtro para preparar expresso longo duplo (Lungo Figura 11 Doppio) (veja a figura 11). 2. Coloque o filtro selecionado no porta-filtro e encha-o com café para expresso moído na hora. Elimine o excesso de café...
- Page 57 Para obter melhores resultados, recomendamos espumar o leite em uma jarra separada e em seguida despejá-lo sobre o café. Tanto o leite, quanto a jarra devem estar frios. Não use uma jarra que tenha sido lavada com água morna naquele instante. Também recomendamos o uso de uma jarra de aço inoxidável para espumar e um termômetro para bebidas, se tiver um, para preparar a melhor espuma de leite e o melhor leite aquecido ao vapor.
- Page 58 C O MO US AR A FU N ÇÃ O PA R A ÁGU A q U EN T E Esta prática função para água quente lhe ajudará a preparar bebidas quentes, tais como chá, café instantâneo, chocolate quente instantâneo e muito mais: 1.
- Page 59 ELIMINANDO RESÍDUOS MINERAIS Os resíduos minerais que se formam em sua cafeteira afetam o bom funcionamento da mesma. Você deve remover o sarro sua Cafeteira para Expresso e Cappuccino Oster ® quando começar a notar um aumento no tempo que o aparelho leva para preparar o café, ou quando gere um excesso de vapor.
- Page 60 P RO BL EM AS E C A USA S PROBLEMA CAUSES SOLUTIONS O café não sai • Não tem água no depósito. • Adicione água. • O café foi moído muito fino. • Moer os grãos de café um pouco mais grossos.
- Page 61 Se isso não resolver estão piscando interno é muito alta ou o o problema, leve-o ao Centro simultaneamente. sensor de temperatura não de Serviço Autorizado Oster ® está funcionando bem. mais próximo para ser examinado ou reparado. P o rt uguê s-14...
- Page 62 R EC E I TAS MOCHA (CAFÉ COM CHOCOLATE) CAFÉ LATTE 30 ml (1 onça) de chocolate líquido, 1/4 expresso e 3/4 leite aquecido no uma parte de café expresso, 1 xícara vapor, despeje ambos em uma mesma de espuma de leite xícara simultaneamente CAFÉ...
- Page 63 CAFETERA ESPRESSO OSTER ® MODELOS: BVSTEM7701, BVSTEM7701-013 LEA EL INSTRUCTIVO ANTES DE USAR EL APARATO LA SIGUIENTE INFORMACION ES PARA MEXICO IMPORTADOR: SUNBEAM MEXICANA, S.A. DE C.V. AV. JUÁREZ No. 40-201, EX–HACIENDA DE SANTA MÓNICA, TLALNEPANTLA, ESTADO DE MéXICO, C.P. 54050, R.F.C. SME570928G90, TEL. 53660800 PAIS DE ORIGEN: CHINA PAIS DE PROCEDENCIA: E.U.A., CHINA...
Need help?
Do you have a question about the BVSTEM7701 and is the answer not in the manual?
Questions and answers