Crow EDS-2000AM Installation Instructions Manual
Dual-tech motion sensor (single pir, microwave and antimask)
Hide thumbs
Also See for EDS-2000AM:
- Installation instructions manual (18 pages) ,
- Installation instructions & user manual (20 pages)

Related Manuals for Crow EDS-2000AM


Summary of Contents for Crow EDS-2000AM
- Page 1 ELECTRONIC ENGINEERING LTD. INSTALLATION INSTRUCTIONS EDS-2000AM Dual-Tech Motion Sensor (Single PIR, Microwave And Antimask) & USER MANUAL P/N: 7101796A...
- Page 2 The EDS-2000AM is designed to protect large areas and can easily be installed on walls in order to provide a solid protection of the area while rejects interferences from birds and small animals due to the optional “PET MASK”...
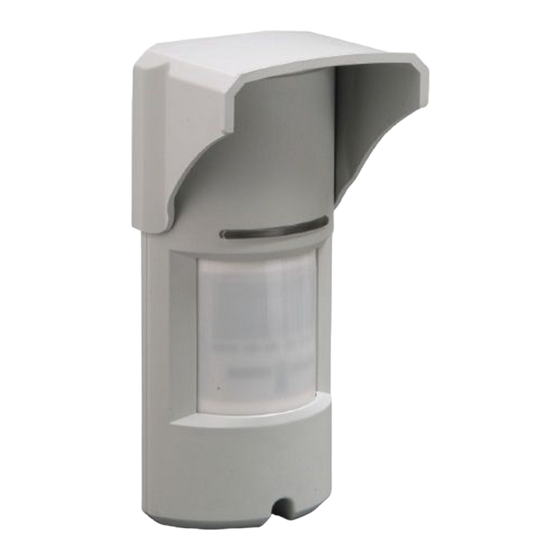
- Page 3 Assembly description The EDS-2000AM is a robust yet small detector which includes a large LED indicator that can be easily observed from long distances to provide indication of intrusion. Using the supplied mounting bracket, the EDS-2000AM can be easily mounted to walls using the provided mounting screws.
- Page 4 Detection Pattern The EDS-2000AM has a 90° top view PIR and MW detection pattern with 12m detection distance (when installed at 2.4m above the ground surface). Standard Lens P/N: 7101796A...
- Page 5 Corridor Lens (sold separately) Having MW movement detection combined with PIR detection beam, the EDS-2000AM can differentiate between pets and human bodies and alert accordingly. By having both PIR detection beam and MW crossing an object it will be defined as intrusion, Causing an alarm.
- Page 6 • The EDS-2000AM performs best when provided with a constant and stable environment. • In order to ensure suitable operation of the EDS-2000AM, the type of ground should be one of the following: Asphalt concrete, Cement, Soil, Clay, Gravel or Grass (mown).
- Page 7 Detector Installation Important! Prior to installation, read both “Operation” and “Selecting the mounting location” sections carefully. 1. Install the detector in such manner that the intruder is 2. The detector is to be installed at height of 1.8 to 2.4 most likely to cross the detection area from side to side.
- Page 8 7. Release the detector body from the metal bracket by 8. Attach the rear bracket to the wall using mounting pulling the detector up and out. screws. 9. Insert wires through provided access hole and wiring 10. Attach the sealing sponge pad to the wire opening channels.
- Page 9 Terminal Block Connections Terminal 1 - Marked “+” (+12V) - Connect to a positive Voltage of 9.6 -16Vdc source (Usually from the alarm CP) Terminal 2 - Marked “-” (GND) - Connect to the ground of the CP. Terminal 3 –Marked "Test" 9.6-16 v on this pin will enter the EDS2000AM to walk test mode even if SW2 position 1 is off Terminals 4 &...
- Page 10 Settings & Adjustments 8.1 Detection beam direction The EDS-2000AM detection beam direction is fixed. As a result, it is recommended to face the intrusion area with the detector. 8.2 Sensitivity and Range Adjustment There are 2 options for PIR sensitivity option: PIR potentiometer adjust SW position 3 –...
- Page 11 General configuration setting table (for sw2) Feature Sw position On (up) Off (down) Indication LEDs Indication LEDs on Indication LEDs off Anti Mask PIR pulse count 2 pulses 3 pulses Pet immunity The sensitivity adjustment is performed by setting a potentiometer and MW jumper as Follows (using clock needle positioning): Environment type Potentiometer position...
- Page 12 *Note: when the MW sensitivity is applied the detector is very sensitive and it’s effected the PIR adjustment also to 1 pulse only. 8.3 Pet immunity setting The EDS-2000AM has a detachable Pet immunity filter. As such the Pet immunity level may vary between: 1. 36kg (80 lbs) with pet immunity filter assembled 2.
- Page 13 8.4 Indications setting The EDS-2000AM has 3 LEDs that each points at different indication: 1. Green LED indicates PIR detection. 2. Yellow LED indicates MW detection. 3. Red LED - alarm indication (logic AND of both MW and PIR). The installer has an option to control LEDs operation, using the LED control on SW2 position 1, between “ON”...
- Page 14 If the first power up is under direct sunlight the EDS2000AM will made the self calibration 30 minutes after the sun light intensity will decrease Operation Note! Connect the EDS-2000AM to a positive Voltage output of 9.6 -16VDC source. Use only a listed power limited source.
- Page 15 11 Test procedures Walk Test Make sure LEDs control is set to “ON” Allow 30 seconds of warm up time. Make sure that the protected area is cleared of all people. Start walking across the detection zone. Look at the LEDs whenever motion is detected - all LEDs are turned ON. Allow 5 sec.
- Page 16 12 Specifications PIR AND MW Detection Method X-band (9.9GHz / 10.525GHz / 10.687GHz) Microwave Frequency Power Input 9.6 to 16Vdc Active: 24mA (±5%) Current Draw Standby: 21mA (±5%) Temp Compensation Dual slop temperature compensation 2 sec (±0.5sec) Alarm Period Form C (NC, NO, Common) Alarm Outputs 28Vdc 0.1 A with 10 Ohm Two Switches...
- Page 17 There are no warranties, expressed or implied, of merchantability or fitness for a particular purpose or otherwise, which extend beyond the Description on the face hereof. In no case shall CROW be liable to anyone for any consequential or incidental damages for breach of this or any other warranty, expressed or implied, or upon any other basis of liability whatsoever, even if the loss or damage is caused by CROW’s own...
- Page 18 12 Kineret St. Airport City, 70100 Israel Tel. +972 3 9726000 Fax. +972 3 9726001 sales@crow.co.il support@crow.co.il www.thecrowgroup.com CROW LATIN AMERICA USA INC. 7200 NW 19 st. Suite 307 Miami FI 33126, USA Tel. +305 513 4001 Fax. +305 513 4005 rejane@crowlatinamerica.com www.crowlatinamerica.com...
Need help?
Do you have a question about the EDS-2000AM and is the answer not in the manual?
Questions and answers