Table of Contents
Advertisement
Quick Links
Advertisement
Table of Contents

Related Manuals for K40 RL100


Summary of Contents for K40 RL100
- Page 2 If you get a speeding ticket within one year of purchase, we’ll reimburse you for the full cost of the ticket.* Guaranteed performance If your K40 radar detection system does not outperform any other radar detector you’ve owned, return it within 30 days for a full product credit.
-
Page 3: Table Of Contents
Table of Contents Mounting and Powering the RL100 ....4 Mounting Instructions ....4 Power Connection. -
Page 4: Mounting And Powering The Rl100
Do not mount the unit behind wipers or any metal obstructions. 3. Slide the RL100 unit itself on to the bracket to complete the mounting. 4. Level the radar detector, if necessary, by carefully bending the Windshield Mounting Bracket. -
Page 5: Quick Start
Quick Start (using factory default settings) Once your K40 RL100 has been mounted and had the power connected, you may begin using immediately by following these steps: 1. Switch on the RL100 – Turn the Power On/Volume Control Wheel on the side of the unit. -
Page 6: Receiving Alerts
Receiving Alerts The K40 RL100 provides a combination of audio and visual alerts to warn you when radar and laser signals are detected. Radar Alert Sequence The RL100 detects every kind of FCC approved police radar. When a signal is identified: A voice alerts which band was detected. -
Page 7: Laser Alert Sequence
Audio Alert: Voice announces “Laser” followed by distinctive audio tone. Alerts from non-police signals Your RL100 is sensitive enough to detect signals generated by non-police equipment, such as bank security systems. To learn how to deal with these signals, please read about FILTER options (page 8) and Quiet Ride (page 9). -
Page 8: Special Features/Functions
Special Features/Functions Filter Operation (i.e. signal sensitivity) The Filter system on the RL100 offers you 3 levels of sensitivity settings to accommodate various driving situations. To change the level at any time, press and release FILTER button. Level / Mode... -
Page 9: Quiet Ride
Ride speed. For example, if 45 is your desired setting, stop 45 MPH pressing when the display shows The RL100 automatically saves your settings after 10 seconds, exits the Menu Function and the display returns to the main screen. NOTE: Locations that you have “Marked for Alert” are not affected by the Quiet Ride function and will initiate alerts at any speed. -
Page 10: Reference Guide
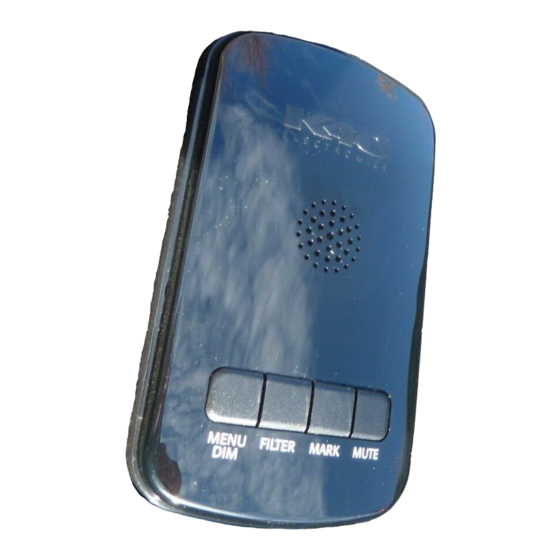
12v outlet Power On/Volume Control Wheel – Turn on the RL100 unit and adjusts volume of voice/tones MENU/DIM Button – Press and release to change display brightness from bright (factory default) to dim or dark, or press... - Page 11 Speaker – Alerts delivered via voice and tones FILTER Button – Press and release to select level of alert sensitivity (page 8), or enter “Speed Monitor” function by pressing and holding for 3 seconds (page 13) MARK Button – Identify and “mark”...
-
Page 12: Mark Location
Alrt Loc Display shows and voice announces “Marked • to Alert” After marking the location, in the future the RL100 will • alert you: When you arrive… You will hear a… …within a radius of 1500 feet ..."Bing Bong"... -
Page 13: Speed Monitor
The Speed Monitor function alerts the driver when a pre- selected speed is exceeded. The Speed Monitor can be set to any speed between 40-100 mph in 5 mph increments. When the preset speed is exceeded: The RL100 emits a beeping alert tone accompanied by the • Slow Down... -
Page 14: Menu / Customizable Settings
Menu / Customizable Settings The RL100 comes with factory default settings on certain features that we’ve learned are desirable for our customers. However, we provide you with the option of changing the settings based on your preferences. To access and change any of the 12 selectable preferences: Press and hold MENU button for 3 seconds. - Page 15 Enables the detection of KA-Band radar. Laser Enables the detection of laser. Factory Reset RESET! Returns the K40 to its original factory defaults for all settings. To save your settings and exit: Press and hold MENU button for 3 seconds. (or do •...
-
Page 16: Troubleshooting Guide
800.323.6768 Warranty K40 Electronics offers a one-year “repair or replace” warranty if your RL100 fails to work properly. To ensure you are covered by our warranty please register your product online today by visiting K40.com. - Page 17 Product subject to one or more of the following patents: U.S. Patents 7,298,248 B2 5,001,777 RE39,038 RE40,653 RE41,905 Other patents pending Learn more at K40.com ©K40 Electronics...
- Page 18 (2) this device must accept any interference received, including interference that may cause undesired operation. In addition, any changes or modifications to this product, which are not expressly approved by K40 Electronics in writing, could void the user’s authority to operate this product.
Need help?
Do you have a question about the RL100 and is the answer not in the manual?
Questions and answers