Table of Contents
Advertisement
Advertisement
Table of Contents

Related Manuals for Casio SF-8350


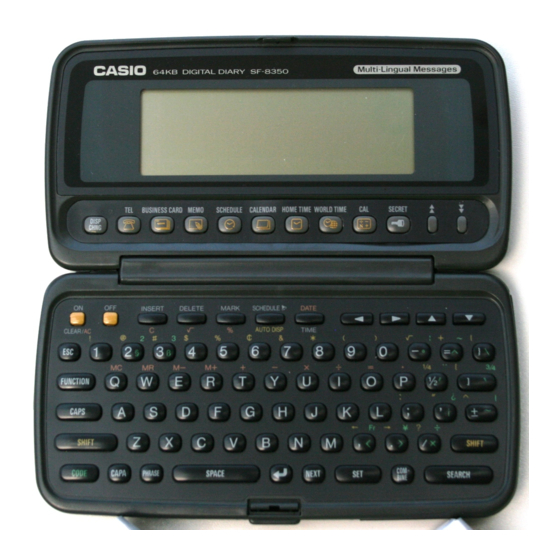
Summary of Contents for Casio SF-8350
- Page 1 (without price) SF-8350 (LX-572) JUNE 1993 INDEX...
-
Page 2: Table Of Contents
CONTENTS SCHEMATIC DIAGRAM....................1 SPECIFICATIONS ......................5 TO REPLACE THE BATTERY ..................6 ERROR MESSAGE ....................... 7 TO RESET THE DIGITAL DIARY ................. 7 TO SAVE THE DATA TO OTHER MACHINE ............... 8 TO CHECK THE MEMORY CAPACITY ..............11 DISASSEMBLY ...................... - Page 3 1. SCHEMATIC DIAGRAM 1-1. Main Block — 1 —...
- Page 4 1-2. Display Block — 2 —...
- Page 5 1-3. Key Matrix — 3 —...
-
Page 6: Specifications
2. SPECIFICATIONS Data storage: Telephone/business card/memo/schedule data storage/recall, calendar display, marker, phrase memory, secret area, editing, capacity display, auto display Clock: Average of accuracy ±3 seconds per day under normal temperatures; worldtime, schedule alam, daily alarm Calculation: 12-digit arithmetic calculations, constants for + / – / × / ÷, independent memory, percentages, square roots, 24-digit approximations, date calculations, other mixed calculations General: 32-column ×... -
Page 7: To Replace The Battery
3. TO REPLACE THE BATTERY A) To replace the main batteries Before replacing the main batteries, note the following precautions. • Do not remove the back-up battery from the SF Unit while main batteries are removed. • Be sure to replace both batteries at the same time, and do not use an old battery with a new one. -
Page 8: Error Message
4. ERROR MESSAGE Message Meaning Action DATA ITEM NOT Text specified for Correct or change FOUND! search does not exist. specified text. PASSWORD Wrong password Enter correct MISMATCH! entered. password. MEMORY FULL! No more room in Delete unnecessary memory for storage of data items from data. -
Page 9: To Save The Data To Other Machine
System Language: English 6. TO SAVE THE DATA TO OTHER MACHINE SF-8350 can transfer customers data to other SF-8350 with memory protection only when replacing the LCD or the outer case. How to transfer the data. * Before connecting the cable (SB-60 or SB-62), be sure to reset the slave machine to clear all data. - Page 10 4) Check the hardware parameters, and if the units have another condition, reset as follows. To change the hardware HARDWARE PARAMETERS parameters, press the PARITY EVEN NONE cursol keys. LENGTH7 bits 7 bits 8 bits 1200 2400 4800 9600 To set the hardware parameters, press the set key.
- Page 11 Press to select "TRANSMIT" and the following menu appears. 1 ONE DATA ITEM 2 MODE DATA ITEMS 3 ALL DATA ITEMS — SEND — Press to select "ALL DATA ITEMS", and the following display appears to confirm whether you wish to proceed. SEND ALL DATA ITEMS ? YES SET / NO ESC Press the...
-
Page 12: To Check The Memory Capacity
Message Cause STOPPED ! • key pressed on transmitting or receiving unit. • Memory area of receiving unit full. • Battery power drops below a certain level. TRANSMIT ERROR ! Cable connection broken or abnormal noise in cable. MEMORY FULL ! Memory area of receiving unit full. -
Page 13: Disassembly
8. DISASSEMBLY (SF-8350) 1) To open display unit 1. Remove the key switch sheet from the display frame with care using a sharp tweezers and remove 2 screws, then remove the display back cover. 2. Remove the blind plate of hinge and then release the 2 screws of hinge cover. - Page 14 — 13 —...
-
Page 15: Block Diagram
9. BLOCK DIAGRAM 192 X 48 dots CD401-TS S0~S31 S32~S111 S112~S191 C0~C47 LCD DRIVER LCD DRIVER LCD DRIVER MSM6585AV MSM6585AV MSM6585AV -Z-358B -Z-358B -Z-358B DATA BUS TO KEYBOARD LCD DRIVE VOLTAGES V1 ~ V4, VREG POWER SUPPLY CHIP FOR LCD µ... -
Page 16: System Chart
10. CIRCUIT EXPLANATIONS 10-1. System chart Generally, SF-8350 is working with the following steps. "H" (Pin30) (Pin39) (Pin17) (Pin31) (Pin3) Gate array (Pin24) Power supply chip µ SC371015FU PD65005G-452-22 (Pin29) (Pin2) VREG,V1~V4 VDD1 Open Output VDD2 Batteries for LCD (Pin32) -
Page 17: Power Supply Circuit
10-2.Power supply circuit 1) Power supply chip SC371015FU The IC SC371015FU is power supply chip for SF- 8350. When IC SC371015FU receives a Voltage 6V (CR-2032 × 2 pcs.) at the terminal VDD1(Pin No.2), the regulated voltage VDD (4.3~4.7V) will be applied to the VDD lines. - Page 18 2) Gate array When VDD is applied from power supply IC SC371015FU to gate array uPD65005G-452- 22, gate array will send "L" signal to active the main switch signal from terminal SWO. Also, gate array will send "H" signal to release the Open INT0 terminal of CPU from LSO terminal.
- Page 19 4) Power supply for LCD "H" (Pin69) (Pin30) (Pin31) INT1 "H" POWER SUPPLY CHIP V2ON (Pin45) (Pin29) SC371015FU µ GATE ARRAY PD3055GF002-2BA µ PD65005G-452-22 LCD drive voltages VREG,V1~V4 When the system is start up, CPU will send "H" signal to VIN terminal of gate array from V2ON terminal.
-
Page 20: Battery Voltage Detection
10-3.Battery voltage detection (Pin32) The power supply IC chip SC371015FU has GND1 (Pin7) (Pin79) GND2 VCOMP2 (Pin22) two kind voltage detection circuit in it. Accord- Power Supply Chip ing to the batteries input voltage, the detection SC371015FU (Pin6) (Pin37) VCOMP1 ONMK outputs V comp1 and V comp2 will change the (Pin1) - Page 21 µ 10-4.CPU pin description ( PD3055GF002-2BA) Pin No. Name In/Out Status Status Description of OFF of ON 1~14,16,17 A0~A15 Pulse Address Bus line 15,39,100 GND terminal Pulse Write signal Pulse Read signal Pulse Not used Not used Chip select signal for gate array Pulse Chip select signal for ROM (Chargacter generator) (Character generator)
-
Page 22: Cpu Pin Description ( Μ Pd3055Gf002-2Ba)
µ 10-5.Gate array pin descriptions ( PD65005G-452-22) Pin No. Name In/Out Status Status Description of OFF of ON card OI7~OI0 In/Out Data bus line for ICcard Not used Pulse Address input 10,11 A01,A00 Pulse A1,A0 address input Pulse Decode signal for data access 13~16,18~21 IO0~IO7 In/Out... -
Page 23: Character Generator Rom Pin Descriptions (Hd62063B01)
Pin No. Name In/Out Status Status Description of OFF of ON EROUT VFB capacitor terminal 3.2V EROUT signal input 3.2V 3.2V Display contrast control signal (Up/Down) CLOCK Display contrast clock signal Display contrast data reset signal 10-7.Character generator ROM pin descriptions (HD62063B01) Pin No. -
Page 24: Operation Program Rom Pin Descriptions ( Μ Pd23C4001Ebgw-301)
µ 10-8. Operation program ROM pin discriptions ( PD23C4001EBGW-301) Pin No. Name In/Out Status Status Description of OFF of ON 1,30,31 Connected to VCC 2~12, 23, A0~A16 Pulse Address bus line (A0~A14,RA15,RA16) 25~29 13~15, 17~21 IO0~IO7 Pulse Data bus line (IO0~IO7) Power GND terminal Pulse... -
Page 25: Diagnostic Operation
11. DIAGNOSTIC OPERATION Main switch Check pad 1. Diagnostic mode SELECT MENU 1 DISPLAY The diagnostic mode appears when main switch is turned on 2 MEMORY while there is a short in the checkpad. After this operation, 3 KEY the machine will beep and display "SELF-TEST". 4 BUZZER 5 I/F The menu appears after press SET key. - Page 26 #2---Test data pattern(FF,FE,FD..) NOTE 1. To change the RAM internal or extenal, press WORLD TIME key. As SF-8350 has no RAM card interface, Test only Internal RAM area. NOTE 2. To change the test data pattern, press HOME TIME key for data pattern 1 (00,01,02,03,..FF,00,01,02,03,..).
- Page 27 Input can be made in the second and However, if the ROM is not in third lines using the numeric keys. standard Casio format, a format Entry of 12 or more digits sets the time error will be displayed. and date. Entry of 4 or 6 digits sets the Size : Memory capacity (total) daily alarm.
- Page 28 5. Buzzer check TEL key : Key input sound every 1 second Business card key : Sound alarm 1 MEMO key : Sound alarm 2 BUZZER 1 BEEP 2 ALARM 1 3 ALARM 2 Sound can be stopped by pressing the any key. While an alarm is sounding the screen display is as shown at left.
- Page 29 NOTE : As diagnostic program area does not have all ASCII code, to display a reception data, some charactor will be changed to other charactor. For example, a chapital letter will be changed to small letter. Break display (Broken transmission) Error display TRNS BREAK ! TRNS ERROR !
-
Page 30: Troubleshooting
12. TROUBLESHOOTING Generally, check the machine with the followning steps for repair. CONDITION : Main battery switch START Main battries 6V? Replace main battries (CR2032 2pcs.) (Clean and adjust battery contact.) Key input OK? Reset operation Display OK? Key input OK? Save data to P/C if necessary. - Page 31 Adjust keyboard cable. Connection of keyboard cable OK? When press power on Key, any Poor connection Solder line oscillation at oscillator? on oscillator? Replace parts. Pin 45 ofµPD3055GF002-2BA "H" ? Poor connection? Solder line Replace parts. Pin 29 of µPD65005G-452-22 "H" ? Solder line Pin 30 of µPD65005G-452-22 "H"...
- Page 32 Repair section 2 : For no display or wrong display problem START Pin 30 of µPD65005G-452-22 "H" ? Poor connection? Solder line Replace parts. Solder line Pin 31 of SC371015FU "H"? LCD drive voltages OK? Poor connection? (Pin8~12) Poor connection on chip resistors R8~R10 ? Poor connection on chip Solder line...
-
Page 33: Parts List
13. PARTS LIST (SF-8350) — 32 —... - Page 34 — 33 —...
-
Page 35: Pcb View
14. PCB VIEW (SF-8350) — 34 —... -
Page 36: Assembly View
15. ASSEMBLY VIEW (SF-8350) — 35 —... - Page 37 8-11-10, Nishi-Shinjuku Shinjuku-ku, Tokyo 160, Japan Telephone: 03-3347-4926...
Need help?
Do you have a question about the SF-8350 and is the answer not in the manual?
Questions and answers