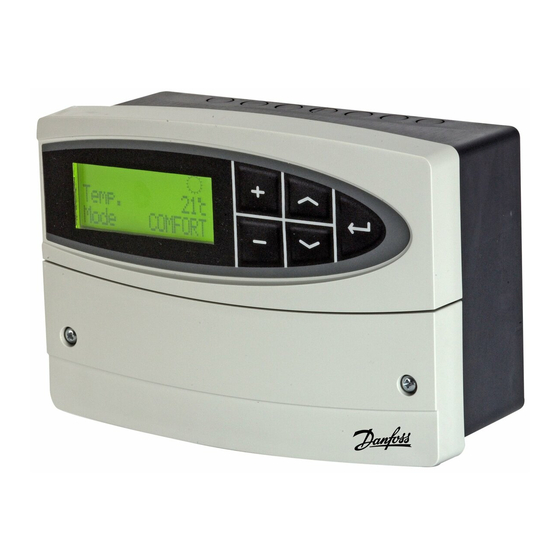
Danfoss ECL Comfort 110 User Manual, Installation & Maintenance
Constant temperature control of domestic hot-water systems (dhw)
Hide thumbs
Also See for ECL Comfort 110:
- Operating manual (52 pages) ,
- User manual, installation & maintenance (26 pages) ,
- Datasheet (8 pages)

Related Manuals for Danfoss ECL Comfort 110


Summary of Contents for Danfoss ECL Comfort 110
- Page 1 Instructions ECL Comfort 110 Application 116 Constant temperature control of domestic hot-water systems (DHW) User guide, Installation & Maintenance VI.KT.F2.02 DH-SMT/DK © Danfoss 06/2008...
- Page 2 The warning sign is used to emphasize special conditions Language 8315 that should be taken into consideration. MOD address (MODBUS address) 8320 This symbol indicates that this particular piece of information should be read with special attention. VI.KT.F2.02 VI.KT.F2.02 © Danfoss 06/2008 DH-SMT/DK DH-SMT/DK © Danfoss 06/2008...
-
Page 3: Table Of Contents
Electrical connections - 230 V a.c. - in general Electrical connections - 24 V a.c. - in general Connecting the temperature sensors and the ECL BUS How to identify your system type Adapting the ECL Comfort 110 controller Manual control Placing the temperature sensors Checklist, electrical connections ..............32 Settings overview Frequently asked questions . -
Page 4: Vi.kt.f2.02 © Danfoss
Backlight (display brightness) 8310 Contrast (display contrast) 8311 Language 8315 English MOD address (MODBUS address) 8320 23 °C (degrees Celsius) is an absolute temperature whereas K (Kelvin) is a relative temperature. VI.KT.F2.02 VI.KT.F2.02 © Danfoss 06/2008 DH-SMT/DK DH-SMT/DK © Danfoss 06/2008... -
Page 5: Daily Use
Set your personal schedule Temperature overview 2 sec. It is only possible to set the personal schedules if the ECL Comfort 110 controller has a built-in Push the button to see the sensor (S3-S4) temperatures. ECA 110 timer program. Change between the temperature displays:... -
Page 6: Maintenance
It is only necessary to set the correct date and time in connection with the first use of the ECL Comfort 110 controller or after a power break of more than 36 hours (see the chapter Adapting the ECL Comfort 110 controller). -
Page 7: Vi.kt.f2.02 © Danfoss 06/2008 Dh-Smt/Dk
When the return temperature falls below or gets higher than the set value, the controller automatically changes the desired flow temperature to obtain an acceptable return temperature. The influence is set in lines 4035 and 4036. VI.KT.F2.02 VI.KT.F2.02 © Danfoss 06/2008 DH-SMT/DK DH-SMT/DK © Danfoss 06/2008... -
Page 8: Gain - Min. (Return Temp. Limitation - Min. Influence) 4036
During auto tuning the circulation pump for tap water must be switched off. This is done automatically if the pump is controlled by the ECL controller. Auto tuning is only applicable in connection with valves that are approved for auto tuning, i.e. the Danfoss types VB 2 and VM 2 with split characteristic. VI.KT.F2.02 VI.KT.F2.02 ©... -
Page 9: Motor Prot. (Motor Protection) 6174
5.0 mm x 15 sec. / mm = 75 sec. Rotating valves Running time = Turning degrees x actuator speed (sec. / degr.) Example: 90 degr. x 2 sec. / degr. = 180 sec. VI.KT.F2.02 VI.KT.F2.02 © Danfoss 06/2008 DH-SMT/DK DH-SMT/DK © Danfoss 06/2008... -
Page 10: P1 Exercise (Pump Exercise) 7022
ON the circulation pump to meet the heat demand. -20 ... 50: The circulation pump is ON above the set value. The setting should be kept as high as acceptable to increase the lifetime of the actuator. VI.KT.F2.02 VI.KT.F2.02 © Danfoss 06/2008 DH-SMT/DK DH-SMT/DK © Danfoss 06/2008... -
Page 11: Daylight (Daylight Saving Time Changeover) 7198
Each slave must be configured with its own address (1 ... 9). However, more slaves can have the address 0 if they only have to receive information about outdoor temperature and system time. VI.KT.F2.02 VI.KT.F2.02 © Danfoss 06/2008 DH-SMT/DK DH-SMT/DK © Danfoss 06/2008... - Page 12 OFF: No backlight. Weak backlight. 30: Strong backlight. Contrast (display contrast) 8311 Setting range Factory setting 0 ... 20 The contrast of the display can be adjusted. High contrast 20: Low contrast VI.KT.F2.02 VI.KT.F2.02 © Danfoss 06/2008 DH-SMT/DK DH-SMT/DK © Danfoss 06/2008...
- Page 13 93 x 139 mm. Insert the controller into the panel cut-out and fix it with the clamp which is placed horisontally on the controller. Establish the electrical connections. For further details on mounting, see the mounting guide. VI.KT.F2.02 VI.KT.F2.02 © Danfoss 06/2008 DH-SMT/DK DH-SMT/DK © Danfoss 06/2008...
-
Page 14: Connecting The Temperature Sensors And The Ecl Bus
Relay R2 4 (2) A Cable lengths of more than 125 m may cause noise sensibility (EMC). Wire cross section: 0.5 - 1.5 mm Incorrect connection can damage the TRIAC outputs. VI.KT.F2.02 VI.KT.F2.02 © Danfoss 06/2008 DH-SMT/DK DH-SMT/DK © Danfoss 06/2008... -
Page 15: How To Identify Your System Type
When the language has been chosen, and date and time have been set, the controller will ask for application type. Choose application type. 2 sec. Start the chosen application. Go to the ‘Maintenance’ part for further setup of your controller. VI.KT.F2.02 VI.KT.F2.02 © Danfoss 06/2008 DH-SMT/DK DH-SMT/DK © Danfoss 06/2008... -
Page 16: Manual Control
Flow temperature sensor (ESMU, ESM-11 or ESMC) Place the sensor max. 15 cm from the mixing point. In systems with heat exchanger, 5 sec. Danfoss recommends that the ESMU-type to be inserted into the exchanger flow outlet. Go to manual mode. Actuator M1 is opening ( Actuator M1 is closing ( Make sure that the surface of the pipe is clean and even where the sensor is mounted. -
Page 17: Checklist, Electrical Connections
A PI control does the same as a P control, but the offset will disappear over time. A long ‘Intgr. time’ will give a slow but stable control, and a short ‘Intgr. time’ will result in a fast control but with a higher risk of oscillations. VI.KT.F2.02 VI.KT.F2.02 © Danfoss 06/2008 DH-SMT/DK DH-SMT/DK © Danfoss 06/2008... -
Page 18: Definitions
The relative humidity is measured by the ECA 62 / 63. The definitions apply to the Comfort 110 series. Consequently, you might come across expressions that are not mentioned in your guide. VI.KT.F2.02 VI.KT.F2.02 © Danfoss 06/2008 DH-SMT/DK DH-SMT/DK © Danfoss 06/2008... - Page 19 Disposal instruction: Danfoss can accept no responsibility for possible errors in catalogues, brochures and other printed material. Danfoss reserves the right to alter its products without notice. This also applies to products already on order provided that such alterations can be made without subsequential changes being necessary in speci cations already agreed.
Need help?
Do you have a question about the ECL Comfort 110 and is the answer not in the manual?
Questions and answers