Sign In
Upload
Download
Table of Contents
Contents
Add to my manuals
Delete from my manuals
Share
URL of this page:
HTML Link:
Bookmark this page
Add
Manual will be automatically added to "My Manuals"
Print this page
×
Bookmark added
×
Added to my manuals
Manuals
Brands
MTU Manuals
Engine
12V2000M86106
Operating instructions manual
MTU 12V2000M86106 Operating Instructions Manual
Hide thumbs
1
2
Table Of Contents
3
4
5
6
7
8
9
10
11
12
13
14
15
16
17
18
19
20
21
22
23
24
25
26
27
28
29
30
31
32
33
34
35
36
37
38
39
40
41
42
43
44
45
46
47
48
49
50
51
52
53
54
55
56
57
58
59
60
61
62
63
64
65
66
67
68
69
70
71
72
73
74
75
76
77
78
79
80
81
82
83
84
85
86
87
88
89
90
91
92
93
94
95
96
97
98
99
100
101
102
103
104
105
106
107
108
109
110
111
112
113
114
115
116
117
118
119
120
121
122
123
124
125
126
127
128
129
130
131
132
133
134
135
136
137
138
139
140
141
142
143
144
145
146
147
148
149
150
151
152
153
154
155
156
157
158
159
160
161
162
163
164
165
166
167
168
169
170
page
of
170
Go
/
170
Contents
Table of Contents
Troubleshooting
Bookmarks
Table of Contents
Operating Instructions
Table of Contents
1 Safety
Correct Use for All Products
Personnel and Organizational Requirements
Transport
Safety Regulations for Startup and Operation
Safety Precautions When Working on the Engine
Fire Prevention and Environmental Protection, Fluids and Lubricants, Auxiliary Materials
Compressed Air
Standards for Safety Notices in the Text
2 General Information
Tightening Specifications for Screws, Nuts and Bolts
Installation
Engine Side and Cylinder Designations
Product Description
Engine - Overview
Sensors and Actuators - Overview
3 Technical Data
Engine Data 12V2000M86/M96/M96L, Marine EPA Tier 3, IMO Tier
Engine Data 16V2000M86/M96/M96L, Marine EPA Tier 3, IMO Tier
Firing Order
Engine - Main Dimensions
4 Operation
Putting the Engine into Operation after Extended Out-Of-Service Periods (>3 Months)
Engine - Putting into Operation after Scheduled Out-Of-Service-Period
Starting the Engine
Operational Checks
Emission Label - Check
Engine - Shutdown
Emergency Engine Shutdown
After Stopping the Engine
Plant - Cleaning
5 Maintenance
Maintenance Task Reference Table [QL1]
6 Troubleshooting
Solas
SOLAS Shielding as Per MTN 5233 - Installation
SOLAS Shielding - Installation
Installation Locations for SOLAS Shielding
SOLAS Shielding as Per MTN
7 Task Description
Engine
Barring Engine Manually
Engine - Cranking on Starting System
Cylinder Liner
Instructions and Comments on Endoscopic and Visual Examination of Cylinder Liners
Cylinder Liner - Endoscopic Examination
Valve Drive
Cylinder Head Cover - Removal and Installation
Valve Clearance - Check and Adjustment
Injection Pump / HP Pump
HP Fuel Pump - Filling with Engine Oil
Injector
Injector - Replacement
Injector - Removal and Installation
Installation
Fuel System
Fuel System - Venting
Fuel Filter
Fuel Filter - Replacement
Fuel Prefilter - Differential Pressure Check and Gauge Adjustment
Fuel Prefilter - Draining
Fuel Prefilter - Flushing
Fuel Prefilter - Filter Element Replacement
Charge-Air Cooling
Intercooler - Checking Leak Line and Drain Line for Coolant Discharge and Obstruction
Charge-Air Coolant - Draining
Air Filter
Air Filter - Replacement
Air Filter - Removal and Installation
Air Intake
Service Indicator - Signal Ring Position Check
Starting Equipment
Starter - Condition Check
Lube Oil System, Lube Oil Circuit
Draining Engine Coolant
Check
Belt Drive
Battery-Charging Generator
Wiring (General) for Engine/Gearbox/Unit
Fuel Treatment System
Installation
Engine Monitoring Unit – Removal and
Engine Interface Module EIM – Removal and
Diagnostic Features on EIM
8 Appendix A
MTU Contact/Service Partners
9 Appendix B
Index
Advertisement
Quick Links
1
Engine - Overview
2
Engine Data 12V2000M86/M96/M96L, Marine Epa Tier 3, Imo Tier
3
Engine Data 16V2000M86/M96/M96L, Marine Epa Tier 3, Imo Tier
4
Maintenance
5
Maintenance Task Reference Table [Ql1]
Download this manual
Operating Instructions
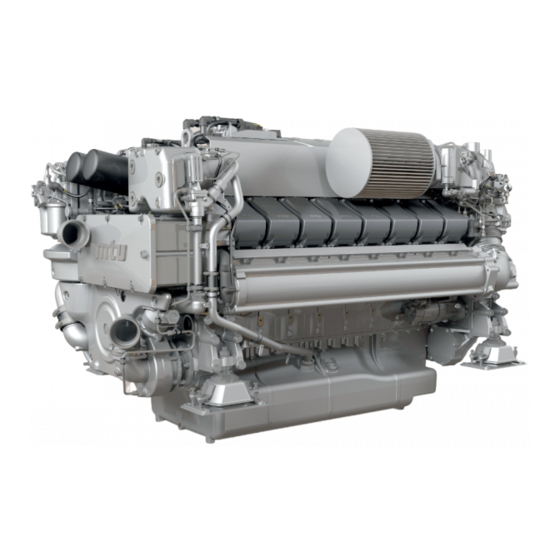
Diesel engine
12V/16V2000Mx6
12V/16V2000M96L
MS150119/01E
Table of
Contents
Previous
Page
Next
Page
1
2
3
4
5
Advertisement
Table of Contents
Need help?
Do you have a question about the 12V2000M86106 and is the answer not in the manual?
Ask a question
Questions and answers
Related Manuals for MTU 12V2000M86106
Engine MTU 12 V 2000 M40A Operating Instructions Manual
(246 pages)
Engine MTU 8 V 2000 M40A Operating Instructions Manual
(195 pages)
Engine MTU 8 V 2000 M51A Operating Instructions Manual
Mtu 8 v 2000 m50a; 8 v 2000 m50b; 8 v 2000 m51a; 8 v 2000 m51b; 12 v 2000 m50a; 12 v 2000 m50b; 12 v 2000 m51a; 12 v 2000 m51b; 16 v 2000 m50a; 16 v 2000 m50b; 16 v 2000 m51a; 16 v 2000 m51b diesel engines (257 pages)
Engine MTU 8 V 2000 M50A, M50B Operating Instructions Manual
Diesel engine (272 pages)
Engine MTU 12V2000G series Operating Instructions Manual
(177 pages)
Engine MTU 12V 2000 G23 Use And Maintenance Manual
(214 pages)
Engine MTU 12 V 2000 G25 Operating Instructions Manual
(155 pages)
Engine MTU 12V2000G65 Operating Instructions Manual
(155 pages)
Engine MTU 12V2000M93 Operating Instructions Manual
(163 pages)
Engine MTU 12V2000M84 Operating Instructions Manual
(151 pages)
Engine MTU 16V2000S56 Operating Instructions Manual
(163 pages)
Engine MTU 12V2000B26F Operating Instructions Manual
(147 pages)
Engine MTU 12V2000M91 Operating Instructions Manual
(169 pages)
Engine MTU 12V2000Gx6 series Operating Instructions Manual
(239 pages)
Engine MTU 12V2000M41B Operating Instructions Manual
(242 pages)
Engine MTU 12 V 2000 M70 Operating Instructions Manual
(167 pages)
This manual is also suitable for:
12v2000m96112
16v2000m96112
12v2000m96l119
16v2000m96l
16v2000m86102
Table of Contents
Save PDF
Print
Rename the bookmark
Delete bookmark?
Delete from my manuals?
Login
Sign In
OR
Sign in with Facebook
Sign in with Google
Upload manual
Upload from disk
Upload from URL


Need help?
Do you have a question about the 12V2000M86106 and is the answer not in the manual?
Questions and answers