Table of Contents
Advertisement
Quick Links
Download this manual
See also:
User Manual
Service
Manual
ON
OFF
REMARK : This service manual explains them by extracting specifications designed for the
model DR2100 only. The explanation for CD-R module "MAR775" ( Loader : CDL4009' +
CD-R Main board ) is not mentioned on this seevice manual.
The CD-R module information is described in the service manual of CD-R modules
<MAR770/MAR775>.
MAIN UNIT
1.
SERVICING THE DR2100 ...................................................................................... 1
2.
TECHNICAL SPECIFICATION ............................................................................... 3
3.
WARNINGS ............................................................................................................ 4
4.
SERVICE HINTS AND TOOLS ............................................................................... 5
5.
SERVICE MODE .................................................................................................... 6
6.
DIAGNOSTIC SOFTWARE .................................................................................... 7
7.
FAULTFINDING TREES ....................................................................................... 11
8.
FAULTFINDING GUIDE ........................................................................................ 17
9.
WIRING DIAGRAM ............................................................................................... 30
10.
BLOCK DIAGRAM ................................................................................................ 33
11.
SCHEMATIC DIAGRAM AND PARTS LOCATION ............................................... 35
12.
EXPLODED VIEW AND PARTS LIST ................................................................... 41
13.
ELECTRICAL PARTS LIST ................................................................................... 44
MAR1250 ( CD MODULE )
2.1
WIRING DIAGRAM ............................................................................................. 2-1
2.2
SCHEMATIC DIAGRAM ..................................................................................... 2-3
2.3
PARTS LOCATION ............................................................................................ 2-11
2.4
EXPLODED VIEW AND PARTS LIST ............................................................... 2-15
2.5
ELECTRICAL PARTS LIST ............................................................................... 2-17
Please use this service manual with referring to the user guide (D.F.U) without fail.
STANDBY
STANDBY
POWER
SOURCE
REC TYPE
REC
STOP
PLAY/PAUSE
ERASE
FINALIZE
OPEN/CLOSE
TABLE OF CONTENTS
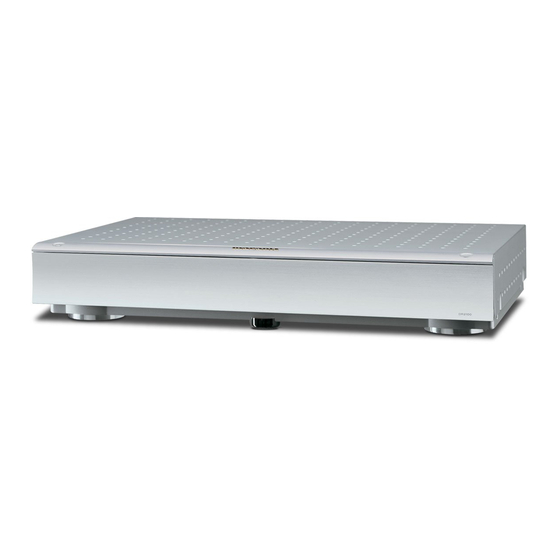
DR2100
DR2100/
OPEN/CLOSE
OPEN/CLOSE
OPEN/CLOSE
STOP
PLAY/PAUSE
DISPLAY
MENU/STORE
CANCEL/DELETE
PROGRAM
N1S, /C1S
CD Recorder
MULTI JOG
+
PUSH
ENTER
399K855010 AO
3120 785 22510
First Issue:2001.03
Advertisement
Table of Contents

Related Manuals for Marantz DR2100


Summary of Contents for Marantz DR2100
- Page 1 PROGRAM REMARK : This service manual explains them by extracting specifications designed for the model DR2100 only. The explanation for CD-R module “MAR775” ( Loader : CDL4009’ + CD-R Main board ) is not mentioned on this seevice manual. The CD-R module information is described in the service manual of CD-R modules <MAR770/MAR775>.
- Page 2 MARANTZ Parts for your equipment are generally available to our National Marantz Subsidiary or Agent. ORDERING PARTS : Parts can be ordered either by mail or by Fax.. In both cases, the correct part number has to be specified.
-
Page 3: Mar1250 ( Cd Module )
1. Servicing the DR2100 1.1 INTRODUCTION: The DR2100 is the consumer version of a CD recorder, this means that the SCMS (Serial Copy Management System) is included. The DR2100 can only record on the Audio CDRs (Consumer Use). The DR2100 is suitable for recording and playback of CD-R W discs (CD-Re Writable disc). - Page 4 This PCB contains the Power SW, which is jointed the Power bottom on the front panel. This PCB consists of power supply part. The power suppluy part delivers the several voltages for the diffrent PCB in the DR2100. On this power supply one fuse (primary side) is mounted on this PCB.
-
Page 5: Technical Specification
2 TECHNICAL SPECIFICATIONS GENERAL System ....................Compact disc digital audio Number of channels ................2 (stereo) Applicable discs ..................CD, CD-R (digital audio), CD-RW (digital audio) Power Requirement ................AC 110 V - 240V 50 / 60 Hz Power Consumption ................20 W Operating Temperature . -
Page 6: Warnings
3. WARNINGS WARNING WAARSCHUWING All ICs and many other semiconductors are susceptible to Alle IC´s en vele andere halfgeleiders zijn gevoelig voor electrostatic discharges (ESD). Careless handling during electrostatische ontladingen (ESD). repair can reduce life drastically. Onzorgvuldig behandelen tijdens reparatie kan de levensduur When repairing, make sure that you are connected with the drastisch doen vermindern. - Page 7 4. SERVICE HINTS AND TOOLS SERVICE TOOLS The tools listed below are standard test tools that can be used for repairing and testing Marantz CD Players & Recorders. Audio signals disc 4822 397 30184 Disc without errors (SBC444)+ Disc with DO errors, black spots and fingerprints (SBC444A)
-
Page 8: Service Mode
5. SERVICE MODE The plug is in the socket Turn off the POWER Press<POWER>while pressing <ENTER>and<PLAY/PAUSE> of CD player Press<ENTER>and<PLAY/PAUSE> of CD Player “SERVICE_1” is displayed Press< > STANDBY LED Light on RED Version of MAIN -COM is displayed “POWER_LED” is displayed “VER ”... -
Page 9: Diagnostic Software
DIAGNOSTICS SOFTWARE Dealer mode 6.2.2 Requirements to perform the test Working keyboard to start up the test. The purpose of the dealer mode is to prevent people taking out Working local display to check the output messages. the CD inside the player at exhibitions, showrooms etc.. This mode disables the open/close function of the player. - Page 10 Electrical service diagnostics ELECTRICAL SERVICE DIAGNOSTICS (software versions, test for defective components) If power ON, switch power OFF Load CD-DA disc (SBC444A) Press <ENTER> + <CD STOP> simultaneously and switch ON unit LOADER TESTS PLAYER INFORMATION CDR LOADER TEST Display : ABORT TEST CD-DA disc must be loaded "PLAYER ID"...
- Page 11 Switching off the unit ends These tests determine if the CDR loader and the CD loader in the test. In case of a DR2100, one can check the CD loader case of a DR2100 work correctly. A CD-DA disc with a mechanics in the same way by pressing the above key minimum of 3 tracks needs to be inserted in both loaders.
- Page 12 6.4.2 Requirements to perform the test 6.5.1 Description Working keyboard to cycle through the tests and to start up This test is initiated by pressing [ENTER] and [MENU/STORE] the test. simultaneously while switching on the unit. The player will Working local display to check the output messages. erase a complete CD-RW disc (including PMA and ATIP lead out area) at speed N=2.
-
Page 13: Faultfinding Trees
Faultfinding trees CDR-Module (MAR775) NO DISC LOADED SWITCH ON POWER CHECK: MAINS, MAINS CABLE POWER SUPPLY (SEE FAULT FINDING GUIDE PSU) WIRING ON/OFF SWITCH FUSES VOLTAGES DISPLAY (SEE FAULT FINDING GUIDE DISPLAY BOARD) DISPLAY? WIRING SUPPLY VOLTAGES CLOCK SIGNAL 8MHz CONTROL SIGNALS KEYBOARD STANDBY LED... - Page 14 CD-DA DISC LOADED CHECK: WIRING POWER SUPPLY VOLTAGES DISC ELECTRICAL SERVICE DIAGNOSTICS: DETECTION & READING? REPLACE CDR MODULE IF "DERRn" OR "BERRn" ERROR OCCURS CHECK: DISC: DIRT, SCRATCHES, DAMAGED... DISPLAY: ELECTRICAL SERVICE DIAGNOSTICS: “CD” & REPLACE CDR MODULE IF "DERRn" T.O.C.
- Page 15 CD-R DISC LOADED CHECK: DISC WIRING DETECTION & POWER SUPPLY VOLTAGES READING? ELECTRICAL SERVICE DIAGNOSTICS: REPLACE CDR MODULE IF "DERRn" OR "BERRn" ERROR OCCURS CHECK: DISPLAY: DISPLAY: DISC: DIRT, SCRATCHES, DAMAGED... “CD R” & “CD” & ELECTRICAL SERVICE DIAGNOSTICS: OPC INFO? T.O.C.
- Page 16 CD-RW DISC LOADED CHECK: DISC WIRING DETECTION & POWER SUPPLY VOLTAGES READING? ELECTRICAL SERVICE DIAGNOSTICS: REPLACE CDR MODULE IF "DERRn" OR "BERRn" ERROR OCCURS CHECK: DISPLAY: DISPLAY: DISC: DIRT, SCRATCHES, DAMAGED... “CD RW” & “CD” & ELECTRICAL SERVICE DIAGNOSTICS: OPC INFO? T.O.C.
-
Page 17: Faultfinding Guide
CD Module CD MODULE NO DISC POWER ON CHECK FLEX CONNECTION FROM CDR MAIN BOARD POWER SUPPLY +5V, +12V AT TESTPOINTS 28 AND 27 +5V AT CONN. 1000 PINS 1 AND 3 +5V AT IC7005 PIN 14 +3V3 AT IC7000 PINS 5,17,21,57, CHECK SAFETY RESISTORS DISC +5V AT IC7020 PIN 25 DETECTION... - Page 18 CD MODULE PLAYBACK PRESS <PLAY> DAC 7309 TESTPOINTS 20, 21, 22 : I 2 S AT INPUT OF DAC 7309 CHECK POWER SUPPLY PINS 4, 13 CHECK CLK11 AT PIN 6 : 11.2896MHz AUDIO? PIN 11 : MUTE HIGH? TESTPOINTS 23, 24 : ANALOG OUTPUT? REPLACE DAC 7309 OPAMP 7120 TESTPOINTS 23, 24 : ANALOG OUTPUT?
- Page 19 -COM DESCRIPTION Faultfinding Guide Pin Configuration Pin PORT SIGNAL DESCRIPTION P20/A16 LCD_DIM LCD back light of DIMMER Control See DIMMER Control Display Board P21/A17 LCD_BL LCD backlight ON/OFF See DIMMER Control P22/A18 POWER_LED Power ON LED Active H P23/A19 STB_LED Standby LED Active H 8.1.1...
- Page 20 Block Diagram NJU6450A Page Address Register I / O Buffer Page Address Decoder ~SEG ~COM Line Decoder Line Counter E (RD) Common Displey Timing Timing R/W (RD) Staet Line Register Generator Generator Pin Configuration NJU6450A...
- Page 21 IR receiver - remote control As clock driver for the display controller, a resonator of 8 MHz In the DR2100 the IR receiver RPM6934 (ZY83, ZY84) is (XY01) is used. The signal can be measured at pins 8 and 9 of mounted on the display board.
- Page 22 8.1.3 Display board troubleshooting guide SWITCH POWER ON, EXIT STAND BY MODE CHECK : SUPPLY VOLTAGES 5 % at conn. JU04-1 DISPLAY? CLOCK SIGNAL 8Mhz at pins 82, 83 of QU01 CONTROL SIGNALS RESET IN 3V3 (high) at conn. JU02-4 after start up I2C DATA at conn.
- Page 23 The microprocessor controls the CD10 and is slave of the mechanism MAR1250 and a loader 1250. The CDM delivers master processor on the CDR main board in the DR2100. Both diode signals and an unequalised high frequency signal. These processors communicate via a DSA connection (data, strobe signals are necessary inputs for the decoder CD10.
- Page 24 Connect on pin 2 of position 1208 a clock signal of 8.4672 MHz ( 100ppm minimum rise time of 50ns and at TTL level CDM V AM1250 Loader assy (0V and +5V). HF amp. Keep microprocessor 7202 in reset by forcing pin 7 at Trig enta Diode signals position 1208 to +5V.
- Page 25 Pin Configuration Location Value DC 5.8V ± 10% 7022 7022 5.8V SBSY 7022 5.8V HFREF SFSY 7022 5.8V HFIN 7021 5.8V ISLICE 7021 5.8V SSA1 7021 TRAY- 5.8V TEST3 DDA1 7021 TRAY+ 5.8V STATUS CL96532086_054.eps SILD 080999 SAA7324 Figure 8-12 RESET 8.3.5 BA6856FP Turn Table Motor Driver (7020) SCLI...
- Page 26 Motor controller truth table Input conditions conn 1006 pin Outputs conn 1006 Test points on driver UCOIL VCOIL WCOIL HALL_U HALL_V HALL_W CL96532086_055.eps 080999 Figure 8-13 Hall-elements input signal voltage levels Input voltage Level Tolerance Unit CL96532086_056.eps 080999 Figure 8-14 8.3.6 Tray Control Description...
- Page 27 8.3.7 HF Path another amplification and filtering circuit. The filtering again is controlled by the S1 and S2 lines, dependant on whether the disc starts up (speed n=1, S1 and S2 Low), disc plays at speed Description n=1 (S1 Low, S2 High) or disc plays at speed n=2 (S1 and S2 The pre-amplified HF-signal is presented to both n=1 and n=2 High).
- Page 28 Transfer Characteristics function generator as a sine wave generator with output level Set the power and reset connections as described above in of 1Vtt. Check this AC value with an AC mV-meter connected "1.1.1. Supply Voltages". Connect a function generator via a to the input (pin 2) of the CD10 (7000) : serial resistor of 1k5 to pin 4 of connector 1000.
- Page 29 Measurements 1200 - 17 AMPLIFIER CLK11 1200 - 19 NMUTE CL96532086_062.eps 080999 Figure 8-20 Keep processor 7202 in reset by forcing pin 7 of connector 1208 to +5V. This puts the processor outputs in tristate. Check the reset at pin 4 of processor 7202 to make sure that the processor is in reset.
-
Page 30: Wiring Diagram
9. WIRING DIAGRAM DISMOUNTING ADDITIONAL CABLES De-soldering and remove cables W651 from the loader PCB. W651 REMARK When replace the CDR module MAR775 to + side 2430 the new one. It is necessary to add removed cables at same positions as follows; + side 2424 .. - Page 31 SIGNALS OF EACH WIRES W851(J851 TO CDR MODULE) WU04(J852 TO JU04) WU10(JY10 TO JU10) DOOR 1 +5V 1 +5V 1 PULSE 2 GND 2 PULSE 3 STANDBY 3 KEY 4 GND 4 GND 4 GND WY02 5 +5V 5 +12V 6 +5V WU01(JY01 TO JU01) 7 GND...
-
Page 32: Block Diagram
10. BLOCK DIAGRAM CDR MAIN BOARD CDL 4009 J851 POWER SUPPLY J853 LOADER ASSY 2 WIRES 7703 BOARD 7330 CDM3800 1500 1330 FLASH HALL +12N 11 WIRES DRIVE, HALL FEEDBACK MOTOR FRONT BOARD FLEX 11P DRIVER BA6856FP LCD DISPLAY TURN ADDRESS DATA KEYS... -
Page 33: Schematic Diagram And Parts Location
11. SCHEMATIC DIAGRAM AND PARTS LOCATION RY22 RY24 2.2K RY17 SEG20 FROM RY18 WY02 SEG20 SEG21 FRONT DOOR SEG21 RY19 SEG22 SEG22 OPTION WY01 SEG23 SEG23 RY20 SEG24 SEG24 SEG25 SEG25 RY21 SEG26 SEG26 SEG27 SEG27 RY23 RY25 CY02 SEG28 QY01 SEG28 OPTION... - Page 34 P816 L831 HEAT SINK Q851 5.2V SI-3050 L820 C825 D802 R825 R851 470pF S1WB /400V C819 3.9V 0.01 C859 L856 250V D856 5.0V 47/16V C822 C826 RK46 6.8UH R821 R822 R819 470pF 5.92V 0.047u R852 1M(CB) /400V C821 R826 /400V C857 J851 C856...
- Page 35 QN58 QN57 Q701 Q651 QM01 QU13 QU01 QY13 QY14 QU10 QU03 QU02 QN56 QN55 QN52 QN51 Q311 QU12 QU09 QU08 QU05 QU04 PU16 CDR/CD QU06 OUTPUT JU02 CDR MECHA RU42 JU07 STANDBY PP16 QU10 RU24 XY01 CU24 RU25 RU43 RU65 RU66 CM04 JU06...
-
Page 36: Exploded View And Parts List
12. EXPLODED VIEW AND PARTS LIST 5127 3x8(K) x2 Z001 5127 J804 5127 3x8(K) x2 3x8(K) x2 P826 N ONLY 5128 001D 3x8(A) x2 J801 5128 P816 5110 5128 3x8(A) x2 3x6(A) 3x8(A) x2 040G 001M 5127 021L~025L 5128 3x8(K) x2 3x8(A) x2 PP16 5110... - Page 37 327J010110 070B 9965 000 08210 LCD WINDOW 399K158010 080B 9965 000 08211 IR LENS FOR FRONT PANEL 327J355030 089B 9965 000 08212 MARANTZ BADGE 327J251110 090B 9965 000 08213 POWER BUTTON 399K270010 095B 9965 000 08214 EASY JOG KNOB 399K154010...
- Page 38 13. ELECTRICAL PARTS LIST NOTE ON SAFETY FOR FUSIBLE RESIST OR : ASSIGNMENT OF COMMON PARTS CODES. RESISTORS The suppliers and their type numbers of fusible resistors are as 1) GD05 x x x 140, Carbon film fixed resistor, 5% 1/4W follows ;...
- Page 39 VERS. VERS. POS. PART NO. POS. PART NO. PART NO. PART NO. DESCRIPTION DESCRIPTION COLOR (PCS) COLOR (PCS) (MJI) (MJI) PP16-MAIN AUDIO LF51 4822 242 80418 CORE BL02RN2-R62T2 FC90050130 CIRCUIT BOARD FERRITE BEAD PP16-CAPACITORS LF52 4822 242 80418 CORE BL02RN2-R62T2 FC90050130 CF51 4822 126 10408 CER.
- Page 40 VERS. VERS. POS. PART NO. POS. PART NO. PART NO. PART NO. DESCRIPTION DESCRIPTION COLOR (PCS) COLOR (PCS) (MJI) (MJI) RU12 4822 051 30101 CHIP 5% 1/16W NN05101610 RY09 4822 116 83819 5% 1/16W NN05183610 RU13 4822 051 30153 CHIP 5% 1/16W NN05153610 RY10...
- Page 41 VERS. PART NO. VERS. POS. POS. PART NO. PART NO. PART NO. DESCRIPTION DESCRIPTION COLOR COLOR (PCS) (PCS) (MJI) (MJI) ZY83 4822 130 11494 PHOTO UNIT IR SENSOR HW10004210 P816-RESISTORS(COMMON) RPM6936-V4 CARBON FILM FIXED RES. 5% 1/6W : R827 R829 PY66-IR SENSOR R851-R854 R861 R862 R871 CIRCUIT BOARD...
-
Page 42: Table Of Contents
Service MAR1250 Manual CD Module TABLE OF CONTENTS SECTION PAGE 2. MAR1250 ( CD MODULE ) 2.1 WIRING DIAGRAM ..........................2-1 2.2 SCHEMATIC DIAGRAM ........................2-3 2.3 PARTS LOCATION ........................... 2-11 2.4 EXPLODED VIEW AND PARTS LIST ....................2-15 2.5 ELECTRICAL PARTS LIST ....................... 2-17 Please use this service manual with referring to the user guide ( D.F.U. - Page 44 2.1 WIRING DIAGRAM CD LOADER VAL1250 CONNECTOR 1006 CONNECTOR 1002 Connection tray motor and tray switch HALL + HOMESW SGND TRAY+ TRAY- HALL- LOADER VAL1250 CONNECTOR 1001 Tray HOMESW 1002 switch UCOIL SGND To main board CDR 10 VCOIL 1208 11 WCOIL CDM VAM1250 Flex from OPU...
-
Page 45: Schematic Diagram
2.2 SCHEMATIC DIAGRAM CD Diagram 1A 1000-1 C1 1000-7 H1 2148 C1 2159 D1 3164 B15 3178 C8 7006 D3 7130 H15 F151 C13 F174 E7 F190 H14 F321 G12 1020 G10 2169 F8 2183 F3 2232 H13 3187 D2 3196 E6 3205 E7 3219-C G13... - Page 46 CD diagram 1B 1000-13 E1 F100 F3 1000-14 E1 F101 F1 1000-15 D1 F102 A11 1000-16 D1 F103 A2 CD MAIN BOARD - CIRCUIT DIAGRAM 1B 1001 B1 F104 F4 1002 A1 F105 A11 1005 F5 F106 F1 SERVO DRIVERS PART 1006-1 F1 F107 A2 1006-10 G1...
- Page 47 CD diagram 1C 1208-10 C11 F325 G10 1208-11 C11 F329 G10 1208-12 D11 F350 G7 1208-13 D11 F351 G7 CD MAIN BOARD - CIRCUIT DIAGRAM 1C CONN. 1208 : TO CDR MAIN BOARD 1208-14 A11 F352 G7 1208-2 B11 F353 H10 CONN.
- Page 48 CD diagram 2 1205 F7 1206 D12 1207 E12 VPROC VPROC VPROC 3999 CD MAIN BOARD - CIRCUIT DIAGRAM 2 1208-1 E13 1208-15 E13 VPROC VPROC VPROC VPROC 1208-16 D13 MICROPROCESSOR PART 1208-17 E13 1208-18 I13 1208-19 H13 1208-20 I13 1208-21 I13 1208-7 G13 F200...
-
Page 49: Parts Location
2.3 PARTS LOCATION CD top CD MAIN BOARD - TOP VIEW CL 96532086_019.eps 080999 2-11 2-12... - Page 50 CD bottom CD MAIN BOARD - BOTTOM VIEW CL 96532086_020.eps 080999 2-13 2-14...
- Page 51 2.4 EXPLODED VIEW CD LOADER VAL1250 CLAMPER ASSY SUSPENSION RACK SPRING CDM VAM1250 SCREW MOTORSPRING SCREW SUSPENSION RACK SUB CHASSIS RUBBER RUBBER SWITCH SUSPENSION RUBBER SUSPENSION PLUG RUBBER TRAY GEARWHEEL PLUG CHASSIS ASSY VAL1250 TULE CD Loader VAL1250 RACK GEARWHEEL 0001 3104 147 14100 CHASSIS ASSY LOADER VAL 1250 BELT...
-
Page 52: Electrical Parts List
2.5 ELECTRICAL PARTS LIST 2-17... - Page 53 2-18...
Need help?
Do you have a question about the DR2100 and is the answer not in the manual?
Questions and answers