
Related Manuals for Stirling TAC-09CHSA/JAI5


Summary of Contents for Stirling TAC-09CHSA/JAI5
- Page 1 Reverse Cycle Inverter Split System Air Conditioner Model Number TAC-09CHSA/JAI5 INSTALLATION MANUAL After Sales Support Telephone: 1300 886 649 Email: info@tempoaustralia.com.au...
-
Page 2: Table Of Contents
Contents Warranty Details Welcome General Safety Instructions Product Overview Selecting the Installation Place Installation Information for the Installer Other Useful Information After Sales Support Telephone: 1300 886 649 Email: info@tempoaustralia.com.au... -
Page 3: Warranty Details
Reverse Cycle Inverter Split System Air Conditioner Warranty Details The product is guaranteed to be free from defects in workmanship and parts for a period of 60 months from the date of purchase. Defects that occur within this warranty period, under normal use and care, will be repaired, replaced or refunded at our discretion, solely at our option with no charge for parts and labour. -
Page 4: Welcome
Welcome Congratulations on choosing to buy a STIRLING ® product. All products brought to you by STIRLING ® are manufactured to the highest standards of performance and safety and, as part of our philosophy of customer service and satisfaction, are backed by our comprehensive warranty. We hope you will enjoy using your purchase for many years to come. -
Page 5: General Safety Instructions
PROTECT YOUR WARRANTY These installation instructions for the TAC-09CHSA/JAI5 STIRLING Reverse Cycle Inverter Split System Air Conditioner are for use by an appropriately qualified installer. Do not try to install the air conditioner on your own; doing so will expose you to danger and void the warranty. -
Page 6: Product Overview
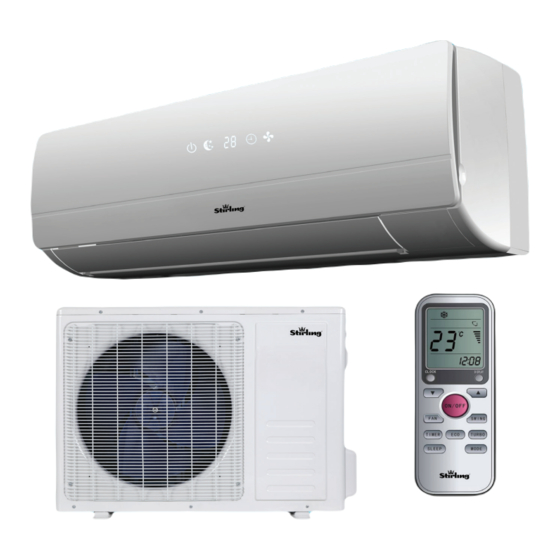
Product Overview • This Inverter Split System Air Conditioner (9000 BTU) is made up of an indoor and outdoor unit (as pictured below), which are connected through copper pipes (properly insulated) and an electrical connecting cable. • The indoor unit is installed on a wall of the room to be air conditioned. •... -
Page 7: Selecting The Installation Place
PROTECT YOUR WARRANTY These installation instructions for the TAC-09CHSA/JAI5 STIRLING Reverse Cycle Inverter Split System Air Conditioner are for use by an appropriately qualified installer. Do not try to install the air conditioner on your own; doing so will expose you to danger and void the warranty. -
Page 8: Outdoor Unit
Selecting the Installation Place (Cont.) Outdoor unit • Do not install the unit: • Near sources of heat, steam or flammable gas. • Where it is exposed to high winds or excessive dust. • Where people often pass. • Avoid installing the unit where it will be exposed to direct sunlight (otherwise use a protection, if necessary, that will not interfere with the airflow). -
Page 9: Installation
Installation Installation of the indoor unit • Before starting installation, decide on the position of the indoor and outdoor units, taking into account the minimum space required around the units. • Install the indoor unit in the room to be air conditioned, avoid installation in corridors or communal areas. -
Page 10: Refrigerant Piping Connection
Installation (Cont.) Electrical connections for the indoor unit • Lift the front panel. • Take off the cover as indicated on the right (by removing a screw or breaking the hooks). • For the electrical connections, see the circuit diagram on the right part of the unit under the front panel. - Page 11 Installation (Cont.) Connecting the pipes • Do not remove the cap from the pipe until connecting it, to avoid dampness or dirt from entering. • If the pipe is bent or pulled too often, it will become stiff. Do not bend the pipe more than three times at one point.
- Page 12 Installation (Cont.) After having connected the pipe according to the instructions, install the connection cables, then the drain pipe. After connection, lag the pipe, cables and drain pipe with the insulating material. pipes, cables and drain hose well. • Arrange the •...
-
Page 13: Installation Of The Outdoor Unit
Installation (Cont.) Installation of the outdoor unit • The outdoor unit should be installed on a solid wall and fastened securely. • Before connecting pipes and cables, decide on the best position on the wall, leaving enough space for easy maintenance. •... - Page 14 Installation (Cont.) Connecting the pipes Screw the flare nuts to the outdoor unit coupling with the same tightening procedures described for the indoor unit. To avoid leakage, pay attention to the following points: • Tighten the flare nuts using two wrenches, taking care not to damage the pipes.
- Page 15 Installation (Cont.) • With the vacuum pump still in operation, close the low-pressure knob on the vacuum pump coupling. Stop the vacuum pump. • Open the 2-way valve by ¼ turn and then close it after 10 seconds. Check all the joints for leaks using liquid soap or an electronic leak device.
- Page 16 Installation (Cont.) Final stage ind insulating covering around • W the joints of the indoor unit and fix it with insulating tape. • Fix the exceeding part of the signal cable to the piping or to the outdoor unit. • Fix the piping to the wall (after having coated it with insulating tape) using clamps, or insert them into plastic slots.
-
Page 17: Information For The Installer
Information for the Installer Pipe details Inverter Split System Air Conditioner Capacity 9000BTU Liquid pipe diameter 6mm (1/4”) Gas pipe diameter 9.52mm (3/8”) Length of pipe with standard charge Type of refrigerant R410A Tightening torque for protection caps and flange connection Pipe diameter Tightening Corresponding... - Page 18 Information for the Installer (Cont.) Cable wires specifications Model Capacity (BTU/hr) Sectional Area 1.0mm AWG18 1.0mm Power Supply AWG18 Cable 1.0mm AWG18 1.0mm 1.0mm Connection 0.75mm Supply Cable 0.75mm 0.75mm Inverter Type Model Capacity (BTU/hr) Sectional Area 1.0mm (1.5mm AWG18 (AWG16) 1.0mm Power Supply...
-
Page 19: Other Useful Information
Other Useful Information (Cont.) Responsible disposal • Packaging materials are recyclable. Please dispose them responsibly for recycling. • At the end of its working life, do not throw this appliance out with your household rubbish. Electrical and electronic products contain substances that can have a detrimental effect on the environment and human health if disposed of inappropriately. - Page 20 After Sales Support Telephone: 1300 886 649 Email: info@tempoaustralia.com.au...
Need help?
Do you have a question about the TAC-09CHSA/JAI5 and is the answer not in the manual?
Questions and answers