Table of Contents
Advertisement
Quick Links
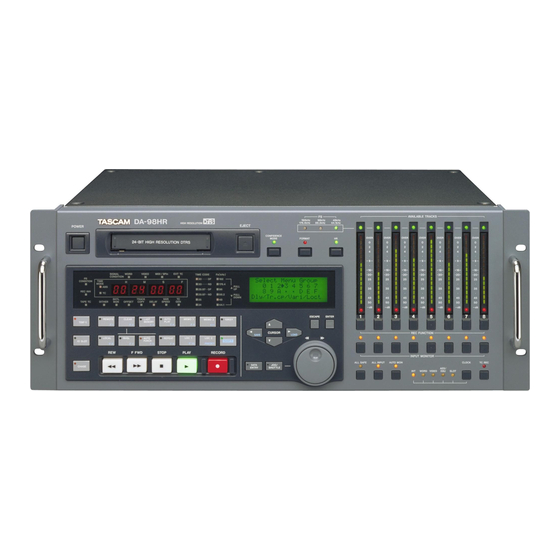
DA-98HR
Digital Multitrack Recorder
Ü
The lightning flash with arrowhead symbol, within an equilateral triangle, is intended to alert
ÿ
the user to the presence of uninsulated "dangerous voltage" within the product's enclosure
that may be of sufficient magnitude to constitute a risk of electric shock to persons.
The exclamation point within an equilateral triangle is intended to alert the user to the pres-
Ÿ
ence of important operating and maintenance (servicing) instructions in the literature
accompanying the appliance.
This appliance has a serial number
located on the rear panel. Please record
the model number and serial number
and retain them for your records.
Model number
Serial number
OWNER'S MANUAL
CAUTION: TO REDUCE THE RISK OF ELECTRIC SHOCK, DO NOT
REMOVE COVER (OR BACK). NO USER-SERVICEABLE PARTS
INSIDE. REFER SERVICING TO QUALIFIED SERVICE PERSONNEL.
WARNING: TO PREVENT FIRE OR SHOCK
HAZARD, DO NOT EXPOSE THIS
APPLIANCE TO RAIN OR MOISTURE.
D00539600A
Advertisement
Table of Contents

Related Manuals for Tascam DA-98HR


Summary of Contents for Tascam DA-98HR
- Page 1 D00539600A DA-98HR Digital Multitrack Recorder OWNER’S MANUAL CAUTION: TO REDUCE THE RISK OF ELECTRIC SHOCK, DO NOT Ü REMOVE COVER (OR BACK). NO USER-SERVICEABLE PARTS INSIDE. REFER SERVICING TO QUALIFIED SERVICE PERSONNEL. The lightning flash with arrowhead symbol, within an equilateral triangle, is intended to alert ÿ...
- Page 2 Für Kunden in Europa Warnung Dies is eine Einrichtung, welche die Funk-Entstörung nach Klasse A besitzt. Diese Einrichtung kann im Wohnbereich Funkstörungen versursachen ; in diesem Fall kann vom Betrieber verlang werden, angemessene Maßnahmen durchzuführen und dafür aufzukommen. TASCAM DA-98HR...
-
Page 3: Important Safety Instructions
(including amplifiers) supporting structure, grounding of the lead-in wire to an antenna discharge that produce heat. unit, size of grounding conductors, location of antenna-discharge unit, con- nection to grounding electrodes, and requirements for the grounding elec- trode. TASCAM DA-98HR... -
Page 4: Table Of Contents
Table of Contents 1 – Introduction to the DA-98HR 4.3.1 To assign a menu screen to a key....25 4.3.2 Recalling an assigned menu function..25 1.1 Unpacking .............7 4.4 Using the function keys as number keys... 25 1.2 Features............7 1.3 Using this manual.........8 5 –... - Page 5 9.7.1 Video reference setting .........68 8.4.2 Cancelling machine offset......52 8.4.3 Setting machine offset “on the fly” ....52 10 – External control 8.4.4 An example of setting offsets .......52 10.1 Selecting the control source (protocol) ..69 8.4.5 Clock mode.............53 TASCAM DA-98HR...
- Page 6 10.4.1 Assigning a MIDI and Bus ID to the DA-98HR ...............72 13 – Options/specifications/reference 10.5 MIDI Machine Control .........72 13.1 DA-98HR options ........88 10.5.1 MMC and the DA-98HR ........72 13.1.1 Accuride® mounting........88 13.1.2 Remote control units (RC-898, RC-848 11 – Menu and parameter reference and RC-828) ............88 11.1 Menu groups ..........74...
-
Page 7: Introduction To The Da-98Hr
TASCAM can make no guarantee that the 440Hz for tuning and 1kHz for lineup purposes DA-98HR by itself will assure the quality of the recordings • Digital input and output in TDIF-1 format on a sin- you make. Your skill as a technician and your abilities as an gle convenient compact D-sub connector artist will be significant factors in the results you achieve. -
Page 8: Using This Manual
Using this manual 12, “Maintenance and settings”: Read this section to learn how to maintain the DA-98HR in top condi- We suggest that you take the trouble to read this man- tion, as well as to store and retrieve settings for fur- ual through at least once before starting to use the ther use. -
Page 9: Clock Source In A Digital Studio
NOTE unit in your setup, you should note that all units must If you need to clean the DA-98HR, use a soft cloth, moist- be driven by the same central clock source (“word ened if necessary with a little detergent and water. Do not use abrasive cleaners or solvents such as alcohol or clock”... -
Page 10: Condensation
They have a durability which allows them to be used as If you use the DA-98HR in a warm place after mov- work tapes in studio and post-production ing it from a cold place (for instance, recording on environments. -
Page 11: Tape Brands
DTRS machines, as the machine will detect the thickness of tape and automatically eject any tape thinner than recommended. Never attempt to use a tape with the DA-98HR that has previously been used in video equipment. NOTE You cannot cut and splice DTRS 8mm tapes for editing pur- poses. -
Page 12: Front And Rear Panels
1 Power switch cator allow selection and viewing of the status of this monitoring mode. Turns the power to the DA-98HR on and off. When the DA-98HR is turned off, settings will be retained For a full explanation of confidence monitoring, see in memory (12.3, “Memory backup”). -
Page 13: Display Screen
It goes out when all The status indicators show the current status of vari- inputs are “normalled”. ous DA-98HR functions. The legends of these indi- D AES/EBU key and indicator cators are abbreviated for reasons of space. Here is a... - Page 14 When this key is pressed (the indicator lights), the O LOC 1 (F10) key DA-98HR will automatically start playing as soon as a preset location point has been reached (7.1, This key locates the tape to the position set by MEMO “Autolocation”).
- Page 15 Starts playing the tape. If this key pressed while menu parameter value, and turning it counter-clock- recording is in progress, the DA-98HR drops out of wise decrements the value. record mode. When the...
- Page 16 For a full treatment of monitoring modes on the DA- subcode track of the DA-98HR. No audio track is 98HR, see 5, “Monitoring modes”. needed to record timecode. For full details of time- code operation, see 9, “Operations related to time-...
-
Page 17: Rear Panel Connectors
DA-98HRto the AES/EBU devices. BNC connectors are used to carry video VIDEO q MIDI IN/OUT/THRU frame sync signals when the DA-98HR is used with video equipment. The self-terminating con- THRU These connectors carry MIDI Time Code (MTC) and nector echoes messages received at the MMC (MIDI Machine Control) commands. - Page 18 AUX 1 SERIAL IN STOP – This is used to connect another DTRS unit in the “daisy-chain” or, if this DA-98HR is the last unit in – the chain, to attach a termination plug. AUX 2 – u TDIF-1 (DIGITAL I/O) CHASE –...
-
Page 19: Connections
This section explains how to connect other equip- Before starting to make the cable, we suggest you ment to the DA-98HR in a variety of situations. It is contact your TASCAM dealer for full details of cable not intended as a complete reference to the use of the specifications, etc. -
Page 20: Synchronization Connections
VIDEO a.High speed b.Dual line THRU connector. If the DA-98HR is the last unit in the chain of video Synchronization equipment, there is no need to terminate it, as this circuit is self-terminating. connections For details of how the DA-98HR can be synchro- nized to video frame information, see 9.7, “Video... -
Page 21: Control Connections
(either digital or other controllers or editors which will control the analog). DA-98HR using the Sony P2 protocol, or a bus pro- If more than one DTRS unit is to be used, the first tocol. See 10, “External control” for details. -
Page 22: Meter Unit (Mu-8824)
Meter unit (MU-8824) The optional MU-8824 external meter bridge unit can be connected using a PW-88M cable from the METER UNIT connector . You do not need to make any settings on the DA-98HR when connecting the meter unit. TASCAM DA-98HR... -
Page 23: Menu Operations
You can now change the values ENTER of that parameter. The DA-98HR has fifteen menu groups, labeled from 0 through 9, and A, B, D, E and F. These are referred 4.1.3 The ESCAPE key to in this manual as “menu group 0”, menu group E”,... -
Page 24: Resetting A Menu Value
It is also possible to use the dial to change values. This can be a convenient way of making larger 1 Go to menu group 7, move the cursor to changes to numeric values. FunctMode and press ENTER TASCAM DA-98HR... -
Page 25: The Shift Key And Function Keys
It is quite likely that you will find yourself using a is used to change the sign of numeric entries few of the same menu functions many times (for where appropriate. instance, manual adjustment of punch points) and TASCAM DA-98HR... - Page 26 ENTER flashes. The bottom line of the display stops blinking and the indicator stops flashing. 10KEY 7 You can also use the § and ¶ keys (or the dial) to adjust the value you have just entered. TASCAM DA-98HR...
-
Page 27: Monitoring Modes
This depends on the AUTO MON switch settings, and on the REC FUNCTION Like all multitrack recorders, the DA-98HR has a transport mode currently engaged. number of different monitoring modes, depending on the current monitor status, transport status and whether the track is armed or not. -
Page 28: Patching The Outputs
NOTE Note that this routing function only allows rerouting For this reason, the DA-98HR includes a confidence between tracks of the same sampling frequency. It is not mode which permits off-tape monitoring on a track- possible, for instance, to assign a double-frequency track to by-track basis while recording is in progress. -
Page 29: Arming Tracks In Pairs
The indicator will light steadily. to the DA-98HR, to ensure the quality of the transfer. Another use for the confidence mode is when you are If you do not press the CONFIDENCE MODE recording using dither (7.12, “Dither”). -
Page 30: Selecting The Mixdown Sources
TDIF(dubbing) frequencies, or cable not connected , if a TDIF digital source has been selected, but is not properly connected or switched on. If such an error message appears, press the ESCAPE and correct the settings. TASCAM DA-98HR... -
Page 31: Basic Operations
NOTE 6.1.3 Clock range with slot board In the case of a setup where the DA-98HR is the only digi- When the IF-AN98HR optional slot boards are fitted, tal device in the system (connected to the analog mixing it is possible to select the internal PLL clock source console through the optional IF-AD98HR analog I/O slot (and hence the clock range) for these boards. -
Page 32: Formatting A Tape
Formatting a tape — — — — — — — — — — Before you use a tape in the DA-98HR, you must base base — — — first format it. This marks internal synchronization base base base base —... -
Page 33: Aborting The Format Process
AES/EBU input and has been selected as a record- ing source, the DA-98HR’s base recording and playback Recording the first tracks sampling frequency is automatically determined by the sampling frequency of the input signal and you cannot change it. -
Page 34: Preparing To Record
The DA-98HR has two built-in digital input sources: tracks. for AES/EBU and TDIF-1 format data. Each of these With a digital recorder such as the DA-98HR, track connectors can accept and output eight channels of crosstalk is almost negligible (better than 90dB at base-frequency audio. -
Page 35: Recording The Basic Tracks (Ii)
Punch-in and punch-out Though it is not strictly necessary, we suggest There are a number of ways in which the DA-98HR turning off the RECORD FUNCTION on all can be used to perform reliable punch-in and punch-... -
Page 36: Overview Of Punch Procedures
“on-the-fly” in real time. material is recorded at this stage (6.6.6, “Rehearsing the punch-in”). The DA-98HR provides a rehearsal mode which sim- ulates the punching process, allowing the artists to 4 When ready for the take, press the AUTO perfect the timing of the new material. -
Page 37: Setting And Editing Punch Points Using The Menus
8 After the post-roll period, the tape returns to times the pre-roll point (the punch-in point minus As shipped from the factory, the DA-98HR will posi- the pre-roll offset). tion the tape 5 seconds before the punch-in point, indicator now lights steadily, show-... -
Page 38: Rehearsing The Punch-In
4 The indicator lights steadily, AUTO PUNCH showing that the DA-98HR is now in “review” Very often while rehearsing a punch-in, you will not mode. want to run the tape all the way to the punch-out point (an entry is missed, or a mistake is made early... -
Page 39: Reviewing The Punched Material
3 You can press the key so that the AUTO MON indicator goes out and normal monitoring modes are now in effect (5, “Monitoring modes”). However, leaving the unit in AUTO MONITOR mode may be more useful while recording. TASCAM DA-98HR... -
Page 40: Advanced Operations
The display screen will indicate that the loca- location point, minus a pre-defined pre-roll time. tion memory point has been stored. As shipped, the DA-98HR’s default location pre-roll P o s i t i o n s a v e d time is 0 seconds. -
Page 41: Locating To Memo 1 And Memo 2
Once a location has been assigned to a function key, this is the procedure for location to the memory posi- tion: 1 With the function keys in “location memory” mode(4.2.1, “Function key modes”, set in menu TASCAM DA-98HR... -
Page 42: Location And Playback
How- the second location is reached. The tape then stops ever, this does not mean that the DA-98HR includes a playing, and rewinds to a little before the first point time machine! Since the monitoring head is a “vir- and starts playing again. -
Page 43: To Set The Track Delay
( The speed of recording and playback (and hence the NOTE pitch) of the DA-98HR can be adjusted to 6% above Sample always refers to the actual frequency at or below normal speed in 0.1% steps. which the selected track is being recorded. At high sam-... -
Page 44: Resetting The Speed To Standard
7.5.2 Resetting the speed to standard This is also covered in 5, “Monitoring modes”. 1 Select menu group 0, move the cursor to The default behavior of the DA-98HR is that when Vari Spd , and press ENTER shuttling the tape, you can choose whether to monitor... -
Page 45: Shuttle Muting
7 – Advanced operations–Reference levels 7.6.2 Shuttle muting NOTE Any tapes produced with the TASCAM DA-88 or DA-38 will As explained above, shuttling the tape will usually conform to the TASCAM standard. The IF-AN98HR slot allow monitoring of the tape. However, there may be... -
Page 46: Sine Oscillator
Only use TASCAM digital cables when making digital audio quency of 1kHz. connections to the DA-98HR. Other types of cable may The oscillator signal level is at the nominal signal cause damage to the system, and the warranty will be... -
Page 47: Setting The High-Frequency Aes/Ebu I/O Transfer Mode
7 – Advanced operations–REC MUTE (recording silence) length is set to 20 or 24 bits and recording at 16 bits what the DA-98HR is expecting, an appropriate mes- (non-HR). Though you will lose a little in the signal- sage will normally be shown on screen. However,... -
Page 48: Dither
(for instance 24 or 20 input bits, 7.13 Output word length as in the case of the DA-98HR) to a lower number (for instance 16 when the DA-98HR is recording in standard mode) to improve quantization. -
Page 49: Setting The Power-On Message
5 Press when all characters have been ESCAPE entered. NOTE To reset the message to TASCAM HR, move the cursor to INIT and press the ENTER key. The current message will be erased and replaced. TASCAM DA-98HR... -
Page 50: Dtrs Synchronization
In addition to control by a master DTRS unit, the a and the last slave at the tail. chain of DA-98HR and other DTRS units can be con- trolled by a remote control unit (for example, the RC- Connections are made from the... -
Page 51: Setting Machine Id
8 – DTRS synchronization–DTRS emulation Therefore, for a chain of three units; a DA-98HR as 1 On each slave unit, select menu group 3, move TimeMode master, with a DA-88 and DA-38 as slaves, the the cursor to and press machines’... -
Page 52: Machine Offset
None of these emulations provides full control of all facili- Offset menu (see above). ties available on the DA-98HR from the remote control unit. If the remote control unit does not support the DA-98HR, Machine offset is now cancelled. select DA-98 as the emulation. If the controller does not support the DA-98, select DA-88 as the emulation. -
Page 53: Clock Mode
8 – DTRS synchronization–Machine offset Another DA-98HR (the slave) has a tape with some 8.4.5 Clock mode tracks containing video backing music. It is neces- There are some circumstances where it may be nec- sary to produce an offset between the two so that... -
Page 54: Digital Dubbing
Digital dubbing master tape, into the target slave. 5 Select the digital inputs on the target slave (this SOURCE differs between models—for the DA-98HR, see MASTER 6.3.3, “Selecting input sources”). 6 Put the target slave machine into mode CHASE (8.2.3, “Master/slave settings (CHASE... -
Page 55: Recording While Formatting
TDIF-1 (DIGITAL I/O) unit that does not support the high-frequency connectorr. modes supported by the DA-98HR, so long as W A R N I N G ! any of 48 kHz, 96 kHz or 192 kHz are selected on the master unit. -
Page 56: Operations Related To Timecode
Selecting TC or ABS timing with a value of 00:00:00:00. This is the timing refer- NOTE ence used when the DA-98HR is not using SMPTE/ This procedure is fundamental to synchronization opera- EBU timecode. tions. If you select the ABS timing mode when you want to... -
Page 57: Tape Timecode Mode
(either from an external source, from the DA-98HR’s own internal generator The time you enter is the time at which the timecode or synthesized or assembled from ABS). -
Page 58: Checking Tape Tc
9.3.1 Selecting the timecode source the “synthesized” timecode and the absolute time on The DA-98HR allows you to select one of three tape, assuming that the “hours” value has been set to sources for recording timecode: the DA-98HR’s internal generator, an external source, or timecode Timecode values based on the “Tape TC”... -
Page 59: Recording Timecode Using The Generator
R u n / S t o p M o d e generator S t o p R e s e t 1 Insert a formatted tape into the DA-98HR. 9 Press the . The indicator starts TC REC to flash. -
Page 60: Recording Synthesized Timecode From Abs Timing
Tape check the frame rate, etc. especially in situations shown above. where you are using the output from the DA-98HR’s generator to stripe another tape, etc. 4 Rewind the tape to a point which already con- tains timecode to be used as the source for the 1 Go to menu group E, and move the cursor to rest of the tape. -
Page 61: Recording Timecode From An Analog Recorder
When recording timecode from an external digital source, make sure the digital clock of the DA-98HR and that of the external source are synchronized, as explained in ?????????? and ??????????. A warning message will appear if the timecode source and the DA-98HR are not synchronized, but timecode can still be recorded. -
Page 62: Checking External Timecode
This setting is not memorized in the backup memory–you When using the DA-98HR to chase to a timecode must reset it every time the DA-98HR is turned off and on master, the system frame rate on the DA-98HR must again. -
Page 63: Timecode Input
1 Go to menu group 5, move the cursor to Timing (output timecode timing) and press NOTE ENTER When the DA-98HR is in CHASE mode, and the tape time- code mode has been set to TC Track (9.2, “Tape I / O T i m i n g timecode mode”... -
Page 64: Using Midi Time Code (Mtc)
If they do not match, a warning message field for which you want to turn MTC on and will be shown, and the DA-98HR will not chase to time- off, and the § and ¶ keys to turn MTC on or code. -
Page 65: Setting Timecode Offset From The Menu
9.6.8 Automatic park position setting code will be captured and stored as the timecode off- When the DA-98HR is acting as a timecode slave, it set (either a positive or negative value). can automatically determine the optimum park pre- Note that if the words... -
Page 66: Absolute And Relative Difference
). Usually you should find that the DA-98HR does not need to rechase, however, and you can leave it in free-running mode. If the timecode master tape includes a break in the timecode, though, you may want the DA-98HR to rechase the master. -
Page 67: Bypassing Timecode Errors
3 If you select rechase move to the right field, and select a Window As explained above, if the DA-98HR is to be syn- of either seconds. chronized with a VTR, all units must share a com- mon video reference for the digital audio clocks, 9.6.11 Bypassing timecode errors... -
Page 68: Video Reference Setting
Video reference setting Auto 29.97F (the default), When syncing the DA-98HR to a video frame source, it may be useful to specify the frame rate of the video source, in order to assist the synchronization process. Auto option automatically detects and To specify this explicitly: synchronizes to the incoming video frame rate. -
Page 69: External Control
Selecting the control source 10.3.1 Video clocking (protocol) If the DA-98HR is to be controlled by a video editor, it is essential that the DA-98HR and the controller 1 Go to menu group 3, move the cursor to receive identical video signals from the same source... -
Page 70: Record Delay
10.3.4 Cue-up tally are programmed to take this into account. When the DA-98HR is in 9-pin protocol mode and a However, the DA-98HR starts recording immediately locate command is received, the transport locates to it receives the command. -
Page 71: Track Mapping
10 – External control–Use with 9-pin external control 2 Use the § and ¶ keys to select between the DA-98HR track 3, and when referring to digital track x 100 two options: 4, it is addressing DA-98HR track 8. 2 Use the § and ¶ keys to select the track map-... -
Page 72: Remote Track Arming
ID is unique in your setup. control of four tracks, this means that you cannot control the eight tracks of the DA-98HR from the You can also use the function keys as number editor, and so remote track arming should be dis- keys (4.4, “Using the function keys as number... - Page 73 MIDI OUT (2) (MMC commands) (musical data) MIDI OUT In this way, though the DA-98HR is the timecode (MTC) master, the sequencer is the transport master. The arrangement shown here uses two inputs to the sequencer. The same effect could be achieved with the intelligent use of filtering mechanisms and one input to the sequencer.
-
Page 74: Menu And Parameter Reference
10 ms through 200 ms in 10 ms steps Milliseconds 7.4, “Crossfade time” Dither off , Rectangular , Type of dither 7.12, “Dither” Triangular Rec Mute Track muting On or off for each track 7.11, “REC MUTE (recording silence)” TASCAM DA-98HR... -
Page 75: Menu Group 2
9Pin , MIDI , Bus , off Type 10, “External control” Protocol Remote Track enable , disable Enabled 10.3.8, “Remote track Arming arming” Video Reference Auto , 30F , 29.97F , 25F , Automatic or 9.7.1, “Video reference frame rate setting” TASCAM DA-98HR... -
Page 76: Menu Group 4
9.2, “Tape timecode TcTrack , ABS , ABS-Ofs mode” ABS-13 , ABS-23 a.If the ABS-Ofs (Absolute timing with offset) option is selected, the bottom line of the display changes to allow direct entry of the desired offset value. TASCAM DA-98HR... -
Page 77: Menu Group 6
7.2, “Function key loca- (Function Key) Locate Position ”, location tion memories” “ point is displayed. If the function key mode is not Locate Position ”, off “ is displayed) F. 1 through F.10 Function key Time value 00:00:00:00 Defaults to TASCAM DA-98HR... -
Page 78: Menu Group 8
7.15, “Setting the power- sage on message” Setup 1 , 2 , 3 and F (factory) Setup 12.4, “User setups in memories RAM” Load/Save Load , Save Error Mute mute , no mute enable 7.14, “Disabling auto- matic muting” TASCAM DA-98HR... -
Page 79: Menu Group A
Device Type DA-38 , DA-88 , DA-98 , Device type 8.3, “DTRS emulation” Select DA-78HR , DA-98HR AES/EBU Clock AES/EBU chan- Usually paired (1-2, etc.), but for dual- and quad- 6.1.2, “Setting the AES/ nels to be used frequency tracks, these are grouped together. -
Page 80: Menu Group D
Servo Ver display. Dr Search 12.1, “Head and trans- port cleaning” Front Ver 12.6, “Checking ver- sion numbers” Dr Total 12.1, “Head and trans- port cleaning” TASCAM DA-98HR... -
Page 81: Menu Item Index
Generate Mode Sine Oscillator Generate Start Time Sys Ver Input Board Info. Tape TC Input Patch Tape TC Mode Io Board Clk Range Tape TC Mode Level Meter Mode TC Accuracy Locate Position TC Chase Indiv. Rec Locate Pre-roll TASCAM DA-98HR... - Page 82 Menu Menu Item group TC Frame Mode TC Frame Mode TC Record Enable TC Record Source TC Timing TDIF Word Length Time Mode Timecode Offset Track Delay Time Track Mapping User bits Vari Speed Video Reference Video Resolve TASCAM DA-98HR...
-
Page 83: Maintenance And Settings
Do not attempt to rewind or fast forward the cleaning tape, NEVER use a wet-type cleaning tape, as this will result in either in the DA-98HR or in a video unit. Simply insert it into winding problems. the DA-98HR when you use it the next time. -
Page 84: Checking Error Rates
If, after trying different tapes and cleaning the heads, you tion of the difference between tape types), we suggest that still see many errors, you should contact a TASCAM ser- you clean the heads, as described here. vice technician to check your DA-98HR. -
Page 85: User Setups In Ram
There is also a preset memory bank which contains the factory settings (see below). L o a d When the DA-98HR is shipped, the contents of all 2 To load the setup memory into the current setup memories are the same; they contain the fac- memory, make sure the bottom line shows tory settings. -
Page 86: Tape Storage Of Settings
ENTER ation. The tape rewinds to the start of the ABS The DA-98HR saves the user parameters to tape code, records the settings, rewinds and verifies using the first few seconds of the tape after the ABS... -
Page 87: Checking Version Numbers
12 – Maintenance and settings–Checking version numbers 12.6 Checking version numbers In case of problems, you may need to quote the ver- sion number of the DA-98HR’s internal software components to a TASCAM representative. 1 Go to menu group F: ˘ S y s... -
Page 88: Options/Specifications/Reference
RC-848 and RC-828) below: The RC-828, RC-848 and RC-898 remote control units can be used with the DA-98HR as well as the Cable Purpose DA-78HR, DA-98, DA-88 and DA-38 DTRS record- ↔... -
Page 89: Specifications
Sampling frequency 44.1 kHz, 48 kHz, 88.2 kHz, 96 kHz, 176.4 kHz, 192 kHz Recording resolution 16/24 bits linear Error correction Double-encoded Reed-Solomon code 13.2.4 Tape recorder section Format DTRS format Recording method Rotary-head, helical-scan method Tracking method TASCAM DA-98HR... -
Page 90: Recorder Chaacteristics
MIDI functions MMC (MIDI Machine Control) Pulse (auto detect) MTC (MIDI timecode) output ± 0.2 V (Negative Sync Com- 1 V p-p, TASCAM System Exclusive (track posite Video or Sync Composite delay, etc.) Video) Control Change (mixdown) TTL Level (Frame Pulse) Supported timecode for- SMPTE 30, 29.97 drop, 29.97... -
Page 91: Mmc Bit Map Array
13 – Options/specifications/reference–MMC Bit Map Array 13.3 MMC Bit Map Array Commands unavailable on the DA-98HR are struck through, as for example (RECORD PAUSE). Byte Bit 7 Bit 6 (40H) Bit 5 (20H) Bit 4 (10H) Bit 3 (08H) Bit 2 (04H) - Page 92 RESPONSE VITC INSERT TRACK EVENT PROCEDURE SEGMENT ENABLE MUTE RESPONSE RESPONSE (6D) (6C) (6B) (6A) (69) (68) (67) (74) (73) (72) (71) (70) (6F) (6E) (7B) (7A) (79) (78) (77) (76) (75) (7F) (7E) (7D) (7C) RESUME WAIT TASCAM DA-98HR...
-
Page 93: Midi Implementation Chart
Mo d e 2 : O M NI ON , M ON O o : Y es Mo de 3 : O M NI OF F, PO L Y Mo d e 4 : O M NI OF F , M ON O x : N o TASCAM DA-98HR... -
Page 94: Midi Control Change
8 on the master DA-98HR in a DTRS chain. MIDI channels 9 through 16 can be used to control 13.6.3 Track delay channels 1 through 8 on the first slave DA-98HR in a Track delay can be set from –200 through +7200 chain. -
Page 95: Input Patch Setup
+7 (08h through 0Fh), or the tape track number + 15 There are two data bytes: <destination> and (10h through 17h). <source>. In addition, if the <source> is set to 18h, the <desti- <destination> is the tape track number – 1 (00h nation> is muted. through 07h) TASCAM DA-98HR... - Page 96 21 AUTO PLAY key 14 Error rates, checking 84 synchronization 20 Errors, bypassing timecode 67 AUTO PUNCH 14 to other TASCAM units 21 Autolocation 40 Errors, Muting on playback 48 video 20 Automatic punch point setting 36 ESCAPE key 15...
- Page 97 46 INPUT MONITOR keys 16 locating to 41 sine 46 INPUT PATCH key 13 setting “on the fly” 40 Other TASCAM units, connection Input patchbay 46 Memory to 21 Input sources, selecting 34 resetting to factory defaults 85 Output...
- Page 98 RS-422 specifications 90 overview 36 SYNC OUT 18 Punch recording Synchronization connections 20 exiting 39 Synchronized formatting 54 interrupting 38 Saving settings to tape 86 Synthesized timecode from ABS recording 38 timing 60 Saving user setups 85 rehearsing 38 TASCAM DA-98HR...
- Page 99 Upgrades, Software 87 Tape, formatting 32 Use with 9-pin external control 69 Tapes, recommended 10 User bits, viewing 47 TASCAM units, connection to 21 User settings TC or ABS timing 56 loading 85 TC REC key 16 loading from tape 86...
- Page 100 » DA-98HR TEAC CORPORATION Phone: (0422) 52-5082 3-7-3, Nakacho, Musashino-shi, Tokyo 180-8550, Japan TEAC AMERICA, INC. Phone: (323) 726-0303 7733 Telegraph Road, Montebello, California 90640 TEAC CANADA LTD. Phone: 905-890-8008 Facsimile: 905-890-9888 5939 Wallace Street, Mississauga, Ontario L4Z 1Z8, Canada TEAC MEXICO, S.A.
Need help?
Do you have a question about the DA-98HR and is the answer not in the manual?
Questions and answers