Table of Contents
Advertisement
Available languages
Available languages
Quick Links
Advertisement
Table of Contents
Troubleshooting

Related Manuals for Citizen E31 M


Summary of Contents for Citizen E31 M
- Page 1 TECHNICAL INFORMATION INFORMACION TECNICA CITIZEN QUARTZ Cal. No. E31 M...
-
Page 2: Table Of Contents
ENGLISH Contents §1. FEATURES ....................1 §2. SPECIFICATIONS ..................1 §3. PART NAMES AND THEIR MAIN FUNCTIONS ........1 §4. OPERATING THE CROWN ............... 2 §5. CHARGING THE BATTERY ..............2 A. Charging the Battery ................. 2 B. When the Battery Becomes Short of Power – Insufficient Charge Warning Function .............. - Page 3 ESPAÑOL Índice §1. CARACTERÍSTICAS ................25 §2. ESPECIFICACIONES................25 §3. NOMBRES DE LOS COMPONENTES Y FUNCIONES PRINCIPALES ..25 §4. FUNCIONAMIENTO DE LA CORONA ........... 26 §5. CARGA DE LA PILA ................26 A. Carga de la Pila ................26 B.
-
Page 4: Features
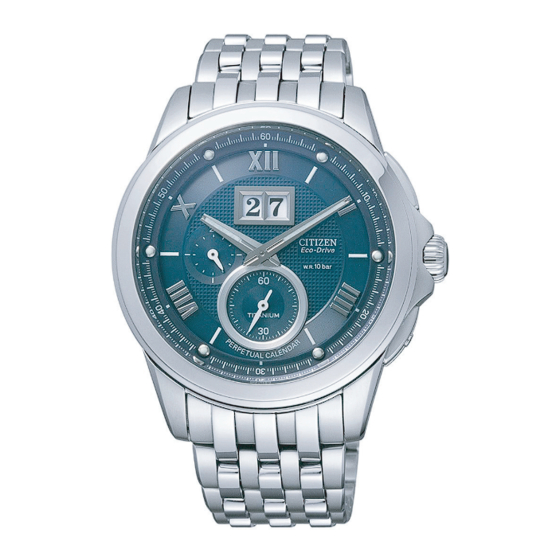
§1. FEATURES • Eco-Drive: Solar-powered and no battery replacement (page 3) • The date window: Large and highly visible • The calendar: No date correction at the end of months (page 4) §2. SPECIFICATIONS Caliber No. E310-00M Type Analog solar-powered watch ø28.8 x 27.9 x 4.16 t Movement size (mm) Within ±15 seconds per month on average (when worn at normal... -
Page 5: Operating The Crown
§4. OPERATING THE CROWN How to use the screw down crown To release the crown Turn the crown to the left until it pops out slightly. To lock again Tighten the crown completely by pressing and turning it to right. When leaving the watch unused for an extended period of time Pull out the crown to position All hands stop moving and the battery power is saved. -
Page 6: Charging Time
• After the battery is charged for a while, the second The two-second hand will move normally. interval movement • If you have not charged the battery for three days or more since the warning movement began, the battery will run out and the watch will stop. Note: You cannot check or adjust the settings while the warning movement continues, though you can see the time. -
Page 7: Setting The Time
§6. SETTING THE TIME Date window 1. Pull out the crown to position All hands stop moving. • To set the time accurately, pull out the crown when the second hand is at the 0 second position. Second hand 24-hour hand 2. -
Page 8: Setting The Year, Month, And Date
§8. SETTING THE YEAR, MONTH, AND DATE Note: Do not operate between 23:00 and 0:30; otherwise, the date may not change even if the 24-hour hand moves past midnight. The calendar setting has the following stages: Enter the setting mode Set the year Set the month Set the date... - Page 9 3. Set the month Set the month—tens digit, then ones digit. Date window 3-1. Press button A to set the tens digit of the month. Setting Month Window value From January to Button B September From October to December Button A 3-2.
-
Page 10: Handling Solar Powered Watch
Reset the watch, then adjust the reference you have tried the remedies on page 7. position. The watch does not move even if the Contact the Citizen Service Center or the − battery is fully charged. store where you purchased your watch. -
Page 11: Checking And Correcting The Reference Position
§11. CHECKING AND CORRECTING THE REFERENCE POSITION The figures of the date window rotate referring to the “0” position as the initial position. If the “0” position, the reference position, has moved off because of shock or other reasons, the figures are not displayed upright. -
Page 12: Resetting The Watch
Your watch needs an inspection once every two or three years for safety and longer usage. To keep your watch water-resistant, the packing needs to be replaced regularly. Other parts need to be inspected and replaced if necessary. Ask for genuine Citizen parts upon replacement. 12 9... -
Page 13: Hands Fitting Procedure
§14. HANDS FITTING PROCEDURE Hand installation method Process Point of work 1 Installation of There are convex parts for fixing the dial hands near by the 3 and 9 o'clock positions. Fix the dial by setting its concave parts to the convex parts. 2 Preparation (1) Pull out the crown from the normal for hand... - Page 14 Hand installation method Process Point of work 3 Preparation (3) Turn the crown clockwise (Turn the for hand hands counterclockwise) slowly installation and stop when the date dial returns Manual setting (Move by 30 - 60 minutes). (4) Turn the crown counterclockwise (Turn the hands clockwise) more slowly and stop precisely when the date dial starts moving (Move by...
-
Page 15: Disassembly And Assembly Of Movement
§15. DISASSEMBLY AND ASSEMBLY OF MOVEMENT... - Page 17 Process 1 → 15: Assembly procedure Lubrication: [AO-2]=F, [AO-3]=A, [AO-V]=V, [AO-G08]=CH-1 Process 15 → 1: Disassembly procedure Process-1 Parts Name Parts No. Plate complete 750-*** Stator 190-*** Date stator 1 190-*** Date stator 2 190-*** Process-2 Parts Name Parts No. 2-10 Setting stem spacer 212-***...
- Page 18 Lubrication: [AO-2]=F, [AO-3]=A, [AO-V]=V, [AO-G08]=CH-1 Process-4 Parts Name Parts No. Rotor 285-*** Second wheel 025-*** Fourth wheel and pinion 023-*** Fifth wheel and pinion 084-*** Cannon pinion with wheel 028-*** Third wheel and pinion 017-*** Process-5 Parts Name Parts No. Lub.
- Page 19 Lubrication: [AO-2]=F, [AO-3]=A, [AO-V]=V, [AO-G08]=CH-1 Process-7 Parts Name Parts No. Lub. rotor upper shaft AO-2 Lub. fifth wheel upper shaft AO-2 Lub. second wheel upper AO-3 shaft Lub. fourth wheel and pinion AO-3 upper shaft Lub. third wheel and pinion AO-3 upper shaft Lub.
- Page 20 Lubrication: [AO-2]=F, [AO-3]=A, [AO-V]=V, [AO-G08]=CH-1 Process-10 10-7 Parts Name Parts No. 10-1 Shield plate 186-*** Date rotor 1 285-*** 10-2 10-9 Intermediate date wheel 1 084-*** Intermediate date wheel 3 087-*** Intermediate date wheel 2 087-*** 10-8 Date rotor 2 285-*** Intermediate date driving 084-***...
- Page 21 Lubrication: [AO-2]=F, [AO-3]=A, [AO-V]=V, [AO-G08]=CH-1 Process-13 Parts Name Parts No. Date dial 108-**** 13-1 13-2 Date dial guard 293-*** Screw for date dial guard 922-*** 13-3 Date dial 108-**** Date dial rivet 107-*** 13-4 Wire spring x 2 902-*** 13-5 13-6 13-6 Process-14...
-
Page 22: Troubleshooting And Adjustment Method
§16. TROUBLESHOOTING AND ADJUSTMENT METHOD Remove dirt or replace parts. Abnormal Signal is not Normal generated. Measurement of 2.3V or higher Confirmation of Check of Replacement of Watch stops secondary battery output signal connection parts electronic circuit unit voltage * Since the watch may Signal is Normal Normal... - Page 23 Check Items How to Check Results and Treatment Measured battery voltage 1 Measurement of secondary Above 2.30 V battery voltage • If the battery voltage is below 2.30 V, charge the battery. • Charge warning level of this watch is about 2.25 V. Be sure to charge the battery so that its voltage will be above this value.
- Page 24 Check Items How to Check Results and Treatment (1) Check for looseness of the screws, dirt and stain. (1) Stain of solar cell pattern or 3 Check of connection parts circuit pattern (2) Check the solar cell patterns (2 places) for stain, removal Remove stain.
- Page 25 Check Items How to Check Results and Treatment 6 Measurement of current consumption • Normal values Motor A (Second): 0.6 - 1.0μA Connect the positive power Motor B (Tens digit of source to the battery holder etc. by a date): crocodile clip etc. At this time, take 2.7 - 3.4μA care not to deform the battery holder.
- Page 26 Check Items How to Check Results and Treatment • The solar cell voltage can be 7 Check of solar cell checked with the tester No problem. • The solar cell voltage is checked with the tester but the movement does not move Perform "6 Measure- ment of current consumption".
- Page 27 Check Items How to Check Results and Treatment (1) Check that the hands can be moved normally. (1) Wrong mounting direction or 8 Check of dial side mechanism deformation/breakage (2) Check around the train wheel of the minute wheel and Correct or replace.
-
Page 28: Características
§1. CARACTERÍSTICAS • Eco-Drive: Se alimenta mediante energía solar y no se requiere el cambio de la pila (página 27) • Ventana de fecha: Grande y bien visible • Calendario: No es necesario corregir la fecha a fin de mes (página 28) §2. -
Page 29: Funcionamiento De La Corona
§4. FUNCIONAMIENTO DE LA CORONA Cómo usar la corona de rosca Para desbloquear la corona Gire la corona hacia la izquierda hasta que salga ligeramente. Para volver a bloquear la corona Apriete completamente la corona, presionándola y girándola hacia la derecha. Cuando guarde el reloj durante un tiempo prolongado Tire de la corona hasta la posición Todas las manecillas se detienen y se logra economizar... -
Page 30: Tiempos De Carga
• Luego de cargar la pila por un cierto tiempo, la Movimiento a intervalos manecilla de segundos se moverá de la manera de dos segundos normal. • Si no se carga la pila, el reloj dejará de funcionar al cabo de tres días después que se inicie el movimiento de carga insuficiente. -
Page 31: Puesta En Hora
§6. PUESTA EN HORA Ventana de fecha 1. Extraiga la corona hasta la posición Todas las manecillas se detienen. • Para ajustar la hora con precisión, extraiga la corona cuando la manecilla de segundos se encuentre en la posición de 0-segundo. Manecilla de los segundos Manecilla de 24... -
Page 32: Ajuste Del Año, Mes Y Fecha
§8. AJUSTE DEL AÑO, MES Y FECHA AVISO: No efectúe ningún ajuste entre las 23:00 y 0:30 pues de lo contrario, la fecha puede no cambiar aunque la manecilla de las 24 horas pase la medianoche. El ajuste del calendario se realziza en la siguiente secuencia: Acceda al modo de ajuste Ajuste el año Ajuste el mes... - Page 33 3. Ajuste el mes Ajuste el mes—dígito de las decenas, luego dígito de las unidades. Ventana de fecha 3-1. Presione el botón A para ajustar el dígito de las decenas del mes. Valor de Ventana ajuste De enero a Botón B septiembre De octubre a Botón A...
-
Page 34: Manejo De Su Reloj Alimentado Por Energía Solar
Reposicione el reloj, luego ajuste la posición de haber realizado las acciones de la de referencia. página 29. El reloj no funciona aunque la pila está Póngase en contacto con el Centro de totalmente cargada. Servicio Citizen o con la tienda donde − compró el reloj. -
Page 35: Comprobación Y Corrección De La Posición De Referencia
§11. COMPROBACIÓN Y CORRECCIÓN DE LA POSICIÓN DE REFERENCIA Los números de la ventana de fecha se desplazan refiriéndose a la posición “0” como la posición inicial. En caso de que la posición “0”, o sea, la posición de referencia, se haya movido debido a algún golpe u otros motivos, los números no aparecerán rectos. -
Page 36: Reposición Del Reloj
Su reloj requiere inspección cada dos o tres años para poder funcionar en condiciones de seguridad y durante mucho tiempo. Para mantener su reloj estanco al agua, deberá reemplazar la empaquetadura a intervalos regulares. Las demás piezas deberán inspeccionarse y reemplazarse según se requiera. Solicite repuestos legítimos Citizen. -
Page 37: Procemento De Fijación De Las Manecillas
§14. PROCEMENTO DE FIJACIÓN DE LAS MANECILLAS Procedimiento de fijación de las manecillas Procedimiento Forma de fijación 1 Instalación de Existen partes convexas para fijar la las manecillas esfera cerca de las posiciones de las 3 y 9 en punto. Fije la esfera encajando las partes cóncavas en las partes convexas. - Page 38 Procedimiento de fijación de las manecillas Procedimiento Forma de fijación 3 Preparativos (3) Gire lentamente la corona hacia para la la izquierda (las manecillas giran instalación hacia la izquierda) y pare en la Ajuste manual posición en la que la esfera regrese (Mueva las manecillas 30 –...
-
Page 39: Desmontaje Y Montaje Del Mecanismo
§15. DESMONTAJE Y MONTAJE DEL MECANISMO... - Page 41 Proceso 1 → 15: Procedimiento de desmontaje Lubricación: [AO-2]=F, [AO-3]=A, [AO-V]=V, [AO-G08]=CH-1 Proceso 15 → 1: Procedimiento de montaje Proceso-1 Nombre de pieza Núm. de pieza Placa completa 750-*** Estator 190-*** Estator de la fecha 1 190-*** Estator de la fecha 2 190-*** Proceso-2 Nombre de pieza...
- Page 42 Lubricación: [AO-2]=F, [AO-3]=A, [AO-V]=V, [AO-G08]=CH-1 Proceso-4 Nombre de pieza Núm. de pieza Rotor 285-*** Segund rueda 025-*** Cuarte rueda y piñón 023-*** Quinta rueda y piñón 084-*** Rueda central 028-*** Tercera rueda y piñón 017-*** Proceso-5 Nombre de pieza Núm. de pieza Lub.
- Page 43 Lubricación: [AO-2]=F, [AO-3]=A, [AO-V]=V, [AO-G08]=CH-1 Proceso-7 Nombre de pieza Núm. de pieza Lub. eje superior de rotor AO-2 Lub. eje superior de quinta rueda AO-2 Lub. eje superior de AO-3 segunda rueda Lub.eje superior de cuarta AO-3 rueda y piñón Lub.
- Page 44 Lubricación: [AO-2]=F, [AO-3]=A, [AO-V]=V, [AO-G08]=CH-1 Proceso-10 10-7 Nombre de pieza Núm. de pieza 10-1 Placa de blindaje 186-*** Rotor de fecha 1 285-*** 10-2 10-9 Rueda de fecha intermedia 1 084-*** Rueda de fecha intermedia 3 087-*** Rueda de fecha intermedia 2 087-*** 10-8 Rotor de fecha 2...
- Page 45 Lubricación: [AO-2]=F, [AO-3]=A, [AO-V]=V, [AO-G08]=CH-1 Proceso-13 Nombre de pieza Núm. de pieza 13-1 13-2 Esfera de la fecha 108-**** Protector de la esfera de 293-*** la fecha 13-3 Tornillo para protector de 922-*** esfera de fecha 13-4 Esfera de la fecha 108-**** Remache de esfera de 107-***...
-
Page 46: Método De Inspección Y De Ajuste Del Mecanismo
§16. MÉTODO DE INSPECCIÓN Y DE AJUSTE DEL MECANISMO Eliminación de suciedad o reemplazo de piezas Anormal No se Normal genera señal. Comprobación de 2,3V o más Reemplazo de la Medición de la Confirmación de las piezas de Parada unidad del circuito tension de la la señal de salida conexión... - Page 47 Itemes de comprobación Forma de comprobación Resultados y tratamiento Tensión de batería medida 1 Medición de la tension de la Más de 2,30 V batería secundaria • Si la tensión de la batería es inferior a 2,30 V, cargue la batería. • El nivel de advertencia de este reloj es de aproximadamente 2,25 V.
- Page 48 Itemes de comprobación Forma de comprobación Resultados y tratamiento 3 Comprobación de las (1) Compruebe si hay tornillos flojos, suciedad y manchas. (1) Manchas en las pistas de la piezas de conexión célula solar o del circuito (2) Compruebe las pistas de la célula (2 lugares) para ver si Elimine las manchas.
- Page 49 Itemes de comprobación Forma de comprobación Resultados y tratamiento 6 Medición del cosumo de corriente • Valores normales Motor A (Segundos): 0,6 – 1,0 μA Conecte una fuente de alimentación Motor B (Dígito de las positiva al soporte de la batería, etc. decenas de la fecha): mediante una pinza de cocodrilo, etc.
- Page 50 Itemes de comprobación Forma de comprobación Resultados y tratamiento • La tensión de la célula solar 7 Comprobación de la célula solar puede comprobarse con el polímetro. No hay ningún problema. • La tensión de la célula solar puede comprobarse con el polímetro, pero el mecanismo no se mueve.
- Page 51 Itemes de comprobación Forma de comprobación Resultados y tratamiento (1) Compruebe si las manecillas se mueven normalmente. (1) Dirección de montaje errónea 8 Comprobación del mecanismo o deformación/rotura (2) Compruebe alrededor del puente de rodaje de la rueda del lado de la Corrija o reemplace.
Need help?
Do you have a question about the E31 M and is the answer not in the manual?
Questions and answers