Table of Contents
Advertisement
Advertisement
Table of Contents

Subscribe to Our Youtube Channel
Related Manuals for Citizen Eco-Drive


Summary of Contents for Citizen Eco-Drive
- Page 1 INSTRUCTION MANUAL...
- Page 2 ENGLISH...
- Page 3 Repairs All repairs performed on this watch, with the exception of repair of the band, are to be performed at CITIZEN. This is because special technologies and equipment are required to perform repairs, inspections and adjustments. Please make requests for repairs to Citizen Service Center when having your watch repaired.
- Page 4 ■ This radio wave watch receives standard time radio signals broadcast in the People’s Republic of China in order to adjust the time and date. ■ • Only standard time radio signals broadcast from in the People’s Republic of China (BPC) are received.
- Page 5 Second hand Minute hand Hour hand Button (B) Crown for turning Crown the outer scale Button (A) H, M, L: Reception level/ reception status NO: Reception status NO RX: Reception standby • This watch indicates the reception level and reception status with the short side of the second hand.
-
Page 6: Table Of Contents
Table of Contents 1. Your Watch ....................142 2. Operating the Crown ................. 143 3. Before Use ....................144 A. Check the Movement of the Second Hand.......... 144 B. Check the Reference Position ............... 146 4 . Functions List ..................... 148 Radio Signal Reception 5. - Page 7 Correcting the Time Difference ................164 12. Adjusting the Reference Position ............. 166 Troubleshooting ..................... 168 Solar Power 13. Solar Power Function ................172 14. Characteristics of the Solar Powered Watch ........... 174 A. Power Saving Function ................. 176 B. Insufficient Charge Warning Function ..........178 C.
-
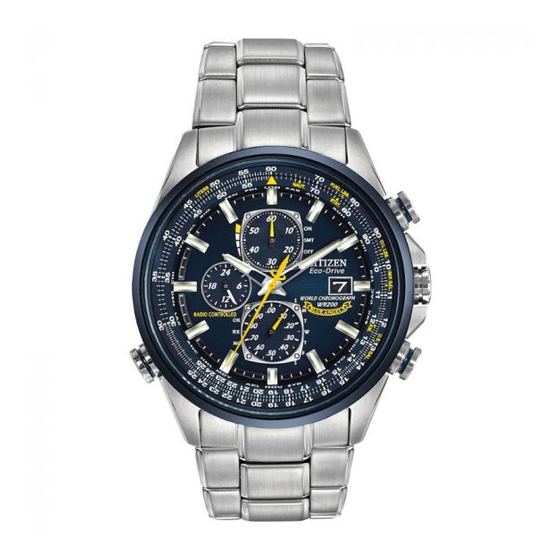
Page 8: Your Watch
* Not possible when the radio wave is interrupted. <Eco-Drive Function> This solar powered Eco-Drive watch is powered by photo energy converted into electrical energy. ◎ Power saving function: If the watch face is not exposed to light for one week or longer, the hands are stopped in order to restrict the power consumption of the watch. -
Page 9: Operating The Crown
2. Operating the Crown There are two models available for the crown: normal and screw lock. <Operating the Screw Lock Crown> • Turn the crown • When the screw lock is counterclockwise. released, the crown pops out a little and stops in the normal position. -
Page 10: Check The Movement Of The Second Hand
3. Before Use A. Check the Movement of the Second Hand The second hand is moving at 1-second Check the intervals. movement of the second The second hand is hand. moving at 2-second intervals or is stopped. Button (A) Reception level/reception Charge the watch status... - Page 11 Your watch is The second hand correctly receiving shows H, M, L as the standard time Check the a reception reception status. radio signal. status by It is ready to use. pressing button (A) once which is located at Perform on demand the 4:00 The second hand reception as...
-
Page 12: Check The Reference Position
B. Check the Reference Position Before using the watch, check that the hands are aligned with “0”, similar to when setting weighing scales ◎ The reference position may become misaligned by environmental factors such as magnetism, static electricity or an external impact. Even if radio signals are received, if the watch hands are not aligned to the correct reference position, it will not be possible to indicate the correct time. -
Page 13: Checking The Reference Position
[Checking the Reference Position] Correct reference position indication Time: 00:00:00 Date: Between 31 and 1 Button (B) (1) With the crown in the normal position, press and hold button (B) for more than 5 seconds, and release when the second hand starts to move. (2) All the hands and the date will move rapidly, stopping at the reference position. -
Page 14: Functions List
4. Functions List Function Button or Crown Operation On Demand Reception Press and hold button (A) for more (P. 151) than two seconds and release when the second hand stops in the RX position. Confirming Reception Press button (A) once. Status (P. - Page 15 Hand Movement The second hand will stop in the RX position and then move to the H, M or L level. If the reception level is not shown, normal hand movement will return without a signal being received. The second hand will stop at H, M, L or NO. The second hand will stop at the 12:00 position.
-
Page 16: Radio Signal Reception
Radio Signal Reception 5. Reception Three types of radio signal reception are possible: regular automatic reception, on demand reception and automatic reception recovery. Regular Automatic Reception (To receive signals automatically) • It is not necessary to operate buttons during regular automatic reception. <Receiving the radio signals>... -
Page 17: Manual Reception
On demand reception (Manual reception) • Signals can be received at any time in this mode. * Not possible when the radio wave is interrupted. Use this function when regular automatic reception is impossible due to changes in the reception environment. [Reception standby] [Receiving signal] [Reception completed]... - Page 18 5. Do not move the watch during reception. 6. When the signal has been properly received, the second hand will automatically move from H, M or L to the time that was received, all the hands will be adjusted, and the second hand will return to 1-second interval movement. •...
-
Page 19: Poor Reception Areas
6. Poor Reception Areas It may be difficult to properly receive the radio signals under certain environmental conditions or in areas susceptible to radio noise. ◆ Near high-tension electrical ◆ Inside vehicles, ◆ Inside reinforced concrete lines, railway overhead wires including cars, trains buildings, or underground or communication facilities... -
Page 20: Position Of The Second Hand During Reception
7. Position of the Second Hand During Reception [Reception signal] [Receiving signal] [Reception completed] ◆ Second hand moves to ◆ The second hand will move ◆ When reception is successful, the RX and stops. from RX to reception level second hand will return to 1-second H, M or L and will begin interval movement and the positions receiving signals. -
Page 21: Confirming Reception Status
8. Confirming Reception Status ◎ The reception status can be confirmed. Step 1: Press button (A) once to confirm the reception status. The second hand will move to H, M, L or NO. Step 2: The reception status will be indicated for 10 seconds before the watch automatically returns to normal hand movement. -
Page 22: Reception Area Standards
9. Reception Area Standards The map shows a standard of the reception area. However, note that the signal condition could change due to factors including the weather (such as lightning) and changes in the season or sunrise/sunset time. The reception area on the map should be used only as a standard, and it may be difficult to receive the radio signal even within the areas indicated on the map. - Page 23 C H I N A TAIWAN...
-
Page 24: Manually Setting The Time And The Date
Manually Setting the Time and the Date 10. Setting the Time When using the watch in an environment where radio signals cannot be received, manually adjust the time and the date. • After pulling out the crown to position 2, press button (A) to repeatedly change between [Second Hand/Minute Hand] adjustment and [Hour Hand/Date] adjustment. - Page 25 Step 3: Press button (A) once to enter the hour hand/date adjustment mode. (1) Rotate the crown clockwise by one click to move the hour hand ahead by 1 hour. (2) Rotate the crown counterclockwise by one click to move the hour hand back by 1 hour. •...
-
Page 26: Setting The Calendar
11. Setting the Calendar Crown in position 1 <Procedure for Month and Year (Elapsed Years after the Most Recent Leap Year) Adjustment> Step 1: Pull out the crown to position 1. • The watch will enter the calendar adjustment mode and the second hand will stop at the month and elapsed year positions recorded in the watch memory. - Page 27 <Reading the Month and Year (Elapsed Years after the Most Recent Leap Year) with the Second Hand> * Reading the Month Shown by the zone Second Hand Second hand between 1:00 and 2:00: January Second hand between 2:00 and 3:00: February Second hand between 12:00 and 1:00: December...
- Page 28 Quick reference for the elapsed years after the most recent leap year Year Elapsed years Year Elapsed years Year Elapsed years 2012 Leap year 2016 Leap year 2020 Leap year 2013 year 2017 year 2021 year 2014 year 2018 year 2022 year 2015...
- Page 29 Example: • April of the 3 year after the most recent leap year Read the elapsed years after the most recent leap year from the quick reference for the elapsed years. • Align the second hand with the 23 seconds position (in the zone between 4:00 and 5:00).
-
Page 30: Correcting The Time Difference
Correcting the Time Difference The watch can be adjusted to the local time when going to an area in a different time zone, by using the second hand to set the time difference in units of 1 hour. Step 1: Press button (B) once and the second hand ±0 will stop in the 12:00 position. - Page 31 Step 3: Press button (B) once after setting the time difference to return to 1-second interval movement. Alternatively, do not perform any operations for 10 seconds and the watch will indicate the time difference setting time and then return to 1-second interval movement.
-
Page 32: Adjusting The Reference Position
12. Adjusting the Reference Position <Adjusting the Reference Position for the Date and Hands> • After pulling out the crown to position 2, press button (A) to repeatedly change between [Second Hand/Minute Hand] adjustment and [Hour Hand/Date] adjustment. Step 1: Press and hold button (B) for more than 5 seconds, release when the second hand starts to move rapidly and immediately pull out the crown to position 2. - Page 33 Step 3: Press button (A) once and turn the crown to set the minute and second hands. (1) Turn the crown clockwise by 1 click to rapidly move the second hand ahead by 1 minute and turn it counterclockwise to move it back. (2) Continuously turn the crown by 2 or more clicks to rapidly rotate the second hand.
-
Page 34: Troubleshooting
Troubleshooting <Radio Signal Reception Function> Consult the following chart: Problem Check Remedy Radio signals • Radio waves may be • Try to receive the wave again after a cannot be interrupted occasionally due to few hours. received. special circumstances at the radio wave transmitter. - Page 35 Problem Check Remedy Radio signals • Are there objects nearby that • Avoid objects that block radio signals cannot be could block radio signals or or generate noise. Try to receive radio received. generate noise? signals by pointing the 9:00 position Are you attempting to receive of the watch in the direction of the the radio signal in a location far...
- Page 36 Problem Check Remedy Radio signals • Is the watch moving at • The watch changes to 2-second cannot be 2-second intervals? interval movement if the battery received. voltage is low. At this time, neither on demand reception nor regular automatic reception can be performed.
- Page 37 Problem Check Remedy The watch can • Is the reference position set • Even if radio signals are received, if receive the radio correctly? the watch hands are not aligned to the signal, but it correct reference position, it will not does not show Check the Reference Position.
-
Page 38: Solar Power 13. Solar Power Function
Solar power 13. Solar Power Function This watch uses a secondary battery to store electrical energy. When the watch is fully charged, it will maintain its accuracy for about 6 months. <Ensuring Best Operation of the Watch> Always store the watch in a bright location for best results. ◆... - Page 39 ◆ Charge watch by exposing the watch face to direct sunlight or to a fluorescent lamp. ◆ Wearing clothes with long sleeves makes it difficult for the watch to get the necessary light, resulting in insufficient charging. It is recommended that the watch is charged in direct sunlight once a month.
-
Page 40: Characteristics Of The Solar Powered Watch
14. Characteristics of the Solar Powered Watch ◎ When the watch is insufficiently charged, the indication will be changed as follows: [Normal Indication] [Insufficient Charge Warning] The watch has been insufficiently charged because the watch face, which contains the solar cell, has not received sufficient light. - Page 41 * 1. The watch stopped due to insufficient charging. • It takes at least 30 minutes to recharge sufficiently to perform automatic reception recovery, even if the watch is being exposed to light. After recovery, refer to “Guide to Charging Time” on page 180 and sufficiently charge the watch. * 2.
-
Page 42: A. Power Saving Function
A. Power Saving Function When the watch is stored in a dark location, the solar cell is not exposed to light, and power is not generated continuously for 1 week or more, the power saving function is activated and some features of the watch will be deactivated. The power saving function will be automatically canceled when the watch face is exposed to light. - Page 43 <Turning Off the Power Saving Function> The power saving mode will be automatically canceled when the watch face is exposed to light. • After the power saving mode has been canceled, the hands will rapidly move to the current time and return to 1-second interval movement. •...
-
Page 44: B. Insufficient Charge Warning Function
B. Insufficient Charge Warning Function The second hand’s movement changes from 1-second intervals to 2-second intervals to show that the watch is insufficiently charged. The watch will stop due to insufficient charging about 4 days after starting the 2-second interval movement if kept in a place with no light. -
Page 45: C. Overcharging Prevention Function
C. Overcharging Prevention Function No matter how much the watch is charged, it will not affect the secondary battery, timekeeping, functions or performance of the watch. Whenever the secondary battery becomes fully charged by exposing the watch face to light, the overcharging prevention function is automatically activated to prevent the battery from being charged further. -
Page 46: D. Guide To Charging Time
D. Guide to Charging Time The charging time varies according to the model (including the color of the watch face). The following should only be used as a guideline. * The charging time is based on continuous exposure. Charging time (approximate) Time from stopping Luminescence Environment... - Page 47 For a 1-day movement charging time The charging time to run the watch for one day with normal movement. Time for full charging The time for full charging after the watch has stopped due to an insufficient charging. NOTE: A fully charged battery will run the watch for about 6 months without further charging.
-
Page 48: E. Handling Your Solar Powered Watch
E. Handling Your Solar Powered Watch WARNING Handling the Secondary Battery ◆ Do not remove the secondary battery from the watch yourself, unless unavoidable. If you must remove the battery, store it out of reach of children to avoid accidental ingestion. - Page 49 CAUTION Charging Precautions ◆ Do not charge the watch in a high-temperature environment (about 60°C/140°F or more). Overheating while charging can cause the watch exterior to become discolored, the watch to deform or the movement to be damaged. Example: • Charging close to incandescent lighting, halogen lamps, or other lighting sources that easily become hot.
-
Page 50: Using The Slide Rule Bezel
15. Using the Slide Rule Bezel Flying distance and other navigation Inside scale calculations as well as general calculations can be performed using the Outside scale slide rule bezel located around the outside of the dial. This slide rule bezel is not able to display decimal places for calculation results, and should only be used as a general reference as an... - Page 51 A. Navigation Calculator 1. Calculation of time required Problem: How long does it take an airplane flying at 180 knots to fly a distance of 450 nautical miles? Solution: Set the 18 mark on the outside scale to the SPEED INDEX ( ▲ ). At this time, the point on the inside scale that is aligned with 45 on the outside scale indicates (2:30), and the answer is 2 hours and 30 minutes.
- Page 52 2. Speed (Ground Speed) Calculation Problem: What is the speed (ground speed) of an airplane when it takes 1 hour and 20 minutes to fly a distance of 240 nautical miles? Solution: Align the 24 on the outside scale with 1:20 (80) on the inside scale. At this time, 18 is aligned with the SPEED INDEX ( ▲...
- Page 53 3. Flying distance calculation Problem: What is the flying distance traveled in 40 minutes at a speed of 210 knots? Solution: Align the 21 on the outside scale with the SPEED INDEX ( ▲ ) of the inside scale. The 40 of the inside scale is now pointing to 14, and the answer is 140 nautical miles.
- Page 54 4. Fuel consumption rate calculation Problem: If 120 gallons of fuel are consumed in 30 minutes’ flying time, what is the fuel consumption rate? Solution: Align the 12 of the outside scale with 30 of the inside scale. The SPEED INDEX ( ▲...
- Page 55 5. Fuel consumption calculation Problem: How much fuel is consumedin 6 hours at a fuel consumption rate of 250 gallons per hour? Solution: Align the 25 of the outside scale with the inside scale’s SPEED INDEX ( ▲ ) of the inside scale. The 6:00 is aligned with 15, and the answer is 1500 gallons.
- Page 56 6. Maximum flying hours Problem: With a fuel consumption rate of 220 gallons per hour and a fuel supply of 550 gallons, what is the maximum number of flying hours? Solution: Align the 22 of the outside scale with the inside scale’s SPEED INDEX ( ▲ ) of the inside scale.
- Page 57 7. Conversion Problem: How do you convert 30 miles into nautical miles and kilometers? Answer: Align the 30 on the outside scale with the STAT ( ▲ ) mark on the inside scale. At this time, 26 nautical miles is aligned at the NAUT ( ▲ ) mark on the inside scale, while the answer of 48.2 kilometers is aligned at the kilometers on the inside scale.
- Page 58 B. General calculation functions 1. Multiplication × Problem: 20 Solution: Align 20 on the outside scale with 10 on the inside scale, and read the outside scale at the 30 mark which is aligned with 15 of the inside scale. Figure the number of decimal places, and the answer is 300.
- Page 59 2. Division Problem: 250/20 Solution: Align 25 on the outside scale with 20 on the inside scale. On the outside scale read the 12.5 mark that is aligned with 10 on the inside scale. figure the number of decimal places, and the answer is 12.5.
- Page 60 3. Reading Ratios Problem: 30/20 = 60/x Solution: Align 30 on the outside scale with 20 on the inside scale. At this time, the answer of 40 can be read from the inside scale corresponding to 60 on the outside scale. In addition, the ratio of the value on the outside scale to the value on the inside scale is 30:20 at all positions on the scales.
- Page 61 4. Determining Square Root Problem: What is the square root of 225? Solution: Rotate the scales so that the value on the inside scale corresponding to 22.5 on the outside scale is equal to the value on the outside scale corresponding to 10 on the inside scale, and read off the answer of 15 at that location.
-
Page 62: Precautions
16. Precautions WARNING: Water-resistance performance There are several types of water-resistant watches, as shown in the following table. The unit "bar" is roughly equal to 1 atmosphere. * WATER RESIST(ANT) xx bar may also be indicated as W.R. xx bar. Indication Minor exposure to water Specifications... - Page 63 For correct use within the design limits of the watch, confirm the level of water- resistance of your watch, as indicated on the dial and case, and consult the table. Examples of use Moderate exposure to Operation of the Marine sports Scuba diving water (washing, kitchen crown or button...
- Page 64 • If moisture has entered the watch, or if the inside of the crystal is fogged up and does not become clear within a day, immediately take the watch to your dealer or Citizen Service Center for repair. Leaving the watch in such a state will allow corrosion to form inside.
- Page 65 • If seawater enters the watch, place the watch in a box or plastic bag and immediately take it in for repair. Otherwise, pressure inside the watch will increase, and parts (crystal, crown, buttons, etc.) may come off. CAUTION: Keep your watch clean. •...
- Page 66 CAUTION: Operating environment • Use the watch within the operating-temperature range specified in the instruction manual. Using the watch where temperatures are outside the specified range, may result in deterioration of functions or even stoppage of the watch. • Do NOT use the watch in places where it is exposed to high temperature, such as in a sauna.
- Page 67 Your watch needs inspection once in every two or three years for safety and long use. To keep your watch water-resistant, the packing needs to be replaced regularly. Other parts need to be inspected and replaced if necessary. Ask for Citizen geuine parts upon replacement.
-
Page 68: Specifications
17. Specifications 1. Cal. No.: H486 2. Type: Analogue Solar Powered Watch 3. Time accuracy: Without reception (when watch is not receiving a radio signal) ±15 seconds per month on average (at a room temperature of +5°C/41°F to +35°C/95°F) 4. Acceptable temperature range: -10°C/14°F to +60°C/140°F 5. - Page 69 • Reference position checking/adjustment function • Solar power function • Power saving function • Insufficient charge warning function (2-second interval movement) • Overcharging prevention function 7. Duration: • Time from a full charge until the watch stops without charging : About 2 years (when in the power saving mode) : About 6 months (when not in the power saving mode) Note that this duration may vary depending on the number of times that signals are received.
- Page 70 This product follows the provisions of EMC(2004/108/EC) amended by the Directive 93/68/EEC EMC EN61000-6-1:2007 EN61000-6-3:2007...
- Page 71 Model No.AS5 Cal.H486 CTZ-A8114...
Need help?
Do you have a question about the Eco-Drive and is the answer not in the manual?
Questions and answers