Table of Contents
Advertisement
Advertisement
Table of Contents

Subscribe to Our Youtube Channel
Related Manuals for Citizen Eco-Drive


Summary of Contents for Citizen Eco-Drive
- Page 1 INSTRUCTION MANUAL...
- Page 2 After reading the manual, store it in a safe place for future reference. Be sure to visit the Citizen website at http://www.citizenwatch-global.com/ . Here you will find a variety of information such as electronic setting guides, answers to frequently asked questions, Eco-Drive recharging information and more.
- Page 3 Safety precautions — IMPORTANT This manual contains instructions that should be strictly followed at all times not only for optimal use, but to prevent any injuries to yourself, other persons or property. We encourage you to read the entire booklet (especially, pages 66 to 79) and understand the meaning of the following symbols: ■...
- Page 4 Safety precautions ■ Important instructions are categorized and depicted in this manual as follows: (Following symbols are examples of Pictograms.) Warning (caution) symbol followed by prohibited matters. Warning (caution) symbol followed by instructions that should be followed or precautions that should be observed.
- Page 5 7 levels. time signal reception. It can be used as a reference for • Perpetual calendar choosing a good charging place. No need for monthly and leap-year date correction until February 28, 2100. * “Eco-Drive” is an original technology of Citizen.
-
Page 6: Table Of Contents
CONTENTS Before using this watch . . . . . . . Setting the world time . . . . . . Band adjustment . . . . . . . . . . . . . . .8 Switching daylight saving time Protective stickers . - Page 7 CONTENTS Checking and adjusting leap Eco-Drive watch handling second setting . . . . . . . . . . . . precautions . . . . . . . . . . . . . . .
-
Page 8: Before Using This Watch
Before using this watch After unpacking, the following must be done before using the watch: Checking the current power reserve (page 12) Setting the world time (page 24) Receiving the satellite time signal (page 32) This watch has a rechargeable cell which is charged by exposing the dial to light. -
Page 9: Band Adjustment
If adjustment is not done correctly, the bracelet may unexpectedly become detached leading to loss of your watch or injury. Consult your nearest authorized Citizen service center. Other shops may charge for, or may not provide, the service. -
Page 10: How To Use A Specially Designed
Before using this watch How to use a specially designed crown/button Some models are equipped with a specially designed crown and/or push button to prevent accidental operation. Screw down crown/button Unlock the crown/button prior to operate your watch. Unlock Lock Push the crown in to the case. - Page 11 Before using this watch Recessed button Press the button with a non-marring narrow-tipped object such as a wooden toothpick. • Metal objects may cause marring or scratching of the button.
-
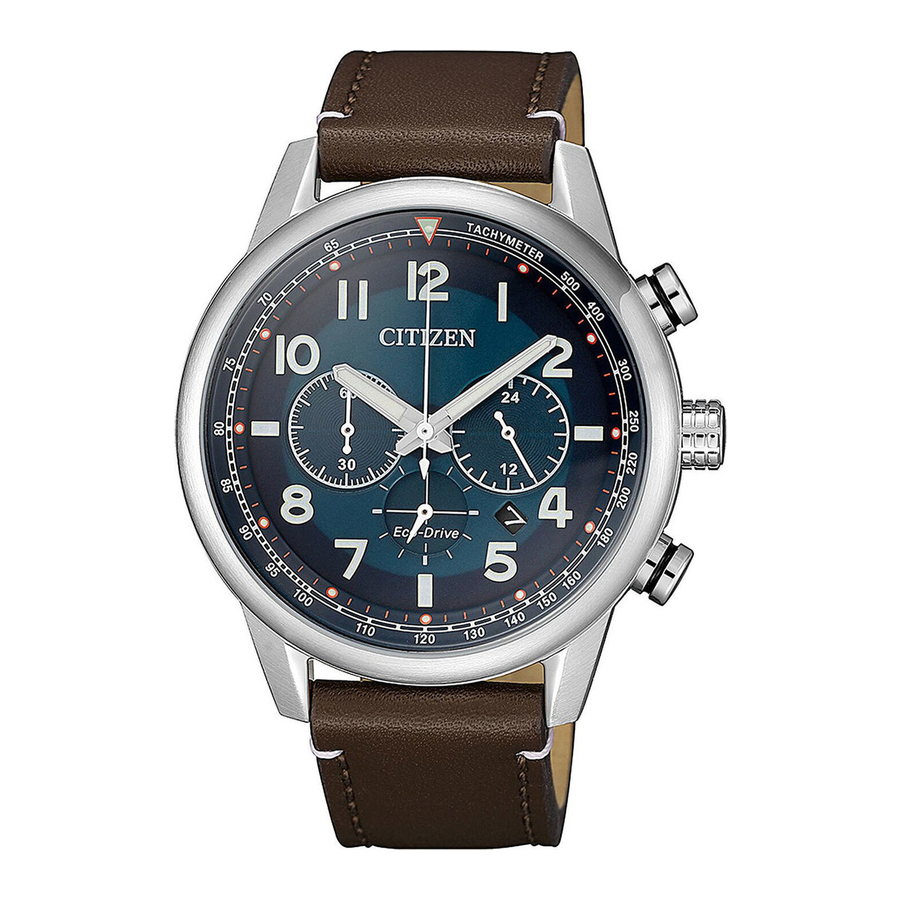
Page 12: Component Identification
Component identification RX: Reception-in- progress indication OK/NO: Reception Hour hand result indication Button Function hand • Day indication Minute • Power reserve level hand scale (5 levels) Crown • Daylight saving time ( SMT ON/OFF ) Date indication Button Place name/ time zone Second hand... -
Page 13: Charging Your Watch
Charging your watch This watch has a rechargeable cell which is charged by exposing the dial to light, such as direct sunlight or fluorescent lamps (refer to page 16 for charging guidelines). For optimal performance, be sure to: • Put the watch in a location where the dial is exposed to bright light such as by the window even when it is not used. - Page 14 • This watch contains a large-capacity rechargeable cell for performing power- consuming satellite signal reception. This large capacity cell takes more time to charge than those found in other Eco-Drive watches. • If the surrounding temperature falls below 0°C (32°F) or exceeds 40°C (104°F), the “Charge suspension temperature detection function”...
- Page 15 • If you do not charge the watch for 30 days after it has stopped, recharging will not be possible (over discharge detection function). Consult your nearest authorized Citizen service center if no hands start to move even after charging a stopped watch for one day or more exposing to direct...
- Page 16 Charging your watch During the insufficient charge warning state The time and date is indicated correctly. Operations below are available: • Checking power generation amount • Setting the world time • Adjusting the time and calendar manually You cannot execute operations other than above such as reception of satellite time signals.
- Page 17 Charging your watch Charging time by environment Below are the approximate charging times when exposing to light continuously. Please use this table as a reference only. Charging time (approx .) To start working To become fully Environment Illuminance (lx) To work for one day normally when the charged when the cell cell is discharged...
- Page 18 Charging your watch Power save function The hour, minute, and second hands stop automatically to save power as 3 days passed after stopping power generation. • The watch is still running internally to keep the time and calendar correctly even after the power save function has activated.
-
Page 19: Checking The Current Power Reserve And Power Generation
Charging your watch Checking the current power reserve and power generation amount Always care about the current power reserve and charging environment of the watch to be sure it is charged sufficiently. Indication of power generation amount in level Indication of power reserve in level Function hand Hour, minute and... - Page 20 Charging your watch Push the crown in to position Press and release the upper right button The power reserve and power generation amount at the moment of pressing the button are indicated in level. • Power reserve level: page 20 •...
- Page 21 Charging your watch Indication of power reserve in level Level Power reserve level scale Duration 5 months - 5 days or 24 - 20 months 20 - 14 months 14 - 5 months (approx .) 5 days shorter Insufficient Power reserve Power reserve Power reserve is OK.
- Page 22 Charging your watch CAUTION • At the level 0, the second hand starts to move once every two seconds (insufficient charge warning function, page 14). Some functions become unavailable while the function is activated. For details, see page 15. • The level of power reserve is not indicated when temperature of the watch is too high or too low (non-chargeable state).
-
Page 23: Amount
Charging your watch Indication of power generation amount in level The level of power generation amount means power being generated by the solar cell represented in 7 levels (0 - 6). Level Level scale of power generation amount Sufficient power Charge in a brighter location where the level of power Meaning generation for... - Page 24 Charging your watch CAUTION • The level of power generation amount indicated is that of the moment you engage this function. The level indication does not reflect any change in power generation after engaging this function. • The level may vary even under the same brightness due to the entry angle of light to the dial of the watch or other elements.
-
Page 25: Setting The World Time
Setting the world time This watch can indicate the time around the world according to which of 40 time zones (offsets from UTC—Coordinated Universal Time) is chosen. Pull the crown out to position The second hand indicates the current time zone and the function hand indicates the daylight saving time setting (page 30). - Page 26 Setting the world time How to read indication of the world time setting The watch has 40 time zone markers with several representative area names. A time zone is set by pointing the second hand at one of the markers. In the illustration on the left, the second hand Time zone markers points to 28 seconds and time zone setting is...
- Page 27 Setting the world time Table of time zones and representative areas • Countries or regions may change time zones for various reasons. Time zone Second hand Area name Representative area (UTC offset) position 0 sec. London 2 sec. Paris 4 sec. Athens 6 sec.
- Page 28 Setting the world time Time zone Second hand Area name Representative area (UTC offset) position 14 sec. Dhaka +6.5 15 sec. — Yangon 16 sec. Bangkok 18 sec. BJS (HKG) Beijing/Hong Kong +8.75 20 sec. — Eucla 21 sec. Tokyo +9.5 23 sec.
- Page 29 Setting the world time Time zone Second hand Area name Representative area (UTC offset) position +12.75 31 sec. — Chatham Islands 32 sec. Nuku‘alofa 34 sec. — Kiritimati 36 sec. — Baker Island 38 sec. Midway 40 sec. Honolulu -9.5 41 sec.
- Page 30 Setting the world time Time zone Second hand Area name Representative area (UTC offset) position -4.5 51 sec. — Caracas 52 sec. Santiago -3.5 53 sec. — St. John’s 54 sec. Rio de Janeiro 56 sec. Fernando de Noronha 58 sec. Azores •...
-
Page 31: Switching Daylight Saving Time
Switching daylight saving time and standard time Daylight saving time is a system adopted in some countries/areas to gain an extra daylight during summer. This watch can display the daylight saving time or the standard time according to the area selected for world time. •... - Page 32 Switching daylight saving time and standard time Pull the crown out to position The second hand indicates the current world time setting and the function hand indicates the current daylight saving time setting. Press and release the lower right button SMT ON SMT OFF The daylight saving time is...
-
Page 33: Before Receiving The Satellite
Before receiving the satellite time signal This watch receives time information from satellites to adjust the time and calendar automatically. This watch only receives time information. Location information is not acquired. For receiving the satellite time signal smoothly The average monthly accuracy of this watch is ±5 seconds even if a satellite time signal is not received. - Page 34 Before receiving the satellite time signal Cautions regarding receiving the satellite time signal Do not perform satellite time signal reception while operating a vehicle as doing so is extremely dangerous. • If the second hand is moving once every two seconds (insufficient charge warning function), you cannot perform satellite time signal reception.
-
Page 35: Time Signal
Before receiving the satellite time signal When receiving the satellite time signal As shown in the picture below, make sure you are in an area with few surrounding trees, buildings, or other objects with may obstruct the satellite time signal. Face the dial towards the sky and perform time signal reception. -
Page 36: Time Signal
Before receiving the satellite time signal Receiving signals indoors near a window Place the watch near a window with a wide view of the sky and orient the dial in an obliquely upward direction (approximately 45°). • If there are buildings, trees, or other obstacles above the window, satellite signals may not be able to be received. -
Page 37: Time Signal
Before receiving the satellite time signal Poor reception areas It may be difficult to receive the satellite time signal under certain environmental conditions or in certain areas. Areas with obstructions above the watch Nearby objects which emit magnetism or noise •... -
Page 38: Receiving The Satellite Time
Receiving the satellite time signal Reception methods of the satellite time signal You can use the two reception methods below. You can also check the previous reception result (success or fail). (page 42) Method Time required (approx .) 3 - 20* seconds Manual Normal reception for time and * It may take up to 70 seconds after... -
Page 39: Receiving The Satellite Time
Receiving the satellite time signal Manual reception 1 (time required: 3 - 20 seconds) Reception for time and calendar adjustment. Use this method normally. • It may take up to 70 seconds after adjusting calendar or some other cases. Push the crown in to position Press and hold the lower right button until the second hand points “RX”... - Page 40 Receiving the satellite time signal After finishing reception, the second hand indicates the reception result (page 42) for 2 seconds and returns to normal movement. When the time or calendar is incorrect even after successful reception Check the settings of world time (page 24) and daylight saving time (page 30). If the time or calendar is still incorrect after that, execute manual reception 2 (page 40).
- Page 41 Receiving the satellite time signal Manual reception 2 (time required: about 21 seconds - 13 minutes) Reception to adjust the time and calendar when the leap second has been updated. Push the crown in to position Press and hold the lower right button for 7 seconds .
- Page 42 Receiving the satellite time signal After finishing reception, the second hand indicates the reception result (page 42) for 2 seconds and returns to normal movement. When the time or calendar is incorrect even after successful reception Check the settings of world time (page 24) and daylight saving time (page 30). •...
-
Page 43: Checking The Previous Reception Result Of The Satellite
Receiving the satellite time signal Checking the previous reception result of the satellite time signal Push the crown in to position Press and release the lower right button The previous reception result is indicated. The reception succeeded. The time and calendar have been corrected. -
Page 44: Time Signal
Receiving the satellite time signal Press and release the lower right button to finish the procedure . The hands returns to current time indication. • They returns to current time indication automatically in about 10 seconds. About the reception result The previous reception result is stored for 6 days. -
Page 45: Checking And Adjusting Leap
Checking and adjusting leap second setting This watch displays the time information by setting the leap second and time difference (manual adjustment) to the International Atomic Time information received from the satellite. • Leap second setting can automatically be adjusted by executing manual reception 2 (page 40) and using leap second information. - Page 46 Checking and adjusting leap second setting Pull the crown out to position The second hand points to the 0 second. Press and release the upper right button Using 0 minute/second position as the starting point, the minute and second hands indicate the leap second setting.
-
Page 47: Second Setting
Checking and adjusting leap second setting Turn the crown to adjust the setting if the leap second is not correct . • Adjustable range is from 0 to ‒90 seconds. Push the crown in to position to finish the procedure . -
Page 48: Checking And Adjusting The Rollover Number Setting
Checking and adjusting the rollover number setting In order for this watch to correctly process the week information* received from the satellite, a rollover number for each time period is set. The rollover numbers will be updated automatically. If the rollover number setting is incorrect, the time and date may not be indicated accurately. - Page 49 Checking and adjusting the rollover number setting Pull the crown out to position The second hand points to 0 second. Press and release the upper right button The second and minute hands indicate the leap second setting. Press and hold the upper right button for 5 seconds or more .
-
Page 50: Rollover Number Setting
Checking and adjusting the rollover number setting Turn the crown to adjust the setting if it is not correct . • Adjustable range is from “0” to “5”. • See the table below and set the correct rollover number. Push the crown in to position to finish the procedure . -
Page 51: Adjusting The Time And Calendar
Adjusting the time and calendar manually Pull the crown out to position Press and hold the upper right button until the second hand points to the 30 seconds position . Pull the crown out to position The second hand points to 0 second. Press and release the lower right button repeatedly to change the hand/indication to be corrected . - Page 52 Adjusting the time and calendar manually Rotate the crown to adjust the hand/indication . • Year and month are indicated with the second hand. Set them referring to the next page. • The function hand rotates 5 times for each change of date.
-
Page 53: Manually
Adjusting the time and calendar manually Month and year indications Set the year and month with the position of the second hand. “Month” corresponds to one of the 12 “Year” corresponds to the years since zones shown in the figure below. leap year and indicated with markers in Each number means month. -
Page 54: Manually
Adjusting the time and calendar manually Years since leap Actual year Second hand position year 2012, 2016, 2020, 2024 0 (Leap year) Hour marker 2013, 2017, 2021, 2025 1st min. marker 2014, 2018, 2022, 2026 2nd min. marker 2015, 2019, 2023, 2027 3rd min. -
Page 55: Checking And Correcting The Reference Position
Checking and correcting the reference position If the time or calender is not shown correctly even after proper reception of the time signal, check whether the reference position is correct. • If the hands and indication do not reflect the correct reference position, the time and calendar will not be indicated accurately even if the satellite time signal is received. - Page 56 Checking and correcting the reference position Push the crown in to position Press and hold the upper right button for 7 seconds . The current reference position is indicated after indicating the power reserve and power generation amount. Check the current reference position . Refer to the figure on the previous page.
-
Page 57: Reference Position
Checking and correcting the reference position Pull the crown out to position The function hands move slightly. Press and release the lower right button repeatedly to change the hand/indication to be corrected . • Each time you press the button, the target changes as follows: Date/day →... -
Page 58: Reference Position
Checking and correcting the reference position Repeat steps 5 and 6 . Push the crown in to position Press and release the upper right button finish the procedure . • The watch returns automatically to the time indication as about 2 minutes passed without any operation. -
Page 59: Troubleshooting
Troubleshooting If you have a problem with your watch, check the items below. Symptom Remedies Page Problems with time signal reception When the second hand moves once every two seconds, the watch cannot receive the time signal. Charge the watch. Avoiding places where the satellite signal may be obstructed and objects which emit noise. - Page 60 Page Problems with time signal reception (continued) If the remedies above do not solve the problems, Reception is − consult your nearest authorized Citizen service unsuccessful. center. Check the world time setting. Check the daylight saving time setting. The correct time...
- Page 61 Charge the watch under direct sunlight until the No hands move. second hand moves normally. If the remedies above do not solve the problems, − consult your nearest authorized Citizen service center.
- Page 62 Troubleshooting Symptom Remedies Page Time/calendar is abnormal. Check the world time setting. Check the daylight saving time setting. Receive the satellite time signal to adjust the time Time/calendar is incorrect. and calendar. Check and correct the reference position. Adjust the time and calendar manually. Check the daylight saving time setting.
- Page 63 If the watch does not work charged. after exposing the dial to direct sunlight for more than one day, it is possible that the rechargeable cell has over discharged. Consult the nearest authorized Citizen service center.
- Page 64 The watch stops the watch is being charged correctly. Continue charging − immediately after it is even when the second hand starts moving normally. charged. If there are no other defects, please consult your nearest authorized Citizen service center.
- Page 65 Troubleshooting Resetting the watch — All Reset When the watch does not work properly, you can reset all the settings. If the power reserve is insufficient, charge the watch first. Be sure to perform the following operations after All Reset. .
- Page 66 Troubleshooting Pull the crown out to position Press and hold buttons at the same time for 3 seconds or more and release them . As you release the buttons, the hands move slightly to indicate that reset completed. The setting values after All Reset Calendar January of leap year (5-second position) World time...
-
Page 67: Eco-Drive Watch Handling
Eco-Drive watch handling precautions <Always Make Sure to Recharge Frequently>... - Page 68 Eco-Drive watch handling precautions CAUTION Recharging Precautions Examples:...
-
Page 69: Precautions
Eco-Drive watch handling precautions <Replacement of Rechargeable Cell> WARNING Handling of Rechargeable Cell... -
Page 70: Precautions
Eco-Drive watch handling precautions WARNING Use Only the Specified Battery... -
Page 71: Water Resistance
Water resistance WARNING Water Resistance • Refer to the watch dial and/or the case back for the indication of the water resistance of your watch. The following chart provides examples of use for reference to ensure that your watch is used properly. - Page 72 Water resistance Water-related use Operate the Minor crown or exposure to Swimming Scuba diving Saturation button when water (washing and general Skin diving, using an air diving using the watch face, rain, etc.) washing work marine sports tank helium gas is wet...
- Page 73 Water resistance • Non-water resistant models are not designed to come into contact with any moisture. Take care not to expose a watch with this rating to any type of moisture. • Water resistance for daily use (to 3 atmospheres) means the watch is water resistant for occasional accidental splashing.
-
Page 74: Precautionary Items And Usage
Precautionary items and usage limitations CAUTION To Avoid Injury • Be particularly careful when wearing your watch while holding a small child, to avoid injury. • Be particularly careful when engaged in strenuous exercise or work, to avoid injury to yourself and others. - Page 75 Precautionary items and usage limitations CAUTION Precautions • Always use the watch with the crown pushed in (normal position). If the crown is of the screw lock-type, make sure it is securely locked. • Do not operate the crown or any push buttons when the watch is wet. Water may enter the watch causing damage to vital components.
-
Page 76: Limitations
Precautionary items and usage limitations CAUTION When Wearing Your Watch <Band> • Leather bands and rubber (urethane) bands will deteriorate over time due to perspiration dirt. Because of the natural materials, leather band will be worn, deformed, and discolored over time. -
Page 77: Limitations
• We recommend seeking the assistance of an experienced watch technician for sizing of your watch. If adjustment is not done correctly, the bracelet may unexpectedly become detached leading to loss of your watch or injury. Consult your nearest authorized Citizen service center. Other shops may charge for, or may not provide, the service. -
Page 78: Limitations
Precautionary items and usage limitations <Strong Shock> • Avoid dropping the watch or subjecting it to other strong impact. It may cause malfunctions and/or performance deterioration as well as damage to the case and bracelet. <Static Electricity> • The integrated circuits (IC) used in quartz watches are sensitive to static electricity. Please note the watch may operate erratically or not at all if exposed to intense static electricity. -
Page 79: Limitations
Precautionary items and usage limitations CAUTION Always Keep Your Watch Clean • Rotate the crown while it is pressed in fully and press the buttons periodically so they do not become stuck due to accumulations of foreign matter. • The case and band of the watch come into direct contact with the skin. Corrosion of the metal or accumulated foreign matter may result in black residue coming from the bracelet when exposed to moisture or perspiration. -
Page 80: Limitations
Precautionary items and usage limitations Caring for Your Watch • Wipe any dirt or moisture such as perspiration from the case and crystal with a soft cloth. • For metallic, plastic or synthetic rubber (polyurethane) band, clean it with soap and a soft toothbrush. -
Page 81: Specifications
Specifications Model Type F100 Analog solar-powered watch Timekeeping Average monthly accuracy: ±5 seconds when worn at normal operation accuracy temperatures between +5°C (41°F) and +35°C (95°F) (without reception) Operating ‒10°C (14°F) to +60°C (140°F) temperature range • Time: Hours, minutes, seconds •... - Page 82 Specifications • Solar power function • Confirming reception status (RX) • Overcharging prevention function • Indicating the result of the last • Insufficient charge warning function reception (OK/NO) (two-second interval movement) • World time • Over discharge detection function (40 time zones (27 place names)) •...
- Page 83 This product follows the provisions of R&TTE Directive (1999/5/EC) ETSI EN300 440-2 V1.4.1 ETSI EN301 489-3 V1.4.1 EN60950-1 : 2006 +A12 : 2011 * Model No.CC2 Cal.F100 CTZ-B8182...
Need help?
Do you have a question about the Eco-Drive and is the answer not in the manual?
Questions and answers