
Subscribe to Our Youtube Channel
Related Manuals for Midas PRO X


Summary of Contents for Midas PRO X
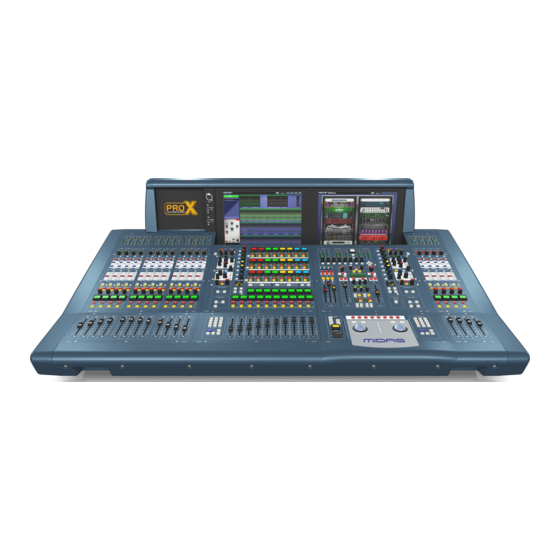
- Page 1 PRO X Live Digital Console Control Centre and Audio System Engine with 168 Input Channels, 99 Mix Buses and 96 kHz Sample Rate Quick Start Guide...
-
Page 2: Legal Disclaimer
10. Protect the power cord from being walked on or seguridad. Si el enchufe suministrado con el equipo no documento están sujetas a modifi caciones sin previo of their respective owners. MIDAS, KLARK TEKNIK, concuerda con la toma de corriente, consulte con un pinched particularly at plugs, convenience receptacles, aviso. -
Page 3: Garantie Limitée
12. Sollte der Hauptnetzstecker oder eine Utilisez uniquement des câbles d’ e nceintes de haute dass die Gefahr eines Stromschlags besteht. leurs propriétaires respectifs. MIDAS, KLARK TEKNIK, d’alimentation est suffisamment protégé, notamment au qualité disponibles dans les points de vente avec les Verwenden Sie nur hochwertige, im Handel Gerätesteckdose die Funktionseinheit zum Abschalten... -
Page 4: Instruções De Segurança Importantes
Certifi que-se de que o cabo eléctrico marcas são propriedade de seus respectivos donos. ます。 商標はすべて、 それぞれの所有 のです。 備え付けのプラグが、 お使いのコン está protegido. Verifi que particularmente nas fi chas, nos MIDAS, KLARK TEKNIK, TURBOSOUND, BEHRINGER, Aviso! 者に帰属します。 MIDAS 、... - Page 5 PRO X Quick Start Guide 法律声明 其他的重要信息 MUSIC Group MIDAS KLARK TEKNIK TURBOSOUND BEHRINGER BUGERA MUSIC Group IP Ltd. © MUSIC Group IP Ltd. 201 ¼ '' TS 保修条款 music-group.com/warranty 2000...
- Page 6 True and consistent 96 kHz sampling frequency and 40 bit fl oating point This is the Quick Start Guide for the PRO X Live Audio System. Its purpose is to or POP groups, merely press the select switch and those channels unfold to the...
-
Page 7: About The Control Centre
KVM switch on the rear panel. mains connectors. The control centre is of modular construction and is built on a robust MIDAS steel frame chassis similar to those used for established MIDAS analogue products. -
Page 8: Front And Rear Panel Connections
PRO X Quick Start Guide During show time the screen functions that require fast access are controlled by Each GUI screen has its own default display, although either is selectable via A connector panel on the rear of the control centre has three main sections control knobs, pushbutton switches, faders, etc. -
Page 9: Basic Principles
Also, the LCD select buttons in the input fast strips will display the current bus most of the PRO X controls and their operation. Therefore, this chapter only deals NOTE: As the operation of both input bays is principally the same, this mode, for example, “MONO AUX”. -
Page 10: Text Editing
PRO X Quick Start Guide Navigation Text Editing >> To select a GUI menu option A keyboard is used to type in text on the GUI, for example, to confi gure input Click the menu option, for example, Monitors. The background of the menu and output channel names. - Page 11 PRO X Quick Start Guide Input channel navigation controls on the PRO X. >> To assign an input channel to the control surface Do one of the following: Mix bay channel strip • • Scroll buttons - Scroll the desired input channel to the control surface using the scroll by 1 / 12 buttons in the input select section.
-
Page 12: Navigating The Mix Buses
PRO X Quick Start Guide Navigating The Mix Buses >> To navigate a mix bus to the control surface >> To navigate the mix bus processing area to the channel strip The input channels each have aux and matrix mix buses. -
Page 13: Navigating The Output Channels
This is done via the GUI at their respective sheet screens. • • Channel type buttons - On the PRO X the Channel Type buttons Master bay channel strip For confi guration details, see Confi guring VCA/POP Groups. -
Page 14: About The Patching Procedure
PRO X Quick Start Guide Patching Item Element(s) Description REDO button Redoes an undo. This can be repeated for each undo in the previous undo operation. Introduction Clears all current selections and their patches. Important: CLEAR SEL. button Patching is a GUI-only feature that lets you carry out all system routing Unlike the NONE button, which merely removes the current selections (highlighted in yellow), CLEAR SEL. - Page 15 PRO X Quick Start Guide How To Patch 3. Select the card/channel you want to confi gure/change, from the drop-down list at the upper-right corner of the confi guration window. For example, Patching, basically, involves selecting the source patching connectors in the the “Analogue In Card”.
-
Page 16: Basic Operation
2. In the fi lters section of the input channel strip, press the fi lter select button 3. Adjust the gain trim control knob to the required level to suit the MIDAS (high pass or low pass) to switch the fi lter in. -
Page 17: Input Equalisation (E Zone)
PRO X Quick Start Guide Input Equalisation (E Zone) Input Dynamics Processing (D Zone) Use EQ to equalise the input signal via the treble, hi-mid, lo-mid and bass fi lters, Set up compressor and gate dynamics processors using the controls in the input which are situated in the input channel strip’s E zone. - Page 18 PRO X Quick Start Guide >> To assign channels to a VCA/POP group >> To select the mix bus mode 1. Press and hold down the LCD select button of the desired group (VCA or >> To set up the name of a VCA/POP group POP).
-
Page 19: Simple Routing To Master Stereo Outputs
PRO X Quick Start Guide Mix bus routing 7. Click CLOSE to close the eff ect window. The new eff ect will appear in >> To load a show >> To create a new scene using the current settings the eff ects rack. You can now patch the new eff ect, which will be on the You can route an aux or matrix (or even master output) to an eff ect or output. -
Page 20: Surround Panning
4. You may see an “Analysing...” message in the Removable Storage panel, which means that the MIDAS folder on the USB memory stick is being read. The control centre has a user library where you can store settings, such as for the In addition to stereo, the control centre has three surround panning modes: 1. -
Page 21: Setting Up The System
NOTE: Wwhen operating in area B, remember to select the B option, where appropriate, particularly in the monitor section. Also note that solo If you want to connect AES50 audio between two MIDAS digital consoles the B (also for talkback) is totally independent of area B, which is used for slave console must be set to external AES50 synchronisation, irrespective of the navigation only. -
Page 22: Appendix A: Troubleshooting
Check for correct signal routing by making sure channel sources/ destinations are correctly assigned. If you still don’t have any audio, contact MIDAS Technical Support. >> To switch off the control centre >> To set up the ID of a unit 1. -
Page 23: Audio Performance Specifi Cations
PRO X Quick Start Guide Audio Performance Specifi cations The colour of each device, together with its link (if applicable), indicates its current status, as shown in the following table. Frequency Response State Description Unit Status Link Status Connection of Active Link... -
Page 24: Input & Output Characteristics
PRO X Quick Start Guide Input & Output Characteristics System Inputs and Outputs Control Surface Input Connector 3 pin XLR balanced Analogue Input Characteristics AD Converter 24 bit, 96 kHz and 128 X oversampling Input Type Load Z Gain Max Level... -
Page 25: Appendix C: Dimensions
Website midasconsoles. com. Wenn Sie Ihren Kauf ていることを確認してください。 ユ ニットに de su compra a través de nuestro sencillo sistema online nos mit unserem einfachen online Formular registrieren, PRO X is built around a road rugged frame: よっては、 230 V と... -
Page 26: Federal Communications Commission Compliance Information
PRO X Quick Start Guide FEDERAL COMMUNICATIONS Other important information COMMISSION COMPLIANCE INFORMATION 其他的重要信息 1. 在线注册。 请购买 产品后立 MUSIC Group 即在 网站注册。 网页上有简 midasconsoles. com PRO X 单的在线注册表格。 这有助于我们更快更有 效率地处理您维修等事宜。 请阅读保修的相 关条款及条件。 Responsible Party Name: MUSIC Group Research UK Limited 2. - Page 27 midasconsoles.com...
Need help?
Do you have a question about the PRO X and is the answer not in the manual?
Questions and answers