Table of Contents
Advertisement
Quick Links
Advertisement
Table of Contents

Related Manuals for AVM EVOLUTION CD 3.2


Summary of Contents for AVM EVOLUTION CD 3.2
- Page 1 Operating Instructions EVOLUTION CD 3.2 EVOLUTION CD 5.2...
-
Page 2: Vorwort
Dear Music lover, Thank you for making AVM your choice. You now own a versatile and excellent sounding hifi component. Before enjoying music, please read thru this manual carefully. After that you will know how to use your new AVM component in the optimal way. -
Page 3: Table Of Contents
Table of contents Advanced settings Vorwort Personal setup menu Inhaltsverzeichnis 3.1.1 Volume control 3.1.2 Display brightness Getting started 3.1.3 Set autoplay What's in the box? 3.1.4 Skip unused inputs Control and operating elements Installation and cooling 3.1.5 Define input names Connection to mains Reset menu (Factory Settings) Connection to a preamplifier or integrated... -
Page 4: Getting Started
Getting started 1.1 What's in the box? EVOLUTION CD 3.2 / CD 5.2 CD Player • Power cable • RC 3 remote control • CAUTION: After unpacking, please check the scope of delivery to ensure that all the parts have been supplied and are undamaged. -
Page 5: Installation And Cooling
16 Analogue output right (balanced, XLR) 23 Configuration port (Updates) 17 Analogue outputs (RCA) 24 Digital inputs coaxial 18 Analogue output left (balanced, XLR) 25 Connector for external IR receiver 19 Digital output optical 26 Digital input AES/EBU 20 Digital output coaxial 27 Trigger outputs 21 USB B digital input 28 Mains connector... -
Page 6: Battery Change
If there is no CD inserted or the CD is not in playback mode, you can switch between the different digital inputs by pressing the STATION buttons of the RC 3. P Press PLAY to return to CD mode. If a variable output level has been activated in the personal setup menu (see 3.1.1), you can control the output level of the analogue outputs of your CD 3.2 / CD 5.2 by pressing the VOLUME buttons on your RC 33 remote control (see also 2.3). -
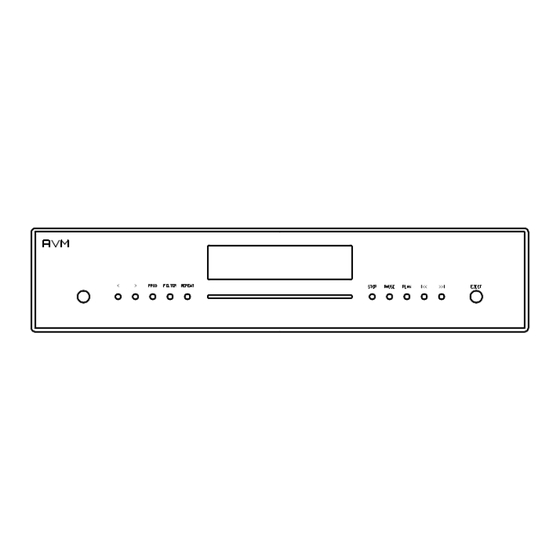
Page 7: Basic Operation
2 Basic operation 2.1 First operation / self test In case your CD player was not connected to mains a self test will be performed when it is switched on by the mains switch (29) for the first time. The unit will check its configuration and that all the installed components work properly. -
Page 8: Display In D/A Converter Mode
2.3.2 Display in D/A converter mode On the left-hand side the name of the currently selected input is displayed (SOURCE). If there is no incoming signal available at the currently selected input, "NO SIGNAL" is displayed right next to the input name. -
Page 9: Programming An Individual Playlist, Random Mode
2.4.5 Programming an individual playlist, Random mode If a disc is inside the player you can program your individual playing sequence as follows: Tip on the PROG button (4) to enter the playlist-menu. • Pressing STOP (10) exits the menu and the unit will return to normal mode. •... -
Page 10: Usb B Digital Input
Macintosh Computer. If you are using a Windows PC you will need to install an additional driver which is available for download on the respective product page at www.avm-audio.com. Below the LO RES and HI RES display, the currently active data format is displayed (PCM or DSD). -
Page 11: Advanced Settings
3 Advanced settings 3.1 Personal setup menu The personal setup offers you a range of settings to individualize the device according to your personal needs. To enter the personal setup menu, please switch off your device on the rear of the unit at the mains switch (29). -
Page 12: Reset Menu (Factory Settings)
3.2 Reset menu (Factory Settings) This function cancels certain or all settings and makes the unit return to default settings. To enter the reset menu, please switch off your device on the rear of the unit at the mains switch (29). Keep both the REPEAT button (6) and the STOP button (10) pressed while you switch on the unit again (29). -
Page 13: Conditions Of Warranty (Ec Only)
6 Conditions of warranty (EC only) If despite expectations a defect occurs that cannot be repaired by yourself or your dealer, we undertake the repair of your unit free of charge for up to three years from date of purchase. The warranty covers the costs of material and working time, transport costs are to be borne by the owner. -
Page 14: Digital Output
7.2 Digital output Output impedance Coax 75 Ohm Output format Coax S/P-DIF, as input format, max 192 kHz / 24 Bit Output format Optical S/P-DIF, as input format, max 96 kHz / 24 Bit 7.3 CD player CD formats CD Audio, CDR (according to Red Book standard) Frequency response CD <20 Hz –...
Need help?
Do you have a question about the EVOLUTION CD 3.2 and is the answer not in the manual?
Questions and answers