Table of Contents
Advertisement
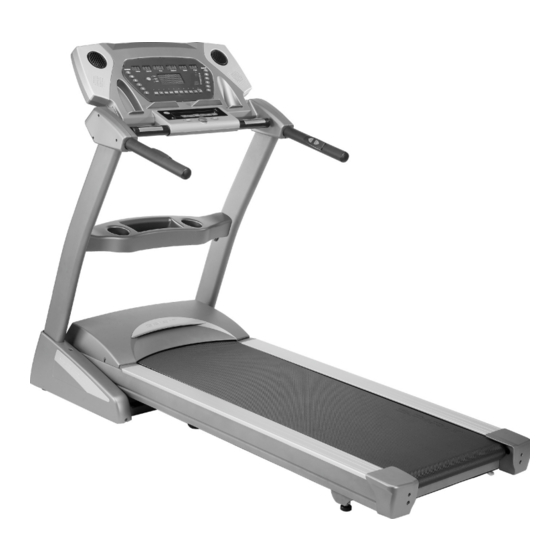
Owner's Manual
Model No.
1654915
– Assembly
– Operation
– Adjustments
– Parts
– Warranty
CAUTION:
You must read and
understand this
owner's manual
before operating
unit.
Keep this manual
for future reference.
Serial number
Write the serial
number in the space
above for reference.
Serial number can
be found at the front
bottom section of
the Treadmill.
Advertisement
Table of Contents

Related Manuals for Dyaco Canada everlast 1654915


Summary of Contents for Dyaco Canada everlast 1654915
- Page 1 Owner’s Manual Model No. 1654915 – Assembly – Operation – Adjustments – Parts – Warranty CAUTION: You must read and understand this owner’s manual before operating unit. Keep this manual for future reference. Serial number Write the serial number in the space above for reference.
-
Page 2: Table Of Contents
Manufacture’s Limited Warranty Dyaco Canada Inc. warrants all its home use treadmills parts for a period of time listed below, from the date of retail sale, as determined by a sales receipt or in the absence of a sales receipt. Dyaco Canada Inc.’s responsibilities include providing new or remanufactured parts, at Dyaco Canada Inc.’s option, and technical... -
Page 3: Important Safety Instructions
Keep the treadmill indoors, away from moisture and dust. Do not put the treadmill in a garage, covered patio or near water. Do not operate the treadmill where aerosol products are used or where oxygen is being administered. Customer Service 1-888-707-1880 Dyaco Canada Inc. 2014 Email: customerservice@dyaco.ca... - Page 4 35 or persons with preexisting health problems. Read all instructions before using any fitness equipment. We assume no responsibility from personal injury or property damage sustained by or through the use of this product. SAVE THESE INSTRUCTIONS Customer Service 1-888-707-1880 Dyaco Canada Inc. 2014 Email: customerservice@dyaco.ca...
-
Page 5: Important Electrical Information
Do not use excessive pressure on console control keys. They are precision set to function properly with little finger pressure. Pushing harder is not going to make the unit go faster or slower. If you feel the buttons are not functioning properly with normal pressure, contact your dealer. Customer Service 1-888-707-1880 Dyaco Canada Inc. 2014 Email: customerservice@dyaco.ca... - Page 6 The treadmill will stop, depending on speed, with a one to two step coast anytime the magnet is pulled off the console. Use the red Stop / Pause switch in normal operation. Customer Service 1-888-707-1880 Dyaco Canada Inc. 2014 Email: customerservice@dyaco.ca...
-
Page 7: Assembly Instructions
The assembly steps below are numbered one through four and correspond to the hardware in the numbered sections of the hardware pack. Remove only the hardware for the step you are currently assembling to avoid confusion and mix-ups. Customer Service 1-888-707-1880 Dyaco Canada Inc. 2014 Email: customerservice@dyaco.ca... -
Page 8: Before You Begin
Before reading further, please familiarize yourself with the parts that are labeled in the drawing below. Console Safety Key Handpulse Speed Adjustment Switch Upright Running Belt Wheels Adjusting Bolt MAX. USER WEIGHT LIMIT 181 KGS (400 LBS) Customer Service 1-888-707-1880 Dyaco Canada Inc. 2014 Email: customerservice@dyaco.ca... -
Page 9: Hardware List
137. 5/16" × UNC18 × 1-1/2" Star Washer (2pcs) Button Head Socket Bolt (2pcs) 93. 5/16" × UNC18 × 2-3/4" 139. Ø 8 x 23mm x 1.5T Button Head Socket Bolt (2pcs) Flat Washer (4pcs) Customer Service 1-888-707-1880 Dyaco Canada Inc. 2014 Email: customerservice@dyaco.ca... - Page 10 Button Head Socket Bolt (4pcs) Tools 30. Deck / Belt 81. Safety Key (1pc) Lubricant (1pc) 141. Combination M5 Allen Wrench 142. M6 Allen Wrench (1pc) & Phillips Head Screw Driver (1 pc) Customer Service 1-888-707-1880 Dyaco Canada Inc. 2014 Email: customerservice@dyaco.ca...
- Page 11 (49). Install the Left and Right (L & R) Uprights into the Left and Right Receiving Tubes. Be careful not to pinch the wire when installing the upright. 2. Install and tighten the eight 5/16" × UNC18 × 15L Button Head Socket Bolts (138). Customer Service 1-888-707-1880 Dyaco Canada Inc. 2014 Email: customerservice@dyaco.ca...
- Page 12 3. Install the six Iron Plate Nuts (131) onto the tabs on the frame. 4. Install and fasten in place the two upright covers (63,64) with the six 5mm X 16mm tapping screws (120). Customer Service 1-888-707-1880 Dyaco Canada Inc. 2014 Email: customerservice@dyaco.ca...
- Page 13 23 × 1.5T flat washers (139) and star washers (145) through the holes at the top and front of the console support with the combination M5 allen wrench & phillips head screwdriver (141). Customer Service 1-888-707-1880 Dyaco Canada Inc. 2014 Email: customerservice@dyaco.ca...
- Page 14 Connect the Incline Adjustment Switch W/Cable (57) into the Incline Cable (Upper)(38). Connect the Computer Cable (Middle)(50) and Computer Cable (Upper/Lower) (48). Connect the Receiver, HR Assembly (147) with the HR Assembly (147). Customer Service 1-888-707-1880 Dyaco Canada Inc. 2014 Email: customerservice@dyaco.ca...
- Page 15 3. Install the outside pieces of the console end caps with six 3.5mm x 40mm Self Tapping Screws (135) and install the Bolt Access Caps (146) into the uprights. (Be careful not to cut or pinch the wires.) Customer Service 1-888-707-1880 Dyaco Canada Inc. 2014 Email: customerservice@dyaco.ca...
-
Page 16: Folding/ Transport Instructions
The treadmill is equipped with four transport wheels which are engaged when the treadmill is folded. After folding simply roll the treadmill away. Carefully lift the treadmill at the rear roller area, grasping the two side end caps, and roll the treadmill away. Customer Service 1-888-707-1880 Dyaco Canada Inc. 2014 Email: customerservice@dyaco.ca... -
Page 17: Treadmill Operation
2 Plug the power cord into an appropriate outlet that is properly installed and gounded. See drawing below. Important: The treadmill is not compatible with GFCI-equipped outlets . Note: Your power cord and outlet may appear different Customer Service 1-888-707-1880 Dyaco Canada Inc. 2014 Email: customerservice@dyaco.ca... - Page 18 (ie: waistband). If you should slip or fall while exercising the safety key will pull out of the console, shutting off the treadmill. Customer Service 1-888-707-1880 Dyaco Canada Inc. 2014 Email: customerservice@dyaco.ca...
-
Page 19: Getting Started
STEP 3: To slow tread-belt press and hold the Slow key (console or hand rail) to the desired speed. You may also press the rapid speed adjust keys, 2 through 12. STEP 4: To stop the tread-belt press and release red Stop key. Customer Service 1-888-707-1880 Dyaco Canada Inc. 2014 Email: customerservice@dyaco.ca... -
Page 20: Incline Feature
The 1/4-mile track will be displayed around the dot matrix window. The flashing dot indicates your progress. Once the 1/4-mile is complete this feature will begin again. There is a lap counter in the center of the track for monitoring your distance. Customer Service 1-888-707-1880 Dyaco Canada Inc. 2014 Email: customerservice@dyaco.ca... -
Page 21: Pulse Grip Feature
Disabled. When the indicator light is lit, the handrail switches are disabled. This allows you to use the full length of the handrails without fear of activating the speed or elevation controls. Customer Service 1-888-707-1880 Dyaco Canada Inc. 2014 Email: customerservice@dyaco.ca... -
Page 22: To Select A Program
STEP 5: The Speed window will now be blinking the preset top speed of the selected program. Use the Up/Down keys to adjust, then press enter. Each program has various speed changes throughout; this allows you to limit the highest speed the program can reach. Customer Service 1-888-707-1880 Dyaco Canada Inc. 2014 Email: customerservice@dyaco.ca... -
Page 23: User Programs
This is for the incline programming. Repeat the above process to program all segments for incline. STEP 6: Press the Start button to begin the workout and also save the program to memory. Customer Service 1-888-707-1880 Dyaco Canada Inc. 2014 Email: customerservice@dyaco.ca... - Page 24 The target value used in HR-1 and HR-2 programs is a suggestion only for normal, healthy individuals. Do not exceed your limits! You may not be able to obtain your chosen target. If in question, enter a higher age value that will set a lower target goal. Customer Service 1-888-707-1880 Dyaco Canada Inc. 2014 Email: customerservice@dyaco.ca...
- Page 25 90 degrees may de-tune the interference. WARNING! DO NOT USE THE HEART RATE CONTROL PROGRAM IF YOUR HEART RATE IS NOT REGISTERING PROPERLY ON THE TREADMILL’S DISPLAY! Customer Service 1-888-707-1880 Dyaco Canada Inc. 2014 Email: customerservice@dyaco.ca...
-
Page 26: Rate Of Perceived Exertion
In this condition, your pace will feel harder. Again, this will show up in your RPE and you will train at the proper level for that day. Customer Service 1-888-707-1880 Dyaco Canada Inc. 2014 Email: customerservice@dyaco.ca... - Page 27 STEP 5: The Time window will now be blinking. Adjust the time and press enter. STEP 6: Press Start to begin program. During the program you may increase or decrease the target heart rate by pressing the elevation/incline up or down buttons. Customer Service 1-888-707-1880 Dyaco Canada Inc. 2014 Email: customerservice@dyaco.ca...
-
Page 28: Exploded View Diagram/Parts List
Motor Controller 491537 400m/m_Speed Cable (Upper) 491538 400m/m_Incline Cable (Upper) 39~2 491539~2 650m/m_Handpulse Wire 39~3 491539~3 Handpulse Top Cover 39~4 491539~4 Handpulse Bottom Cover 39~5 491539~5 Handpulse End Cap 491540 1000m/m_Sensor W/Cable Customer Service 1-888-707-1880 Dyaco Canada Inc. 2014 Email: customerservice@dyaco.ca... - Page 29 Plastic Plate Of Frame Base Cap (R) 491567 Left Handgrip Side Cap (L) 491568 Left Handgrip Side Cap (R) 491569 Right Handgrip Side Cap (L) 491570 Right Handgrip Side Cap (R) 491571 Rear Adjustment Base (L) Customer Service 1-888-707-1880 Dyaco Canada Inc. 2014 Email: customerservice@dyaco.ca...
- Page 30 M5 × P0.8 × 5.0T_Nyloc Nut 4915112 Ø5.5 × 27 × 60 × 1T × 2.5H_Concave Washer 4915113 Ø10_Split Washer 4915114 M3_Split Washer 4915115 M5_Star Washer 4915116 4 × 12m/m_Sheet Metal Screw Customer Service 1-888-707-1880 Dyaco Canada Inc. 2014 Email: customerservice@dyaco.ca...
- Page 31 Drink Bottle 4915159 Controller Back Plate 4915160 400m/m_Console Ground Wire 4915161 Chest Strap 4915162 400m/m_Audio Cable 4915170 Handrail Support 4915171 Beverage Holder 4915172 5/16" × UNC18 × 3/4"_Button Head Socket Bolt Customer Service 1-888-707-1880 Dyaco Canada Inc. 2014 Email: customerservice@dyaco.ca...
-
Page 32: Parts Diagram
PARTS DIAGRAM Customer Service 1-888-707-1880 Dyaco Canada Inc. 2014 Email: customerservice@dyaco.ca... -
Page 33: General Maintenance
Allen bolts an equal amount. This adjustment should be made by turning both bolts clockwise by no more than a 1/4 turn at a time. DO NOT OVERTIGHTEN – Over tightening will cause belt damage and premature bearing failure. Customer Service 1-888-707-1880 Dyaco Canada Inc. 2014 Email: customerservice@dyaco.ca... - Page 34 If the treadmill belt/deck is kept reasonably clean it is possible to expect over 1000 hours before additional re- lubing is necessary. CAUTION - KEEP HANDS CLEAR OF MOVING REAR PULLEY! Customer Service 1-888-707-1880 Dyaco Canada Inc. 2014 Email: customerservice@dyaco.ca...
-
Page 35: Treadmill Lubrication
If the surface is (slick) to the touch, then no further lubrication is required If the surface is dry to the touch, apply one packet of lubricant or half of the bottle of lubricant. Customer Service 1-888-707-1880 Dyaco Canada Inc. 2014 Email: customerservice@dyaco.ca... -
Page 36: Reset Switch Resetting
The spacing must be 1/8”. Loosen screw and slide speed sensor in or out of clamp. Retighten screw and replace the motor cover. Customer Service 1-888-707-1880 Dyaco Canada Inc. 2014 Email: customerservice@dyaco.ca... -
Page 37: Service Checklist - Diagnosis Guide
High belt/deck friction. See General maintenance Computer shuts off when console is touched Treadmill is not grounded. Static electricity is crashing” the (on a cold day) while walking/running computer. Refer to Grounding Instructions on page 4 Customer Service 1-888-707-1880 Dyaco Canada Inc. 2014 Email: customerservice@dyaco.ca... -
Page 38: Troubleshooting
To clear: Check and make sure that the incline motor cable is properly connected and resume power to clear error message. 3. E2: EEPROM memory error To clear: replace new PCB Customer Service 1-888-707-1880 Dyaco Canada Inc. 2014 Email: customerservice@dyaco.ca... -
Page 39: Training Guidelines
There is little transfer of the effects of exercise, i.e. from strength training to cardiovascular fitness. That is why it is important to have an exercise program tailored to your specific needs. Reversibility Customer Service 1-888-707-1880 Dyaco Canada Inc. 2014 Email: customerservice@dyaco.ca... - Page 40 Two final comments:(1) don’t be concerned with day to day variations in your pulse rate, being under pressure or not enough sleep can affect it;(2) your pulse rate is a guide, don’t become a slave to it. Customer Service 1-888-707-1880 Dyaco Canada Inc. 2014 Email: customerservice@dyaco.ca...
- Page 41 Rest between exercises by all means, but do not allow this to exceed two minutes. Most people manage with half minute to one minute rest periods Customer Service 1-888-707-1880 Dyaco Canada Inc. 2014 Email: customerservice@dyaco.ca...
- Page 42 Bring your heel as close to your buttocks as you can for one count. Feel the stretch up possible. Hold for 15 counts and repeat with your right side. Repeat this action with your left foot up. left arm. Customer Service 1-888-707-1880 Dyaco Canada Inc. 2014 Email: customerservice@dyaco.ca...
- Page 43 Relax and then repeat with left leg floor then bend the left leg and lean forward extended. by moving your hips toward the wall. Hold, then repeat on the other side for 15 counts. Customer Service 1-888-707-1880 Dyaco Canada Inc. 2014 Email: customerservice@dyaco.ca...
Need help?
Do you have a question about the everlast 1654915 and is the answer not in the manual?
Questions and answers